# eSIM activation and testing quick start guide
Before deploying eSIM-based IoT devices in the field, one must test for device compatibility and verify that they can switch from one mobile network operator to another without access to the device. Here are a few guidelines before you start.
## **eSIM activation and data plan selection.**
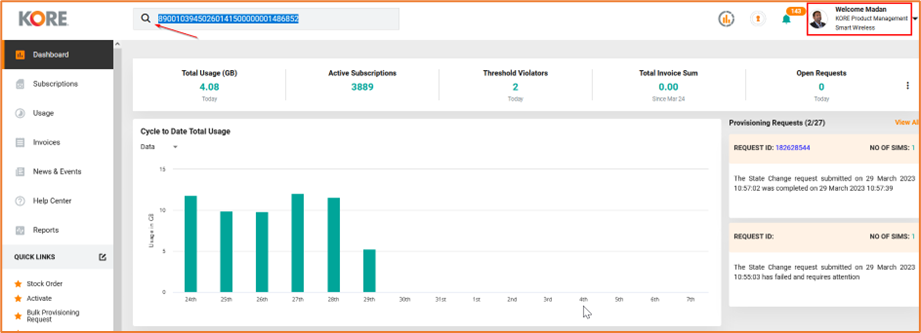
Once logged in to KORE ConnectivityPro, you are on the dashboard.
Next, type in the EID *(e.g: 89001039450260141500000001486852)* in the **Search Bar** indicated by the arrow and click enter, and you will be taken to the results page:
Search for a EID
Check the state of the eSIM in your ConnectivityPro account, which should be in Stock State:
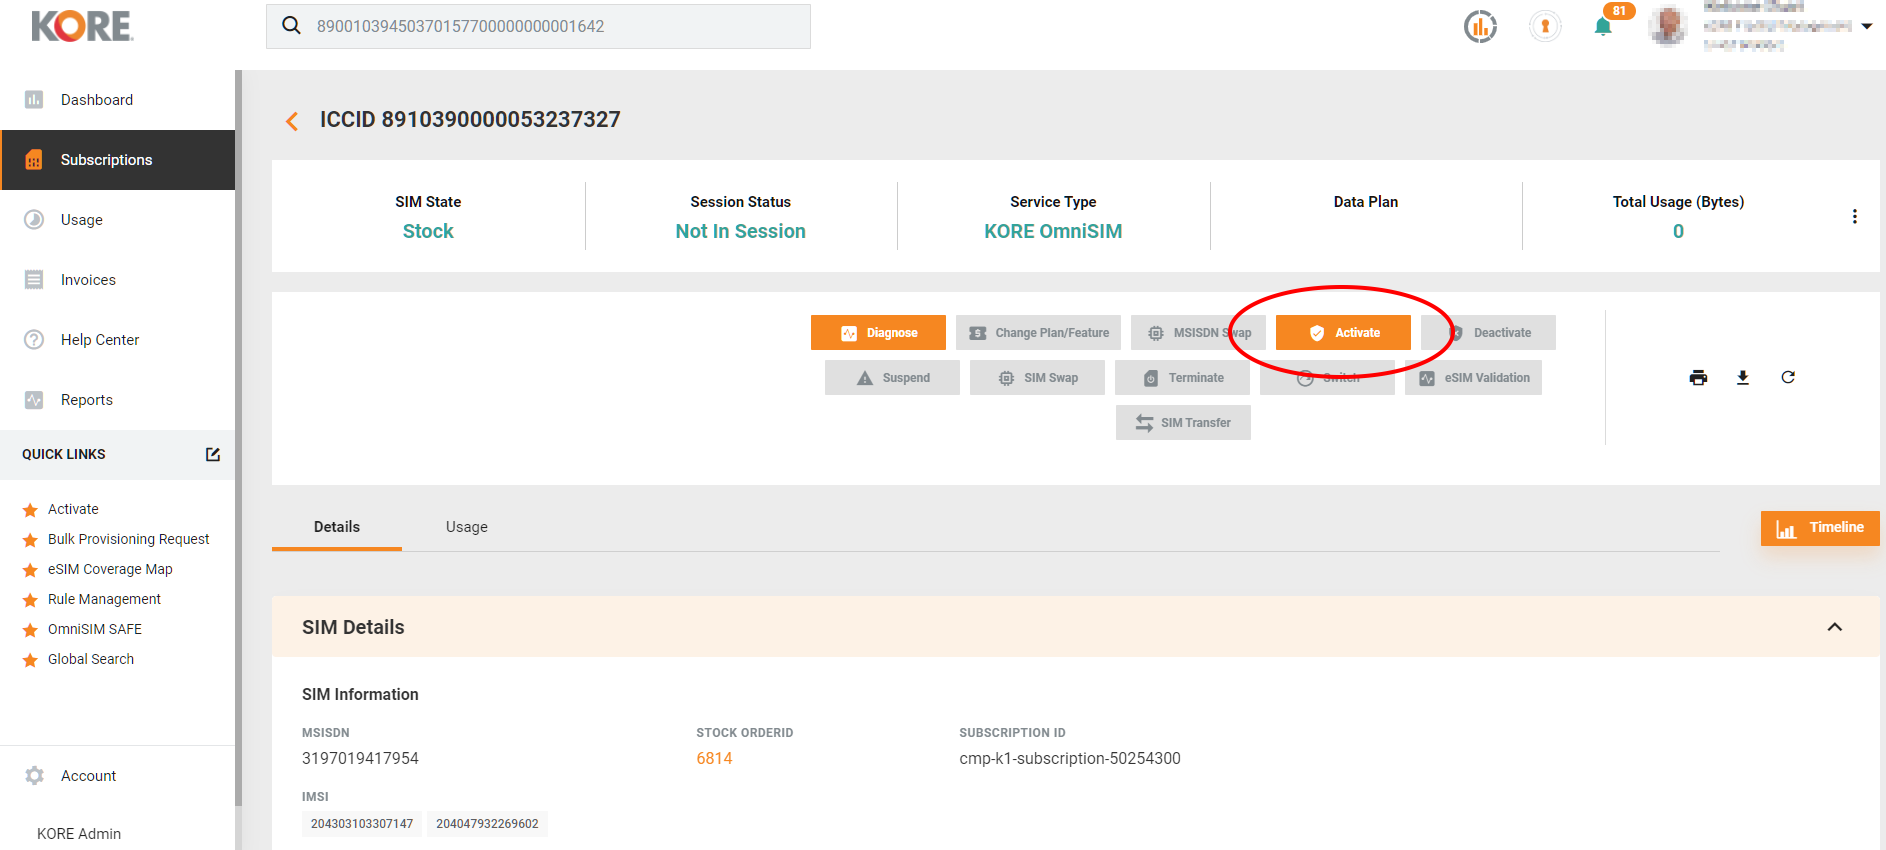
Click View Subscription Details
Clicking on **View Subscription Details** (in the above screenshot) will take you to the subscription details page (below), where you can Activate the SIM and select the required data plan:
Click Activate
Select **Activate** (as shown in the above screenshot) to activate the SIM.
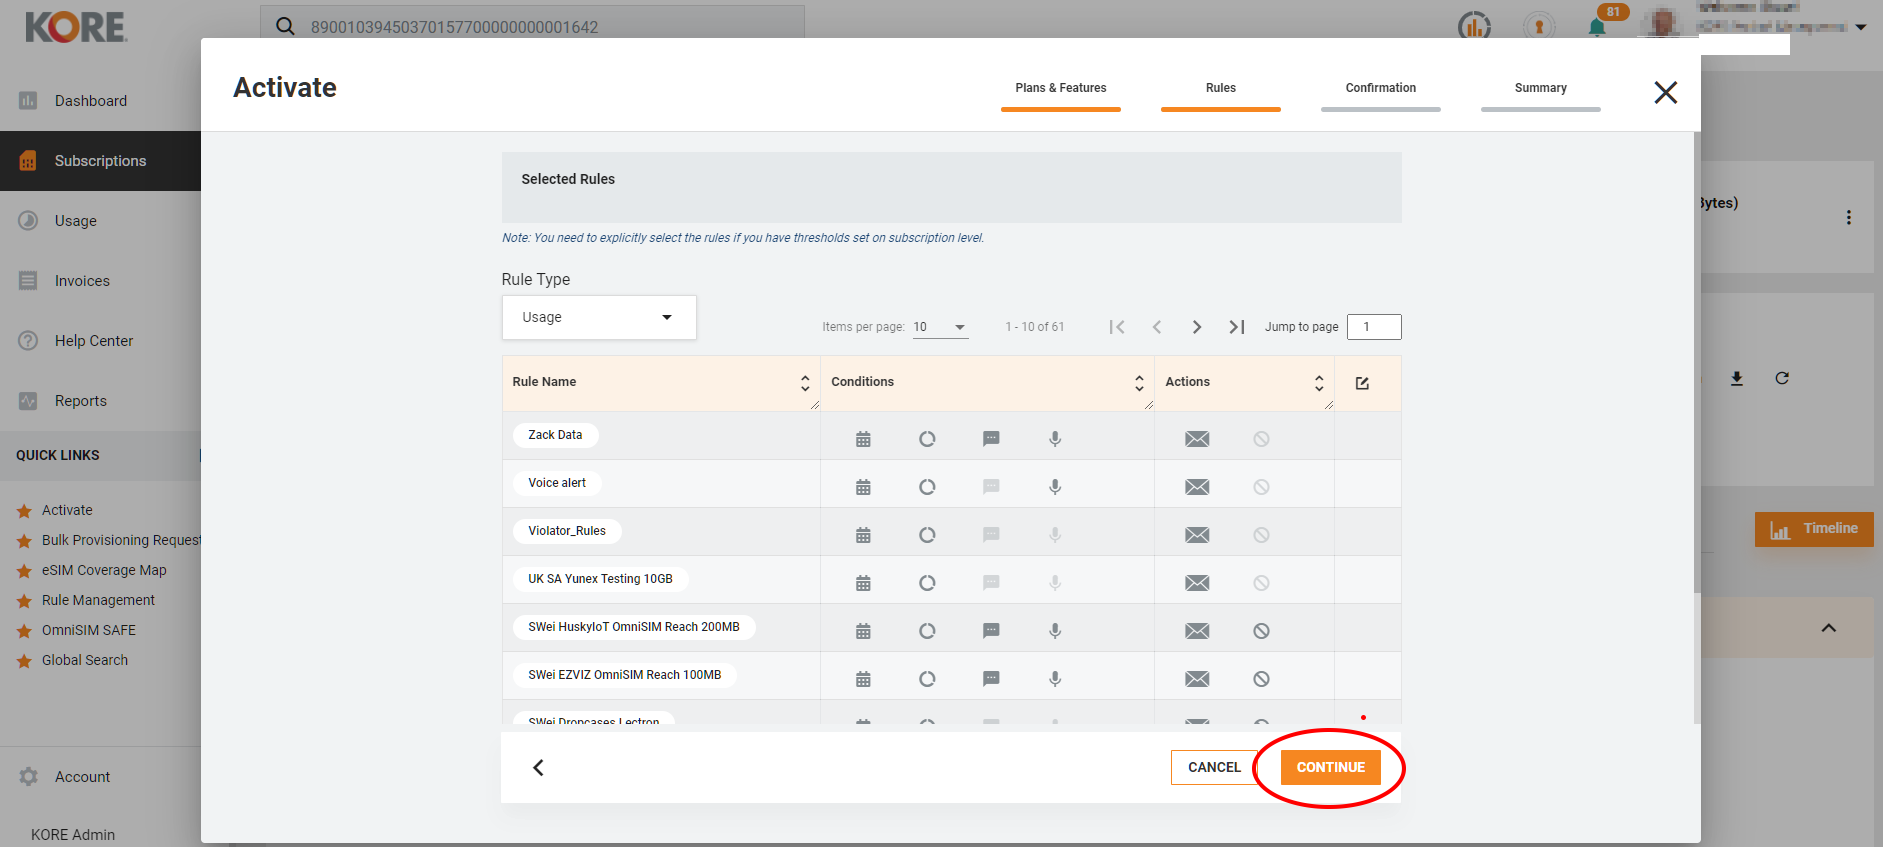
Select the **Activation Profile** to complete the provisioning/Activate step in ConnectivityPro.
Select an Activation Profile
Select Continue on the Rules page, as in most cases, these will have been defined for you.
Click Continue on the Rules page
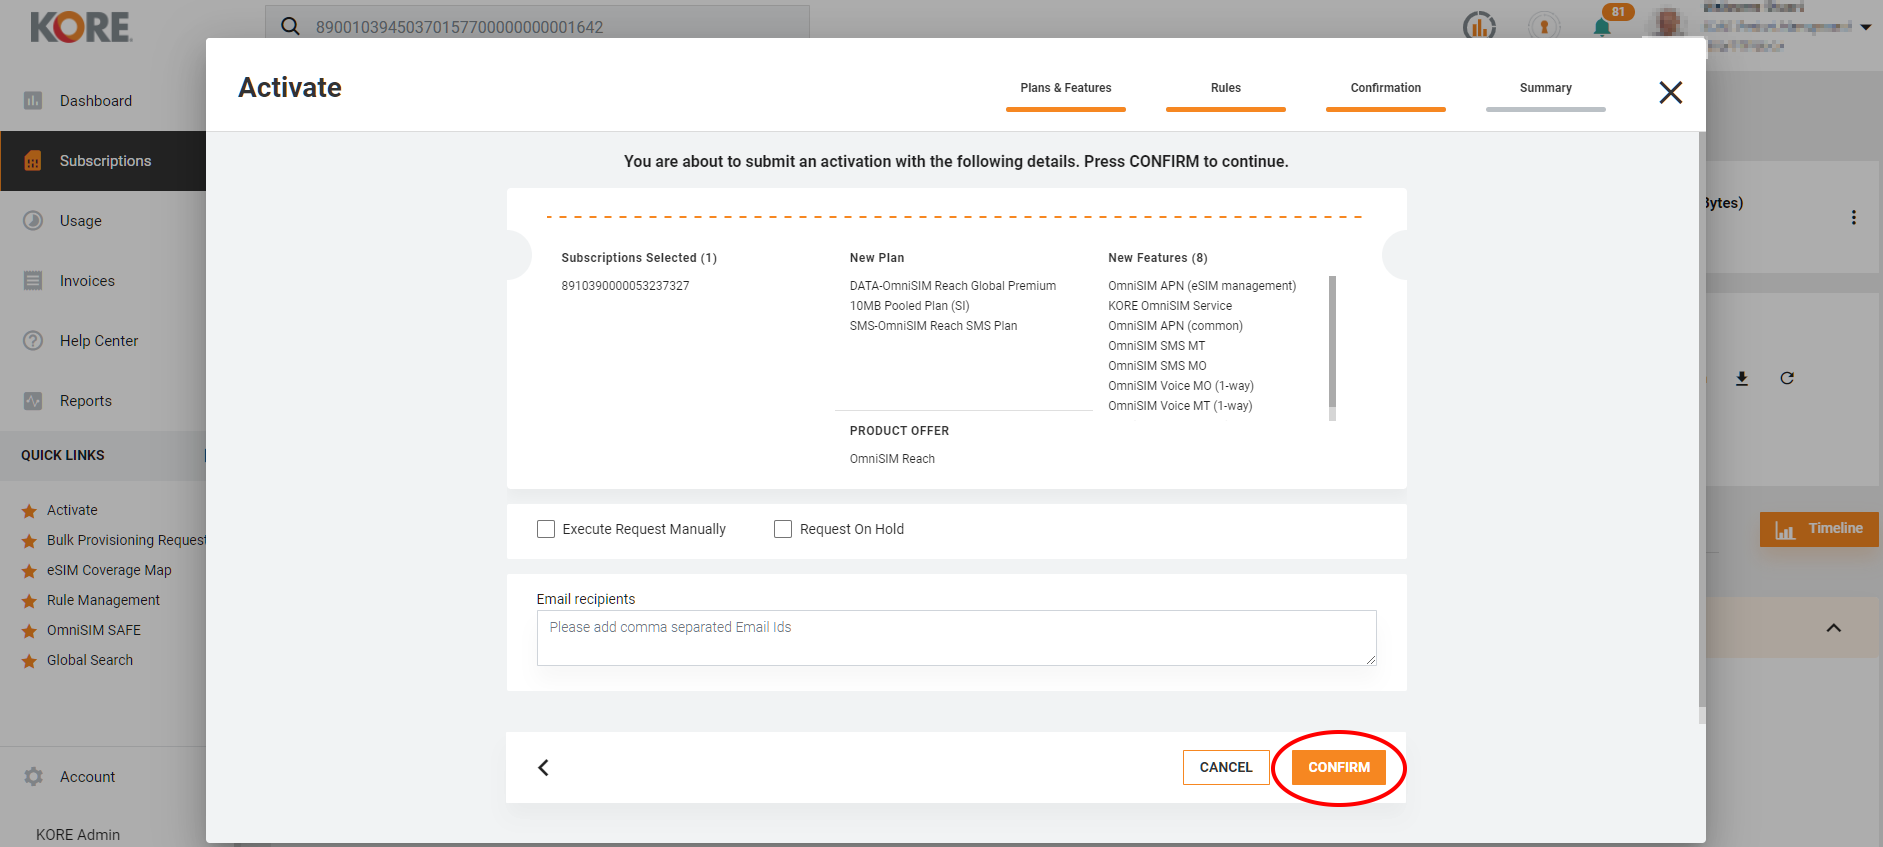
Review the subscription features and select **Confirm** to submit the activation request.
Click Confirm the activation request
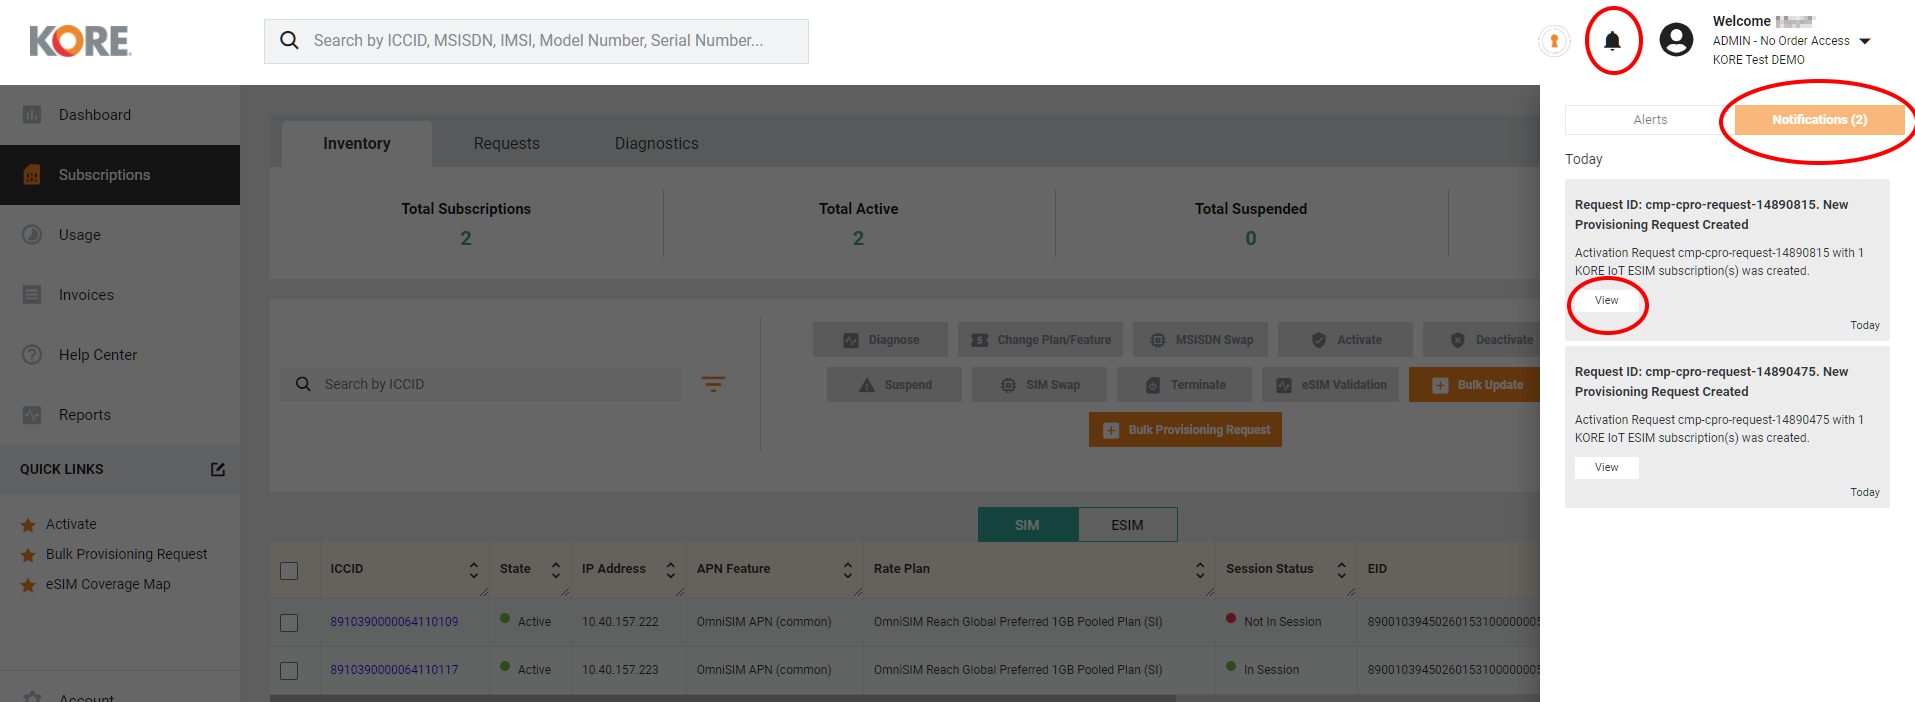
Check the Provisioning status by clicking on the **Bell Icon** on the top right page and select **Notifications**. Check the corresponding request id for the status.
Bell Icon Top Right gives access to notifications
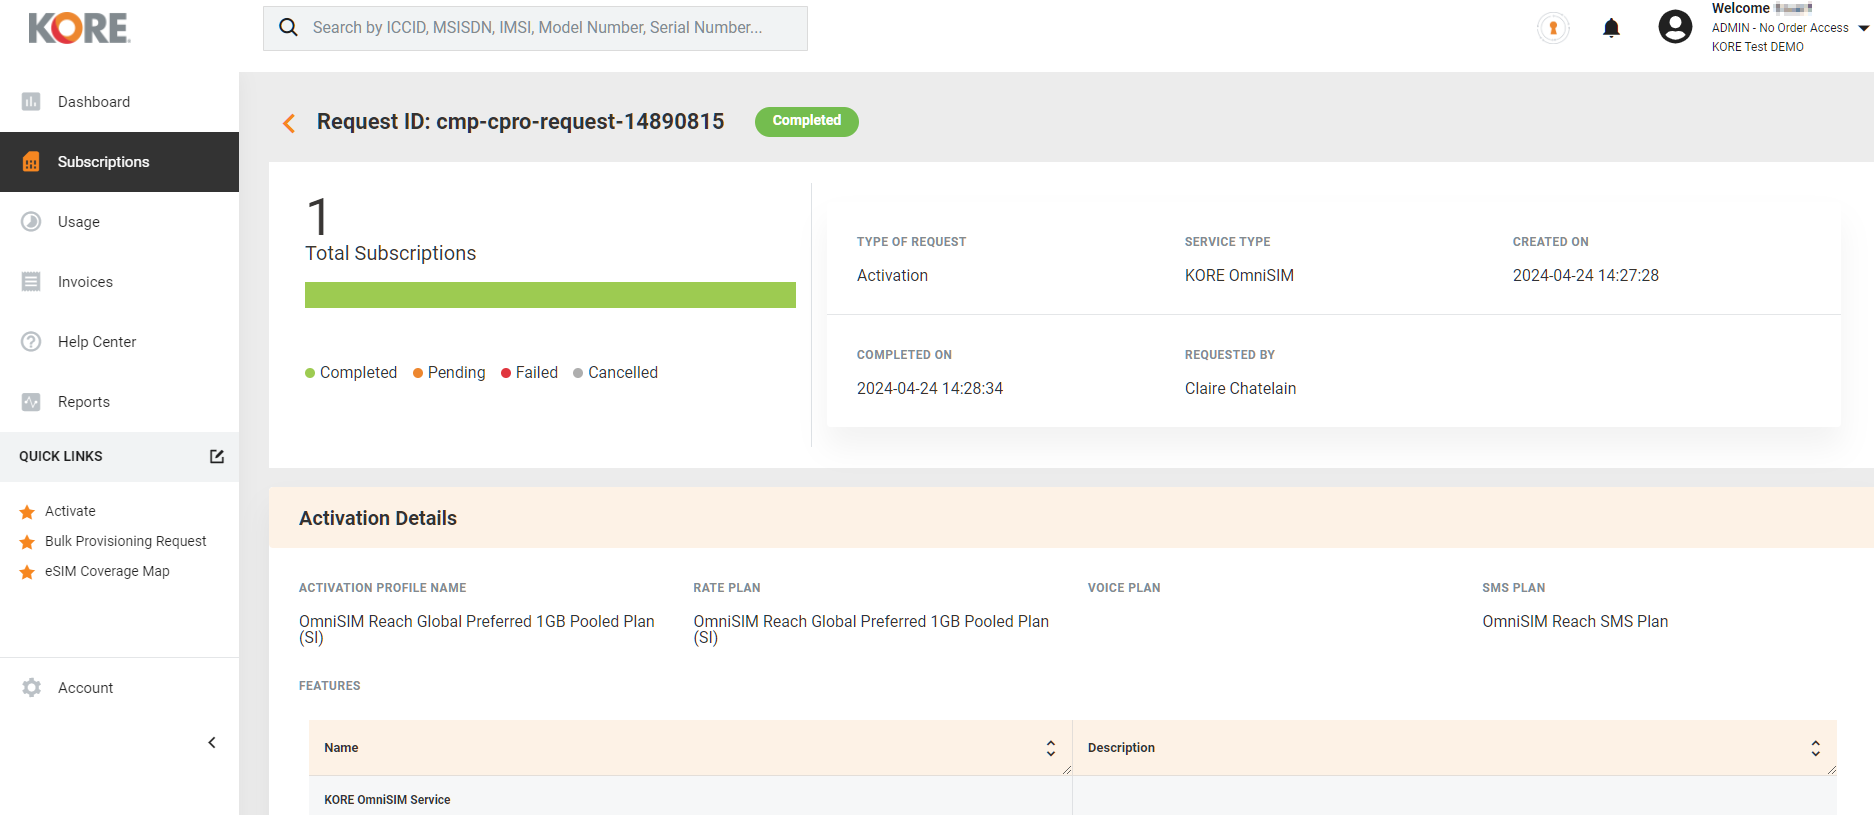
The request status page will give full details of the progress of the activation request. It can take 5-10 minutes.
Request Status Page
When provisioning has been completed successfully, you are ready to start testing.
## **Device Testing:**
1. When attached to the network, you should be able to browse the internet.Insert the eSIM into the device SIM slot and power ON the device. Ensure that you have configured on the device the APN “[data.apn.name](http://data.apn.name/)”.
2. Check that the data and data roaming feature is enabled.
3. When attached to network, you should be able to browse internet.
4. Check you are able to send and receive SMS from the device.
5. If it does not work, then please check the device documentation for settings to be done, that the IOT device has got the latest firmware etc.. and test it once again (steps 1 to 4)
6. If it still fails, power off the device, put the SIM into a mobile phone (or another device) and repeat the above steps 1 to 4. If it does work with mobile phone or the other device, then we can conclude that it is a device related issue and seek support from the device manufacturer.
7. If the device attached to network and you are able to browse internet and send and receive SMS, then you can perform the eSIM Validation test, which will prove that your device is capable of supporting eSIM.
8. If it does not, please raise a support ticket () and our customer support team will be able to investigate further and come back to y