# KORE Knowledge Center

KORE delivers seamless connectivity, device management, and data solutions so you can launch, scale, and optimize IoT with ease. Whether you’re deploying at scale or navigating the shift to 5G, we simplify the process and keep you connected to what matters.

***

## Connectivity

Helps you *build* devices, *connect* devices to wireless networks, and *integrate* device data to the cloud.

<table data-view="cards"><thead><tr><th></th><th></th><th></th><th data-hidden data-card-target data-type="content-ref"></th></tr></thead><tbody><tr><td><a href="https://korewireless.service-now.com/csm?id=kore_one_kb_articles&#x26;kb_category=d1c0c1529752a994d038301e6253af1b"><strong>ConnectivityPro</strong><sup><strong>®</strong></sup></a></td><td>Our main Connectivity Management Portal. Manage all your connectivity through a single interface.</td><td><a href="https://developer.korewireless.com/api?product=Connectivity">API Reference</a></td><td></td></tr><tr><td><a href="/spaces/CnkunA1wgmUD4t1WndMi/pages/dPVzMiWkPhtXPezGbWlk"><strong>KORE OmniSIM</strong><sup><strong>®</strong></sup></a></td><td>Our main global eSIM offering. Manage global deployments with a single multi-IMSI SIM and local downloadable profiles as needed</td><td><a href="https://developer.korewireless.com/api?product=Connectivity#overview">API Reference</a></td><td></td></tr><tr><td><a href="https://korewireless.service-now.com/csm?id=kb_category&#x26;kb_category=cce085529752a994d038301e6253af99&#x26;kb_id=05ff44289f011200550bf7b6077fcfa3"><strong>KORE LPHub®</strong></a></td><td>Our LoRaWAN network management platform. Manage your public and private LoRaWAN deployments, and orchestrate, monitor and troubleshoot your data flows.</td><td><a href="https://korewireless.service-now.com/csm?id=kb_category&#x26;kb_category=cce085529752a994d038301e6253af99">API Reference</a></td><td></td></tr><tr><td><a href="/spaces/uQQbnJlSgjMIxsWK06ol"><strong>Super SIM</strong><sup><strong>®</strong></sup></a></td><td>Our digital-first global IoT SIM. Manage global deployments with a single multi-IMSI SIM and use our highly available APIs for maximum operational efficiency.</td><td><a href="/spaces/JknMM6SZJYk9EbbitKp5/pages/RQlTq7FfcumtzT1mJNgG">API Reference</a></td><td></td></tr></tbody></table>

***

## IoT Managed Services

Offers end-to-end services for your IoT projects, from inventory management, staging & kitting, and device & network management to complete forward and reverse logistics.

<table data-view="cards"><thead><tr><th></th><th></th><th></th></tr></thead><tbody><tr><td><a href="https://korewireless.service-now.com/csm?id=kore_one_kb_articles&#x26;kb_category=71d0c1529752a994d038301e6253afbf"><strong>IoT Managed Services</strong></a></td><td>Our end-to-end professional logistics service, gets your devices assembled, delivered, connected, and supported.</td><td><a href="https://developer.korewireless.com/api?product=AMS">API Reference</a></td></tr></tbody></table>

***

## Pre-configured Solutions

Bundles global network coverage and market-leading hardware into ready-to-go industry solutions with fully managed logistics.

<table data-view="cards"><thead><tr><th></th><th></th><th></th></tr></thead><tbody><tr><td><a href="https://korewireless.service-now.com/csm?id=kb_category&#x26;kb_category=d1b041529752a994d038301e6253afd9"><strong>Connected Health Telemetry Solution (CHTS)</strong></a></td><td>Our solution to launch and scale connected health solutions - combining connectivity with integrated medical devices telemetry services and managed IoT services.</td><td><a href="https://developer.korewireless.com/api?product=Connected%20Health#auth">API Reference</a></td></tr></tbody></table>

***

## KORE Console

Manage your accounts and billing resources for Super SIM and Programmable Wireless.

<table data-view="cards"><thead><tr><th></th><th></th><th></th></tr></thead><tbody><tr><td><a href="/spaces/j6QcqCeek2LmISTs9Rfp"><strong>KORE Console</strong></a></td><td>Manage your KORE account(s), user(s), and profile</td><td></td></tr></tbody></table>

***

## Super SIM and Programmable Wireless Developer Tools&#x20;

Manage your developer integration into KORE through the APIs and tools in our [developer console](https://build.korewireless.com).

<table data-view="cards"><thead><tr><th></th><th></th><th></th></tr></thead><tbody><tr><td><a href="/spaces/0ydryXnnBZcpfzlfF36e/pages/2Mkw3479a2p3MGIVnbsZ"><strong>API Management</strong></a></td><td>Manage your access to KOREs APIs</td><td></td></tr><tr><td><a href="/spaces/0ydryXnnBZcpfzlfF36e/pages/o4QUDTl5Al32HGYbeYi4"><strong>Webhooks</strong></a></td><td>Listen to events on your Webhook endpoint and automatically trigger actions</td><td></td></tr><tr><td><a href="/spaces/0ydryXnnBZcpfzlfF36e/pages/rZq0t7j3nI45ZW3Tk4WP"><strong>Event Streams</strong></a></td><td>Stream data to your exisiting systems</td><td></td></tr></tbody></table>


# KORE Console

KORE's unified console for Super SIM and Programmable Wireless provides a seamless experience for managing user and company accounts, billing, invoices, and profile settings. From a single platform, you can access [Super SIM](https://docs.korewireless.com/supersim/)<sup>®</sup>, [Programmable Wireless](https://docs.korewireless.com/programmable-wireless/)<sup>®</sup>, [KORE Shop](https://shop.korewireless.com/), and [Super SIM Developer Portal](https://build.korewireless.com/dashboard), simplifying your account and service management.


# Quick start guide

We selected the following shortlist of articles to help you get started. We recommend you read and use them in the order below.

## Dashboard

* Review and familiarize yourself with the [Dashboard](/console/get-started/dashboard), our landing page.

## Account&#x20;

* [New account setup](/console/accounts/new-account-setup) - create and set up your first account.
* Review the [Multiple accounts](/console/accounts/multiple-accounts) article to determine whether this configuration is needed for your business.

## User settings

* Manage [Users](/console/user-management/users).
* Review available [User roles and permissions](/console/user-management/user-roles-and-permissions)
* [Invite users to an account](/console/user-management/invite-users-to-an-account).
* Complete your [Profile](/console/user-management/profile).

## Payment information

* [Payment methods](/console/billing-and-payments/payment-methods#add-a-new-card) if not done during the registration process.
* [Payment methods](/console/billing-and-payments/payment-methods#update-your-cards) to remove or change an existing card.

## Order SIMs

* Buy SIMs from the [KORE Shop](https://docs.korewireless.com/en-us/twilio-iot-acquisition/migration-guides/migrating-to-sim-ordering-at-kore#head-to-the-kore-shop).

## Invoice

* Review and understand your monthly and hardware [Invoices](/console/billing-and-payments/invoices).

## Need help?

* If you cannot find what you need, log in to our secured portal (**Tools & Support > Contact Support**) and [create a case](https://korewireless.service-now.com/csm?id=sc_cat_item\&sys_id=e1d2c2f18791ed10364fffb7cebb3500\&sysparm_category=1b8611d5c3921200b0449f2974d3ae12).
* Does your SIM or network seem slow? Check the [status page](https://korewireless.service-now.com/csm?id=services_status) and subscribe for outages or maintenance.


# Dashboard

The dashboard is the landing page for KORE Console.

<div align="left"><figure><img src="/files/toMXkryMNUvBWVZCjprK" alt=""><figcaption></figcaption></figure></div>

## Menu options

<table><thead><tr><th width="168.44439697265625" valign="top">Menu </th><th valign="top">Description</th></tr></thead><tbody><tr><td valign="top">Dashboard</td><td valign="top"><p>Displays the apps ( <a data-mention href="/spaces/uQQbnJlSgjMIxsWK06ol/pages/fmiJudMRFU1ji68cX3Q8">/spaces/uQQbnJlSgjMIxsWK06ol/pages/fmiJudMRFU1ji68cX3Q8</a>, <a href="https://shop.korewireless.com/">KORE Shop</a>, <a data-mention href="/spaces/0ydryXnnBZcpfzlfF36e">/spaces/0ydryXnnBZcpfzlfF36e</a>, ConnectivityPro) available. </p><p></p><p>All apps contain two options:</p><ul><li>Launch - open the app<br><strong>Note:</strong> If you do not currently have a ConnectivityPro, launch it to add to your IoT toolbox.</li><li>More details - shows a short description of what the app has to offer</li></ul><p><strong>Note</strong>: ConnectivityPro users have access to Super SIM. If you have Super SIM, you can request access to ConnectivityPro by selecting the app and selecting <strong>Request Access</strong>.</p></td></tr><tr><td valign="top"><a data-mention href="/pages/yrZ5Gvgr7O1csWFNX7in">/pages/yrZ5Gvgr7O1csWFNX7in</a></td><td valign="top">Account management tools include <a data-mention href="/pages/Q5dXE5d4zYvOw2IN4lzj#create-a-new-account">/pages/Q5dXE5d4zYvOw2IN4lzj#create-a-new-account</a>, <a data-mention href="/pages/EfTRdAAaZODx9d7bjBCs">/pages/EfTRdAAaZODx9d7bjBCs</a>, <a data-mention href="/pages/AVUVO6usKlGU6qjBkamr">/pages/AVUVO6usKlGU6qjBkamr</a>, and <a data-mention href="/pages/2ZuZbMRFalRGDEyEfPsj">/pages/2ZuZbMRFalRGDEyEfPsj</a>.</td></tr><tr><td valign="top"><a data-mention href="/pages/wwFn8EJnYvWFKrkGiNpr">/pages/wwFn8EJnYvWFKrkGiNpr</a></td><td valign="top">User management tools include adding new users, assigning permissions, transferring ownership, and resetting passwords.</td></tr><tr><td valign="top">Billing</td><td valign="top">Billing tools include all monthly and hardware <a data-mention href="/pages/fAC0SBYt0h3GOzIMcmbr">/pages/fAC0SBYt0h3GOzIMcmbr</a> and <a data-mention href="/pages/dAmdoiGFgrlPxcDpqb2c">/pages/dAmdoiGFgrlPxcDpqb2c</a> information.</td></tr><tr><td valign="top">Tools &#x26; Support</td><td valign="top">Includes a link and brief description for each of your apps and a link to our Help Center to contact our Global Technical Support team by creating a case.</td></tr></tbody></table>


# Account

The account page will include information for that account, including any child accounts.\
**Note:** if you have more than one account, refer to [Multiple accounts](/console/accounts/multiple-accounts#switching) to move between accounts.

<figure><img src="/files/3jOTPRTOniqsRfBdeQyS" alt=""><figcaption></figcaption></figure>

<table><thead><tr><th width="102.333251953125" valign="top">Section</th><th valign="top">Fields and descriptions</th></tr></thead><tbody><tr><td valign="top">1</td><td valign="top">The account name and the person logged in.</td></tr><tr><td valign="top">2</td><td valign="top">Information for the current account, including the owner.</td></tr><tr><td valign="top">3</td><td valign="top">The child accounts associated with that account (section 2), if any. <br><br>The <a data-mention href="/pages/EfTRdAAaZODx9d7bjBCs#relationship-tree">/pages/EfTRdAAaZODx9d7bjBCs#relationship-tree</a> displays the structure of all accounts associated to the parent account.</td></tr></tbody></table>


# Add additional accounts

## Parent account

You can have multiple main or parent accounts.

1. Go **Account > Account** and select **Create New Account**.

   <div align="left"><figure><img src="/files/5jMdCLkRp4AMBYC4l56f" alt=""><figcaption></figcaption></figure></div>
2. Create a business or personal account. Refer to [New account setup](/console/accounts/new-account-setup#add-account-details) if needed to complete the new account creation.
3. Wait for the confirmation message confirming that your new account has been created. **Select Close Window** to return to the Dashboard.<br>

   <div align="left"><figure><img src="/files/HStR04wpiYEn6229xZhE" alt=""><figcaption></figcaption></figure></div>

## Child account

You must be in the parent account before creating the child account.

1. Select the parent account using one of the following options:
   1. **More than one account**\
      Select all accounts (**Accounts > Account > Accounts**) to display all accounts.&#x20;

      <div align="left"><figure><img src="/files/yGz4YE5iKWmP8YlAn829" alt=""><figcaption><p><br></p></figcaption></figure></div>

      **Switch to** the parent account for the new account, and then close (**X**) the screen.

      <div align="left"><figure><img src="/files/BP3KtLWHpaqlnSzhwZhC" alt=""><figcaption></figcaption></figure></div>
   2. **One account**\
      Select **Account** to display your account information.<br>

      <figure><img src="/files/tTrn87bj9Ibbasrowkwf" alt=""><figcaption></figcaption></figure>
2. Select the ![](/files/8OmHrYDxhUPeNtKFMwhJ) menu next to the account name, then select **Create Child.**

   <div align="left"><figure><img src="/files/n0GdwZsePegIKvOk9Nq4" alt=""><figcaption></figcaption></figure></div>
3. Add the account name and optional description, then select **Create Child Account**.\
   **Note:** You will receive an error if the new account exceeds the four-level maximum.

   <div align="left"><figure><img src="/files/xAJDHU7Wi2k7By4oMK0G" alt=""><figcaption></figcaption></figure></div>
4. Wait for the confirmation message confirming that your new account has been created.&#x20;

   <div align="left"><figure><img src="/files/LWGed373czYYxcLu3Vrd" alt=""><figcaption></figcaption></figure></div>

   You will be returned to the parent account page.
5. Review the new account on the child list. The new account is automatically added to the end of the child account list.

{% hint style="info" %}
The parent account owner is always added to the new child account, along with the user who created the account. All other users will need to be added manually.
{% endhint %}


# Change accounts

You can change accounts from any main menu page.

1. Select **Account** from the header, and then select Accounts.<br>

   <div align="left"><figure><img src="/files/k7ZGhBdHUrEK0GYOj7Oj" alt=""><figcaption></figcaption></figure></div>

   \
   The first account will always be the account you are currently logged in (see Account Name column). All other accounts will be listed after.
2. Find the account you want and select **Switch To** in the Actions column. \
   Filter options are available if needed to sort your accounts.<br>

   <figure><img src="/files/sECRoMpDZsEhUd1vshGQ" alt=""><figcaption></figcaption></figure>


# Multiple accounts

Single and parent/child accounts

## Overview

You will always have a single (parent) account when you complete your registration. But if a single account does not meet your needs, you can create and configure multiple accounts with KORE.

You can create multiple single accounts or, based on your needs, create a parent/child configuration.

Parent/child account management provides a four-level hierarchical configuration. Accounts can have both parent and child roles, as shown below.

<div align="left"><img src="https://korewireless.service-now.com/sys_attachment.do?sys_id=6d09825947549e50f6be545c416d4361" alt="parent/child chart" height="402" width="552"></div>

{% hint style="info" %}
Regardless of its type, every account is assigned a unique identifier known as the account ID. The ID is used throughout our documentation, user interface (UI), and application programming interfaces (APIs).
{% endhint %}

## Relationship tree

The ![](/files/sHkroJZURfErkn1mfl2d)option is available on multiple pages. Select to see the hierarchy of the parent/child structure. Select the expand **>** icon to open all levels.

{% hint style="info" %}
The tree will list only the accounts you have access to.
{% endhint %}

<div align="left"><figure><img src="/files/3tjoUmhmtvvP9FKnF1r2" alt=""><figcaption></figcaption></figure></div>

<table><thead><tr><th width="123" valign="top">Folder type</th><th valign="top">Description</th></tr></thead><tbody><tr><td valign="top"><img src="/files/bRMS9uqS81ugvc1Nx3N7" alt=""></td><td valign="top">The account has child accounts.</td></tr><tr><td valign="top"><img src="/files/H7s2WyXzU1X65lhu0eFQ" alt=""></td><td valign="top">The account does not have child accounts.</td></tr></tbody></table>

### Export list

The export list option will create and download a CSV file automatically to your current device.

## Parent account

Your initial account will always be the parent account, which is the billable account that consolidates charges from all associated child accounts, if applicable. The parent account is the primary account affiliated with KORE.

Each parent account has a separate invoice, payment methods, user base, API credentials, and resources. For example, the SIMs in Account 1 have no connection to the SIMs in Account 2, even if both accounts belong to the same owner, and both Account 1 and Account 2 will receive an invoice.

A parent account will always have one owner who can invite additional users. Any user with any role can create an account, which they will be automatically assigned as the owner. A user can own multiple parent accounts and switch between them easily.

{% hint style="info" %}
An owner can transfer ownership of an account to another user at a later time.
{% endhint %}

## Child account

A child account allows you to allocate your resources to various subaccounts. Some users do this to organize resources by end customer, department, region, or business unit. Ultimately, how you structure your accounts and resources is up to you.

A child account must always be associated with a parent account. Child accounts are not billable separately, and a root-level parent is always associated with any hierarchy invoicing.

All users with access to the parent account will inherit the same set of permissions in the child accounts. A user can move resources from a parent account to a child account, which means these resources will now be managed from the destination child account.

Any charges generated from a child account will be aggregated under the parent account at the rates agreed upon with KORE for the parent account.

## Account hierarchy examples <a href="#examples-of-an-account-hierarchy" id="examples-of-an-account-hierarchy"></a>

### Default  <a href="#default-behaviour" id="default-behaviour"></a>

In this example (the default behavior), the user is satisfied with a single account they created during registration.

```
Parent Account 1 (Owner) < Invoiced
```

### Multiple child accounts <a href="#multiple-child-accounts" id="multiple-child-accounts"></a>

You wish to segregate your resources per child account for each end customer and report on each end customer based on the unique account identifier for each child's account. Each resource, such as a SIM, will identify the child and parent accounts to which it belongs.

#### Billing

You will receive a single invoice with the charges rolled up from each child account (A, B, C) to Account 1.

```
Parent Account 1 (Owner) < Invoiced
│
├── Child Account A < Charges rolled up to parent account 1
├── Child Account B < Charges rolled up to parent account 1
└── Child Account C < Charges rolled up to parent account 1
```

### Multiple parent accounts <a href="#multiple-parent-accounts" id="multiple-parent-accounts"></a>

You may wish to have different invoices billed to other addresses.&#x20;

#### Billing

Each single-parent account is considered a different hierarchy, and each will receive an invoice to the same user (owner).

```
Parent Account 1 (Owner) < Invoiced

Parent Account 2 (Owner) < Invoiced
```

### Combination of multiple parent and child accounts <a href="#combination-of-multiple-parent-and-child-accounts" id="combination-of-multiple-parent-and-child-accounts"></a>

```
Parent Account 1 (Owner) < Invoiced
│
├── Child Account A < Charges rolled up to parent account 1
├── Child Account B < Charges rolled up to parent account 1

Parent Account 2 (Owner) < Invoiced
│
├── Child Account D < Charges rolled up to parent account 2
├── Child Account E < Charges rolled up to parent account 2
└── Child Account F < Charges rolled up to parent account 2
```


# New account setup

## Create a new account or join an existing account?

Two options are available for new users of the KORE Console: creating a new account or joining an existing one. \
\
The process for both is different.&#x20;

* **Create a new account**.\
  Creating a new account establishes you as an owner, initially, of one account. You can then create multiple accounts and invite users. Use the following instructions to create an account that you will own and, as needed, invite other users to it.
* **Join an existing account**. \
  Wait for an email from KORE Wireless (KORE User Invitation) and select **Accept Invite** to be added to the account. Refer to the [Invite - accept an invitation to join an account](/console/user-management/invite-accept-an-invitation-to-join-an-account) for additional instructions.

{% hint style="warning" %}
The **register** option will only create a new account. It will ***never*** add you to an existing account.
{% endhint %}

## Create a new account

The process is different based on whether you are [#new-to-kore](#new-to-kore "mention") or are a [#current-kore-customer](#current-kore-customer "mention").

### New to KORE

1. Go to the [KORE Console sign-in](https://console.korewireless.com/dashboard) page and select **Register**.&#x20;

   <div align="left"><figure><img src="/files/nSGXcbEYC6rEYfiV9iRc" alt=""><figcaption></figcaption></figure></div>
2. Add your email address and then select **Send Code**.

   <div align="left"><figure><img src="/files/m2kJicOCAoTcTx12voU3" alt="register page" width="563"><figcaption></figcaption></figure></div>
3. Watch your email for "<noreply@korewireless.com>" with the subject line "**KORE Email Verification**." Open the email and copy the verification code.

   <div align="left"><figure><img src="/files/LJjnYA87A0jts0xxCdNT" alt="verify email example" width="475"><figcaption></figcaption></figure></div>
4. Switch back to the KORE Console page, enter the verification code, and select **Verify**.

   <div align="left"><figure><img src="/files/GW4kgThp1BLaMGezkh45" alt="verify code sign in page" width="563"><figcaption></figcaption></figure></div>
5. Create your password using the parameters listed on the screen.

   <div align="left"><figure><img src="/files/c7D2yL9Y9LF9gJA7zC1c" alt="create password page" width="563"><figcaption></figcaption></figure></div>

### Add user and account details

1. New users - Add your user details, then select **Next**.\
   KORE users - confirm or complete your user details, then select **Save**.

   <div align="left"><figure><img src="/files/z1xIyuKzVd721wHhtXtR" alt="user name and number detail page" width="563"><figcaption></figcaption></figure></div>

   You return to the dashboard, and the Security tab is now available to choose your MFA method.
2. Select [Profile](/console/user-management/profile#security) tab and confirm your MFA option. The default is email.
3. Select the Dashboard tab and add your account details. Select whether this is a business or individual account, add all needed information, and then select **Next**.\
   Refer to the [VAT validation issues](/console/accounts/new-account-setup/vat-validation-issues) if needed.

   <div align="left"><figure><img src="/files/LdM0oIygNPnxPFMf9dou" alt="account details input page"><figcaption></figcaption></figure></div>
4. Verify your information, and then select  **Add Payment Method** or **Complete**. Payment information can be added at any time before purchase. Refer to the [Payment methods](/console/billing-and-payments/payment-methods) article to add payment information at a later date.

   <figure><img src="/files/rz7vjEBvRYQETbaywTBd" alt="summary page"><figcaption></figcaption></figure>
5. Select **Back to KORE Wireless** to complete the process. You will receive an email welcoming you to KORE once your account setup is complete, with a link to the KORE [console](https://console.korewireless.com/dashboard). <br>

   <div align="left"><figure><img src="/files/0z9sdMRsT3129AycfIl3" alt=""><figcaption></figcaption></figure></div>

### Current KORE customer

A current KORE user has a ConnectivityPro, SecurityPro, Super SIM, or Programmable Wireless account.

1. Go to the [KORE Console sign-in](https://console.korewireless.com/dashboard) page. Add your current KORE email ID and password.&#x20;

   <div align="left"><figure><img src="/files/Yz3LL9zaHb97Wo3Y5XD2" alt=""><figcaption></figcaption></figure></div>
2. Add your password and select **Sign In**. Watch for an email with your verification code.

   <figure><img src="/files/mha7OI9b0wTfC26MzcbE" alt=""><figcaption></figcaption></figure>
3. Add your authentical code and select **Submit**.&#x20;

   <div align="left"><figure><img src="/files/Hxhita7nclk228sJgP7C" alt=""><figcaption></figcaption></figure></div>
4. Select **create a new account** and follow the [#add-user-and-account-details](#add-user-and-account-details "mention") instructions to complete your account setup.

   <div align="left"><figure><img src="/files/6fP3DyrM4oGx77VUSTLE" alt=""><figcaption></figcaption></figure></div>

[Account management](https://docs.korewireless.com/en-us/iam/accounts)


# VAT validation issues

The European Union created the VAT Information Exchange System (VIES) to help businesses validate VAT numbers for cross-border trade within the EU. We use these services to ensure compliance and transparency for our EU customers.

Here are some common problems and how to solve them.

## Account setup is pending&#x20;

If the VAT number can't be validated, this results in an account to be stuck in `Pending`. Two of the root causes are:

* Invalid VAT number
* VIES service is not available

In either case, you start by logging in to the [console](https://console.korewireless.com/dashboard).  The signup page will bring you to the missing/invalid field.

<div align="left"><figure><img src="https://docs.korewireless.com/~gitbook/image?url=https%3A%2F%2F2279590263-files.gitbook.io%2F%7E%2Ffiles%2Fv0%2Fb%2Fgitbook-x-prod.appspot.com%2Fo%2Fspaces%252FBIYQ3ZtBpdPXvDKZhKt8%252Fuploads%252FnzGP0fVyePMIAhYQtTau%252Fimage.png%3Falt%3Dmedia%26token%3Df3fb3313-fe5e-4785-92ad-8472d35ef738&#x26;width=768&#x26;dpr=4&#x26;quality=100&#x26;sign=b263e0da&#x26;sv=2" alt="account setup pending error message"><figcaption><p>Account Setup Pending Dialog</p></figcaption></figure></div>

This is normally due to an invalid VAT number or the VIES service not being available. You can fill in the missing information on the next page by selecting the **Complete Setup** button.

## Unreachable VIES VAT number validation

### New registration&#x20;

If the VIES is down during your registration, we won’t be able to validate your VAT number. Your registration will be marked as **pending** until we can verify it.

### Active account&#x20;

If you need to change your VAT number for an active account and the validation service is unavailable, we cannot validate your new VAT number immediately. Your account will stay active with the existing VAT Number.

We suggest waiting a few minutes and trying again.

### Invalid VAT number

If the VIES VAT service returns an invalid VAT number error, double-check that you have entered the VAT number correctly, without any typos or extra spaces. Ensure the VAT number follows the correct format for the respective EU country. More information on the VAT number format can be found on the [European Commission website](https://ec.europa.eu/taxation_customs/vies/#/faq) under Q11.

## Still not working?

If your VAT number cannot be validated during account setup, you cannot complete your business account registration.

As an alternative, you can:

* Wait and try the next day.<br>
* If you cannot wait, create a personal account with credit card payment to order SIMs and invite users. Once you have resolved the issues with your VAT number, contact [Support](mailto:support@korewireless.com) or [create a case](https://korewireless.service-now.com/csm?id=sc_cat_item\&sys_id=e1d2c2f18791ed10364fffb7cebb3500\&sysparm_category=1b8611d5c3921200b0449f2974d3ae12), and we will convert the account to business.&#x20;


# Invoices

**Billing > Documents**

You can find your invoices under the Documents tab on the Billing menu.&#x20;

<div align="left"><figure><img src="/files/tHO2qbrjTbg4MLCSf2D2" alt="Billing tab under invoice menu"><figcaption><p>Invoices</p></figcaption></figure></div>

## Invoice types

There are three types of documents.

<table><thead><tr><th>Invoice type</th><th>File name</th><th valign="top">Frequency</th></tr></thead><tbody><tr><td>Usage and recurring charges </td><td>Invoice number.pdf</td><td valign="top">Monthly</td></tr><tr><td>Hardware</td><td>Invoice number.pdf</td><td valign="top">After every purchase</td></tr><tr><td>CSV summary</td><td>YYYYMMDD-YYYYMMDD.csv</td><td valign="top">Monthly</td></tr></tbody></table>

## Invoice

### KORE information

<div align="left" data-full-width="false"><figure><img src="/files/aNOGsC2cGQlG15c0hUGA" alt="KORE invoice heading image"><figcaption><p>Invoice header</p></figcaption></figure></div>

You will need this information if you contact [Global Customer Support](https://korewireless.service-now.com/login_with_sso.do?glide_sso_id=147af54697a22194c4e478e3a253af8a).

<table data-header-hidden><thead><tr><th width="260.6666259765625"></th><th valign="top"></th></tr></thead><tbody><tr><td><strong>Field</strong></td><td valign="top"><strong>Notes</strong></td></tr><tr><td>Invoice #</td><td valign="top">Invoice number. </td></tr><tr><td>Billing month</td><td valign="top">Service month billed.</td></tr><tr><td>Issue date</td><td valign="top">Issue date of the invoice.</td></tr><tr><td>Due date</td><td valign="top">Due date of the invoice.</td></tr></tbody></table>

### Customer information <a href="#h_6f709f80-f617-4cf6-a080-c6f420c98023" id="h_6f709f80-f617-4cf6-a080-c6f420c98023"></a>

<div align="left"><figure><img src="/files/O9kzCzVecbhiuxrrM1EV" alt="Invoice customer information section"><figcaption><p>Customer information</p></figcaption></figure></div>

<table data-header-hidden><thead><tr><th width="264" valign="top"></th><th valign="top"></th></tr></thead><tbody><tr><td valign="top"><strong>Field</strong></td><td valign="top"><strong>Notes</strong></td></tr><tr><td valign="top">Bill to</td><td valign="top">Billing address on the account.</td></tr><tr><td valign="top">Fees at a glance</td><td valign="top"><p>Summary of total owing, which can include:</p><ul><li>Recurring fees</li><li>Usage fees</li><li>Other/hardware fees</li><li>Tax (if applicable)</li><li>The total amount owing and currency</li></ul></td></tr><tr><td valign="top">Account ID</td><td valign="top">The account number for the main or billed account.</td></tr><tr><td valign="top">Tax/VAT Registration Number</td><td valign="top">Required for business accounts.<br>Tax or VAT number requirements depend on geographical area.</td></tr><tr><td valign="top">Ship to</td><td valign="top">Shipping address on file.</td></tr><tr><td valign="top">Purchase order #</td><td valign="top">Purchase order numbers are optional.<br><br>If you choose to use a purchase order number, we will use the number on file for the amount of time you authorize. Quarterly or yearly purchase order numbers are preferred.<br><strong>Note:</strong> Monthly purchase order numbers must be received by the 18th.</td></tr><tr><td valign="top">WAY BILL NUMBER#</td><td valign="top">Waybill number is applicable.</td></tr><tr><td valign="top">Terms</td><td valign="top">Payment terms if available on your account.<br><em>Example:</em> net 30 days.</td></tr></tbody></table>

### &#x20;How to pay&#x20;

Credit cards will be charged directly.

<div align="left"><figure><img src="/files/v4xb1yp4DA96Pt51KvOq" alt="Invoice wire transfer information"><figcaption><p>Wire transfer information</p></figcaption></figure></div>

<table data-header-hidden><thead><tr><th width="269.5555419921875"></th><th valign="top"></th></tr></thead><tbody><tr><td><strong>Field</strong></td><td valign="top"><strong>Notes</strong></td></tr><tr><td>ACH payment</td><td valign="top">The bank routing and transit numbers if this payment option is available.</td></tr><tr><td>Wire transfer payment</td><td valign="top">Bank information information if this payment option is available.</td></tr></tbody></table>

### &#x20;How to contact us&#x20;

The information includes the local mailing and email address for invoice-related questions.&#x20;

<div align="left"><figure><img src="/files/2JElBM7Ubhg1F1EmH7Ti" alt="Local contact information"><figcaption><p>Local contact information</p></figcaption></figure></div>

<table data-header-hidden><thead><tr><th width="274"></th><th valign="top"></th></tr></thead><tbody><tr><td><strong>Field</strong></td><td valign="top"><strong>Notes</strong></td></tr><tr><td>Our address</td><td valign="top">Mailing address in your geographical area.</td></tr><tr><td>Phone number</td><td valign="top">Phone number for your local area.</td></tr><tr><td>Payment remittance and overdue payment query information</td><td valign="top">Email addresses for invoice inquiries.</td></tr></tbody></table>

### &#x20;Recurring fees

<div align="left"><figure><img src="/files/bjWLDQIDAtoe980qbawf" alt="Invoice recurring fees"><figcaption><p>Invoice recurring fees</p></figcaption></figure></div>

Most monthly recurring charges (MRCs) are system access fees (SAF) for plan bundles and other monthly charges.

* MRCs are billed in advance for the next month
* SIMs activated during the billing period are prorated
* The rate may be an average of the contracted rate based on full month and prorated charges (SAF and plan charges)

**Note:** The name of the fee includes the month of the charge.

<table data-header-hidden><thead><tr><th width="276.22216796875" valign="top"></th><th valign="top"></th></tr></thead><tbody><tr><td valign="top"><strong>Charge type</strong></td><td valign="top"><strong>Notes</strong></td></tr><tr><td valign="top">SAF charges</td><td valign="top">SAF charges are monthly.<br><br><strong>Note:</strong> If a SIM is active for two days or less in a billing period, there is no SAF charge.</td></tr><tr><td valign="top">Plan charges</td><td valign="top">Plan charges are for each SIM.</td></tr><tr><td valign="top">VPN charges</td><td valign="top">Monthly lease fee.</td></tr><tr><td valign="top">Prorated charges</td><td valign="top">These are usually charges for SIMs activated during the billing period.</td></tr></tbody></table>

### &#x20;Usage fees

<div align="left"><figure><img src="/files/GUQ3hcwfVRrQpC5FzJtm" alt="Invoice usage fees"><figcaption><p>Invoice usage fees</p></figcaption></figure></div>

Usage charges include data, SMS, and voice charges for the previous month billed retroactively. This will include plan overages, roaming charges, and all usage charges for pay-per-use (PPU) plans.

**Note:** The name of the fee includes the month of the charge.

<table data-header-hidden><thead><tr><th width="276.22216796875" valign="top"></th><th valign="top"></th></tr></thead><tbody><tr><td valign="top"><strong>Charge type</strong></td><td valign="top"><strong>Notes</strong></td></tr><tr><td valign="top">SMS (text) service fees</td><td valign="top">SMS totals are based on the number of messages that are sent or received from active SIMs. Plans can be for a specific amount of messages or just a set charge for each message (PPU).<br><br>There is no credit or rollover for messages not used.</td></tr><tr><td valign="top">GPRS (data) service fees</td><td valign="top">Data plans are based on the total usage of your SIMs within the billing period and vary based on the type of plan. Refer to your contract for any session rounding rules.<br><br>There is no credit or rollover for data not used.</td></tr><tr><td valign="top">Voice service fees</td><td valign="top">Voice (airtime) is charged by the minute; refer to your contract for any rounding rules.</td></tr><tr><td valign="top">Overage fees</td><td valign="top">Overage fees are clearly marked.</td></tr></tbody></table>

### &#x20;Other/hardware/fees

<div align="left"><figure><img src="/files/CQgVpaRnVkBck66K8Osp" alt=""><figcaption><p>Invoice hardware and misc charges</p></figcaption></figure></div>

This section includes non-connectivity charges. The month the fee applies to is included in the name.

**Note:** Hardware is invoiced separately immediately after purchase.&#x20;

<table data-header-hidden><thead><tr><th width="279.5555419921875" valign="top"></th><th valign="top"></th></tr></thead><tbody><tr><td valign="top"><strong>Charge type</strong></td><td valign="top"><strong>Notes</strong></td></tr><tr><td valign="top">API charges</td><td valign="top">API is a one time charge.</td></tr><tr><td valign="top">Late payment fees</td><td valign="top">Late payment fees will be listed and added to the invoice total.</td></tr><tr><td valign="top">Overdue balance</td><td valign="top">Any overdue balances will be listed but not added to the invoice total.</td></tr><tr><td valign="top">State based</td><td valign="top">The rate will be an average of the contracted rate based on full month and pro-rated charges.</td></tr></tbody></table>

### &#x20;Subtotal and tax

<div align="left"><figure><img src="/files/3ecWipIMzvp0KDYlWsaY" alt="Subtotal and total amount due"><figcaption><p>Subtotal breakdown and total </p></figcaption></figure></div>

<table data-header-hidden><thead><tr><th width="287.3333740234375" valign="top"></th><th valign="top"></th></tr></thead><tbody><tr><td valign="top"><strong>Field</strong></td><td valign="top"><strong>Notes</strong></td></tr><tr><td valign="top">Subtotal</td><td valign="top">Total recurring charges, usage fees, and other/hardware fees.</td></tr><tr><td valign="top">Tax </td><td valign="top">Taxes if applicable and description of taxes.</td></tr><tr><td valign="top">Total</td><td valign="top">The total amount owing and currency.</td></tr><tr><td valign="top">Click Here to Pay</td><td valign="top">The link directs you to a secured site to pay the invoice online. <br><strong>Note:</strong> The link will no longer be available if the balance has been paid or the invoice canceled.</td></tr></tbody></table>

## CSV invoice summary file

A CSV summary version of the monthly invoice is also available.

<div align="left"><figure><img src="/files/TCbvPZ3twJJtSrjgbkdA" alt="Monthly invoice csv file"><figcaption><p>Monthly invoice csv file format</p></figcaption></figure></div>

<table><thead><tr><th width="288.4444580078125" valign="top">Field</th><th valign="top">Name</th></tr></thead><tbody><tr><td valign="top">InvoiceBilingPeriod</td><td valign="top">YYYYMMDD-YYYYMMDD format.</td></tr><tr><td valign="top">InvoiceAccountPlatformId</td><td valign="top">The Account SID number of the usage/charge.<br><strong>Note:</strong> For parent/child accounts, this will be the parent account.</td></tr><tr><td valign="top">OwnerAccountPlatformId</td><td valign="top"><p>The Account SID number billed for the usage/charge.</p><ul><li>Single accounts - the same as the InvoiceAccountPlatformId.</li><li>Parent/child accounts - the account the SIM is assigned to.</li></ul></td></tr><tr><td valign="top">SkuName</td><td valign="top">Product type (i.e. data plan).</td></tr><tr><td valign="top">Description</td><td valign="top">Product description (i.e. data plan name).</td></tr><tr><td valign="top">BillingCurrency</td><td valign="top">Billing currency based on your contract.</td></tr><tr><td valign="top">UnitOfMeasure</td><td valign="top"><p>Based on the SkuName:</p><ul><li>EA - each</li><li>MB - megabyte</li></ul></td></tr><tr><td valign="top">Quantity</td><td valign="top">The value is based on the UnitOfMeasure column.</td></tr><tr><td valign="top">Rate</td><td valign="top">Contracted charged rate.</td></tr><tr><td valign="top">Total</td><td valign="top">Total charged rate for that line item charge.</td></tr></tbody></table>


# Payment methods

**Billing > Card Information**&#x20;

If you did not add a credit card when you set up your KORE account, you can add it anytime before making a purchase. You also have the option to add multiple credit cards to your account. The first card added to the account is automatically set as the default.

Once you have added a credit card to your account, you are required to have an active credit card on your account at all times.

## Credit card

### Add a new card

1. Go to **Billing > Card Information** and select **Add Card Now**.
2. Complete all fields and then select Add Card Now. The system will take a few moments to validate the card information.\
   ![](/files/0QT7t88uWKfJz4YFJ9Mk)

### Update your cards

You change remove (delete), update (edit), or change your default card at anytime.

If you have more multiple cards, your default payment card will appear on the left.

<div align="left"><figure><img src="/files/yMafGsqZIFUv1YGX1jUq" alt="card information image"><figcaption></figcaption></figure></div>

Select the menu ![](/files/cNxiiMXAzI4YAznNklaF) icon on the card you want to change and depending on the card, select the appropriate action:

* Set as default - changes to the primary payment card. \
  **Note:** You will not be asked to confirm but will receive a confirmation message on the screen.
* Edit - you can update the name on the card, expiry month, or expiry year. Select **Update Card** to confirm changes.\
  **Note:** if you need to update or are unsure of any other fields on the card (card number, security code, zip code, etc.), you must delete the card and add it back to your account.&#x20;
* Delete - delete the card from your account. Select **Yes, Delete** on the confirmation screen.\
  **Note:** You cannot delete the only active card on your account.

## Payment and contract terms

Larger business accounts may be eligible for contract and payment terms. [Contact Sales](https://www.korewireless.com/contact-us) to request either of these options.\
\
&#x20;  &#x20;


# Users

Review all users for an account.

**Users > Users**

A list of all users, including their names, emails, [roles](/console/user-management/user-roles-and-permissions#user-roles), and statuses, will be displayed for that account. Use the search as needed.

<div align="left"><figure><img src="/files/LvoKVyA4vxmtcKB2jGEY" alt=""><figcaption></figcaption></figure></div>


# Invite users to an account

Invite users to an account

Once you have your account configured, you can add new or existing KORE users to that account using the invite feature. Use this option to invite users to any application on KORE Console.

## Invite users to your account&#x20;

**Users > Invitations**

1. Select **Users > Invitations**, and then select the **+ Invite Users** button.

   <div align="left"><figure><img src="/files/42uIZteOvSt5KwFS2F1D" alt=""><figcaption></figcaption></figure></div>
2. Complete the user invite, confirm the additional product permissions, and select **Send Invite**. \
   Refer to the [User roles and permissions](/console/user-management/user-roles-and-permissions)article if needed. You will receive a confirmation message that your request has been sent. \
   **Product Permissions** - if the person you are inviting has access to another product, you must assign them a permission from that existing product.\
   **Note:** Existing users can be assigned different roles in each account.\
   ![](/files/eFGYU0lU7xJVnPSSIt2x)
3. Monitor the request as needed.\
   You can cancel the invitation anytime before they complete the invitation.

   <div align="left"><figure><img src="/files/h3nNBgwElgJz8ZoafSKa" alt=""><figcaption></figcaption></figure></div>

Once the user completes the invitation process, they will appear active on your user tab.

<figure><img src="/files/rwN0QU8RqrG02QiRW1C4" alt=""><figcaption></figcaption></figure>

## Developers and API access

API development requires access to the Super SIM and Programmable Wireless [Developer Portal](https://build.korewireless.com/). Two methods are available, both requiring a user invite.

<table><thead><tr><th valign="top">Option</th><th valign="top">Description</th></tr></thead><tbody><tr><td valign="top">Invite a user as an Admin.</td><td valign="top">Inviting the user as an admin grants them access to <a href="https://docs.korewireless.com/en-us/developers/api-management/api-clients#global-resources">global resources</a> and <a href="https://docs.korewireless.com/en-us/developers/api-management/api-clients#products">products</a>. This is a very trusted role.</td></tr><tr><td valign="top">Invite the user as a Developer.</td><td valign="top">inviting a user as a developer grants them access to <a href="https://docs.korewireless.com/en-us/developers/api-management/api-clients#products">products</a> only.</td></tr></tbody></table>


# Invite - accept an invitation to join an account

You will receive an email to complete the process.

1. Open the "KORE User invitation" email, and select either **Accept Invite** option.

   <div align="left"><figure><img src="/files/EaxnBGMDLZ3G1H8uBfap" alt="" width="545"><figcaption></figcaption></figure></div>
2. Wait while the system validates the request to confirm it is still active. Once complete, you will see the confirmation message shown below. Close the browser tab and wait for the login email from KORE.

   <figure><img src="/files/XFYBIEyjwyxiQX5vXPKi" alt=""><figcaption></figcaption></figure>
3. Open the "Welcome to KORE" email, select **Log in to KORE Console**, and follow the [New account setup](/console/accounts/new-account-setup)process if you are new to KORE, or just login with your current KORE email ID and password.\
   ![](/files/ATu46qfD76pbGR9g34ni)


# Passwords

You have two options for changing your password at login or from your profile page.&#x20;

## Password change during login

You will need to partially log in before being able to reset your password.

1. Open the [KORE Console](https://console.korewireless.com/), add your email ID, and select **Sign In**.
2. Select **Forget Password?**
3. Add the email address for that account and select **Continue**.

   <div align="left"><figure><img src="/files/xopHQ3FNJZk2jtbJjp7o" alt=""><figcaption></figcaption></figure></div>

   You will receive a confirmation that a reset email was sent. \
   **Note:** The link in the email expires in 30 minutes.

   <div align="left"><figure><img src="/files/fuuey3OchVRaTKhWh8Bq" alt=""><figcaption></figcaption></figure></div>
4. Open the email and select the **Reset My Password** button. A new browser window will open.&#x20;
5. Change your password, then select **Reset My Password**. You will receive a confirmation message that your password has been reset.

   <div align="left"><figure><img src="/files/r5NWdQAv0a3ErGqV0kyW" alt=""><figcaption></figcaption></figure></div>
6. Return to the original browser window and **Sign in**.

   <div align="left"><figure><img src="/files/x7I1l36Wv6jNr0fkmSt2" alt=""><figcaption></figcaption></figure></div>

## Password change from your profile&#x20;

You can reset your password from your user profile at any time.&#x20;

1. Select your profile, then select the security tab.

   <div align="left"><figure><img src="/files/OE339Arbo5rqadOZDxrL" alt="User menu with profile menu option"><figcaption></figcaption></figure></div>
2. Select the Security tab, then select **Send reset password link**.

   <div align="left"><figure><img src="/files/XXnNQKrO5XD35Iyijeic" alt=""><figcaption></figcaption></figure></div>

   A message will appear on the screen stating that a message has been sent using the two-factor authentication (2FA) method you have chosen. This information is also available on your profile > security tab.&#x20;
3. Monitor your 2FA method for the password notification.

   <div align="left"><figure><img src="/files/im49Tc02i7ZeUvNMX3VD" alt="2FA email notification"><figcaption></figcaption></figure></div>
4. Follow the instructions to change your password.

   <div align="left"><figure><img src="/files/N3VHNbthrejeouQwnTiW" alt=""><figcaption></figcaption></figure></div>

   <div align="left"><figure><img src="/files/EUnHVxBg1GtciI0pnYl9" alt="password change parameters and instructions"><figcaption></figcaption></figure></div>

   <div align="left"><figure><img src="/files/e6aDgfVsJnov2z7pUOw2" alt="password change complete message"><figcaption></figcaption></figure></div>

[<br>](https://docs.korewireless.com/en-us/iam/users/user-profile)


# Profile

Each user has a unique profile associated with them.&#x20;

{% hint style="info" %}
Profile changes are automatically synced in all platforms.
{% endhint %}

## Profile

Select **My Profile** from the menu next to your name to review or update your profile information.

<div align="left"><figure><img src="/files/hLz1PRe0F7WW8WWgEkJE" alt=""><figcaption></figcaption></figure></div>

The profile dashboard includes basic information about your profile.

<div align="left"><figure><img src="/files/KWT7V6CvUlfjb2urnqsY" alt=""><figcaption></figcaption></figure></div>

<table><thead><tr><th width="172.88885498046875">Option</th><th>Description</th></tr></thead><tbody><tr><td><a href="#profile-avatar">Avatar</a></td><td>Your picture or avatar if you choose to add one.<br>Note: This will show on all accounts.</td></tr><tr><td>Name</td><td>Your first and last name</td></tr><tr><td>Additional tabs</td><td>Additional options include:<br>* Dashboard - main page<br>* <a href="#profile-details">Profile</a> - your name, phone, and email<br>* Security - reset password and MFA options</td></tr><tr><td>Invitations</td><td>Links to any invitations you have received and not responded to.</td></tr></tbody></table>

### Avatar <a href="#profile-avatar" id="profile-avatar"></a>

You can add an avatar or picture to your profile, which will be shown on the top menu bar as you navigate between all KORE platforms.

1. Select the edit button from the avatar icon on the Dashboard.\
   ![](/files/qVOAwH2ycyJ8Nu12os5v)
2. Select one of the three options to add the image.

   <div align="left"><figure><img src="/files/cwu0JYJ0TFIv3AdkOeI2" alt=""><figcaption></figcaption></figure></div>
3. Align the image to fit using the frame tools, then select **Update**.\
   ![](/files/guKPKqYL85in5FSxeVt6)
4. Review your image on the Profile page and the header. Edit the image again if it does not display properly.&#x20;

   <div align="left"><figure><img src="/files/f9yN5P3rB9oHVglVNob8" alt=""><figcaption></figcaption></figure></div>

### Profile  <a href="#profile-details" id="profile-details"></a>

The profile information is automatically loaded from your original registration.&#x20;

<div align="left"><figure><img src="/files/PlLpGcDzYc0HqXedPAaZ" alt="" width="402"><figcaption></figcaption></figure></div>

You can update the following fields from this page:

* First name
* Last name
* Phone

{% hint style="info" %}
Role change - refer to [Transfer account ownership](/console/user-management/transfer-account-ownership) or [User roles and permissions](/console/user-management/user-roles-and-permissions#change-user-role)\
\
Email - You cannot change your email. Contact [Global Technical Support](https://korewireless.service-now.com/login_with_sso.do?glide_sso_id=147af54697a22194c4e478e3a253af8a) for email changes.
{% endhint %}

### Security

The security tab allows you to reset your password and MFA options.

<div align="left"><figure><img src="/files/JlqVytMwunULYCYoynDG" alt=""><figcaption></figcaption></figure></div>

<table><thead><tr><th width="220.6666259765625" valign="top">Option </th><th>Description</th></tr></thead><tbody><tr><td valign="top">Email</td><td>Your email is listed for confirmation. Select the <strong>Send reset password link</strong>; the system will display a confirmation message when the email is sent. The email link expires in 30 minutes.<br><strong>Note:</strong> If this email is used for other KORE platforms (ConnectivityPro, SecurityPro), that password will also be changed.</td></tr><tr><td valign="top">Text (SMS)</td><td>Not available in all areas.<br><img src="/files/xPznSXVbnyQr3FUmKQ0b" alt=""></td></tr><tr><td valign="top">Authenticator Apps</td><td><p>Allows you to select an authenticator app on your phone to log in. The system will not display which app you select for security.<br><br>The first time you log in after you select this option, it will display a QR code to scan on your phone. Select the app you want to use for MFA authentication. </p><p> <br><strong>Note:</strong> If you forget which authentication app you selected, contact <a href="https://korewireless.service-now.com/login_with_sso.do?glide_sso_id=147af54697a22194c4e478e3a253af8a">Global Technical Support</a>. Your MFA selection will then be switched to email, allowing you to log in and reassign an authention app.</p></td></tr></tbody></table>


# Remove users

An owner or admin can remove a user from an account. We will keep the record in our systems but mark the user as inactive and remove them from your view.\
**Note:** An admin can remove another admin.

1. Select the account the user is being removed from. Refer to the [Change accounts](/console/accounts/change-accounts) article for detailed instructions.
2. Select the user from the list.

   <div align="left"><figure><img src="/files/jWwBwUDCBY9qwdqUAMsb" alt=""><figcaption></figcaption></figure></div>
3. Select the ![](/files/WbylUH7GvfGR6NOSUDPO) options menu and select **Remove User**.

   <div align="left"><figure><img src="/files/w75aadPeNVyjG18CCzo7" alt=""><figcaption></figcaption></figure></div>
4. Review the confirmation window and select **Remove User** to continue.

   <div align="left"><figure><img src="/files/bmUtu5Joykkn0S07kVbp" alt=""><figcaption></figcaption></figure></div>

   You will receive a confirmation once the user is removed.<br>

   <div align="left"><figure><img src="/files/3i940N1tciEn3jS8glGt" alt=""><figcaption></figcaption></figure></div>


# Transfer account ownership

Each account has one account owner. This role has unlimited access to the account, such as updating billing details.

The account owner can transfer ownership to another user at any time, regardless of the account level. After the transfer, you can remove the previous owner if needed. This allows each account level to be managed separately while maintaining the overall organizational structure.

## Current account owner has access <a href="#scenario-1-the-current-account-owner-still-has-access" id="scenario-1-the-current-account-owner-still-has-access"></a>

If the current account owner still has access to their user account, they can transfer ownership to any other admin user on the account.

If the user you want to transfer ownership to doesn't already exist in your account, you can **invite** them as an admin. Once accepted, you can then transfer ownership.

1. The owner selects the admin user name from the user list and then selects **Transfer Ownership**.

   <div align="left"><figure><img src="/files/EcyWF5AYT2WIDnG7NuMu" alt="ownership transfer screen"><figcaption></figcaption></figure></div>
2. Review the confirmation message and select **Transfer**.\
   ![](/files/zuTl3k5ecUXzhcZ0k1kS)

The success message will display, and the owner/ admin roles will be switched.

<div align="left"><figure><img src="/files/ynLMy7dCobIeorWOf1HU" alt="ownership transfer success message"><figcaption></figcaption></figure></div>

## Current account owner does not have access <a href="#scenario-2-the-current-account-owner-does-not-have-access" id="scenario-2-the-current-account-owner-does-not-have-access"></a>

There may be times when the existing owner has left the organization or cannot log in. You must [contact support](https://korewireless.service-now.com/login_with_sso.do?glide_sso_id=147af54697a22194c4e478e3a253af8a) to transfer ownership to another user in these instances.


# User roles and permissions

## User roles

<table><thead><tr><th width="175.111083984375" valign="top">Role</th><th>Description</th></tr></thead><tbody><tr><td valign="top">Owner</td><td>An owner is the main point of contact assigned during registration; the owner is the user who completes registration. There can be only one owner, and ownership can be transferred. A user can be an owner of multiple accounts.</td></tr><tr><td valign="top">Admin</td><td>An admin has similar permissions to the owner, and an account can have multiple admins. An owner or other admins can invite an admin.</td></tr><tr><td valign="top">Developer</td><td>A developer has permissions similar to the admin but cannot manage (account settings, users, and billing).</td></tr><tr><td valign="top">Default</td><td><p>The default role is view only in the <a href="https://console.korewireless.com/">KORE Console</a>. The user can edit their profile but will be limited to viewing access for all other functions.</p><p>Other products may further define this role. Review their respective documentation for more details.</p></td></tr></tbody></table>

## Permissions

The grid below shows the permissions included with each role.

<table><thead><tr><th valign="top">Resource</th><th>Permission</th><th data-type="checkbox">Owner</th><th data-type="checkbox">Admin</th><th data-type="checkbox">Developer</th><th data-type="checkbox">Default</th></tr></thead><tbody><tr><td valign="top">Accounts</td><td>View</td><td>true</td><td>true</td><td>true</td><td>true</td></tr><tr><td valign="top"></td><td>Edit</td><td>true</td><td>true</td><td>false</td><td>false</td></tr><tr><td valign="top"></td><td>Transfer ownership</td><td>true</td><td>false</td><td>false</td><td>false</td></tr><tr><td valign="top">Users</td><td>View</td><td>true</td><td>true</td><td>false</td><td>false</td></tr><tr><td valign="top"></td><td>Invite</td><td>true</td><td>true</td><td>false</td><td>false</td></tr><tr><td valign="top"></td><td>Edit</td><td>true</td><td>true</td><td>false</td><td>false</td></tr><tr><td valign="top">Billing</td><td>View invoices</td><td>true</td><td>true</td><td>false</td><td>false</td></tr><tr><td valign="top"></td><td>Manage credit cards</td><td>true</td><td>true</td><td>false</td><td>false</td></tr></tbody></table>

## Change user role

Refer to the permissions grid to ensure you can change a user role.

You cannot change your own role.<br>

1. Select the account in which you want to change the user's access.
2. Select the **Users** menu, then select the user from the name column.

   <div align="left"><figure><img src="/files/hL8DFtXzaaMlPS4b1f2U" alt=""><figcaption></figcaption></figure></div>
3. Select the new role from the list, and then select **Save**.

   <div align="left"><figure><img src="/files/JqE8g8TWNu1OQLWuKRdI" alt=""><figcaption><p><br></p></figcaption></figure></div>

   A success confirmation message will display, and the user profile screen will be updated with the new role.\
   **Note:** You can update their role, but all other information is locked. The user will also receive an email notifying them of their role in which account has been changed.


# KORE OmniSIM®

Overview of the KORE OmniSIM Global Connectivity product

## Overview

With global, future-proofed IoT connectivity that is technology agnostic and provides network access worldwide, the KORE OmniSIM meets the challenges of IoT connectivity. Key features of KORE OmniSIM include the following:&#x20;

* Embedded or removable eSIM that is IoT-grade, ruggedized, and remotely programmable based on GSMA SGP.02 eSIM specifications&#x20;
* Ability to connect to multiple carriers and multiple technologies
* Hosted on the KORE independent network to enable greater control
* Secure access via VPNs and private APNs, as well as single-data bundles via multi-IMSI capabilities
* Zero-touch and over-the-air provisioning of profiles to provide local connectivity from KORE's profile portfolio

## Profile options <a href="#mcetoc_1h0ob1tol2j" id="mcetoc_1h0ob1tol2j"></a>

KORE OmniSIM includes several distinct options.&#x20;

### KORE OmniSIM Reach

KORE OmniSIM Reach provides global connectivity across 500 networks in 195 countries with resilient coverage through multiple available networks per country. Powered by centralized multi-IMSI technology, you can deploy a single SIM SKU globally that supports fail-over connectivity by switching to another network when one is unreachable.&#x20;

### KORE OmniSIM Rush

KORE OmniSIM Rush provides resilient connectivity across 61 networks in 34 countries in the U.S. and Europe. This is a cost-effective solution for IoT use cases that require higher data usage plans from 100MB a month and up, and there’s no permanent roaming restriction for IoT deploying using the 901 IMSI.&#x20;

### OmniSIM KATTCC

OmniSIM KATTCC provides USA connectivity.&#x20;

## Connectivity challenges overcome with OmniSIM&#x20;

The benefits of eSIM for IoT are plentiful, but two key areas of benefit are global connectivity and ensuring future performance. Global connectivity is a fragmented ecosystem, making manufacturing or distributing global IoT solutions challenging. Especially those IoT solutions that travel, like those found in the assets and logistics industries that cross international borders.&#x20;

For a single SIM provisioned to a single network, connectivity will drop once that network is no longer available. KORE OmniSIM provides IoT devices provisioning with multi-carrier technology. You can auto-provision or provision over the air to connect to available networks for seamless connectivity.&#x20;

For IoT devices deployed in vast numbers or located in hard-to-access areas, the ability to ensure connectivity for the lifetime of a device can be a game-changer. Our IoT solution will streamline logistics and keep costs down.&#x20;

IoT devices deployed for a long time will be protected from network changes that come with sunsets or service eliminations and prevent carrier lock-in. Devices can stay deployed in the IoT ecosystem with the option to switch carriers at any time for any reason.&#x20;

Reduce costs by not transporting and replacing SIMs, which could be thousands of devices for an extensive IoT infrastructure. Devices deployed underground or in other difficult-to-access areas become a greater and potentially more costly task to replace a SIM.&#x20;


# eSIM activation and testing quick start guide

Quick start guide for activating and testing your OmniSIM eSIM device

Before deploying eSIM-based IoT devices in the field, one must test for device compatibility and verify that they can switch from one mobile network operator to another without access to the device. Here are a few guidelines before you start.

## **eSIM activation and data plan selection.**

Once logged in to KORE ConnectivityPro, you are on the dashboard.

<figure><img src="/files/dPVOsIqFgevEQYlZTN4A" alt=""><figcaption></figcaption></figure>

Next, type in the EID *(e.g: 89001039450260141500000001486852)* in the **Search Bar** indicated by the arrow and click enter, and you will be taken to the results page:

<figure><img src="/files/VWhHISO82qBxjBhelix2" alt=""><figcaption><p>Search for a EID</p></figcaption></figure>

Check the state of the eSIM in your ConnectivityPro account, which should be in Stock State:

<figure><img src="/files/xutgMBY8VO4JifF6VDIV" alt=""><figcaption><p>Click View Subscription Details</p></figcaption></figure>

Clicking on **View Subscription Details** (in the above screenshot) will take you to the subscription details page (below), where you can Activate the SIM and select the required data plan:

<figure><img src="/files/itlc1zNIdDUaXM7o2RN7" alt=""><figcaption><p>Click Activate</p></figcaption></figure>

Select **Activate** (as shown in the above screenshot) to activate the SIM.

Select the **Activation Profile** to complete the provisioning/Activate step in ConnectivityPro.

<figure><img src="/files/dBv2HdGibcC0bJC09klz" alt=""><figcaption><p>Select an Activation Profile</p></figcaption></figure>

Select Continue on the Rules page, as in most cases, these will have been defined for you.

<figure><img src="/files/nKHB9s22j2PgpFmqmViK" alt=""><figcaption><p>Click Continue on the Rules page</p></figcaption></figure>

Review the subscription features and select **Confirm** to submit the activation request.

<figure><img src="/files/vXIvzPdPP52HvenzXiXi" alt=""><figcaption><p>Click Confirm the activation request</p></figcaption></figure>

Check the Provisioning status by clicking on the **Bell Icon** on the top right page and select **Notifications**. Check the corresponding request id for the status.

<figure><img src="/files/8FHayY2It1FCiveviiBo" alt=""><figcaption><p>Bell Icon Top Right gives access to notifications</p></figcaption></figure>

The request status page will give full details of the progress of the activation request.  It can take 5-10 minutes.

<figure><img src="/files/DGGbYGhXZCYNp42z6jyq" alt=""><figcaption><p>Request Status Page</p></figcaption></figure>

When provisioning has been completed successfully, you are ready to start testing.

## **Device Testing:**

1. When attached to the network, you should be able to browse the internet.Insert the eSIM into the device SIM slot and power ON the device. Ensure that you have configured on the device the APN “[data.apn.name](http://data.apn.name/)”.
2. Check that the data and data roaming feature is enabled.
3. When attached to network, you should be able to browse internet.
4. Check you are able to send and receive SMS from the device.
5. If it does not work, then please check the device documentation for settings to be done, that the IOT device has got the latest firmware etc.. and test it once again (steps 1 to 4)
6. If it still fails, power off the device, put the SIM into a mobile phone (or another device) and repeat the above steps 1 to 4. If it does work with mobile phone or the other device, then we can conclude that it is a device related issue and seek support from the device manufacturer.
7. If the device attached to network and you are able to browse internet and send and receive SMS, then you can perform the eSIM Validation test, which will prove that your device is capable of supporting eSIM.
8. If it does not, please raise a support ticket (<support@Korewireless.com>) and our customer support team will be able to investigate further and come back to y


# Prepaid plans quick start guide

OmniSIM Reach prepaid plans quick start guide for ConnectivityPro

KORE provides two prepaid plans for low data usage: a 3-year plan with up to 250 MB or a 5-year plan with up to 500 MB. These plans are paid in advance and are only available with our OmniSIM Reach SIM cards.

## How do prepaid plans work? <a href="#mcetoc_1iecch68uie" id="mcetoc_1iecch68uie"></a>

The following table highlights the key parameters and features of our prepaid plans.

<table><thead><tr><th width="193">Feature </th><th>Summary</th></tr></thead><tbody><tr><td>ConnectivityPro account</td><td>Prepaid and postpaid SIMs require separate accounts. Existing ConnectivityPro users can contact their account manager or account representative. Their email is on the Company Information page (<strong>Account > Company Information</strong>) in ConnectivityPro.</td></tr><tr><td>Services included</td><td>We offer a prepaid data plan only. SMS and Voice are not supported. If you need SMS or Voice, please contact your KORE representative to explore other options.</td></tr><tr><td>SIM cards</td><td>We offer triple-cut SIM cards.<br><br><strong>Test SIMs</strong><br>Complementary KORE eSIM Starter Kits are available on our <a href="https://www.korewireless.com/request-your-esim-starter-kit">KORE site</a>. While the test SIMs are not configured with prepaid plans, they will help you understand the value of our global flexible future-proofed IoT connectivity solution.</td></tr><tr><td>Activating SIMs</td><td>There is no need to activate your SIMs, as they will be shipped in active state, which means they are ready for use as soon as you get them.</td></tr><tr><td>Deactivate or terminate SIMs</td><td><p>You must create a case and request our Support team deactivate or terminate any SIMs for you.</p><p><br><strong>Note</strong>: You cannot reactivate a SIM once it has been deactivated or terminated.</p></td></tr><tr><td>APN</td><td>The APN used is data.apn.name</td></tr><tr><td>APIs</td><td>Prepaid accounts cannot manage the provisioning of SIM subscriptions through our public APIs.</td></tr><tr><td>Network coverage information</td><td>Prepaid plans are offered for the OmniSIM Reach product at the Preferred service level, with coverage in Europe (EU) or North America (NAM). For network coverage of this service level per region, consult our <a href="https://esimpro.korewireless.com/esim-coverage?productCategory=619fac093837620012870b62">Coverage map</a>.<br><br>OmniSIM Reach provides connectivity with resilient coverage through multiple available networks. Powered by centralized multi-IMSI technology, you can deploy a single SIM SKU that supports failover connectivity by switching to another network when one is unreachable. If you need global connectivity or connectivity in other regions, please contact your KORE representative to explore other option</td></tr><tr><td>Permanent roaming restrictions</td><td>The publicly available <a href="https://esimpro.korewireless.com/esim-coverage?productCategory=619fac093837620012870b62">Coverage Map</a> lists the covered networks per country and service level, and the downloadable coverage document indicates which networks have permanent roaming restrictions. KORE customers with login access can access more detailed service availability per network.<br><br><strong>Note:</strong> Canada roaming is restricted to 90 days. If your devices need to roam permanently in Canada, we can support you with OmniSIM Reach postpaid plans and a downloadable eSIM local profile. Contact your KORE representative to explore these options.</td></tr><tr><td>Invoicing</td><td>You will be charged upfront for either a 3-year term (with up to 250 MB) or a 5-year term (with up to 500 MB) for data connectivity and a SIM.</td></tr><tr><td>Term ends before you have used all the usage</td><td>All unused data will be forfeited once your contract term duration ends</td></tr><tr><td>Term expires or data usage exceeded</td><td>You will be charged the same prepaid amount automatically, and your contract will renew unless you deactivate or terminate your SIMs before the end of your contract term.</td></tr><tr><td>Convert to postpaid (prepaid SIMs converted to postpaid after activation)</td><td>Prepaid and postpaid accounts are under different contracts, so converting from prepaid to postpaid after SIM activation is not possible. Downloadable eSIM profiles are not available on prepaid plans. Please contact your KORE representative to explore other options.</td></tr></tbody></table>

## Order SIMs

KORE will manage your initial SIM order and account creation on ConnectivityPro. SIMs are activated the day they are shipped and will be ready to use upon arrival. You can place additional SIM orders using ConnectivityPro as needed.

For detailed instructions on ordering SIMs, select the Help Center menu option in ConnectivityPro to access the **Order SIMs** article.&#x20;

### Shipping and delivery costs

KORE partners with FedEx and UPS. Shipping and delivery times vary based on location.

* Netherlands: Within Europe and the UK, shipping costs will be approximately €15, with 2-3 business day delivery.
* USA: Shipping costs start at $11, with a 3-7 business day delivery. 2-day and overnight delivery are available with an additional charge.&#x20;

## Usage

The Usage menu allows you to monitor usage. Select the Help Center menu option in ConnectivityPro to access the **Usage** article for general information and filter options (**Help Center > ConnectivityPro > Usage > Usage**).\
\
To create a usage rule, select the Help Center menu option in ConnectivityPro to access the **Usage rule** article for instructions (**Help Center** > **ConnectivityPro > Usage > Usage rule**).

## Need help?

The following self-service and contact options are available if you need them:

<table data-header-hidden><thead><tr><th width="302"></th><th></th></tr></thead><tbody><tr><td><img src="/files/Y7IfjidDNxbYVmzhU7Ae" alt=""></td><td><ul><li>Help Center articles: Access ConnectivityPro self-service articles by selecting the Help Center icon on the main menu and then going to <strong>Knowledge Base > KORE Help Center > ConnectivityPro</strong>.</li><li>Create a support case or ticket: In ConnectivityPro, Select the Help Center icon on the main menu, choose the relevant support option under Technical Support or KORE Support, and create your case or support ticket.  <br><br><strong>Note:</strong> Additional information on creating and tracking a case is available in the Help Center - <strong>KORE Help Center > Need more help? > Cases or support tickets</strong>.</li></ul></td></tr><tr><td><img src="/files/Ec1Ep8lnSiizxuaI8AoK" alt=""></td><td><ul><li>Contact your account manager or account representative. Their email is available in ConnectivityPro - <strong>Account > Company Information</strong></li></ul></td></tr></tbody></table>


# SIM states

SIM states available for KORE OmniSIM

The KORE OmniSIM service type provides eSIM connectivity. Refer to the [eSIM coverage map](https://esimpro.korewireless.com/esim-coverage) for coverage details.

## Availability

KORE OmniSIM SIMs are available for purchase.

## SIM states

### Usage rule management

If usage is blocked, the SIM will moved to suspended with charge.

### SIM lifecycle&#x20;

<div align="left"><figure><img src="/files/SkbwGPCI2Gl6eRYKlcr5" alt="KORE OmniSIM lifecycle diagram"><figcaption><p>KORE OmniSIM lifecycle diagram</p></figcaption></figure></div>

### SIM states

The SIM states are listed in lifecycle order. Some states may not be available depending on your contract terms.

<table><thead><tr><th width="317" valign="top">State</th><th>Exceptions </th></tr></thead><tbody><tr><td valign="top">Stock</td><td></td></tr><tr><td valign="top">Test</td><td><p>Test state availability and configuration are dependent on your contract.</p><p></p><p>The configuration settings are available on the Account menu (Account > Service Agreement > Service Type).</p></td></tr><tr><td valign="top">Ready</td><td><p>Ready state availability and configuration are dependent on your contract.</p><p></p><p>The configuration settings are available on the Account menu (Account > Service Agreement > Service Type).</p></td></tr><tr><td valign="top">Active</td><td></td></tr><tr><td valign="top">Suspended with charge</td><td><p>Suspended with charge is dependent on your contract. The configuration settings are available under the Account menu.</p><p></p><p>SIMs can stay in this state indefinitely for an additional charge.<br></p><p>IP address - APNs managed by KORE will lose their IP address.  <a href="https://korewireless.service-now.com/csm">Contact Support</a> to verify if needed.</p><p></p><p>Activate - you can activate SIMs.</p></td></tr><tr><td valign="top">Pending scrap</td><td><p>SIMs will automatically transfer to scrapped after 1 day.</p><p></p><p>Activate - you cannot active SIMs.</p></td></tr><tr><td valign="top">Scrapped</td><td>SIMs are no longer available for use.</td></tr></tbody></table>


# eSIM switch

The eSIM switch option lets you remotely download, switch, or enable an eSIM profile without removing or physically swapping your SIM card to get service from another provider or carrier. <br>

{% hint style="info" %}
**Note:** Profile switching on the SGP.02 eUICC product family requires SMS support on both your device and the connected network.
{% endhint %}

## Switch options

eSIM switch has four components available.

<table><thead><tr><th width="197.33331298828125" valign="top">Option</th><th valign="top">Description</th></tr></thead><tbody><tr><td valign="top"><a href="https://docs.korewireless.com/omni-sim/esim-switch/esim-switch-process#switch-download-and-enable">Download profile</a></td><td valign="top"><p>Use it to add a profile to your eligible eSIM for future use. </p><p><br><strong>Note:</strong> The eSIM profile does not need to be in your account inventory but must be in your contract.</p></td></tr><tr><td valign="top"><a href="https://docs.korewireless.com/omni-sim/esim-switch/esim-switch-process#switch-download-and-enable">Enable profile</a></td><td valign="top"><p>Use it to switch to a profile previously downloaded to the eligible eSIM and enable it for use. </p><p></p><p>You can also request the system automatically disable the current profile after the switch is complete to free up memory on the eSIM.</p></td></tr><tr><td valign="top"><a href="https://docs.korewireless.com/omni-sim/esim-switch/esim-switch-process#switch-download-and-enable">Switch profile</a></td><td valign="top"><p>Use it to switch to a new profile on your eligible eSIM immediately. </p><p></p><p>You can also request the system automatically disable the current profile after the switch is complete to free up memory on your eSIM.</p><p><br><strong>Note:</strong> The eSIM profile does not need to be in your account inventory but must be in your contract.</p></td></tr><tr><td valign="top"><a href="https://docs.korewireless.com/omni-sim/esim-switch/esim-switch-process#delete-profile">Delete profile</a></td><td valign="top">Use it to remove a profile that is no longer needed from the card, freeing up memory. The maximum amount of profiles you can have on a card is 8.<br>The delete profile option is available on the EID details page.</td></tr></tbody></table>


# eSIM switch process

This page provides instructions for downloading, enabling, switching, and deleting eSIM profiles.

## Requirements

The following is required for download, enable, and switch options:

* Contract terms and plans for switchable profiles must be available on your account.
* The device must have the ability to be provisioned remotely; use the eSIM validation tool to confirm.
* The device must be connected to the network (in session) and support binary SMS (SMS MO-MT)
* APN data.apn.name
* The bulk eSIM switch option requires that all eSIMs have the same product offer.
* KORE VZW requires an IMEI for each switch.

## Switch, download, and enable&#x20;

### Interactive demo for eSIM switch

Review the interactive demo for [eSIM switch](https://capture.navattic.com/cm3d96wl7000103jid4boeist) as needed.

### Process

Follow these steps to request a download, enable, or switch a profile.

{% hint style="info" %}
Enable and switch - we recommend waiting until the device is in the switch profile's geographical area to ensure it can connect to the new networks.
{% endhint %}

The switch time can take up to 10 minutes. Refer to the [eSIM switch  - monitor and troubleshooting](/omnisim/esim-switch/esim-switch-monitor-and-troubleshooting)article if needed.

**Subscriptions > Inventory > eSIM view > Switch** \
**Subscriptions > Inventory > eSIM view > ICCID > Switch** \
**Subscriptions > Inventory > eSIM view > EID > Switch**

1. Verify that the device is powered on, connected to the network, capable of receiving binary SMS messages, and can be remotely provisioned.
2. Select the eSIM or eSIMs using one of the following options.
   1. Single eSIM - use the general search or filter to select the EID or ICCID, and then select **Switch**.
   2. Bulk switch - select **Switch** from the Inventory list (and either choose or paste a list of EIDs.
3. Select the request category, and then select **CONTINUE**.

   <div align="left"><figure><img src="/files/yeBXCse5JJxyYiWeQ5h9" alt=""><figcaption></figcaption></figure></div>

   1. Download profile - continue to the next step.
   2. Switch profile - confirm or reselect if you want to deactivate or suspend the current profile, then select **CONTINUE**.

      <div align="left"><figure><img src="/files/0R6OtJ4PC0H4nMr7w3U6" alt=""><figcaption></figcaption></figure></div>
   3. Enable profile - skip to confirmation.
4. Select the service type and activation profile. The features and plans will automatically display. Review and then select **CONTINUE**. \
   **Note:** Activation profiles can be created during a switch, but we recommend making them in advance to ensure consistency.

   <div align="left"><figure><img src="/files/B2V2CCEFizjS9l1RCIOh" alt=""><figcaption></figcaption></figure></div>
5. Add the IPND information for KORE TELS2.
6. Review all the information, and then select **CONFIRM**.
   1. Download and switch - the new ICCID will not be available until after the switch. Review the option to disable the retry option.

      <div align="left"><figure><img src="/files/rMrGFUgnI7WANgJ4t4mD" alt=""><figcaption></figcaption></figure></div>
   2. Enable - review the option to disable the retry option.

      <div align="left"><figure><img src="/files/IUiWcwM6ky8cMA7Smkyd" alt=""><figcaption></figcaption></figure></div>
7. Monitor your switch request.
8. Add a usage rule if needed once the switch is complete.

{% hint style="info" %}
**Switch** - Once the switch is complete, the new ICCID profile will be in ready state (KORE TELS2 in test) until the first CDR file is processed. Then, it will automatically switch to active. If ready state is unavailable for that service type or is not part of your contract, the new profile will be moved to active.
{% endhint %}

## Delete profile

The delete profile option allows you to remove a profile that is no longer needed from the card, freeing up memory on the card. The maximum amount of profiles you can have on a card is 8.

The delete profile option is available on the EID details page of the eSIM.

{% hint style="info" %}

* Service type KORE VZW or "KVZW" product offers cannot be deleted using this process. Terminating the ICCID will automatically delete the profile.
* The profile must be in a pending scrap or scrap state.
  {% endhint %}

### Delete process

**Subscriptions > Inventory > eSIM view**

1. Find the EID using one of the search options. Select the EID to view the EID details page.
2. Check that the device is powered on, connected to the network, can receive binary SMS, and can be remotely provisioned.
3. Select the **Delete Profile** button.

   <figure><img src="https://korewireless.service-now.com/sys_attachment.do?sys_id=a7a29a69837bf590f0b6bd226daad342" alt="delete profile button"><figcaption></figcaption></figure>
4. Choose the ICCID number (profile) from the list and then select **CONTINUE**.\
   **Note:** Profiles eligible for deletion will be listed in black, and ineligible will be listed in gray.

   <figure><img src="https://korewireless.service-now.com/sys_attachment.do?sys_id=63a29a69837bf590f0b6bd226daad338" alt=""><figcaption></figcaption></figure>
5. Confirm the ICCID selected.

   <div align="left"><figure><img src="/files/Cu61K8upSPaDJ0n2cGfV" alt=""><figcaption></figcaption></figure></div>
6. Verify the ICCID, the option to disable the retry option, and then select **CONFIRM**.

   <div align="left"><figure><img src="/files/lvzmL853WFuMC8I9ZhAW" alt=""><figcaption></figcaption></figure></div>
7. Close (**X**) the confirmation window.


# eSIM switch  - monitor and troubleshooting

You can easily check the status or monitor a switch request whenever you need to.

## Request status <a href="#mcetoc_1h8he93qc2" id="mcetoc_1h8he93qc2"></a>

**Subscriptions > Inventory > ESIM > Search > EID**\
**Subscriptions > Requests > Switch Requests > Request ID**

Search and select the EID or the Reference ID using one of the following options.&#x20;

* **Inventory list** - Search for the ICCID or EID from the Inventory list. Select the EID and review the eSIM history for the request. You can search by ICCID or sort by request type. Note the color of the icon next to the Request ID.

  <figure><img src="/files/9drGoBYfmXMXvlIbWQ2b" alt=""><figcaption></figcaption></figure>
* **Switch Request page** - find the request and review the request status to see if further action is needed.

  <div align="left"><figure><img src="/files/o6frEfgNG174OJnbsSIK" alt=""><figcaption></figcaption></figure></div>

### Request status definitions

<table data-header-hidden><thead><tr><th width="103.4444580078125"></th><th width="119.888916015625"></th><th></th></tr></thead><tbody><tr><td><strong>Icon</strong></td><td><strong>Status</strong></td><td><strong>Description</strong></td></tr><tr><td><img src="https://korewireless.service-now.com/sys_attachment.do?sys_id=2ba29a69837bf590f0b6bd226daad346" alt=""></td><td>Processing </td><td>The request has started but is not complete.</td></tr><tr><td><img src="https://korewireless.service-now.com/sys_attachment.do?sys_id=e7a29a69837bf590f0b6bd226daad344" alt=""></td><td>Processed  </td><td>The request is complete, but there are errors. </td></tr><tr><td><img src="/files/xNWs9eACmJhdJr7kC1zF" alt=""></td><td>Cancelled</td><td>The request was canceled. </td></tr><tr><td><img src="https://korewireless.service-now.com/sys_attachment.do?sys_id=efa29a69837bf590f0b6bd226daad333" alt=""></td><td>Completed</td><td>The request was successful, and the process is complete.</td></tr></tbody></table>

### Validity Period per RSP Operation

The operation times out if the SIM does not respond to the RSP within the validity period.

| **Operation**          | **Validity Period**                         |
| ---------------------- | ------------------------------------------- |
| Audit                  | 180 seconds                                 |
| Download               | 180 seconds (900 seconds for some requests) |
| Enable                 | 900 seconds                                 |
| Set Fallback Attribute | 180 seconds                                 |
| Delete                 | 180 seconds                                 |

## Monitor a request  <a href="#h_01gde5mcvard9bd8bhv5a620a4" id="h_01gde5mcvard9bd8bhv5a620a4"></a>

Select the Request ID to monitor the request.

<div align="left"><figure><img src="/files/tTiFXJKhRHw1vr4Ap4s5" alt=""><figcaption></figcaption></figure></div>

<table data-header-hidden><thead><tr><th width="90.111083984375" valign="top"></th><th width="175.77777099609375" valign="top"></th><th valign="top"></th></tr></thead><tbody><tr><td valign="top"><strong>Number</strong></td><td valign="top"><strong>Field or component</strong></td><td valign="top"><strong>Description</strong></td></tr><tr><td valign="top">1</td><td valign="top">Process bar</td><td valign="top">The process bar shows the process for all SIMs in that request. If a section is marked with a green dot/s, it has been completed successfully. </td></tr><tr><td valign="top">2</td><td valign="top">Status</td><td valign="top">The status explains the current state of the switch.</td></tr></tbody></table>

The section and status indicate the current stage of the request. Check the appropriate section below based on the request's status:

* Processing - statuses during processing
* Processed - troubleshoot a processed request

### Statuses during processing

As the request progresses, you may see the following statuses.

<table data-header-hidden><thead><tr><th width="269.5555419921875" valign="top"></th><th valign="top"></th></tr></thead><tbody><tr><td valign="top"><strong>Status</strong></td><td valign="top"><strong>Description</strong></td></tr><tr><td valign="top">Created</td><td valign="top">The request is created but not started.</td></tr><tr><td valign="top">Pending</td><td valign="top">The request is queued but not yet started.</td></tr><tr><td valign="top">Waiting for session</td><td valign="top">The device is not online, but the request is on hold for one hour.<br><br>Action - connect the device to the network and <a href="https://korewireless.service-now.com/kb_view.do?id=kb_article_view&#x26;sysparm_article=KB0010655#comp">retry</a> the switch request.</td></tr><tr><td valign="top">Acquired new profile</td><td valign="top">The new profile is obtained from KORE for your switch.</td></tr><tr><td valign="top">eSIM pairing completed</td><td valign="top">The new profile is paired with the device EID.<br><br>The step includes ordering the new profile to stock and the new ICCID being available in inventory in stock state.</td></tr><tr><td valign="top">Download profile requested</td><td valign="top">The request to download the new profile to the device has been sent to the RSP.</td></tr><tr><td valign="top">Download profile completed</td><td valign="top">The new profile is successfully downloaded to the device.</td></tr><tr><td valign="top">Activation requested</td><td valign="top">An activation request is created for the new profile.</td></tr><tr><td valign="top">Activation completed</td><td valign="top">The new profile is available for use and is in ready state.<br><strong>Note:</strong> The state will change to active once the first CDR is received.</td></tr><tr><td valign="top">Enable profile requested</td><td valign="top">The request to enable the downloaded profile was sent to the RSP.</td></tr><tr><td valign="top">Enable profile completed</td><td valign="top">The profile is enabled on the device.</td></tr><tr><td valign="top">Deactivation requested</td><td valign="top">The deactivation request is created for the original device profile.</td></tr><tr><td valign="top">Completed</td><td valign="top">The switch process is complete.</td></tr><tr><td valign="top"><strong>Service type KATTCC only</strong> </td><td valign="top"><strong>Description</strong></td></tr><tr><td valign="top">Policy check initiated</td><td valign="top">The policy status check has started.</td></tr><tr><td valign="top">Policy check completed</td><td valign="top">The policy status check is complete.</td></tr><tr><td valign="top">Policy removal initiated</td><td valign="top">The policy removal step has started, and is waiting for the carrier’s response.</td></tr><tr><td valign="top">Policy removal completed</td><td valign="top">The policy removal is complete.</td></tr></tbody></table>

## Troubleshoot a processed request <a href="#comp" id="comp"></a>

Any switch request in an incomplete status may have at least one eSIM that has failed. Review the status to determine the reason and any action that can be taken.

You may be able to troubleshoot and complete the request without contacting Support for assistance. The failed status message includes the description and possible action taken.

<figure><img src="/files/40pGfCq6OTgMkpQR9hcf" alt=""><figcaption></figcaption></figure>

Follow the instructions below based on the status message SIM. You can retry a maximum of five (5) times.&#x20;

{% hint style="info" %}
Before selecting **Retry**, check that the device is powered on, connected to the network, can receive binary SMS, and can be remotely provisioned.
{% endhint %}

<table data-header-hidden><thead><tr><th width="223.3333740234375" valign="top"></th><th valign="top"></th></tr></thead><tbody><tr><td valign="top"><strong>Status</strong></td><td valign="top"><strong>Action</strong></td></tr><tr><td valign="top">All</td><td valign="top">Verify that your device can be provisioned remotely using the <a href="https://korewireless.service-now.com/kb_view.do?id=kb_article_view&#x26;sysparm_article=KB0010580">eSIM validation tool</a> (eDVT).</td></tr><tr><td valign="top">Device not in session</td><td valign="top">Turn on the device, check the connection status, and select <strong>retry</strong>. If unsuccessful, wait 5-10 minutes and <strong>retry</strong> again<strong>.</strong><br>If this does not work, select <strong>skip step</strong>.<br><a href="https://korewireless.service-now.com/kb_view.do?id=kb_article_view&#x26;sysparm_article=KB0010562">Contact Support</a> if both options are unsuccessful.</td></tr><tr><td valign="top">eSIM pairing failed</td><td valign="top">Wait 5-10 minutes, then select <strong>retry</strong>.<br><a href="https://korewireless.service-now.com/kb_view.do?id=kb_article_view&#x26;sysparm_article=KB0010562">Contact Support</a> if unsuccessful.</td></tr><tr><td valign="top">Failed</td><td valign="top">Read the information in the details field for additional information.<br><img src="https://korewireless.service-now.com/sys_attachment.do?sys_id=4289d8e383c64a10f20a53ffeeaad3cb" alt=""></td></tr><tr><td valign="top">Failed to activate</td><td valign="top"><a href="https://korewireless.service-now.com/kb_view.do?id=kb_article_view&#x26;sysparm_article=KB0010562">Contact Support</a>.</td></tr><tr><td valign="top">Failed to acquire new profile</td><td valign="top">Wait 5-10 minutes, then select <strong>retry</strong>.<br><a href="https://korewireless.service-now.com/kb_view.do?id=kb_article_view&#x26;sysparm_article=KB0010562">Contact Support</a> if unsuccessful.</td></tr><tr><td valign="top">Failed to download profile</td><td valign="top">Turn on the device, check the connection status, verify SMS is working, and then select <strong>retry</strong>.<br><a href="https://korewireless.service-now.com/kb_view.do?id=kb_article_view&#x26;sysparm_article=KB0010562">Contact Support</a> if unsuccessful.</td></tr><tr><td valign="top">Failed to enable profile</td><td valign="top">Wait 5-10 minutes, turn on the device, check the connection status, verify SMS is working, and then select <strong>retry</strong>.<br><a href="https://korewireless.service-now.com/kb_view.do?id=kb_article_view&#x26;sysparm_article=KB0010562">Contact Support</a> if unsuccessful.</td></tr><tr><td valign="top">Failed to publish download profile request</td><td valign="top">Wait 5-10 minutes, verify SMS is working, and then select <strong>retry</strong>.<br><a href="https://korewireless.service-now.com/kb_view.do?id=kb_article_view&#x26;sysparm_article=KB0010562">Contact Support</a> if unsuccessful.</td></tr><tr><td valign="top">Failed to publish enable profile request</td><td valign="top">Wait 5-10 minutes, then select <strong>retry</strong>.<br><a href="https://korewireless.service-now.com/kb_view.do?id=kb_article_view&#x26;sysparm_article=KB0010562">Contact Support</a> if unsuccessful.</td></tr><tr><td valign="top">Failed to send activation request</td><td valign="top">Wait 5-10 minutes, then select <strong>retry</strong>.<br><a href="https://korewireless.service-now.com/kb_view.do?id=kb_article_view&#x26;sysparm_article=KB0010562">Contact Support</a> if unsuccessful.</td></tr><tr><td valign="top">Failed to send deactivation request</td><td valign="top">Wait 5-10 minutes, then <br><a href="https://korewireless.service-now.com/kb_view.do?id=kb_article_view&#x26;sysparm_article=KB0010562">Contact Support</a> if unsuccessful.</td></tr><tr><td valign="top">A process is currently running for this device. Please wait and try again.</td><td valign="top">Wait 5-10 minutes, and then resubmit the request. <a href="https://korewireless.service-now.com/kb_view.do?id=kb_article_view&#x26;sysparm_article=KB0010562">Contact Support</a> if still unsuccessful. </td></tr><tr><td valign="top"><strong>Service type KATTCC only</strong></td><td valign="top"><strong>Action</strong></td></tr><tr><td valign="top">Policy check failure</td><td valign="top">Select <strong>retry</strong>.</td></tr><tr><td valign="top">Failed to send policy check request</td><td valign="top">Select <strong>retry</strong>.</td></tr><tr><td valign="top">Failed to send policy removal request</td><td valign="top">Select <strong>retry</strong>.</td></tr><tr><td valign="top">Policy removal failure</td><td valign="top">Turn on the device, check the connection status, and then select retry.</td></tr></tbody></table>

<br>


# OmniSIM Reach - Centralized Multi-IMSI

OmniSIM Reach, technical description of the network steered multi-IMSI implementation.

{% hint style="info" %}
This documentation applies to the following products:

* OmniSIM

For all other products, please review their respective documentation
{% endhint %}

## Summary

OmniSIM Reach uses a centralized (network steered) multi-IMSI mechanism. So, no preferred or blacklist on the SIM, but all decisions on connecting to any network through any IMSI is managed from the core network.

The advantage is “easy to manage, fast to roll-out”:

* No time & signalling consuming OTA campaigns are needed to update parameters on the SIM
* Instantaneous & better targeted deployment of new roaming policies
* Generic implementation for all SIMs in a group, no waiting for OTA campaigns to finalize
* 100% target rate, not depending on OTA success rate

The mechanism is straight forward: the SIM applet round-robins over the available IMSIs and waits for an IMSI/network combination to attach to.

## Technical overview

### Goal

KORE utilizes multiple roaming sponsors to provide global coverage. This is a dynamic area where wholesale pricing & coverage is constantly changing (every 1 – 3 months) due to negotiations, traffic evolvement, and regulations. By leveraging multiple roaming sponsors, KORE is able to create an overlapping blanket of roaming coverage and mix & match based on best coverage and price for any local network.

To be able to provide the best price & coverage, roaming steering needs to be flexible, and this requires it to be centralized (managed through our core network). This means no IMSI selection per country within the SIM. Instead, the applet walks through the various IMSIs until a connection is established.

The high-level behavior is as follows:

1. After power-up, the SIM starts with the last active IMSI
2. The device tries to attach to any of the available networks using that IMSI
3. If no attach is accomplished, the next IMSI is selected after a timeout
4. The device tries again to attach to any of the available networks using this new IMSI
5. The SIM keeps running through the IMSI sequence upon timeout, until an attach is accomplished.

Network searching and Location Update attempts usually take some time. As the SIM is intended for IoT and not for consumer, some delay is acceptable. The success rate of having an attach in the end is of more importance.

### Generic description of an attach

#### SIM to Cellular Module Communication

The communication between the SIM (Subscriber Identity Module) and the Cellular Module is governed by the protocols outlined in the ETSI TS 131 102 standard. This standard specifies the structure of files stored on the SIM that provide essential information required by the Cellular Module for network communication.

Examples of information provided by the SIM to the Cellular Module:

* **Secret Keys:** Utilized for authentication processes to ensure secure communication.
* **OPLMN (Operator PLMN):** The list of preferred networks by the mobile device for connecting to the mobile network.
* **FPLMN (Forbidden PLMN):** A list of networks the device is forbidden to connect to.
* **IMSI (International Mobile Subscriber Identity):** A unique identity for all mobile network users.
* **ICCID (Integrated Circuit Card ID):** The unique serial number of the SIM card.

The SIM card may contain small applets enabling several additional features. Some common applets are multi-IMSI, service monitoring, and voice calls whitelisting. This document limits to the centralized steered multi-IMSI applet.

#### The SIM card and its surrounding are depicted in the picture below:

<figure><img src="/files/Pnix5LIJYdXrjXP8mwvE" alt=""><figcaption></figcaption></figure>

The Cellular Module communicates to the radio network. This starts with scanning all available radio spectrum for networks. Selection of the network to attach to is based on field strength and possible preferred networks.

Preferred networks can be read from the SIM card (not used by KORE at this moment).&#x20;

The Cellular Module initiates a location update to the selected local MNO. The local MNO starts communication to the HLR/HSS for authentication, based on the keys derived from the SIM via the Cellular Module.

An update location is finalized by the HLR/HSS sending roaming allowed/not allowed and granted services. Some other information is exchanged like MSISDN, barring and QoS. The MNO reports back to the Cellular Module that the service is granted or not.

Once connected, the Cellular Module starts a create session request to the GGSN/PGW and a data session will be established using an APN (Access Point Name) which points to an interface port on the GGSN. Usually this is the internet, but the port may also be a dedicated endpoint, also known as a private APN. From this point on, the device may start communication, e.g. sending data from the sensors to the IoT end-point.

The above is also depicted in the flow diagram further on in this document (chapter flow diagrams).

### Multi-IMSI applet description

The above is the generic and initial start-up, without multi-IMSI being involved yet. Here, we will describe how multi-IMSI comes into play.

A SIM is powered on and uses the first IMSI in the list. The multi-IMSI applet needs to get information of the network attach. Based on the STATUS message from the device to the SIM, the applet determines the time of the latest update of the network service.

After a pre-determined number of STATUS messages, the SIM applet requests information of the network service using the update of its LOCI file (Location Information) by sending a PLI (Provide Local Information) to the Cellular Module.&#x20;

The LOCI file is on the SIM and written by the Cellular Module. This file contains information like Mobile network MCC/MNC, Local Area Information and the Location update status. The Location update status can be: updated, not updated, PLMN not allowed, Location Area not allowed. The last three indicate “limited service”. The status “updated” means “service”.

Should this file indicate a “limited service”, multi-IMSI applet will pick the next IMSI from the list and sends a REFRESH to the Cellular Module. This indicates that there is new information from the SIM to the Cellular Module. Examples of files that are refreshed are: IMSI, FPLMN, OPLMN. The Cellular Module will take the new IMSI and cleared FPLMN and start the attach procedure again.

Should the last IMSI be used, the multi-IMSI applet will use the first in the list again. Essentially cycling (round robin) until an attach is established.

This sequence is depicted in this picture:

<div align="left"><figure><img src="/files/PwqpqFZOH8ibB7z4YJjn" alt=""><figcaption></figcaption></figure></div>

## Flow diagrams

### Power up sequence

The multi-IMSI applet and the network attach by the cellular module are two separate processes:

* The applet is triggered by STATUS commands, requesting a PLI / LOCI update after every 4 statuses
* The network attach is based on the network scan by the module, attaching using the IMSI and other information as provided by the SIM

The orange arrows depict the STATUS message from the Cellular Module to the SIM Card. In general, the interval between each STATUS message is 20 – 30 seconds.

After booting up and exchanging information, the multi-IMSI applet will start a PLI (Provide Local Information) after each 4 statuses. The cellular module responses with the information regarding the MCC, MNC, LAC and service and the network attach status. As described earlier, this results in “service” or “limited service”.

<figure><img src="/files/zrznINtS2VKWqkzKqSMr" alt=""><figcaption></figcaption></figure>

### Normal operations, IMSI Switch after service is lost

Once attached to a network, the multi-IMSI applet monitors the service by requesting an update of the LOCI file on the SIM. The multi-IMSI applet sends a PLI to the Cellular Module after each 4 STATUS messages.

<figure><img src="/files/dOxRYfAPmmHRVaWXI9gv" alt=""><figcaption></figcaption></figure>

In case the Cellular Module reports “limited service,” in response to a PLI, the multi-IMSI applet picks the next IMSI from the list and will send a REFRESH to the Cellular Module, indicating that there is new information available. The Cellular Module will get the new IMSI from the SIM and will start the attach sequence again.

### IMSI sequence

The order of IMSIs to be picked is dedicated to a configuration file of the multi-IMSI applet. Standard sequence is 1 > 2 > 3 > 1 ... Where the current implementation is:

1. IMSI 1: Green
2. IMSI 2: Blue
3. IMSI 3: Red

## Best practices

It goes without saying that the device software should always wait for the Cellular Module to report service. This can be done using the AT+COPS and AT+CREG Commands. However, in order to get a full update location, it is advised to make sure the APN is set properly all the time and as early in time as possible.

### APN definition

The APN is used after the initial attach procedure for the PDP Context activation. This could be with or without username/password credentials (PAP/CHAP) depending on customer implementation.

Be aware that in case the APN does not match with the APNs defined in the Insert Subscriber Data, unpredictable behavior from the local mobile operator can be expected. This can mean a reject of the request, local networks changing the requested APN, removing the username/password or other.

Rejecting the create session or changing APNs in a create session will lead to unpredictable behavior from access to the internet while not expected (e.g. in case of dedicated/private APN) or no internet access at all or even a complete disconnect from a network.

Power cycleIn some cases it is advised to power cycle the cellular module. The reason for this could be a process hanging between SIM and Cellular Module due to multiple network attach attempts, incorrect APN in the start or incorrect population of the FPLMN list.A power cycle is also good to reset the SIM and make sure the attach procedures can be re-done without having all kinds of information cached in the SIM or the Cellular Module.

A power cycle is not recommended to perform within the IMSI cycling process, so at least 5 minutes after powering up the Cellular Module should be considered. A longer period is allowed but most probably brings no added value.

Should network services be lost during operation, it is recommended to allow the Cellular Module at least 5 to 10 minutes to get re-connected as the device may be in motion and needs to find new networks to attach to.

### Network monitoring

It is recommended to perform regular network monitoring on the device level. A minimum is to have visibility of the network service. Additional parameters to be checked are MNO and IMSI.&#x20;

#### IMSI monitoring

As IMSI cycling is inherent to the multi-IMSI applet, the IMSI should be monitored to avoid continuous cycling.&#x20;

#### MNO monitoring

Once the attach is established, the Cellular Module should stay on that MNO/IMSI combination. The only reason for switching IMSIs is a loss of service which can happen due to loss of coverage or a defect in the network. An IMSI switch can take place and the Cellular Module should get a new attach within 40 seconds, max 5 minutes.

#### Power cycle

If, after 10 -15 minutes, the SIM is still sending refresh messages to the cellular module, an issue in communication could be the case. A power cycle is recommended.

#### SIM Toolkit

Please be aware that the multi-IMSI applet is a network steered multi-IMSI. There is no STK available to control the applet.


# OmniSIM Product Datasheet

{% hint style="info" %}
This documentation applies to the following products:

* OmniSIM

For all other products, please review their respective documentation
{% endhint %}

## KORE OmniSIM SKU - Products

<table data-full-width="false"><thead><tr><th>OmiSIM Product</th><th width="106">Triple</th><th width="100">2FF</th><th width="91">3FF</th><th width="100">MFF2</th><th width="127">MFF4 (USON8-6)</th><th>Downloadable Profile (M2M)²</th></tr></thead><tbody><tr><td>OmniSIM Reach 1.3</td><td>17493</td><td>17495</td><td>17494</td><td>17536</td><td>18491</td><td>17553</td></tr><tr><td>OmniSIM Rush 1.3</td><td>17496</td><td>17498</td><td>17497</td><td>17537</td><td>-</td><td>17554</td></tr><tr><td>OmniSIM US 1.3</td><td>17844</td><td>18643¹</td><td>18195</td><td>18642¹</td><td>-</td><td>-</td></tr><tr><td>OmniSIM KATTCC 1.3</td><td>17609</td><td>-</td><td>-</td><td>-</td><td>-</td><td>-</td></tr><tr><td>OmniSIM Reach 1.3.1</td><td>156130</td><td>171665</td><td>176385</td><td>155402</td><td>-</td><td>-</td></tr><tr><td>OmniSIM Rush 1.4</td><td>19128</td><td>19129</td><td>19130</td><td>19131</td><td>19132</td><td>19133</td></tr><tr><td>OmniSIM US 1.4</td><td>19134</td><td>19135</td><td>19136</td><td>19137</td><td>19138</td><td>19139</td></tr><tr><td>OmniSIM KATTCC 1.4</td><td>19140</td><td>19141</td><td>19142</td><td>19143</td><td>19144</td><td>-</td></tr><tr><td>OmniSIM KATTCC</td><td>16665</td><td>17176</td><td>17175</td><td>17174</td><td>-</td><td>14505</td></tr></tbody></table>

* Offering as of 17-December-2025 subject to change.&#x20;
* KORE SKU’s listed, if blank speak to your sales contact for options.
* ¹This SKU is not normally held in stock so see the [lead time](#delivery-lead-times) section to see lead time from the manufacturer.
* ²This downloadable SKU is available exclusively through the eSIM Switch feature, not the CPro Stock Order page.

## Form Factors

KORE supports a wide range of form factors. &#x20;

<figure><img src="/files/pLreWxp2sr417cMcrDe3" alt=""><figcaption><p>KORE SIM/eSIM Form Factors</p></figcaption></figure>

{% hint style="info" %}
Removable products the 4FF / Chip is the same thickness as the rest of the card as this helps get a good contact in a M2M device.  The 4FF might be tight in a Smartphone that is expecting 0.67mm Nano SIM.
{% endhint %}

## eSIM Specifications

KORE OmniSIM is engineered for the M2M/IoT market, utilizing an Industrial Grade chipset by default.

### eSIM Hardware&#x20;

<table><thead><tr><th width="257">Hardware Features</th><th>OmniSIM Removable / Embedded</th></tr></thead><tbody><tr><td>AVAILABLE FORMATS</td><td>Triple / 2FF / 3FF / 4FF / MFF2 / MFF4(USON8-6)</td></tr><tr><td>CHIPSET</td><td>Infineon SLM 17ECB800B</td></tr><tr><td>MEMORY (FLASH)</td><td>800kb</td></tr><tr><td>MEMORY (RAM)</td><td>20kb</td></tr><tr><td>DATA RETENTION</td><td>10 years @ 25°C</td></tr><tr><td>ENDURANCE CYCLES (ETSI TS 102 221)</td><td><p>Min 3.2M Write / page (16 byte block) </p><p>Min 200k Erase / page</p></td></tr><tr><td>VOLTAGE RANGE</td><td>1.62 – 5.5V External clock: 1 to 10 MHz</td></tr><tr><td>TEMPERATURE RANGE(TX)</td><td>-40°C to 105°C</td></tr><tr><td>HUMIDITY (HX)</td><td>85ºC, 85% humidity, 1000hrs</td></tr><tr><td>CORROSION (CX)</td><td>Salt atmosphere corrosion test: 24 hours</td></tr></tbody></table>

### eSIM OS

<table><thead><tr><th width="257">OS Features</th><th>OmniSIM 1.3.x</th><th>OmniSIM 1.4</th></tr></thead><tbody><tr><td>eUICC/eSIM OS</td><td>Kigen / EMu10.24</td><td>Kigen / EMu10.35</td></tr><tr><td>GSMA SGP</td><td>SGP.02 v4.2 (M2M)</td><td>SGP.02 v4.2 (M2M)</td></tr><tr><td>PROFILE</td><td>KORE Wireless</td><td>KORE Wireless</td></tr><tr><td>CONNECTVITY</td><td>2G/3G/4G/LTE/LTE-M - according to the profile</td><td>2G/3G/4G/LTE/LTE-M - according to the profile</td></tr><tr><td>JAVACARD</td><td>3.0.5</td><td>3.0.5</td></tr><tr><td>GLOBAL PLATFORM</td><td>2.1.1</td><td>2.1.1</td></tr></tbody></table>

## SIM Standards

#### ISO Standards

* **ISO 10373-1**: Provides test methods for cards.
* **ISO 7810**: Establishes the physical characteristics of identification cards.
* **ISO 7816**: Specifies the characteristics of cards with contacts and their operational conditions.

#### ETSI Standards

* **ETSI TS 101 220**: Specifications for application management in a multi-application environment.
* **ETSI TS 102 221**: Technical specifications for the UICC-Terminal interface; Physical and logical characteristics.
* **ETSI TS 102 241**: Security architecture for Smart Cards.
* **ETSI TS 102 267**: Application Program Interface (API) for Open Platform.
* **ETSI TS 102 671**: Remote APDU structure for UICC based applications.

#### Security Certification

* **Common Criteria EAL 5+**: A security certification indicating a high level of assurance in the product's security features.

### Product Compliance Information

* **Export Control Classification Number (ECCN):** 5A992.c
* **U.S. Harmonized Tariff Schedule (HTS):** 8523.52.0010
* **Country of Origin:** Varies, depending on the SIM supplier.
* **ROHS Compliance:** All KORE SIM suppliers adhere to ROHS standards. (Documentation available upon request)
* **REACH Compliance:** All KORE SIM suppliers meet REACH standards. (Documentation available upon request)
* **Toxic Substances Control Act (TSCA):** Complient to Section 6(h).  (Documentation available upon request)

#### SIM Card Manufacturers

* **Workz,** Dubai
* **Beautiful Card Company (BCC),** Taiwan

These companies adhere to the SIM manufacturing process standards as outlined by the Global System for Mobile Communications Association (GSMA), specifically the Security Accreditation Scheme for UICC Production (SAS-UP) and the Security Accreditation Scheme for Subscription Management (SAS-SM)

## Delivery Lead Times

| Product              | KORE Warehouse | Order from Manufacturer for existing SKU's |
| -------------------- | -------------- | ------------------------------------------ |
| OmniSIM (Removable)  | 1 week         | 9 weeks                                    |
| OmniSIM (Embedded)   | 1 week         | 9 weeks                                    |
| OmniSIM Downloadable | Immediate      | 2 weeks                                    |

* KORE Warehouse - Where the product is held in inventory by KORE
* Order from Manufacturer - Where the product is not held in Kore inventory or when orders exceed the max allowed quantity from inventory

## Order Quantities

| Product             | KORE CMP         | Drop Ship from Manufacturer                                         |
| ------------------- | ---------------- | ------------------------------------------------------------------- |
| OmniSIM (Removable) | 1+               | MoQ 20k                                                             |
| OmniSIM (Embedded)  | Multiples of 500 | <p>MoQ 10k<br>(Can supply in reels of 500 / 1000 / 3000 / 5000)</p> |

* KORE CMP - This could be an order placed through ConnectivityPro Stock Order or via your sales channel.
* Embedded (MFF2/USON) products are delivered on reels and sealed in MSL 3 anti static moisture barrier bags, then boxed for protection.
  * Reel Sizes
    * 500 (this is KORE's default size, held in stock)
    * 1000
    * 3000
    * 5000

## Removable eSIM

### Graphical Personalization

{% columns %}
{% column width="50%" %}
OmniSIM 1.3.x

<figure><img src="/files/lRWCAlBemfurouJaMkeO" alt=""><figcaption></figcaption></figure>
{% endcolumn %}

{% column %}
OmniSIM 1.4

<figure><img src="/files/SMonS27cTY9om1SqcibX" alt=""><figcaption></figcaption></figure>
{% endcolumn %}
{% endcolumns %}

* Removable OmniSIM now comes in KORE Branded Half-Size format.
* EID is printed in full (32 digits) under the barcode which also contains the EID in full so can be scanned with a barcode scanner.
* The pop-out/chip part has the last 24 digits of the EID printed on the back.  This is because the first 8 digits (89001039) are constant for KORE.&#x20;
* SKU is now printed on the back of the card body for easy identification on the type of OmniSIM.

### Physical Characteristics

* The KORE OmniSIM is crafted from ABS plastic, enhancing its durability for M2M/IoT applications, particularly in environments that reach temperatures up to 105°C. Furthermore, ABS plastic is more environmentally friendly compared to traditional PVC-based SIM cards, as it is easier to recycle.

## Embedded MFF2 eSIM

### Graphical Personalization

<div align="left"><figure><img src="/files/H6fWxMala2QkXrr8l1Kv" alt="" width="294"><figcaption><p>KORE MFF2 eSIM</p></figcaption></figure></div>

* EID (marked in orange) is the last 27 digits.  This is because the first 5 digits (89001) are constant for KORE.
* Chip product code (marked in yellow) is related to the Infineon production and is not defined by KORE.&#x20;

### Embedded MFF2 Technical Diagram

<div align="left"><figure><img src="/files/ZKxXgAvEw25zQFvSm3SX" alt=""><figcaption><p>MFF2 Pin Layout</p></figcaption></figure></div>

### Embedded MFF2 eSIM Pin Information

The following documents the key pin information for an embedded MFF2 eSIM module:

* **C1 - VDD/VCC**: Power supply
* **C2 - RST**: Reset signal
* **C3 - CLK**: Clock signal
* **C5 - VSS/GND**: Ground connection
* **C7 - IO**: Input/Output communication line

Section 5 of[ ETSI TS 102 221](https://www.etsi.org/deliver/etsi_ts/102200_102299/102221/17.01.00_60/ts_102221v170100p.pdf) outlines the characteristics of the eUICC PINs.

<div align="left"><figure><img src="/files/i0O26FCc1kLOTVKqRMwe" alt=""><figcaption><p>MFF2 Bottom View</p></figcaption></figure></div>

## Embedded MFF4 (USON8-6) eSIM

### Graphical Personalization

<div align="left"><figure><img src="/files/OYeUhdSIGW4xcRsFfuZE" alt=""><figcaption><p>USON8-6 Markings</p></figcaption></figure></div>

* EID (marked in orange) is the last 5 digits not including the 2 Luhn (check) digits on the end. &#x20;
  * Example EID: 8900103945061014140000000 12345[^1] 80[^2]
  * The last 5 digits of the EID are 12345 and 80 is the Luhn (check) digits
* Chip product code (marked in yellow) is related to the Infineon production and is not defined by KORE.&#x20;

### Embedded MFF4 (USON8-6) Technical Diagram

<div align="left"><figure><img src="/files/ettxwX6sawoPp29qv1Lx" alt=""><figcaption></figcaption></figure></div>

### Embedded MFF4 (USON8-6) eSIM Pin Information

The following documents the key pin information for an embedded USON8-6 eSIM module:

* **C1 - VDD/VCC**: Power supply
* **C2 - RST**: Reset signal
* **C3 - CLK**: Clock signal
* **C5 - VSS/GND**: Ground connection
* **C7 - IO**: Input/Output communication line

Section 5 of[ ETSI TS 102 221](https://www.etsi.org/deliver/etsi_ts/102200_102299/102221/17.01.00_60/ts_102221v170100p.pdf) outlines the characteristics of the eUICC PINs.

<div align="left"><figure><img src="/files/xW298jJU2yGlBcJBluHc" alt=""><figcaption><p>USON8-6 Bottom View</p></figcaption></figure></div>

[^1]: last 5 digits

[^2]: Luhn (Check) digits


# What is a SIM, eSIM, iSIM?

#### What is a SIM Card used for?

A SIM card, short for Subscriber Identity Module, is a crucial component developed in 1991, enabling Mobile Network Operators (MNOs) to identify and authenticate devices. It is standardized by the GSMA and acts as a bridge to the core network. The primary role of a SIM card is to securely store essential information such as:

* **ICCID (Integrated Circuit Card Identifier)** - The serial number of the SIM card.
* **IMSI (International Mobile Subscriber Identity)** - A unique network identifier.
* **Ki (Authentication Key)** - A secret key used for network security purposes.
* **Algorithm** - Used to securely identify and authenticate the SIM with the mobile network.

## What is a SIM

A **SIM (Subscriber Identity Module)** is a smart card designed to securely store subscriber-specific information used to authenticate and identify subscribers on mobile telephony devices. It's a critical component for connecting and accessing mobile networks.

* **Physical Form:** Initially introduced as a physical card, it has evolved in size from standard to Nano-SIMs.
* **Core Information:** Contains key information such as ICCID, IMSI, Ki (Authentication Key), and encryption algorithms.
* **Operator-Specific:** Typically supports a single network operator profile, requiring physical replacement to switch networks.
* **Programmability:** While not inherently reprogrammable, SIM cards can receive updates OTA (Over-the-Air) from the mobile network operator.
* **UICC and uSIM:** With the advent of 3G, the term UICC (Universal Integrated Circuit Card) came into use, reflecting its broader application beyond merely mobile phones to other types of connected devices.
* **Different grades:** Depending on the type of use, there are Commercial, Industrial, Automotive grades

This element of mobile technology has been instrumental in the secure and reliable operation of mobile networks globally.

<div align="left"><figure><img src="/files/e7ZlgUBgeatip5GTHiZ1" alt=""><figcaption><p>SIM Form Factors over time</p></figcaption></figure></div>

## What is an eSIM?

An **eSIM (Embedded SIM)** represents a significant evolution from traditional SIM cards, offering enhanced flexibility and functionality. Here’s what sets the eSIM apart:

* **Embedded by design:** Alongside physical SIM cards, eSIM can be soldered directly onto the device's motherboard, making it non-removable.
* **Remote provisioning:** Users can switch operators without changing a physical SIM. This is done by remotely downloading the operator's profile onto the eSIM.
* **Multiple profiles support:** An eSIM can store multiple operator profiles at once, though only one can be active at a time. This makes it easier to switch between networks or plans.
* **Ideal for a wide range of devices:** Its small form factor and remote programmability make the eSIM suitable not only for smartphones but also for IoT devices, smartwatches, and other connected consumer electronics.
* **Enhanced security:** As with traditional SIMs, eSIMs provide secure authentication to network services but add an extra layer of security by being embedded in the device, making tampering more difficult.

<div align="left"><figure><img src="/files/5uJ8zc04THtpTezwHZgM" alt=""><figcaption><p>eSIM added MFF2 to the available Form Factors</p></figcaption></figure></div>

### eSIM Consumer vs. M2M

When comparing eSIM technology for consumer devices versus Machine to Machine (M2M) applications, key differences emerge in their use case, deployment, and features.

**M2M eSIM (GSMA SGP.02):**

* **Target Devices**: Designed for IoT devices, industrial sensors, automotive applications, and other machines that require connectivity.  The device requires no specific software and works with constrained devices.
* **Deployment**: M2M eSIMs are embedded during the manufacturing process, often not intended to be accessible by the end user.
* **Management**: Provisioning and management are handled remotely through specialized platforms, catering to applications where manual intervention is impractical or impossible. Profiles can be pushed by campaign or using rules from network or CMS triggers
* **Profiles:** KORE has a portfolio of native profiles available to provide local connectivity.

**Consumer eSIM (GSMA SGP.22):**

* **Target Devices**: Aimed at smartphones, tablets, smartwatches, and other consumer electronics.
* **User Control**: Allows consumers to manage their subscriptions and switch carriers via the device’s interface.
* **Remote Provisioning**: Supports over-the-air (OTA) provisioning, enabling users to download and activate carrier profiles as needed.
* **LPA (Local Profile Assistant):** The device must have a LPA, UI or camera to manage the profiles. Not easy to scale as each device must trigger profile management

Both consumer eSIMs and M2M eSIMs offer the benefits of flexibility and improved security but are tailored to fit the distinct needs and logistics of their respective fields.

## What is an iSIM?

An iSIM (Integrated SIM) represents the next step in SIM card technology evolution, building upon the foundation laid by eSIMs. Here are the key features of an iSIM:

* **Integrated functionality:** Unlike the eSIM, which is soldered onto the device's motherboard, an iSIM is integrated into the processor chipset itself. This integration allows for even smaller device sizes and reduced manufacturing costs.
* **Remote provisioning and multiple profiles:** Similar to eSIMs, iSIMs support remote provisioning by network operators and can store multiple operator profiles at once, with the ability to switch between them as needed.
* **Enhanced security and performance:** By integrating the SIM functionality directly into the device's main processor, iSIMs potentially offer improved security and performance, benefiting from the processor's enhanced capabilities.  Integrates into it’s own dedicated space on the System of Chip (SoC), where it is protected by a Tamper Resistant Element (TRE).
* **Wider range of applications:** The smaller size and increased efficiency of iSIMs make them ideal for an even broader array of devices beyond smartphones, including IoT devices, wearable technology, and embedded applications in various sectors.

iSIM technology further simplifies device design and connectivity management, paving the way for future innovations in mobile and IoT ecosystems.  iSIM is not a Soft SIM.

<div align="left"><figure><img src="/files/9DNwWfNislKGmCUZ2i5n" alt=""><figcaption></figcaption></figure></div>


# OmniSIM 1.3.x What is New?

{% hint style="info" %}
This documentation applies to the following products:

* OmniSIM

For all other products, please review their respective documentation
{% endhint %}

## KORE OmniSIM Reach 1.3.1 - Update

KORE updated its OmniSIM Reach 1.3 product in September 2025 to incorporate a new MSISDN range being introduced to the OmniSIM product.

**Non-Geographic MSISDN Update:** The latest version introduces a Non-Geographic MSISDN with the prefix 883460. This shift means that Peer-to-Peer SMS and Voice services are no longer supported in this OmniSIM version.  This does have the advantage of blocking any Spam SMS.

There has been no change in the connectivity options for the product from OmniSIM Reach 1.3 to 1.3.1.  We see no impact to customer deployments when moved to the new SKU's. Unless you use P2P SMS or Voice, your sales contact should be able to provide support in the transition.

## KORE OmniSIM 1.3 - Release Highlights

In 2023, KORE proudly introduced the latest iteration of its flagship product, OmniSIM 1.3. This refresh incorporates several subtle yet impactful improvements, laying the groundwork for more significant updates in the future. Key enhancements include:

* **Half Size**: OmniSIM now offers a more compact form factor, providing greater flexibility for various applications.
* **Brand Integration**: The KORE brand is now prominently featured on OmniSIM, reflecting our commitment to quality and innovation.
* **Profile Enhancements**: We have updated the Reach profile to better align with the latest re-zoning efforts of our IMSI sponsors, ensuring seamless connectivity and improved performance.

These updates reinforce our dedication to delivering state-of-the-art solutions that meet the evolving needs of our clients.

### Half-Size SIM

* Half-Size KORE branded OmniSIM, reduction in plastic waste and reduces the carbon footprint by reducing the impact of shipping.&#x20;

<figure><img src="/files/H6YyYzCzQOlTOKe5c3w6" alt="" width="539"><figcaption><p>OmniSIM has a new look</p></figcaption></figure>

* Press Release: [https://www.korewireless.com/company/news/kore-continues-to-support-reduced-plastic-use](<https://www.korewireless.com/company/news/kore-continues-to-support-reduced-plastic-use >)&#x20;
* Other changes include having the SKU on the back of the card body so it is easier to identify the product.
* Update to eSIM Profile Management (SGP.02) settings, to bring OmniSIM in line with best practice for eSIM and from experience of downloading profiles in the field.&#x20;
  * Rollback Timer is a timer within the OS of the eSIM that waits a period of time to allow a profile to get connectivity before the ISD-R Fall-Back to the previous profile. Due to OmniSIM being in Roaming and multiple IMSI to get connection we have seen issues with profiles rolling back before connectivity was achieved. This OS parameter has been increased from 1 min to 5 mins
  * Default Notification Protocol Priority: The order of the protocol used by the eUICC to notify the RSP of profile download/installation or state.
  * Move to data (HTTPS) first reduces the SMS used at first attach which for OmniSIM will resolve issues of subscriptions moving out of the test state due to SMS.

| Priority | OmniSIM 1.0/1.1 | OmniSIM 1.3 |
| -------- | --------------- | ----------- |
| 1        | SMS             | HTTPS       |
| 2        | HTTPS           | SMS         |


# OmniSIM 1.4 What is New?

{% hint style="info" %}
This documentation applies to the following products:

* OmniSIM

For all other products, please review their respective documentation
{% endhint %}

## KORE OmniSIM 1.4 - Release Highlights

KORE has introduced the latest iteration of its OmniSIM product, OmniSIM 1.4. This refresh incorporates several subtle yet impactful improvements from the OmniSIM 1.3 product.  Key enhancements include:

* **Non-Geographic MSISDN:** The latest version introduces a Non-Geographic MSISDN with the prefix 883460. This new MSISDN is a non-geographic number, providing greater flexibility for deployments by removing location-related constraints and adding enhanced connectivity security hardening to prevent public reachability via SMS or Voice. With this new MSISDN range, Circuit Switched Voice (over 2G and 3G networks) and direct Device to Device SMS services **are no longer supported**.

{% hint style="info" %}
In these new SKU versions, only Application to Device and Device to Application SMS service (over API or SMPP Bind) is supported, and Voice service is not supported.
{% endhint %}

* **Profile Enhancements**: We have improved the OmniSIM profile to provide long term support and mass IoT deployments with;&#x20;
  * [GSMA TS.34](https://www.gsma.com/get-involved/working-groups/gsma_resources/ts-34-v12-0/) - Radio Policy Manager (RPM) file system
  * OmniSIM will support 5G SA once this is enabled in our KORE network.
* **IoT Grade eSIM:** OmniSIM continues to be an industrial grade eSIM based on SGP.02 to take advantage of KORE's portfolio of native carrier profiles and remote orchestration from our Connectivity Pro product.
* [**GSMA TS.48 v7**](https://www.gsma.com/get-involved/working-groups/gsma_resources/ts-48-v7-0-generic-euicc-test-profile-for-device-testing/)**:** OmniSIM 1.4 has the latest release of the GSMA TS.48 profile combined with the latest eSIM operating system, provides security enhancements as well as OEM's the ability to test devices with Rohde & Schwatz for example.
* **Artwork:** We have moved the barcode on the back of the removeable products, now on the left instead of the bottom, this makes the barcode larger and readable by more barcode scanners.  We also include the APN for reference on the back of the card for reference.

<figure><img src="/files/bIiBEojj9gCE7VnxeB2s" alt=""><figcaption></figcaption></figure>

These updates reinforce our dedication to delivering state-of-the-art solutions that meet the evolving needs of our clients.


# Identify OmniSIM Versions

KORE OmniSIM and eSIM products have evolved over time and this guide will help you identify what generation you have.

{% hint style="info" %}
This documentation applies to the following products:

* OmniSIM

For all other products, please review their respective documentation
{% endhint %}

## Physical Identification

### Branded Half-Size Product.

Newer generations of OmniSIM are Half-Size and have KORE branding. (from OmniSIM 1.3)

<figure><img src="/files/Sd5svSz7Z78iahRo9SII" alt="" width="375"><figcaption><p>Branded Half-Size KORE eSIM</p></figcaption></figure>

* **Barcode:** Stores the full EID (32 digits), so it can be scanned by a barcode scanner, as well as printed below.
* **SKU:** Now includes the SKU on the card to assist in identifying the card type.
* **Chip Popout (4FF):** The back has the last 24 digits of the EID with the first 8 digits removed as they are constant for KORE (89001039).

### Full Size White Product

Older eSIM products were white unbranded SIM that would have been delivered as a full size card. (OmniSIM 1.0/1.1)

<figure><img src="/files/x5MOoaRaIiOok38KkVQj" alt="" width="452"><figcaption><p>Older KORE eSIM were unbranded</p></figcaption></figure>

* **Barcode:** Stores the full EID (32 digits), so it can be scanned by a barcode scanner, as well as printed below.
* **Chip Popout (4FF):** The back has the full EID (32 digits).

## OmniSIM Version Command

Starting from OmniSIM 1.3 and subsequent versions, the Profile ID can be queried using the AT+CRSM command. This functionality allows the device to query and identify both the version and type of the OmniSIM.

```
# Read Profile ID file (12081) from the KORE SIM 
AT+CRSM=176,12081,0,0,3
+CRSM: 144,0,"000061"
 
# returns 000061 which digits 4-6 give the = KORE Profile ID 061
```

### Identify the Profile ID from the EID

The Profile ID is a 3 digit code that can be found as part of the KORE EID.

Profile ID = digits 11-13 of the EID as shown in the example below:

{% hint style="info" %}
EID: 8900103945 **061** 0141400000000001580

The Profile ID in this example is: 061
{% endhint %}

## Current OmniSIM Profile ID’s&#x20;

Here is a list of the current Profile ID's and the KORE products.

<table><thead><tr><th width="115">Profile ID</th><th width="365">Product Name</th></tr></thead><tbody><tr><td>046</td><td>OmniSIM KATTCC</td></tr><tr><td>061</td><td>OmniSIM Reach 1.3</td></tr><tr><td>066</td><td>OmniSIM Rush 1.3</td></tr><tr><td>068</td><td>KESIM GREEN / BLUE 1.3</td></tr><tr><td>070</td><td>OmniSIM Reach 1.3 - Downloadable</td></tr><tr><td>071</td><td>OmniSIM Rush 1.3 - Downloadable</td></tr><tr><td>074</td><td>OmniSIM Reach 1.3 Embedded - MFF2</td></tr><tr><td>075</td><td>OmniSIM KATTCC 1.3</td></tr><tr><td>078</td><td>OmniSIM US 1.3</td></tr><tr><td>080</td><td>OmniSIM TELUS 1.3</td></tr><tr><td>083</td><td>OmniSIM Reach 1.4</td></tr><tr><td>084</td><td>OmniSIM Rush / US 1.4 </td></tr><tr><td>085</td><td>OmniSIM Rush / US 1.4 - Downloadable</td></tr><tr><td>087</td><td>OmniSIM KATTCC 1.4</td></tr></tbody></table>


# OmniSIM Power Saving

OmniSIM is meticulously engineered to support Internet of Things (IoT) devices that operate under tight power constraints. Here's how OmniSIM caters to low-power or power-constrained devices.

## OmniSIM Chipset

### Infineon SLM 17ECB800B <a href="#infineon-slm-17ecb800b" id="infineon-slm-17ecb800b"></a>

* 32-bit -ARM® SecurCore™ SC300™ at 33MHz
* 800 kB SOLID FLASH™
* 20kByte RAM
* ISO7816, GPIO’s
* Micro Symmetric Crypto Processor (μSCP)
* Certification: CC EAL 5+ high (IFX\_CCI\_000037H)
* Temperature range: -40°C to 105°C

### Electrical Characteristics  <a href="#electrical-characteristics" id="electrical-characteristics"></a>

* External clock frequency: 1 to 10 MHz
* Supply voltage range: 1.62 V to 5.5 V
* Temperature range: -40°C to +105°C
* Storage temperature range: +5° to +40°C (refer to the respective “Package Specification” document for more information)
* ESD protection > 4 kV (HBM)
* Max. sleep mode current (typical) < 100 μA in clock off mode

## eDRX (Extended Discontinuous Reception) <a href="#edrx-extended-discontinuous-reception" id="edrx-extended-discontinuous-reception"></a>

The eDRX (enhanced Discontinuous Reception) feature is a power-saving innovation designed for IoT devices and smartphones. This mechanism allows a device and its network to agree on extended periods during which the device remains in a low-power state. Despite this, the device can still be reached for incoming data and network-initiated procedures with minimal delay.

### Key Benefits

* **Reduced Power Consumption:** By extending the intervals between active reception periods, eDRX significantly lowers the energy usage of devices, prolonging battery life.
* **Network Availability:** Devices remain reachable and capable of receiving mobile terminating data and participating in network procedures, ensuring no compromise on connectivity.
* **Customizable Delay Intervals:** The delay intervals for device availability can be negotiated and set according to specific application requirements, providing flexibility in balancing power saving with responsiveness.

### Application

eDRX is particularly advantageous for IoT applications and devices that do not require constant network communication but need to remain available for periodic updates or commands, optimizing the balance between power efficiency and network availability.

### PSM Power Saving Mode <a href="#psm-power-saving-mode" id="psm-power-saving-mode"></a>

Intended for devices that are expecting only infrequent mobile originating and terminating services and that can accept a corresponding latency in the mobile terminating communication.

{% hint style="info" %}
eDRX and PSM are power saving features involving devices & access networks. This can be dependent on the local MNO support of these network services.

OmniSIM supports these 2 modes by supporting UICC Suspension.
{% endhint %}

### UICC Suspension <a href="#uicc-suspension" id="uicc-suspension"></a>

The device can switch off the UICC without losing context. Before switching off, the SIM stores its internal status.\
When the device resumes the UICC, it does not need to initialize again all SIM context. This reduces the time and the process between the SIM and the modem.

1. SUSPEND command
2. Deactivate UICC (POWER\_OFF)
3. Entering into eDRX idle mode or PSM Mode
4. re-activate the UICC (POWER\_ON)
5. RESUME Command
6. verify that the same USIM is used, before it can leave the PSM Mode/ eDRX extended idle mode
7. Leave PSM Mode/eDRX extended idle mode

{% hint style="info" %}
OmniSIM 1.3 supports UICC Suspension as byte 3 of EF\_UMPC (0x02 = UICC supports the UICC suspension procedure)
{% endhint %}

### EF\_UMPC (UICC Maximum Power Consumption) <a href="#ef_umpc-uicc-maximum-power-consumption" id="ef_umpc-uicc-maximum-power-consumption"></a>

This file in the KORE profile provides the value of the UICC maximum power consumption during the UICC session. In addition, this file contains the value of the Operator defined time-out for the execution of any commands by the UICC if the terminal is not able to indicate it can supply the UICC maximum power consumption.

<table><thead><tr><th width="92">Bytes</th><th width="504">Description</th><th width="151">Value</th><th data-hidden></th></tr></thead><tbody><tr><td><strong>1</strong></td><td><p><strong>UICC maximum power consumption</strong></p><p>Maximum power consumption of the UICC during the UICC session in mA</p></td><td>0x0A (10mA)</td><td>1 byte</td></tr><tr><td><strong>2</strong></td><td><strong>Operator defined time-out (T_OP)</strong><br>Terminal shall set for the execution of any commands by the UICC if the terminal is not able to indicate it can supply the UICC maximum power consumption. The value is expressed in seconds.</td><td>0x14 (20sec)</td><td>1 byte</td></tr><tr><td><strong>3</strong></td><td><p><strong>Additional information</strong></p><ul><li><strong>0x02 = UICC supports the UICC suspension procedure</strong></li></ul><p>Indicates if the UICC requires an increased idle current during clock-stop-mode and if the UICC supports the UICC suspension procedure</p></td><td>0x02</td><td>1 byte</td></tr><tr><td><strong>4</strong></td><td>RFU</td><td>0x00</td><td>1 byte</td></tr><tr><td><strong>5</strong></td><td>RFU</td><td>0x00</td><td>1 byte</td></tr></tbody></table>


# OmniSIM APN Settings

{% hint style="info" %}
This documentation applies to the following products:

* OmniSIM

For all other products, please review their respective documentation
{% endhint %}

## APN Background <a href="#apn-background" id="apn-background"></a>

An Access Point Name (APN) is a gateway between a cellular mobile network (GSM, GPRS, 3G, 4G and 5G) and the Internet. Any time a device needs to use data, its Mobile Network Operator (MNO) reads the APN to assign an IP address, determines the network access it needs, and implements security measures. The APN identifies the Packet Data Network (PDN) that a device wants to communicate with.

## M2M device&#x20;

### Set the OmniSIM APN

```
AT+CGDCONT=1,"IP","data.apn.name"
```

## Android

It would be best for your Android mobile device to use the right APN, whether you are setting the APN manually or via an MDM agent.

For OmniSIM Reach, OmniSIM US, and OmniSIM Rush, your Android device must use the APN value data.apn.name.

### Single IMSI Android APN Settings <a href="#single-imsi-android-apn-settings" id="single-imsi-android-apn-settings"></a>

For Single IMSI solutions like OmniSIM Rush and OmniSIM US, you can use the standard Android APN settings described below:

1. Navigate to: Settings > More Settings > Cellular Networks > Access Point Names.
2. Tap the menu or the + icon to add a new entry.
3. Enter KORE under Name and enter your appropriate APN value.
4. Activate the new APN: Select your newly created KORE APN entry to set it as the active APN.

For OmniSIM Rush and OmniSIM US, the APN value is data.apn.name

The MCC and MNC in the table below help match the APN to the IMSI used in the device.

<table data-header-hidden><thead><tr><th width="98.5999755859375">Product</th><th width="88.99993896484375">MCC</th><th width="89.59979248046875">MNC</th><th width="132.7998046875">MVNO Type</th><th width="141.59979248046875">MVNO Value</th><th>APN</th></tr></thead><tbody><tr><td>Product</td><td>MCC</td><td>MNC</td><td>MVNO Type</td><td>MVNO Value</td><td> APN</td></tr><tr><td>OmniSIM Rush</td><td>901</td><td>31</td><td>SPN</td><td>KORE</td><td>data.apn.name</td></tr><tr><td>OmniSIM US</td><td>732</td><td>12</td><td>SPN</td><td>KORE</td><td>data.apn.name</td></tr></tbody></table>

### Multi-IMSI Android APN Settings

For Multi-IMSI solutions, such as OmniSIM Reach, it is essential to configure multiple APN entries, including the Mobile Country Code (MCC) and Mobile Network Code (MNC), to match the APN to the IMSI currently in use by the device.\
OmniSIM Reach has multiple IMSIs that will switch between depending on the country in which the device has been deployed. To ensure that your Android device can connect with any of the IMSIs used, please add all of the following APN and MCC-MNC combinations to your device based on your service type.

*As you enter each of these values, they may be immediately hidden by Android and so you will not see them. However, it is crucial to enter all three values MCC, MNC, and APN to ensure full functionality of your device.*

<table><thead><tr><th width="108.00006103515625"></th><th width="104.00006103515625"></th><th width="145.39996337890625"></th><th width="151.2000732421875"></th><th></th></tr></thead><tbody><tr><td>MCC</td><td>MNC</td><td>MVNO Type</td><td>MVNO Value</td><td>APN</td></tr><tr><td>234</td><td>50</td><td>SPN</td><td>KORE</td><td>data.apn.name</td></tr><tr><td>222</td><td>01</td><td>SPN</td><td>KORE</td><td>data.apn.name</td></tr><tr><td>204</td><td>04</td><td>SPN</td><td>KORE</td><td>data.apn.name</td></tr></tbody></table>


# OmniSIM Multi-IMSI Top Tips

Some of the top tips from our OmniSIM guru's on multi-IMSI.

{% hint style="info" %}
This documentation applies to the following products:

* OmniSIM

For all other products, please review their respective documentation
{% endhint %}

OmniSIM Reach uses a centralized (network-steered) multi-IMSI mechanism. There is no preference or blacklisting of the SIM. All decisions on connecting to any network through any IMSI are managed from the core network. The SIM card may contain small applets enabling additional features.

## Overview <a href="#mcetoc_1h6a0cbli3l" id="mcetoc_1h6a0cbli3l"></a>

The advantage is “easy to manage, fast to roll out”:

* No time and signaling consuming OTA campaigns are needed to update parameters on the SIM
* Instantaneous and better targeted deployment of new roaming policies
* Generic implementation for all SIMs in a group, no waiting for OTA campaigns to finalize
* 100% target rate, not depending on OTA success rate

The mechanism is straightforward; the SIM applet round-robins over the available IMSIs and waits for an IMSI and network combination to attach to.

Network searching and location update attempts usually take some time. Some delay is acceptable as the SIM is intended for IoT, not consumers. In the end, the success rate of being able to attach to a network is of more importance.

## How it works <a href="#mcetoc_1h6a0cbli3m" id="mcetoc_1h6a0cbli3m"></a>

KORE utilizes multiple roaming carriers to provide global coverage. This is a dynamic area where wholesale pricing and coverage constantly change (every 1–3 months) due to negotiations, traffic evolvement, and regulations. By leveraging multiple roaming carriers, KORE can create an overlapping blanket of roaming coverage and mix and match based on the best coverage and price for any local network.

To provide the best price & coverage, roaming steering needs to be flexible, requiring it to be centralized (managed through our core network). This means no IMSI selection per country within the SIM. Instead, the applet walks through the various IMSIs until a connection is established.

<figure><img src="/files/8lORAGILad88h4SMKB1e" alt="" width="563"><figcaption></figcaption></figure>

The high-level process:

1. The SIM is powered up and starts with the last active IMSI.
2. The device tries to attach to any available network using that IMSI.
3. The next IMSI is selected if it cannot attach and times out.
4. The device tries again to attach to any available networks using the new IMSI.
5. The SIM continues this cycle until it finally attaches to an IMSI.

The cellular module communicates to the radio network. This starts with scanning all available radio spectrum for networks. The selection of networks is based on field strength and possible preferred networks.

The cellular module initiates a location update to the selected local MNO. The local MNO starts communication with the HLR/HSS for authentication based on the keys derived from the SIM via the cellular module.

An updated location is finalized by the HLR/HSS sending roaming allowed / not allowed and granted services. Some other information is exchanged, like MSISDN, barring, and QoS. The MNO reports to the cellular module whether or not the service is granted.

Once connected, the cellular module starts a create session request to the GGSN/PGW, and a data session will be established using an APN, which points to an interface port on the GGSN. Usually, this is the internet, but the port may also be a dedicated endpoint known as a private APN. From then on, the device may start communicating (sending data from the sensors to the IoT endpoint).

## Multi-IMSI applet description <a href="#mcetoc_1h6a0cbli3n" id="mcetoc_1h6a0cbli3n"></a>

The previous high-level process is the generic and initial start-up, without multi-IMSI involvement. Here, we will describe how multi-IMSI comes into play.

1. The SIM is powered on, and the SIM uses the first IMSI in the list of IMSIs. The multi-IMSI applet needs to get information for the network attach. Based on the status message from the device to the SIM, the applet determines the time of the latest update of the network service.
2. After a pre-determined number of status messages, the SIM applet requests information about the network service using its LOCI file (Location Information) update by sending a PLI (Provide Local Information) to the cellular module.<br>

   <table><thead><tr><th width="139"></th><th></th></tr></thead><tbody><tr><td>LOCI</td><td>The LOCI file is on the SIM and written by the cellular module and contains mobile network MCC/MNC information, local area information, and the location update status.</td></tr><tr><td>Location update status</td><td>Location update status includes; updated, not updated, PLMN not allowed, or location area not allowed.<br><strong>Note:</strong> Limited service is available for statuses not updated, PLMN not allowed, or location area not allowed.<br><strong>Note:</strong> Full service is available for updated status. </td></tr></tbody></table>
3. If the LOCI file indicates a “limited service,” the SIM will pick the next IMSI from the list and sends a refresh to the cellular module. This indicates new information from the SIM to the cellular module.\
   **Example:** Refreshed IMSI, FPLMN, or OPLMN.
4. The cellular module starts the new attach procedure with the new IMSI and cleared FPLMN.
5. If the IMSI used was the last on the SIM, the multi-IMSI applet will return to the top of the list and use that IMSI. Essentially cycling (round robin) until an attach is established.

## APN definition <a href="#mcetoc_1h6a0cbli3o" id="mcetoc_1h6a0cbli3o"></a>

The APN is used after the initial attach procedure for the PDP context activation. Depending on the implementation, this could be with or without username/password credentials (PAP/CHAP).\
**Note:** If the APN does not match the APNs defined in the Insert Subscriber Data, unpredictable behavior from the local mobile operator can be expected. The behavior could mean a rejection of the request, local networks changing the requested APN, removing the username/password, and others.

Rejecting the create session or changing APNs in a create session can lead to the following:

* Unpredictable access to the internet when not expected\
  **Example:** dedicated or private APN
* No internet access
* Complete disconnect from a network

## Power cycle <a href="#mcetoc_1h6a0cbli3p" id="mcetoc_1h6a0cbli3p"></a>

### Recommended <a href="#mcetoc_1h6m7jm3s8" id="mcetoc_1h6m7jm3s8"></a>

In some cases, it is advised to power cycle the cellular module. The reason for this include:

* Process hanging between SIM and cellular module due to multiple network attach attempts
* Incorrect APN
* The incorrect population of the FPLMN list

A power cycle is also good for resetting the SIM and ensuring the attach procedures can be redone without having information cached in the SIM or the cellular module.

### Not recommended <a href="#mcetoc_1h6m7jm3s9" id="mcetoc_1h6m7jm3s9"></a>

A power cycle is not recommended during the IMSI cycling process, so at least 5 minutes after powering up the cellular module should be considered. A more extended period is allowed but most probably brings no added value.

Should network services be lost during the operation, allowing the cellular module at least 5 to 10 minutes to reconnect is recommended, as the device may be in motion and needs to find new networks to attach to.

## Network monitoring <a href="#mcetoc_1h6a0cbli3q" id="mcetoc_1h6a0cbli3q"></a>

We recommend performing regular network monitoring at the device level. At a minimum, ensure visibility to the network service. Additional parameters that can be checked include the MNO and IMSI.

### IMSI monitoring <a href="#mcetoc_1h6a0cbli3r" id="mcetoc_1h6a0cbli3r"></a>

As IMSI cycling is inherent to the multi-IMSI applet, the IMSI should be monitored to avoid continuous cycling.

### MNO monitoring <a href="#mcetoc_1h6a0cbli3s" id="mcetoc_1h6a0cbli3s"></a>

Once an attach is established, the cellular module should stay on that MNO/IMSI combination. The only reason for switching IMSIs is a loss of service which can happen due to loss of coverage or a defect in the network. An IMSI switch can take place, and the cellular module should get a new attach within 40 seconds to a maximum of 5 minutes.

### Power cycle <a href="#mcetoc_1h6a0cbli3t" id="mcetoc_1h6a0cbli3t"></a>

If, after 10 - 15 minutes, the SIM is still sending refresh messages to the cellular module, an issue in communication could be the case, and a power cycle is recommended.


# OmniSIM Troubleshooting Tips

Use this guide when having difficulties with your eSIM connecting or need help creating a case (ticket).

{% hint style="info" %}
This documentation applies to the following products:

* OmniSIM

For all other products, please review their respective documentation
{% endhint %}

## Device Connectivity Checks

Your device should be active and connected to a carrier within 5-10 minutes of completing the activation process.

If your device is not connected, we suggest testing your device using the steps below in order. You do not need to complete all steps if the device regains connectivity and begins to work.&#x20;

1. Insert the eSIM into the device SIM slot and power ON the device. Check that you have chosen “data.apn.name.”
2. Check that data and data roaming is enabled.&#x20;
3. Check if you can browse the internal once attached to the network.&#x20;
4. Check you can send and receive SMS from the device.&#x20;
5. Check the device documentation for settings to be done, that the IoT device has the latest firmware, etc., and test it again (steps 1 to 4).
6. Power off the device, put the SIM into a mobile phone (or another device), and repeat the above steps 1 to 4. If the SIM works with a mobile phone or another device, the assumption is that it is a device related issue. Contact the device manufacturer.&#x20;
7. Check if you can browse the internet and receive SMS. If you can, perform an [eSIM validation test (eDVT)](https://korewireless.service-now.com/csm?id=kb_article_view\&sysparm_article=KB0010580), which will prove that your device is capable of supporting eSIM.&#x20;
8. [Create a case (connectivity option)](https://korewireless.service-now.com/csm?id=kb_article_view\&sysparm_article=KB0010724), and our support team will be able to investigate further.

## SIM and Account Setup  <a href="#mcetoc_1h5ietunqq" id="mcetoc_1h5ietunqq"></a>

### SIM is in an active status  (test, ready, active)

Check that the SIM is provisioned and active on your ConnectivityPro account <https://connect.korewireless.com/login>.&#x20;

Review the [device connectivity checks](#device-connectivity-checks) article to see if this will resolve the issue.&#x20;

{% hint style="info" %}
**Note:** Allow around 5 minutes after making changes for communication between the SIM and ConnectivityPro.
{% endhint %}

#### Check Your Plans

Check that your plan provides suitable coverage for your local network operators.&#x20;

The coverage checker tool can be found here: <https://esimpro.korewireless.com/esim-coverage>

Searching for your country, network, or region – you can see which carriers, bearers, and network features are currently supported for your plan and service level.&#x20;

{% hint style="info" %}
Note of any roaming restrictions that may apply to certain carriers in your region.
{% endhint %}

#### Account Status

Check that your billing account status is active and your account is not in arrears. &#x20;

## Device setup  <a href="#mcetoc_1h5ietunqr" id="mcetoc_1h5ietunqr"></a>

### Physical SIM card

For physical SIMs, ensure the SIM is correctly inserted, and the electrical contacts are clean. It is possible that the SIM is not correctly seated within the device, or grease can accumulate on the electrical contact from handling. Remove the SIM, gently wipe the electrical contact with a soft, clean cloth, and reinsert it into the device, ensuring it is correctly mounted.&#x20;

{% hint style="info" %}
Be careful when breaking apart a “triple” / “multi” SIM. Bending the SIM could cause the electrical contacts to become loose, risking damage to the SIM slot of your device.
{% endhint %}

### Device

Check that the device is powered on and has completed the initial boot cycle. Sometimes OmniSIM will take longer to register with a network on the first initialization following a power cycle while it looks for the best network to attach to.&#x20;

{% hint style="info" %}
Allow 5-10 minutes for this initial attach to ensure it is not just taking a while in your area to get a good attach.
{% endhint %}

### APN

Ensure the APN is set correctly – KORE OmniSIM uses the APN “data.apn.name”. It’s important that this has been configured correctly within the device for it to work.

{% hint style="info" %}
&#x20;OmniSIM APN is: "**data.apn.name**"
{% endhint %}

Check using AT Command.

```
AT+CGDCONT?
```

Response

```
+CGDCONT: 1,"IP","data.apn.name","0.0.0.0",0,0
```

### SMS enabled

Check if the device is configured to send and receive SMS. You can test the SIM card in another device (set the right APN).&#x20;

{% hint style="info" %}
Try sending an SMS to and from the new SIM device to check that this works.
{% endhint %}

### Data Roaming

Check that **data roaming** is switched on.

{% hint style="info" %}
KORE OmniSIM operates under roaming conditions on the host network, and the device needs to be enabled to allow this.
{% endhint %}

### Firmware

Update your device and modem to the latest firmware, if possible. Often bugs or suboptimal performance are remedied by the manufacturer with new releases.

### Determine if it is the SIM or the device

Test the SIM card in an alternative device. Sometimes there is a device issue that is not clear to the user. Testing the SIM in another device and following the setup guide can help to rule out a hardware issue with that specific device.

### Coverage

Confirm local network coverage conditions with a secondary test, and move the device to an alternative location. In some instances, it may not be possible for any local networks to get coverage in a certain location as thick walls may block the signal, or there may be interference from other equipment. Confirming signal reception with another device, or giving the device a better unobstructed line of sight to the cell tower, can help to determine whether it’s a device, SIM, or a coverage issue.

### Power cycle the device

If the device is switched on and is not responding, power cycling (turn off and then on) can help, as this will reboot the modem in the device.

{% hint style="info" %}
**Note:** Check all steps above before power cycling your devices, as this should be a last resort.
{% endhint %}

Need More Help?

If you’ve tried these troubleshooting tips and you are still having problems, please refer to our more in-depth support content if you are a more advanced user, or you can raise a ticket to our global technical support team.

When raising a ticket, please provide as much useful context as possible, to help us identify the issue. This might include the following:

* A brief description of the issue
* Whether the issue is fixed or intermittent
* What services are impacted – data, SMS, voice
* When the issue started (date and time)
* How many SIMs are affected (providing the full list of the SIM numbers affected)
* Address where the unit(s) are located – street, city, postcode, country
* Whether any WORKING SIMs are in the same or close to the location
* What the user case and expected behaviour of the device is
* The APN used and currently configured on the device
* The device and modem make / model / firmware (including any recent firmware changes)
* The device technology – 2G / 3G / LTE / CAT-M1 / NB-IoT
* The RSSI / signal strength of the device
* Whether device / SIM swap has been conducted (for non-embedded SIMs)
* Any error messages / readable copies of device logs that can be shared for review / analysis


# Local Profile Management Guide

Local Profile Management (LPM) is a feature of OmniSIM that extends the M2M Profile management to allow a device to manage resilient connectivity.

{% hint style="info" %}
This documentation applies to the following products:

* OmniSIM

For all other products, please review their respective documentation
{% endhint %}

## Local Profile Management (LPM) for eSIM on IoT Devices

The Local Profile Management (LPM) applet revolutionizes eSIM profile management on IoT devices, enabling more dynamic and efficient connectivity management directly on the device. This approach leverages the device's intrinsic understanding of its environment, allowing for automatic profile switching based on predefined logic and scenarios. Below, we outline the core functionalities offered by the LPM applet.

### Enhancing Device Resilience

The LPM (Local Profile Manager) applet significantly enhances the resilience of devices in mobile networks. It enables devices to not only detect a complete loss of connectivity but also to identify Quality of Service (QoS) issues affecting network bearers. Upon detecting such issues, the device can proactively switch to an alternative Mobile Network Operator (MNO) profile, ensuring uninterrupted service and optimal connectivity performance.

#### Example

MNO Profile’s A, B and C have an active subscription.

1. Profile A is Enabled and used by the device for connectivity.
2. IoT Client detects that it has limited service, drops 5G for example. IoT Client triggers the LPM applet to enable another Profile.
3. Profile B is Enabled and A is disabled, Profile B then provides connectivity for the device.

<figure><img src="/files/12LpX2aiYW8eUuBqOVZD" alt="" width="310"><figcaption><p>Local Device can Manage Profile Resilience</p></figcaption></figure>

### **Key Features of LPM Applet:**

* **Get EID (eUICC Identifier):** Allows retrieval of the eSIM's unique identifier.
* **Get eSIM Profiles:** Lists all available eSIM profiles stored on the card.
* **Enable Profile:** Enables a selected profile based on its ICCID, making it the current active profile.

#### **Activation Methods:**

The LPM applet supports activation through two primary methods:

* **AT Commands (AT-CMD):** Traditional AT command interface for profile management.
* **Local Profile Assistant Daemon (LPAd):** A more intuitive method for triggering profile management actions.

#### **Considerations:**

* The LPM applet is strictly for profile management, **not allowing** for modification or deletion of eSIM profiles.
* Devices equipped with the LPM applet can be fully managed by an SM-SR platform, despite the LPM's use the RSP is still in control of the profiles on the card.
* Responsibility for profile switching in the absence of connectivity from the current MNO profile resides with the device, further emphasizing its autonomous role in connectivity management.
* LPM is a KORE proprietary feature, it extends the GSMA standards that includes emergency profile fallback to allow a device to decide when and what profile should be enabled to manage connectivity.

This refined approach to eSIM management via the LPM applet grants devices a higher degree of control and adaptability, aligning with the needs of modern IoT ecosystems.

### Pre-requisites

To enhance your IoT device's connectivity, ensure you have the following components:

* **OmniSIM 1.3 eSIM from KORE**: This eSIM supports Local Profile Management (LPM).
* **KORE’s ConnectivityPro Portal**: Provides the capability to download multiple profiles, enabling seamless connectivity management.
* **Compatible IoT Device**: Your IoT device should be capable of sending AT Commands to a modem or possess an LPAd (Local Profile Assistant) configurable for changing the ISD-R's Application Identifier (AID) to the LPM AID.

### How to Identify eSIM supports LPM?

To determine if a KORE eSIM supports Local Profile Management (LPM), you can check either:

* **The SKU** printed on the SIM card.
* **The Profile Code** within the eSIM's EID, accessible through a device's GetEID command. The profile code is located in digits 11-13 of the EID.
* **AT Command** to query the card to get a profile id.  Full details in the OmniSIM how to identify section

***

## LPM Command Interface

The LPM applet will be triggered and managed by APDU commands that are either sent directly from the device OS if capable or via the modem by using AT+CSIM commands, this later option will be more common and is how the Kore Device Steering SDK uses.

### Usage Flow

Here is a typical usage flow where the Device Client or Steering SDK uses AT Commands.

1. Open a Channel to the SIM.
2. Select the LPM applet so the following commands will be directed to the applet.
3. Get Profiles – Get a list of profiles and their state to decide which profile to enable.
4. Enable Profile – Request to Enable a profile, the referenced profile will be enabled and the existing disabled by the ISD-R.
5. Close the Channel to the SIM, this will trigger the device to refresh and the device will resume connectivity with the new profile.

<figure><img src="/files/bt4sbg4anUaEXekL6qUb" alt="" width="563"><figcaption><p>Example sequence flow for LPM commands</p></figcaption></figure>

## LPM AT Commands

### Prerequisites

To be able to send the AT commands to the LPM applet there needs to be a channel open to the SIM and select the LPM applet so that the AT Command can send the APDU commands to the LPM applet.

#### Open Channel

The Open Channel command will create a new channel to the SIM, the modem will return the next available channel that can be referenced to send further commands to the SIM.

{% code title="Open Channel command" %}

```shell-session
AT+CSIM=10,"0070000001"
```

{% endcode %}

{% code title="Response" %}

```sh
+CSIM: 6,"0X9000"
```

{% endcode %}

Where **X** is the channel number to be used in the commands below.

#### Select the LPM Applet

The following command will select the LPM applet using it’s AID so that further APDU are sent to the applet.

The LPM Applet has an AID (Application IDentifier):  A000000815030040030902231003

<pre data-title="Select the LPM applet"><code>AT+CSIM=38,"0<a data-footnote-ref href="#user-content-fn-1">X</a>A404000EA000000815030040030902231003"
</code></pre>

* Where X is the channel returned by the Open Channel
* The AID of the LPM applet: **A000000815030040030902231003**

{% code title="Response" %}

```
+CSIM: 4,"9000" // command executed successfully
```

{% endcode %}

### LPM - Get EID

This command is used to return the EID of the eSIM. Could be used to identify the type of card for example.

Here is the format of the APDU that is sent to the LPM applet to request the EID.

<table><thead><tr><th width="86">Field</th><th width="119">Value (hex)</th><th>Comments</th></tr></thead><tbody><tr><td>CLA</td><td>0x8<mark style="color:red;">X</mark></td><td><p>8 stands for proprietary command </p><p><mark style="color:red;">X</mark> stands for logical channel that is open to the SIM</p></td></tr><tr><td>INS</td><td>0x16</td><td>16 defines the Get EID command</td></tr><tr><td>P1</td><td>0x00</td><td></td></tr><tr><td>P2</td><td>0x00</td><td></td></tr><tr><td>Lc</td><td>0x12</td><td>Length of the EID to be returned, KORE's EID is 32 digits so 16 bytes + EID TAG and Length is 18 bytes (0x12)</td></tr></tbody></table>

#### Get EID Command

<pre data-title="LPM Get EID"><code>AT+CSIM=10,"8<a data-footnote-ref href="#user-content-fn-2">X</a>16000012"
</code></pre>

* Where X is the channel returned by the Open Channel

<pre data-title="Response"><code>+CSIM: 40,"4C10<a data-footnote-ref href="#user-content-fn-3">89001039450410141400000000001580</a>9000"
</code></pre>

* Returns the EID: 89001039450410141400000000001580

#### Example - LPM Get EID

```
Tx AT+CSIM=10,"0070000001"    // open channel
Rx +CSIM: 6,"0X9000"          // channel X selected

Tx AT+CSIM=38,"0X A4 04 00 0E A000000815030040030902231003" // select LPM AID
Rx +CSIM: 4,"9000"

Tx AT+CSIM=10,"8X16000012"    // Get EID
Rx +CSIM: 40,"4C10890010394504101414000000000015809000" // 4C EID tag, 10 length

Tx AT+CSIM=10,"0070800100"    // close channel
Rx +CSIM: 4,"9000
```

### LPM - Get eSIM Profile

This command is used to a list of the available downloaded Profiles on the eSIM and the Status. This would provide an IoT application the current status and information on the profiles to allow the device to decide to select an available profile.

Here is the format of the APDU that is sent to the LPM applet to request the eSIM Profiles.

<table><thead><tr><th width="86">Field</th><th width="119">Value (hex)</th><th>Comments</th></tr></thead><tbody><tr><td>CLA</td><td>0x8<mark style="color:red;">X</mark></td><td><p>8 stands for proprietary command </p><p><mark style="color:red;">X</mark> stands for logical channel that is open to the SIM</p></td></tr><tr><td>INS</td><td>0x18</td><td>18 defines the Get eSIM Profiles command</td></tr><tr><td>P1</td><td>0x00</td><td></td></tr><tr><td>P2</td><td>0x00</td><td></td></tr><tr><td>Lc</td><td>0xFF</td><td>No Data</td></tr></tbody></table>

#### Get eSIM Profiles Command

<pre data-title="LPM Get EID"><code>AT+CSIM=10,"8<a data-footnote-ref href="#user-content-fn-4">X</a>180000FF"
</code></pre>

* Where X is the channel returned by the Open Channel

<pre data-title="Response" data-overflow="wrap"><code>+CSIM: 82,"<a data-footnote-ref href="#user-content-fn-5">E3254F10A0000005591010FFFFFFFF8900001100</a><a data-footnote-ref href="#user-content-fn-6">9F70013F</a><a data-footnote-ref href="#user-content-fn-7">530101</a><a data-footnote-ref href="#user-content-fn-8">5A0A98211380007175100017</a>9000"
</code></pre>

#### Returns E3 Tag for each Profile on the OmniSIM

<table><thead><tr><th width="96">Field</th><th width="130">Length (hex)</th><th width="193">Value (hex)</th><th>Comments</th></tr></thead><tbody><tr><td>4F</td><td>0x05-16</td><td>Profile AID</td><td>ISDP-AID of the Profile on the eSIM, this will be used in the Enable Profile command</td></tr><tr><td>9F70</td><td>0x01</td><td><p>3F = Enabled </p><p>1F = Disabled</p></td><td>State of the Profile</td></tr><tr><td>53</td><td>0x01</td><td><p>00 = Fallback not set</p><p>01 = Fallback set</p></td><td>ISD-P attribute - fallback state of the profile</td></tr><tr><td>5A</td><td>0x0A (10)</td><td>ICCID</td><td>ICCD of the profile nibble swapped </td></tr></tbody></table>

{% hint style="info" %}
Nibble Swapping

The SIM stores some data in Nibble Swapped format to save space for example.

ICCID = 89123108001757010071

If this was covereted to Hex as numbers it would be 0x38 39 20 31 32 20 33 31 20 20 30 38 20 30 30 20 31 37 20 35 37 20 30 31 20 30 30 20 37 31  (20 bytes)

Swapped takes 2 digits and swaps them and stores as a byte for example 89 = 0x98

so the ICCID is stores as a hex string: 0x98211380007175100017 (10 bytes)               &#x20;
{% endhint %}

#### Example - LPM eSIM Profiles

```
AT+CSIM=10,"0070000001" // open channel
Rx +CSIM: 6,"0X9000" // channel X selected

Tx AT+CSIM=38,"0XA404000EA000000815030040030902231003" // select LPM AID
Rx +CSIM: 4,"9000"

Tx AT+CSIM=10,"8X180000FF" // Get eSIM Profile
Rx +CSIM: 238,"
Rx E3 25                                      // E3 tag and length
Rx 4F 10 A0000005591010FFFFFFFF8900001100     // Profile AID
Rx 9F70 01 3F                                 // Enabled
Rx 53 01 01                                   // Fallback attribute set
Rx 5A 0A 98211380007175100017                 // ICCID (Swaped)
Rx E3 25
Rx 4F 10 A0000005591010FFFFFFFF8900001000     // Profile AID
Rx 9F70 01 1F                                 // Disabled
Rx 53 01 00                                   // Fallback attribute NOT set
Rx 5A 0A 989400312171001689F8                 // ICCID
Rx E3254F10A0000005591010FFFFFFFF8900001200 // Profile AID
Rx 9F70011F                                 // Disabled
Rx 530100                                   // Fallback attribute NOT set
Rx 5A0A98211380007175100027                 // ICCID
Rx 9000"

Tx AT+CSIM=10,"0070800100" // close channel
Rx +CSIM: 4,"9000
```

{% hint style="info" %}
To decode the response into a more readable structured format then recommend using ASN1 decoder. (<https://asn1.io/asn1playground>)
{% endhint %}

### LPM - Enable Profile&#x20;

This command is used to Enable a specified profile that is already downloaded and installed. If the profile is installed the profile is Enabled and the previous active profile is disabled. Once the new profile is enabled, the applet sends the REFRESH command that will be sent to the terminal to force the switch then the Channel to the SIM is closed. If the profile enabling procedure is done against the POL1, the eUICC will send an error SW (69 E1). There will be no Rollback Mechanism in LM Profile Enable process. A notification to the SM-SR to update its database (notification sequence number value =’0000’).

<table><thead><tr><th width="86">Field</th><th width="119">Value (hex)</th><th>Comments</th></tr></thead><tbody><tr><td>CLA</td><td>0x8<mark style="color:red;">X</mark></td><td><p>8 stands for proprietary command </p><p><mark style="color:red;">X</mark> stands for logical channel that is open to the SIM</p></td></tr><tr><td>INS</td><td>0x01</td><td>01 defines the Enable Profile command</td></tr><tr><td>P1</td><td>0x00</td><td></td></tr><tr><td>P2</td><td>0x00</td><td></td></tr><tr><td>Lc</td><td>0x10</td><td>Length of the Profile AID (data)</td></tr><tr><td>Data</td><td>0xXX..XX</td><td>ISD-P AID (Profile AID) to be enabled example A0000005591010FFFFFFFF8900001100</td></tr></tbody></table>

#### Enable Profile Command

<pre data-title="LPM Enable Profile"><code>AT+CSIM=42,"8X01000010<a data-footnote-ref href="#user-content-fn-9">A0000005591010FFFFFFFF8900001100</a>"
</code></pre>

* Where X is the channel returned by the Open Channel
* AID of the profile that is to be enabled is: A0000005591010FFFFFFFF8900001100

{% code title="Response" overflow="wrap" %}

```
+CSIM: 4,"9000"
```

{% endcode %}

* 9000 is the command succeeded.
* Then Close the channel to the SIM and this will trigger the SIM to issue a Refresh to the devivce and the new profile will connect.

#### Example - LPM Enable Profile

```
Tx AT+CSIM=10,"0070000001" // open channel
Rx +CSIM: 6,"0X9000"       // channel X selected

Tx AT+CSIM=38,"0X A4 04 00 0E A000000815030040030902231003" // select LPM AID
Rx +CSIM: 4,"9000"

Tx AT+CSIM=42,"8X010000 10 A0000005591010FFFFFFFF8900001100" // enable profile
Rx +CSIM: 4,"9000"

Tx AT+CSIM=10,"0070800X00" // close channel to trigger REFRESH
Rx +CSIM: 4,"9000
```

## ES10 LPM Command Interface

The LPM applet will be triggered and managed a LPAd on the IoT device that is sending ES10c APDU commands to the LPM applet. ES10c commands are&#x20;

The applet manages a subset of the ES10c commands to allow the switching of the local profiles only and any other ES10c commands are ignored. ES10c can be used with AID or ICCID to reference a profile.  This means OmniSIM can be used by a device that would have normally required a Consumer eSIM and allows the switching of profiles.   These commands also work with any device that suports AT commands so as a developer you have a choice of LPM/ES10c commands.

### Usage Flow

Here is a typical usage flow where the IoT Client uses a LPAd to switch profiles.

1. Get Profiles – Get a list of profiles and their state to decide which profile to enable.
2. Enable Profile – Request to Enable a profile, the referenced profile will be enabled and the existing disabled by the ISD-R.

<figure><img src="/files/uCis7vrdxHFlft2ilJzW" alt="" width="563"><figcaption><p>Example sequence flow for ES10c commands</p></figcaption></figure>

## LPM ES10c AT Commands

### Prerequisites

#### Using LPAd

To be able to send the commands to the LPM applet from a LPAd, then the LPAd normally sends the ES10c APDU to the ISD-R of the eSIM. The M2M card does not have this interface so these APDU will be ignored by the M2M eSIM. The LPAd needs to be configured to use the AID of the LPM Applet to route the ES10c commands to the LPM applet. This could be a config change or this might mean updating the code of the LPAd.&#x20;

LPM AID: A000000815030040030902231003

#### Using APDU

The LPM applet can be used without a LPAd but the IoT Application can use AT Commands to send the ES10c APDU to the LPM applet. This requires a channel open to the SIM and the LPM applet selected so that the AT Command can send the APDU commands to the LPM applet.

#### Open Channel

The Open Channel command will create a new channel to the SIM, the modem will return the next available channel that can be referenced to send further commands to the SIM.

{% code title="Open Channel command" %}

```shell-session
AT+CSIM=10,"0070000001"
```

{% endcode %}

{% code title="Response" %}

```sh
+CSIM: 6,"0X9000"
```

{% endcode %}

Where **X** is the channel number to be used in the commands below.

#### Select the LPM Applet

The following command will select the LPM applet using it’s AID so that further APDU are sent to the applet.

The LPM Applet has an AID (Application IDentifier):  A000000815030040030902231003

<pre data-title="Select the LPM applet"><code>AT+CSIM=38,"0<a data-footnote-ref href="#user-content-fn-1">X</a>A404000EA000000815030040030902231003"
</code></pre>

* Where X is the channel returned by the Open Channel
* The AID of the LPM applet: **A000000815030040030902231003**

{% code title="Response" %}

```
+CSIM: 4,"9000" // command executed successfully
```

{% endcode %}

### LPM - ES10c - Get EID

Gets the EID from the eUICC, returns the EID that could be used if the IoT application wants to know the eUICC being used.&#x20;

{% hint style="info" %}
Full details of the APDU can be found in SGP.22 – Section 5.7.20 - ES10c – GetEID
{% endhint %}

<table><thead><tr><th width="91">Field</th><th width="119">Value (hex)</th><th>Comments</th></tr></thead><tbody><tr><td>CLA</td><td>0x8<mark style="color:red;">X</mark></td><td><p>8 stands for proprietary command </p><p><mark style="color:red;">X</mark> stands for logical channel that is open to the SIM</p></td></tr><tr><td>INS</td><td>0xE2</td><td>16 defines the Get EID command</td></tr><tr><td>P1</td><td>0x91</td><td></td></tr><tr><td>P2</td><td>0x00</td><td></td></tr><tr><td>Lc</td><td>0x02</td><td>Length of the EID to be returned, KORE's EID is 32 digits so 16 bytes + EID TAG and Length is 18 bytes (0x12)</td></tr><tr><td>Data</td><td>0xBF3E</td><td></td></tr><tr><td>Le</td><td>0x03</td><td></td></tr><tr><td>TAGS</td><td>0x5c 01 5A</td><td></td></tr></tbody></table>

#### Get EID Command

{% code title="ES10c Get EID" %}

```
82E2910002BF3E035C015A
```

{% endcode %}

* Where X is the channel returned by the Open Channel

<pre data-title="Response"><code>BF3E125A10<a data-footnote-ref href="#user-content-fn-10">89001054010210036600000000023780</a>9000
</code></pre>

Where EID = 89001054010210036600000000023780

Example APDU - Get EID The LPAd send a GetEuiccDataRequest:

```
AT+CSIM=24,"83E2910006BF3E035C015A00"
+CSIM: 4,"6115" // Response has returned 15 bytes of data
OK
```

The ISD-R returns a GetEuiccDataResponse:

<pre><code>AT+CSIM=10,"83C0000015" // Retrieve the 15 bytes of data
+CSIM: 46,"BF3E125A10<a data-footnote-ref href="#user-content-fn-3">89049032000001000000148175210022</a>9000"
OK
</code></pre>

### LPM - ES10c Get Profiles

This command is used to a list of the downloaded Profiles on the eUICC and their Status. This would provide an IoT application the current status and information on the profiles to allow the decision to be able to select an available profile.&#x20;

{% hint style="info" %}
Full details of the APDU can be found in SGP.22 – Section 5.7.15 - ES10 – GetProfilesInfo
{% endhint %}

<table><thead><tr><th width="91">Field</th><th width="119">Value (hex)</th><th>Comments</th></tr></thead><tbody><tr><td>CLA</td><td>0x8<mark style="color:red;">X</mark></td><td><p>8 stands for proprietary command </p><p><mark style="color:red;">X</mark> stands for logical channel that is open to the SIM</p></td></tr><tr><td>INS</td><td>0xE2</td><td></td></tr><tr><td>P1</td><td>0x91</td><td></td></tr><tr><td>P2</td><td>0x00</td><td></td></tr><tr><td>Lc</td><td>0x02</td><td>Length of the GetProfilesInfo</td></tr><tr><td>Data</td><td>0xBF2D</td><td></td></tr><tr><td>Le</td><td>0x06</td><td></td></tr><tr><td>TAGS</td><td>0x5C 04 5A 4F 9F 70</td><td>See table below for the definition</td></tr></tbody></table>

This retrieves the following data for the Profile on the eUICC. Not all tags are available from the OS for an M2M card so these TAGs will be ignored.

{% hint style="info" %}
(**Bold**) = Mandatory as would be used in EnableProfile and state could be useful also.
{% endhint %}

<table><thead><tr><th width="203">Name</th><th width="54">TAG</th><th>Example</th><th>Value/Notes</th></tr></thead><tbody><tr><td><strong>ICCID*</strong></td><td>5A</td><td>980193000050577617F1</td><td>ICCId of the profile (Swapped)</td></tr><tr><td><strong>ISD-P AID*</strong></td><td>4F</td><td>A0000005591010FFFFFFFF8900001000</td><td>AID of the Profile</td></tr><tr><td><strong>State*</strong></td><td>9F70</td><td>01</td><td><p>01 = Enabled</p><p>00 = Disabled</p></td></tr><tr><td>Profile Nickname*</td><td>90</td><td>4f6D6E6953494D (OmniSIM)</td><td>N/A for M2M</td></tr><tr><td>Service provider*</td><td>91</td><td>4B4F5245 (KORE)</td><td>N/A for M2M</td></tr><tr><td>Profile name*</td><td>92</td><td>52757368 (Rush)</td><td>N/A for M2M</td></tr><tr><td>Icon type*</td><td>93</td><td>-</td><td>N/A for M2M</td></tr><tr><td>Icon*</td><td>94</td><td>-</td><td>N/A for M2M</td></tr><tr><td>Profile Class*</td><td>95</td><td>-</td><td>N/A for M2M</td></tr><tr><td>Notification Configuration Info</td><td>B6</td><td>-</td><td>N/A for M2M</td></tr><tr><td>Profile Owner</td><td>B7</td><td>-</td><td>N/A for M2M</td></tr><tr><td>SM-DP+ proprietary data</td><td>B8</td><td>-</td><td>N/A for M2M</td></tr><tr><td>Profile Policy Rules</td><td>99</td><td>-</td><td>N/A for M2M</td></tr></tbody></table>

{% hint style="info" %}
If no tag list is present, the eUICC SHALL return the default ProfileInfo: the ProfileInfo data objects marked with (\*) for each Profile matching the selection criterion. The TAGs in Bold are those supported by the M2M card OS, other TAGs will return no data.
{% endhint %}

#### Get eSIM Profiles Command

<pre data-title="ES10c Get Profiles"><code>82E2910009<a data-footnote-ref href="#user-content-fn-11">BF2D</a>065C045A4F9F70
</code></pre>

{% code title="Response" %}

```
BF2D6EA06CE3375A0A980193000050577617F14F10A0000005591010FFFFFFFF89000010009F7
0010090044B4F524591044B4F524592044B4F5245950102E3315A0A980193000050276777F64F
10A0000005591010FFFFFFFF89000011009F70010191044B4F524592044B4F52459501029000
```

{% endcode %}

This eSIM contains two profiles, 8910390000057567711F and 8910390000057276776F, and here’s some additional information about them.

{% hint style="info" %}
To decode the response into a more readable structured format then recommend using ASN1 decoder. (<https://asn1.io/asn1playground>)
{% endhint %}

{% code title="ANS1 Formatted" %}

```
E3 37
5A 0A 980193000050577617F1 (ICCID)
4F 10 A0000005591010FFFFFFFF8900001000 (AID)
9F70 01 00 (Status Disabled)
90 04 4B4F5245 (KORE)
91 04 4B4F5245 (KORE)
92 04 4B4F5245 (KORE)
95 01 02
E3 31
5A 0A 980193000050276777F6 (ICCID)
4F 10 A0000005591010FFFFFFFF8900001100 (EID)
9F70 01 01 (Status Enabled)
91 04 4B4F5245 (KORE)
92 04 4B4F5245 (KORE)
95 01 02
```

{% endcode %}

#### Example APDU - Get Profile Information

The LPAd send a ProfileInfoListRequest:

```
AT+CSIM=28,"82E2910009BF2D065C045A4F9F70"
+CSIM: 4,"6197" // The command returns 97 bytes of data
OK
```

The ISD-R returns a ProfileInfoListRequest:

```
AT+CSIM=10,"02C0000097" // Retrieve the 97 bytes of data
+CSIM:
230,"BF2D6EA06CE3225A0A980193000060983055F84F10A0000005591010FFFFFFFF89000010
009F700101E3225A0A980010325476981032144F10A0000005591010FFFFFFFF89000019009F7
00100E3225A0A980193000060809794F14F10A0000005591010FFFFFFFF89000011009F700100
9000"
OK
```

Using an ASN1 decoder to parse the returned data formats into a more readable format:

```
BF2D 6E
A0 6C
E3 22
5A 0A 980193000060983055F8 // ICCID
4F 10 A0000005591010FFFFFFFF8900001000 // EID
9F70 01 01 // Enabled
E3 22
5A 0A 98001032547698103214 // ICCID
4F 10 A0000005591010FFFFFFFF8900001900 // EID
9F70 01 00 // Disabled
E3 22
5A 0A 980193000060809794F1 // ICCID
4F 10 A0000005591010FFFFFFFF8900001100 // EID
9F70 01 00 // Disabled
```

### LPM - ES10c Enable Profile

This command is used to Enable a specified profile that is already downloaded and installed. If the profile is installed, the profile is Enabled and the previous active profile is disabled. The device will then reconnect with the new profile. If the new profile does not have connectivity then it will not roll back to the previous profile. This needs to be managed by the local IoT Application.

{% hint style="info" %}
Full details of the APDU can be found in SGP.22 – Section 5.7.16 - ES10 – EnableProfile
{% endhint %}

<table><thead><tr><th width="91">Field</th><th width="134">Value (hex)</th><th>Comments</th></tr></thead><tbody><tr><td>CLA</td><td>0x8<mark style="color:red;">X</mark></td><td><p>8 stands for proprietary command </p><p><mark style="color:red;">X</mark> stands for logical channel that is open to the SIM</p></td></tr><tr><td>INS</td><td>0xE2</td><td></td></tr><tr><td>P1</td><td>0x91</td><td></td></tr><tr><td>P2</td><td>0x00</td><td></td></tr><tr><td>Lc</td><td>0x02</td><td>Length of the EnableProfile command</td></tr><tr><td>Data</td><td>0xBF31</td><td></td></tr><tr><td>Le</td><td>0x06</td><td></td></tr><tr><td>TAGS</td><td><p>0x4F&#x3C;AID></p><p>0x5A&#x3C;ICCID></p></td><td>A profile can be referenced either by Profile AID or ICCID.</td></tr></tbody></table>

#### Command from LPAd - ICCID

<pre><code>8XE2910003BF31D0C5A0A<a data-footnote-ref href="#user-content-fn-8">980193000050577617F1</a>
</code></pre>

#### Command from LPAd - AID

<pre><code>8XE2910003BF31D504F10<a data-footnote-ref href="#user-content-fn-12">A0000005591010FFFFFFFF8900001000</a>
</code></pre>

#### Response to LPAd

```
BF310000 9000
```

{% hint style="info" %}
Status: OK (00) UndefinedError (0x7F or 127)
{% endhint %}

#### Example APDU – Enable Profile

```
[AT+CSIM=52,"83E2910014BF3111A00C5A0A981088020087059780F281010000"
+CSIM: 4,"6A88"
OK
```

[^1]: Channel given in the Open Channel command

[^2]: X is the Open Channel

[^3]: EID

[^4]: Open Channel

[^5]: ISDP-AID

[^6]: Enabled

[^7]: Fallback Atribute

[^8]: ICCID

[^9]: Profile AID

[^10]: EID

[^11]: Get Profiles

[^12]: AID


# OmniSIM - GSMA Test Profile (TS.48)

{% hint style="info" %}
This documentation applies to the following products:

* OmniSIM

For all other products, please review their respective documentation
{% endhint %}

## Overview

OmniSIM comes with a GSMA Test Profile (TS.48 - Generic eUICC Test Profile for Device Testing).

The Test profile is disabled by default and is not referenced in CPro or the SM-DP (RSP).

OmniSIM Test profile is aligned with TS.48 v4.x

<https://www.gsma.com/newsroom/wp-content/uploads/TS.48-v4.0.pdf>

The Test Profile can be Enabled and Disabled by sending an APDU to the SIM with a CSIM AT Command.

{% hint style="warning" %}
Please note that although KORE has a Test Profile on OmniSIM it is not supported and we assume the user has knowledge of how to use the TS.48 Test Profile with their device.
{% endhint %}

## Enable the Test Profile <a href="#enable-the-test-profile" id="enable-the-test-profile"></a>

The following AT command can be used to send the APDU to instruct the card to switch to the TS.48 Test profile.

{% code title="Switch to TS.48 Profile" %}

```
AT+CSIM=16,"80C2000003E40102"
```

{% endcode %}

{% code title="Response" %}

```
+CSIM: 4,"6103"
OK
```

{% endcode %}

{% hint style="info" %}
The device will lose connectivity and possibly reset. The Test Profile will be enabled
{% endhint %}

## Disable the Test Profile

The following AT command can be used to send the APDU to instruct the card to switch from to the last enabled KORE profile.

{% code title="Switch back to KORE" %}

```
AT+CSIM=16,"80C2000003E40103"
```

{% endcode %}

{% code title="Response" %}

```
+CSIM: 4,"6103"
OK
```

{% endcode %}

{% hint style="info" %}
The device will roll-back to the KORE profile and reconnect to the cellular network.
{% endhint %}


# Maximum transmission units (MTUs) in devices

Maximum transmission units (MTU)

## What is MTU size

MTU represents the maximum payload size of a network packet that can be transmitted across a network. It specifies the largest data size that can be encapsulated within a packet and sent from one device to another without being divided into smaller fragments. Maximum transmission unit size is measured in bytes, including the data payload and the packet headers.

## Maximum transmission unit explained

When data is transmitted over a network, it is divided into packets for efficient delivery. These packets consist of a header section and a payload section. The header contains control information, such as source and destination addresses, while the payload contains the transmitted data. The MTU size determines the largest packet size that can be transmitted between two networked devices - across all intermediate network components.

## US carriers

* AT\&T: 1420 bytes
* Verizon: 1428 bytes
* T-Mobile: 1420 bytes

## International

The recommended MTU size is 1400 bytes, which is internationally compatible with most mobile networks.

## Other common MTU values

* LAN connection to LAN client: 1500 bytes
* WiMAX wireless WAN connection: 1400 bytes
* Cable/DOCSIS modem wired WAN connection: 1500 bytes
* DSL modem wired WAN connection: 1492 bytes

## Resources

Refer to these resources for additional information.

* [Tech tip - What MTU value should I use for my cellular connection?](https://youtu.be/PhvlPTsa2Nw?si=kW4MUbMm_vzOJkWq)
* [Cellular network — Importance of MTU on UPF performance & UE connectivity](https://medium.com/@thakur.ajay/impact-of-mtu-on-upf-performance-ue-connectivity-0607345bee46)


# Quectel BG95 BG96 BG77 extended configuration settings

The article provides some best practices for the most commonly used QCFG commands.

{% hint style="info" %}
This documentation applies to the following products:

* OmniSIM
* Quectel BG95 BG96 BG77

For all other products, please review their respective documentation
{% endhint %}

## Advised settings <a href="#h_01gv3v65b8qj3g4vh7kdbse22f" id="h_01gv3v65b8qj3g4vh7kdbse22f"></a>

### The following settings are advised for non-NB-IoT markets:

#### Ensures LTE and GSM scanning

```
AT+QCFG="nwscanmode",0
```

#### Ensures LTE scanning first

```
AT+QCFG="nwscanseq",020103
```

#### Ensures no NB-IoT scanning

```
AT+QCFG="iotopmode",0
```

### The following settings are generally advised:

#### Ignores SIM preference

```
AT+QCFG="simeffect",0
```

#### PS + CS to support legacy SMS

```
AT+QCFG="servicedomain",2
```

{% hint style="info" %}
These settings are persistent and will remain after the module's power cycling.

As the settings are persistent, it is advised to check these regularly and properly document the setting and reasons for the setting.
{% endhint %}

Read the sections below to understand the above-advised settings.

## Introduction <a href="#h_01gv3r2p6ga7rbqhd1tqkejvh7" id="h_01gv3r2p6ga7rbqhd1tqkejvh7"></a>

Quectel offers extended configuration settings for the BG series of modules using the **AT+QCFG** commands. These settings may impact the proper working of the KORE OmniSIM.

Examples include:

* In some cases, the attach time of the KORE OmniSIM Reach may be impacted by the fact that the module scans all the NB-IoT bands.
* A network combined attach is necessary for proper legacy SMS support.

{% hint style="info" %}
This note is intended is to provide some best practices of the most common used QCFG commands.
{% endhint %}

## Background <a href="#h_01gv3st8asb0g1d8vhqyx5h97c" id="h_01gv3st8asb0g1d8vhqyx5h97c"></a>

Scanning NB-IoT bands can consume a lot of time, especially when NB-IoT is unavailable locally. During that scan period, the module can be busy and not be responsive for renewing IMSIs as requested by the SIM. This does not affect the Multi IMSI selection process, as the SIM is not getting information from the module, it will wait with switching IMSI, but it will extend the time it takes to attach.

It could be the case that the module accepts new IMSIs from the SIM but cannot start an attach as the scan time is too long.

SMS is supported worldwide by C7 signaling, often called Circuit Switched. The device must request Packet Switched + Circuit Switched connection to force a combined network attach to support C7 signaling.

## Checking the settings <a href="#h_01gv3stg7td990h1sdrtw2vk1t" id="h_01gv3stg7td990h1sdrtw2vk1t"></a>

### Scan mode <a href="#h_01gv3stqxqrt22q11m6y9457ry" id="h_01gv3stqxqrt22q11m6y9457ry"></a>

Check using the following AT command:

```
AT+QCFG="nwscanmode"
```

The module will reply with one of the following modes:

```
0. Automatic (GSM and LTE)
1. GSM only
2. n/a
3. LTE only
```

Depending on the market or region, it may be advised to set the scan mode to GSM only or LTE only.

**Example:** All 2G and 3G networks will be shut down in the USA at the end of 2022. GSM scanning is of no use.

{% hint style="warning" %}
**Note:** New scan mode is not applicable for BG77 (LTE only).
{% endhint %}

### Scan Sequence <a href="#h_01gv3sv2yfqpvs5h4er6bma9hk" id="h_01gv3sv2yfqpvs5h4er6bma9hk"></a>

Check using the following AT command:

```
AT+QCFG="nwscanseq"
```

The module will reply with one of the following modes:

```
00. Automatic (eMTC -> NB-IoT -> GSM)
01. GSM
02. eMTC
03. NB-IoT
```

{% hint style="info" %}
Depending on the market, it may be advised to set the scanning order.&#x20;

NB-IoT scanning always takes more time. However, if NB-IoT is preferred, it is advised to set the order accordingly.
{% endhint %}

### Scanning NB-IoT <a href="#mcetoc_1h854knj01v" id="mcetoc_1h854knj01v"></a>

Check using the following AT command.

```
AT+QCFG="iotopmode"
```

The module will reply with one of the following modes:

```
0. eMTC
1. NB-IoT
2. eMTC and NB-IoT
```

{% hint style="info" %}
As NB-IoT scanning takes more time, it is advised to disable NB-IoT scanning in markets where NB-IoT is not available.
{% endhint %}

### Preferred Access Technology <a href="#h_01gv3tvyy8fmf3v5n4n4hmxr0d" id="h_01gv3tvyy8fmf3v5n4n4hmxr0d"></a>

Check using the following AT command.

**AT+QCFG="simeffect"**

```
AT+QCFG="simeffect"
```

The module will reply with one of the following modes:

```
0. Disable
1. Enable
```

{% hint style="info" %}
KORE OmniSIM is not equipped with any access technology preference. However, to avoid confusion, it is advised to disable this feature
{% endhint %}

### Legacy SMS support <a href="#h_01gv3tw6dc1rh7rsv56mcszp6f" id="h_01gv3tw6dc1rh7rsv56mcszp6f"></a>

Check using the following AT command.

```
AT+QCFG="servicedomain"
```

The module will reply with one of the following modes:

```
1. PS only
2. CS & PS
```

Although it sounds not logical to use PS+CS, it should be noted that this setting determines the back-end of the networks, not the radio access. This setting doesn’t force the device to use 2G/3G technology.

## Default settings <a href="#h_01gv3tves9xmpr1j9j4cew9met" id="h_01gv3tves9xmpr1j9j4cew9met"></a>

### BG77 - Default settings <a href="#h_01gv3v5dkfhbhm8z1ggn9knwcr" id="h_01gv3v5dkfhbhm8z1ggn9knwcr"></a>

<figure><img src="/files/3mVt4LbsY3EZt2sxP4ue" alt="" width="183"><figcaption><p>Quectel BG77</p></figcaption></figure>

The following are the factory configuration setting of the BG77 module

<table><thead><tr><th>AT Command</th><th>Expected Result</th></tr></thead><tbody><tr><td><pre><code>AT+QCFG="nwscanmode"
</code></pre></td><td>+QCFG: "nwscanmode", ERROR</td></tr><tr><td><pre><code>AT+QCFG="nwscanseq"
</code></pre></td><td>+QCFG: "nwscanseq",00</td></tr><tr><td><pre><code>AT+QCFG="iotopmode"
</code></pre></td><td>+QCFG: "iotopmode",2</td></tr><tr><td><pre><code><strong>AT+QCFG="simeffect"
</strong></code></pre></td><td>+QCFG: "simeffect",1</td></tr><tr><td><pre><code><strong>AT+QCFG="servicedomain"
</strong></code></pre></td><td>+QCFG: "servicedomain",2</td></tr></tbody></table>

### BG95 M3 - Default settings  <a href="#h_01gv3v5nxha59djpcxc4r7c59x" id="h_01gv3v5nxha59djpcxc4r7c59x"></a>

<figure><img src="/files/4ubPDH6nK96BGMCghCLM" alt="" width="183"><figcaption><p>Quectel BG95-M3</p></figcaption></figure>

The following are the factory configuration setting of the BG95 module

<table><thead><tr><th>AT Command</th><th>Expected Result</th></tr></thead><tbody><tr><td><pre><code>AT+QCFG="nwscanmode"
</code></pre></td><td>+QCFG: "nwscanmode", 0</td></tr><tr><td><pre><code>AT+QCFG="nwscanseq"
</code></pre></td><td>+QCFG: "nwscanseq",00</td></tr><tr><td><pre><code>AT+QCFG="iotopmode"
</code></pre></td><td>+QCFG: "iotopmode",2</td></tr><tr><td><pre><code><strong>AT+QCFG="simeffect"
</strong></code></pre></td><td>+QCFG: "simeffect",1</td></tr><tr><td><pre><code><strong>AT+QCFG="servicedomain"
</strong></code></pre></td><td>+QCFG: "servicedomain",2</td></tr></tbody></table>

### BG96 - Default settings <a href="#h_01gv3v5wf7b0msz60vd9h6wttt" id="h_01gv3v5wf7b0msz60vd9h6wttt"></a>

<figure><img src="/files/wPvuIa8wpKWJZafrZgYA" alt="" width="183"><figcaption><p>Quectel BG96</p></figcaption></figure>

The following are the factory configuration setting of the BG96 module

<table><thead><tr><th>AT Command</th><th>Expected Result</th></tr></thead><tbody><tr><td><pre><code>AT+QCFG="nwscanmode"
</code></pre></td><td>+QCFG: "nwscanmode", 0</td></tr><tr><td><pre><code>AT+QCFG="nwscanseq"
</code></pre></td><td>+QCFG: "nwscanseq",00</td></tr><tr><td><pre><code>AT+QCFG="iotopmode"
</code></pre></td><td>+QCFG: "iotopmode",2</td></tr><tr><td><pre><code><strong>AT+QCFG="simeffect"
</strong></code></pre></td><td>+QCFG: "simeffect",ERROR</td></tr><tr><td><pre><code><strong>AT+QCFG="servicedomain"
</strong></code></pre></td><td>+QCFG: "servicedomain",2</td></tr></tbody></table>


# Quectel BG95 BG96 BG77 APN settings

The article is intended to provide some best practices for setting and keeping the APN setting.

{% hint style="info" %}
This documentation applies to the following products:

* OmniSIM
* Quectel BG95 BG96 BG77

For all other products, please review their respective documentation
{% endhint %}

An APN (Access Point Name) is the configurable part of the FQDN, representing the end-point address of the 2/3G or 4G tunnel on mobile networks.

The APN needs to be configured in a device to be able to create a data session.

## Advised settings <a href="#h_01gv6hj72s8w45zwv6pz34ck2e" id="h_01gv6hj72s8w45zwv6pz34ck2e"></a>

The following settings are advised for use with KORE OmniSIM:

### Ensures keeping the populated APN.

```
AT+QMBNCFG="AutoSel",0
```

### Set the OmniSIM APN as context #1.

```
AT+CGDCONT=1,"IP","data.apn.name"
```

{% hint style="info" %}
Read the sections below to understand the above-advised settings.
{% endhint %}

## Background <a href="#h_01gv6he8pkvn6yj9kk6bx3xztr" id="h_01gv6he8pkvn6yj9kk6bx3xztr"></a>

APNs are sent to the local operator in the Insert Subscriber Date (2/3G) or Update Location Answer (4G). To ensure that the User Equipment can only access the service as defined in the user profile in the HLR/HSS.

An APN is populated according to the following structure:

* APN Network identifier; to access a service on a GGSN/PGW\
  **Example:** Internet access via Radius for KORE = **data.apn.name**. KORE APN has to be configured in the device.
* APN Operator identifier; to define the PLMN. This is added in the local MNO SGSN/SGW\
  **Example:** KORE: MCC=204 MNC=030

Which together looks like this:

{% hint style="info" %}
data.apn.name.mnc030.mcc204.gprs
{% endhint %}

As KORE acts as an MVNO, international roaming is organized using roaming sponsor operators. Currently, KORE deploys six or more sponsor operators, e.g. Vodafone NL (mnc=004, mcc-204).

While roaming, the FQDN looks like this:

{% hint style="info" %}
data.apn.name.mnc004.mcc204.gprs
{% endhint %}

Vodafone ensures that the data.apn.name is properly routed to the KORE GGSN/PGW.

Many devices have means to populate the APN for the user, avoiding hassle and errors. These features are always built upon the prefix of the IMSI used by the SIM.

So, for example, if a SIM from Vodafone NL is used, the ISMI prefix is 204 004, which maps in the list of the device into:

* APN=live.vodafone.com
* Username=vodafone
* Password=vodafone

This setting will overwrite any earlier populated APN unless otherwise specified.

The Modem Configuration Binaries (MBNs) feature is used to configure in the UE and make it comply with operator requirements.

## Check and configure MBN <a href="#mcetoc_1h853nd3g1e" id="mcetoc_1h853nd3g1e"></a>

The section includes the following:

* Check the list of MBNs
* Autoselect feature
* Check and configure the APN
* Set the APN
* Advised settings

The following shows how to read the file list and use the AutoSelect function of MBN.

### Check the list of MBNs <a href="#h_01gv6hg58xpa0ee0wc3w8z2jwr" id="h_01gv6hg58xpa0ee0wc3w8z2jwr"></a>

Check using the following AT command.

```
AT+QMBNCFG="List"
```

The module will return the list of MBNs. An example would be:

{% hint style="info" %}
**Note:** The content of the list depends on the device and market.
{% endhint %}

```
AT+QMBNCFG="List"
+QMBNCFG: "list",0,1,1,"ROW_Commercial",0x09010801,201911271
+QMBNCFG: "list",1,0,0,"Commercial-Vodafone",0x09011202,202008051
+QMBNCFG: "list",2,0,0,"Commercial-Telefonica",0x09011902,202106221
+QMBNCFG: "list",3,0,0,"Commercial-Rogers",0x09011701,202101271
+QMBNCFG: "list",4,0,0,"Commercial-DT",0x09011102,202007021
+QMBNCFG: "list",5,0,0,"Commercial-TMO",0x09010502,202105061
+QMBNCFG: "list",6,0,0,"Non_VoLTE-ATT",0x09010300,201910241
+QMBNCFG: "list",7,0,0,"IMSless-Verizon",0x09010100,201911071
```

### Autoselect feature <a href="#h_01gv6hghafpvhec5n99ksexwar" id="h_01gv6hghafpvhec5n99ksexwar"></a>

Check using the following AT command.

```
AT+QMBNCFG="AutoSel"
```

The module will reply with one of the following modes:

```
0. Disable
1. Enable
```

Set the Autoselect feature using the following.

```
AT+QMBNCFG="AutoSel",1
```

### Check and configure the APN <a href="#h_01gv6heevr5r421rxaetwk3dhk" id="h_01gv6heevr5r421rxaetwk3dhk"></a>

Check the list of APNs by using the following AT command:

```
AT+CGDCONT?
```

The module will return the list of APNs.\
An example would be:

```
+CGDCONT: 1,"IP","live.vodafone.com","0.0.0.0",0,0,0
+CGDCONT: 1,"IP","ims","0.0.0.0",0,0,0
```

### Set the APN <a href="#h_01gv6hhwmczw5xvsqsrqxzb59s" id="h_01gv6hhwmczw5xvsqsrqxzb59s"></a>

Set the APN using the following command:

```
AT+CGDCONT=1,"IP","data.apn.name"
```

Alternatively, the APN can also be set using (BG95, BG77)

```
AT+QICSGP=1,"IP","data.apn.name"
```

The command will give you the option to add a username/password.


# Cradlepoint E300EU APN Settings

This guide outlines how to setup a Cradlepoint E300EU for OmniSIM

{% hint style="info" %}
The article provides guidelines on how to configure APN for a Cradlepoint router for OmniSIM.  This documentation applies to the following products:

* OmniSIM
* Cradlepoint E300EU Router

For all other products, please review their respective documentation
{% endhint %}

## Cradlepoint E300EU

### Advice

* To get OmniSIM working optimally with Cradlepoint routers, we have compiled the following guide, as there are some challenges in how SIMs are configured in the device. The following tasks should be undertaken:
* Ensuring that the correct APN is manually pre-configured in the connection manager prior to use. This is a basic task, but it prevents the device from being considered truly “plug and play”.

{% hint style="info" %}
When the APN is configured for the device, we have found that OmniSIM attach performance improves (OmniSIM Reach **first attach** time within 2 minutes, in line with product design)
{% endhint %}

* When using the device in **Dual-SIM Configuration** (2 SIMs at once), IMSI switching for OmniSIM Reach may take longer than 90 seconds, which is not fast enough to cater for the reboot timer.&#x20;

{% hint style="warning" %}
Therefore use of OmniSIM Reach in this Dual-SIM configuration is not recommended.&#x20;

Super SIM and OmniSIM Rush however do successfully switch in time, so we may recommend these products for Dual-SIM use.
{% endhint %}

### Connecting to router <a href="#connecting-to-router" id="connecting-to-router"></a>

* Connect your PC to Ethernet port of the router
* By default router will assign you the IP address in 192.168.0.0/24

```
$ ipconfig

Windows IP Configuration

Ethernet adapter Ethernet 3:
   Connection-specific DNS Suffix  . : local.tld
   Link-local IPv6 Address . . . . . : fe80::edd7:bfa0:4515:fbea%16
   IPv4 Address. . . . . . . . . . . : 192.168.0.138
   Subnet Mask . . . . . . . . . . . : 255.255.255.0
   Default Gateway . . . . . . . . . : 192.168.0.1

```

* Open any modern browser and try to open <http://192.168.0.1>

<figure><img src="/files/pVe8xhBYwarcxjjXQluU" alt=""><figcaption></figcaption></figure>

* Finally login to console with the default username admin and the password stored on the sticker on the bottom of the device

### Setting of OmniSIM APN for Cradlepoint <a href="#h_01gv3v65b8qj3g4vh7kdbse22f" id="h_01gv3v65b8qj3g4vh7kdbse22f"></a>

* In *Connection Manager* select the correct modem profile, and then the SIM card (notice how APN is wrongly set)

<figure><img src="/files/I2kgXUssCdtEGcQTG97D" alt=""><figcaption></figcaption></figure>

* Click on *Edit, in the WAN Interface Profile screen that is displayed select SIM/APN/Auth on the left hand side.*
* Set the following as shown in the image below.
* Authentication Protocol: **PAP**
* Access Point Name 01: **data.apn.name (IPV4)**

<figure><img src="/files/XGGA7DzmN7ctSe8dWf0b" alt=""><figcaption></figcaption></figure>

* Save the new settings (grey button on bottom of previous image)
* Below shows the router trying to connect with the correct APN settings (data.apn.name)

<figure><img src="/files/v2Sd3wuQohNELsVYRJiP" alt=""><figcaption><p>Connecting with the correct APN</p></figcaption></figure>

* Successfully registered to the VPLMN

<figure><img src="/files/bpiu9LUar8zLuE9kpxFI" alt=""><figcaption><p>Successfully registered to the VPLMN</p></figcaption></figure>

#### Test the Internet connectivity through the router

{% hint style="info" %}
Verfiy your host routes to sure you are routed through the Cradlepoint Router
{% endhint %}

```
$ NETSTAT.EXE -nr
===========================================================================
Interface List
 16...d0 8e 79 fa 34 c4 ......Intel(R) Ethernet Connection (16) I219-LM
 21...00 a5 54 95 e8 78 ......Microsoft Wi-Fi Direct Virtual Adapter
 24...02 a5 54 95 e8 77 ......Microsoft Wi-Fi Direct Virtual Adapter #2
 11...00 09 0f fe 00 01 ......Fortinet Virtual Ethernet Adapter (NDIS 6.30)
  6...00 a5 54 95 e8 77 ......Intel(R) Wi-Fi 6E AX211 160MHz
  1...........................Software Loopback Interface 1
===========================================================================
IPv4 Route Table

===========================================================================
Active Routes:
Network Destination        Netmask          Gateway       Interface  Metric
          0.0.0.0          0.0.0.0      192.168.0.1     192.168.0.94     50
        127.0.0.0        255.0.0.0         On-link         127.0.0.1    331
        127.0.0.1  255.255.255.255         On-link         127.0.0.1    331
  127.255.255.255  255.255.255.255         On-link         127.0.0.1    331
      192.168.0.0    255.255.255.0         On-link      192.168.0.94    306
     192.168.0.94  255.255.255.255         On-link      192.168.0.94    306
    192.168.0.255  255.255.255.255         On-link      192.168.0.94    306
        224.0.0.0        240.0.0.0         On-link         127.0.0.1    331
        224.0.0.0        240.0.0.0         On-link      192.168.0.94    306
  255.255.255.255  255.255.255.255         On-link         127.0.0.1    331
  255.255.255.255  255.255.255.255         On-link      192.168.0.94    306
===========================================================================
Persistent Routes:
  None
  
IPv6 Route Table
===========================================================================
Active Routes:
 If Metric Network Destination      Gateway
  1    331 ::1/128                  On-link
  6    306 fe80::/64                On-link
  6    306 fe80::2ec7:9ca3:bf5c:6293/128
                                    On-link
  1    331 ff00::/8                 On-link
  6    306 ff00::/8                 On-link
===========================================================================
Persistent Routes:
  None
```

#### Check the internet connection with Ping

```
$ ping google.com

Pinging google.com [172.253.63.139] with 32 bytes of data:
Reply from 172.253.63.139: bytes=32 time=151ms TTL=54
Reply from 172.253.63.139: bytes=32 time=146ms TTL=54
Reply from 172.253.63.139: bytes=32 time=152ms TTL=54
Reply from 172.253.63.139: bytes=32 time=154ms TTL=54
Ping statistics for 172.253.63.139:
    Packets: Sent = 4, Received = 4, Lost = 0 (0% loss),
Approximate round trip times in milli-seconds:
    Minimum = 146ms, Maximum = 154ms, Average = 150ms
    

$ ping 8.8.8.8
Pinging 8.8.8.8 with 32 bytes of data:
Reply from 8.8.8.8: bytes=32 time=96ms TTL=113
Reply from 8.8.8.8: bytes=32 time=57ms TTL=113
Reply from 8.8.8.8: bytes=32 time=60ms TTL=113
Reply from 8.8.8.8: bytes=32 time=62ms TTL=113
Ping statistics for 8.8.8.8:
    Packets: Sent = 4, Received = 4, Lost = 0 (0% loss),
Approximate round trip times in milli-seconds:
    Minimum = 57ms, Maximum = 96ms, Average = 68ms
```


# How Devices Manage eSIM Profile Management & Power Management

{% hint style="info" %}
This documentation applies to the following products:

* OmniSIM

For all other products, please review their respective documentation
{% endhint %}

## Overview

The KORE OmniSIM product family revolutionizes mobile connectivity by allowing electronic SIM profile downloads and activations directly on mobile devices. This technology showcases the seamless integration of eSIM capabilities, largely operating independently from the mobile device's host CPU. Despite this autonomy, there are scenarios where the host CPU is intricately involved in the activation process. Moreover, leveraging the host CPU more significantly can enhance this functionality. This document delves into the specifics of the host CPU’s involvement and its potential for a more substantial role in eSIM management.

## **eSIM Overview**

An ESIM, or eUICC, is a smart-card device backwards-compatible to the classic cell phone SIM. In fact, eUICCs and traditional SIMS can be used interchangeable in most most devices. However, eUICCs do bring new benefits to the table, including the ability to download and enable new profiles via Remote SIM Provisioning (RSP). This capability allows an eUICC to become an entirely new SIM without touching or changing any hardware.

Two basic models exist for RSP, the M2M model, and the Consumer model. In the largest context, the M2M model is a centralized push architecture, while the Consumer model is a decentralized pull architecture. Each model has its relative strengths and the best fit for any application depends on many details. This document focuses on the M2M model, as described by the GSMA in SGP.01 and SGP.02.

In the M2M model, a central RSP server performs operations directly on eUICCs, using the modem for access. Each operation begins with a special binary SMS message sent by the server to the modem and eUICC. The SMS is followed by a corresponding data session between the SIM and RSP server. By and large, this process bypasses the host CPU entirely, and no special code or AT commands are required. The end user typically makes RSP requests via web UI or API to the RSP server, which then performs the appropriate operation. For large deployments, this architecture scales well up to thousands or millions of devices.

Conceptually, RSP supports five top-level operations:

* Download Profile - Downloads a profile into the eUICC.
* Delete Profile - Removes a profile from the eUICC.
* Enable Profile - Enables a profile in the eUICC. The profile must be previously downloaded, and only one profile may be enabled at a time. The enabled profile is, in effect, the “SIM” in a traditional sense. If desired, the host CPU may also enable profiles locally using AT commands (see, KORE Local Profile Management Applet).
* Disable Profile - Disables the eUICC’s currently active profile, and correspondingly enables a designated “fall-back” profile.
* Audit - Verifies that the profiles downloaded into the eUICC match the server’s record of what should be downloaded into the eUICC.

For the most part, these transactions are simple, each involving one binary SMS message and a few hundred bytes of data. The *Download Profile* operation is the exception to this rule, involving 30K-50K bytes of data total. While these operations happen largely transparently to the host CPU, the *Enable Profile* operation will look like a SIM change, involving a new IP address and a potential new APN configuration. Additionally, mobile devices using PSM or eDRX will need to disable (or reduce) power savings before RSP operations start.

## **Host CPU Implementation**

Upon activating a new profile, the host CPU undergoes a process akin to a live SIM swap. This includes updates to its IP address, IMSI, MSISDN, and APN configurations. For Cat-M devices, this procedure can be more intricate due to the potential need to adjust Power Saving Mode (PSM) and extended Discontinuous Reception (eDRX) timers before initiating Remote SIM Provisioning (RSP) operations.

### Devices Operating from Continuous Power

Devices running on continuous power primarily need to adapt to changes in the operational profile. This process involves detecting changes in the profile and adjusting the device's configuration accordingly. The adaptation process can be efficiently represented as a state machine workflow. Here, the host CPU transitions from a configuration state to an operational state. Whenever there's a change in the profile, the system automatically revisits the configuration state to adjust its settings in response to the new requirements. This ensures the device remains optimally configured for its current operational environment.

<figure><img src="/files/hCEFWskWH3teNR72k2Ub" alt=""><figcaption></figcaption></figure>

During the configure state, the host CPU configures its modem, when then attaches to the mobile network. Once configuration is complete the device transitions into the operate state for normal operations. Upon detecting a profile change, the device transitions back into the configure state to accommodate the new profile, then returns to normal operations.

### Devices Operating from **Battery Power**

Battery-powered devices are integral in today's wireless communication ecosystem, with Remote SIM Provisioning (RSP) being a pivotal feature for seamless network connectivity. However, the inherent nature of these devices to conserve energy by disconnecting from the network creates significant challenges for executing RSP operations effectively. This section outlines the complexities associated with energy conservation in battery-powered devices during RSP tasks and proposes a more sophisticated state machine approach to mitigate these challenges.

#### Challenges in RSP Operations Due to Energy Conservation

* **Extended T3412 Timer Issues**: The T3412 timer controls the interval at which a device periodically reports its presence to the network. Setting this timer too long can lead to RSP tasks, such as profile updates, timing out before they even begin. This disconnect between operational timing and network expectations can render RSP processes ineffective.
* **Short T3324 Timer Complications**: On the other hand, a short T3324 timer, which dictates the duration a device waits in idle mode before disconnecting from the network, may not provide ample time for crucial RSP operations, such as Download Profile, to complete successfully. This results in incomplete tasks and potential disruption to the user's network service.

## Mobile Device State Machine for Profile Management

This section outlines the state machine required for a mobile device to effectively manage both its normal operational modes and concurrent profile management operations. These operations ensure the device can interact with servers for profile updates efficiently without unnecessary power consumption, and then revert to energy-saving modes post-operation.

### States Overview

* **Operate**: The regular operational mode where the device performs its standard functions with power-saving strategies activated.
* **Configure**: The state where the device adjusts its settings or updates its profile as per server requests without initiating power-saving measures.
* **PM-Operate (Profile Management Operate)**: A dedicated operational mode where the device maintains connectivity and functionality with reduced or disabled power-saving measures to facilitate profile management.
* **PM-Configure (Profile Management Configure)**: This state involves preparing the device for profile management by disabling or reducing battery savings timers, ensuring a smooth and uninterrupted profile update process.

<figure><img src="/files/92fnH0sigks06vQGRE68" alt=""><figcaption></figcaption></figure>

### State Transitions

1. **Prepare Request**: Upon receiving a server instruction for profile management, the device transitions to **PM-Configure**.
   * In this state, the device temporarily disables or reduces its battery savings timers to remain responsive and ensure uninterrupted profile management operations.
2. **PM-Operate**: Following **PM-Configure**, the device enters **PM-Operate**.
   * Power-saving strategies are disabled or reduced, allowing the device to manage the profile update effectively.
3. **Configure**: Once the Remote SIM Provisioning (RSP) operations are complete, the device moves to the **Configure** state.
   * The modem is reconfigured for operation with the new profile, preparing the device for a return to its normal operation mode.
4. **Operate**: Finally, the device resumes its **Operate** state.
   * It returns to its regular operational mode with appropriate power savings modes reactivated, ensuring efficient power consumption post-profile update.

This state machine allows for seamless transitions between power-efficient operations and the necessary conditions for successful profile management, ensuring minimal disruption to the user experience and device performance.

## **Profile Change Detection**

After an Enable Profile, the new profile is roughly analogous to a new SIM, which includes a new IMSI, MSISDN, IP address, and ICCID. The host CPU needs to detect this profile change and configure itself accordingly. There are several ways to do this.

### **ICCID Query**

The host can query the ICCID periodically, or prior to opening a PDP session, to explicitly detect a profile change.

### **Unsolicited Response Code (URC)**

Modems will often transmit a URC or multiple URCs to the host CPU after a new profile is enabled, as the PDP context closes and the device becomes unregistered. The host CPU can use this to detect the profile change. In some cases, the URC may indicate a possible profile change, such as +CEREG. In this case, the modem will need to query the ICCID after the URC to confirm that the profile has changed.

## **Device driver**

Modems react to profile changes in different ways, depending on their make, model, and configuration. Some modems perform a soft reset when this happens. Others report a network configuration change to connected applications, and other remain completely silent. Depending on the specific modem and driver, the host CPU or OS may be able to detect the profile change through the modem driver.

## **Device Configuration After a Profile Change**

Cellular networks use Access Point Names (APNs) to route IP packets between mobile devices and endpoints outside the cellular network. An APN is a URL-type text string identifying the specific VPN and packet gateway (P-GW) used by the mobile device. The APN determines the mobile device’s authorization, IP address pool, and various other parameters. Cellular modems support multiple APNs, described by their name and numeric class. Most networks use the class 1 APN for the module’s operational connectivity, although the Verizon network uses the class 3 APN for this purpose in most cases. Carriers use other APNs are for other purposes such as IMS, RSP, or over-the-air configuration.

All OmniSIM profiles use one common APN value, [data.apn.name](http://data.apn.name/), which must be written into modem configuration as the class 1 (non-Verizon) or class 3 (Verizon) APN. Once an APN is configured, the modem can attach and open a Packet Data Protocol Context (“PDP context” or “packet context”) to send and receive IP data.

After a profile change, the modem will need to re-attach and open a new PDP context. For applications that do not include the Verizon profile, the host CPU may be able to simply configure the modem once with the [data.apn.name](http://data.apn.name/) APN and disable autoconfiguration-type features of the modem, which will leave the APN settings unchanged after a profile change. However, when using Verizon, this approach will not work because the class of the custom APN changes from 1 to 3 when moving to a Verizon profile. Often, when explicit APN configuration is required, best practice will involve disabling the transceiver (AT+CFUN=4) immediately after detecting a profile change, then configuring the modem appropriately, then restoring the modem to full functionality (AT+CFUN=1).

### KORE Local Profile Specifics

**AT\&T Profile (890117)**

{% hint style="info" %}
AT\&T profile requires that the class 1 APN be set to the OmniSIM custom value [data.apn.name](http://data.apn.name/).
{% endhint %}

<table><thead><tr><th width="471"></th><th></th></tr></thead><tbody><tr><td>+QUSIM: 1 </td><td>Detects the SIM Type when the profile changes</td></tr><tr><td><p>AT+CFUN=4</p><p>OK</p></td><td>Disable the cellular transceiver</td></tr><tr><td><p>AT+CCID </p><p>+CCID: <strong>890117</strong>XXXXXXXXXXXXXX</p><p>OK </p></td><td>Check the ICCID and notice the <strong>890117</strong> prefix, which identifies a AT&#x26;T profile</td></tr><tr><td><p>AT+CGDCONT=1, "IPV4V6", "data.apn.name"</p><p>OK</p></td><td>Configure the class 1 APN</td></tr><tr><td><p>AT+CGDCONT? </p><p>+CGDCONT: 1, "IPV4V6", "data.apn.name", "0.0.0.0.0.0.0.0.0.0.0.0.0.0.0.0",0,0,0</p><p>+CGDCONT: 2, "IP", "attm2mglobal", "0.0.0.0",0,0,0 +CGDCONT: 3, "IP", "m2m.com.attz", "0.0.0.0",0,0,0 </p><p>+CGDCONT: 4, "IPV4V6", "attm2mpartner", "0.0.0.0",0,0,0 OK</p></td><td>Confirm the APN settings (optional)</td></tr><tr><td>AT+CFUN=1</td><td>Restore full functionality</td></tr><tr><td>AT+CGREG?<br>+CEREG: 0,1<br>OK</td><td>Verify attachment</td></tr><tr><td>AT+CGACT=1,1<br>OK</td><td>Activate PDP context 1</td></tr></tbody></table>

#### Verizon Profile (891480)

{% hint style="info" %}
Verizon profile requires that the class 3 APN be set to the OmniSIM custom value **data.apn.name**.
{% endhint %}

{% hint style="info" %}
Verizon profiles come in two basic variants, Cat-1+ and Cat-M, identified by their IMSI.
{% endhint %}

**Cat-1+**

{% hint style="info" %}
The Verizon Cat-1+ profile uses SMS over IMS, which requires the class 1 APN to be set to IMS. The class 3 APN must be set to the OmniSIM value **data.apn.name**, which must be used to establish the PDP context.
{% endhint %}

<table><thead><tr><th width="460"></th><th></th></tr></thead><tbody><tr><td>+QUSIM: 1 </td><td>Detects the SIM Type when the profile changes</td></tr><tr><td><p>AT+CFUN=4</p><p>OK</p></td><td>Disable the cellular transceiver</td></tr><tr><td><p>AT+CCID </p><p>+CCID: <strong>891480</strong>XXXXXXXXXXXXXX</p><p>OK </p></td><td>Check the ICCID and notice the <strong>891480</strong> prefix, which identifies a Verizon profile</td></tr><tr><td><p>AT+CIMI?</p><p><strong>311480</strong>XXXXXXXXX</p><p>OK</p></td><td>Check the IMSI and notice the <strong>311480</strong> prefix, which identifies a Verizon Cat- 1+ profile.</td></tr><tr><td><p>AT+CGDCONT=3, "IPV4V6", "data.apn.name"</p><p>OK</p></td><td>Configure the class 3 APN</td></tr><tr><td><p>AT+CGDCONT? </p><p>+CGDCONT: 1, "IPV4V6", "IMS", "0.0.0.0.0.0.0.0.0.0.0.0.0.0.0.0",0,0,0,0 </p><p>+CGDCONT: 2, "IPV4V6", "VZWADMIN", "0.0.0.0",0,0,0,0 </p><p>+CGDCONT: 3, "IPV4V6", "data.apn.name", "0.0.0.0",0,0,0,0 +CGDCONT: 4, "IPV4V6", "VZWAPP", "0.0.0.0.0.0.0.0.0.0.0.0.0.0.0.0",0,0,0,0 </p><p>+CGDCONT: 5, "IPV4V6", "VZWEMERGENCY", "0.0.0.0.0.0.0.0.0.0.0.0.0.0.0.0",0,0,0,1 </p><p>+CGDCONT: 6, "IPV4V6", "VZWCLASS6", "0.0.0.0.0.0.0.0.0.0.0.0.0.0.0.0",0,0,0,0 </p><p>OK</p></td><td>Confirm the APN settings (optional)</td></tr><tr><td>AT+CFUN=1</td><td>Restore full functionality</td></tr><tr><td>AT+CGREG?<br>+CEREG: 0,1<br>OK</td><td>Verify attachment</td></tr><tr><td>AT+CGACT=1,3<br>OK</td><td>Activate PDP context 3</td></tr></tbody></table>

**Cat-M**

{% hint style="info" %}
The Verizon Cat-M profile uses SMS over NAS, which requires the class 1 APN to be blank. The class 3 APN must be set to the OmniSIM value **data.apn.name**, which must be used to establish the PDP context.
{% endhint %}

<table><thead><tr><th width="460"></th><th></th></tr></thead><tbody><tr><td>+QUSIM: 1 </td><td>Detects the SIM Type when the profile changes</td></tr><tr><td><p>AT+CFUN=4</p><p>OK</p></td><td>Disable the cellular transceiver</td></tr><tr><td><p>AT+CCID </p><p>+CCID: <strong>891480</strong>XXXXXXXXXXXXXX</p><p>OK </p></td><td>Check the ICCID and notice the <strong>891480</strong> prefix, which identifies a Verizon profile</td></tr><tr><td><p>AT+CIMI?</p><p><strong>311480</strong>XXXXXXXXX</p><p>OK</p></td><td>Check the IMSI and notice the <strong>311480</strong> prefix, which identifies a Verizon Cat-1+ profile.</td></tr><tr><td><p>AT+CGDCONT=3, "IPV4V6", "data.apn.name"</p><p>OK</p></td><td>Configure the class 3 APN</td></tr><tr><td><p>AT+CGDCONT? </p><p>+CGDCONT: 1, "IPV4V6", "", "0.0.0.0.0.0.0.0.0.0.0.0.0.0.0.0",0,0,0,0 </p><p>+CGDCONT: 2, "IPV4V6", "VZWADMIN", "0.0.0.0",0,0,0,0 </p><p>+CGDCONT: 3, "IPV4V6", "data.apn.name", "0.0.0.0",0,0,0,0 +CGDCONT: 4, "IPV4V6", "VZWAPP", "0.0.0.0.0.0.0.0.0.0.0.0.0.0.0.0",0,0,0,0 </p><p>+CGDCONT: 5, "IPV4V6", "VZWEMERGENCY", "0.0.0.0.0.0.0.0.0.0.0.0.0.0.0.0",0,0,0,1 </p><p>+CGDCONT: 6, "IPV4V6", "VZWCLASS6", "0.0.0.0.0.0.0.0.0.0.0.0.0.0.0.0",0,0,0,0 </p><p>OK</p></td><td>Confirm the APN settings (optional)</td></tr><tr><td>AT+CFUN=1</td><td>Restore full functionality</td></tr><tr><td>AT+CGREG?<br>+CEREG: 0,1<br>OK</td><td>Verify attachment</td></tr><tr><td>AT+CGACT=1,3<br>OK</td><td>Activate PDP context 3</td></tr></tbody></table>

**Quectel Modems**

{% hint style="info" %}
Certain Quectel Cat-M modems are Verizon-certified via waiver, and they require a different configuration. In these cases, the class 1 APN must be set to the OmniSIM value **data.apn.name**, and the class 3 APN must be set to the Verizon default value VZWINTERNET. The class 1 APN must be used to establish the PDP context. Please contact KORE for specific details on how these modems should be configured.
{% endhint %}

<table><thead><tr><th width="460"></th><th></th></tr></thead><tbody><tr><td>+QUSIM: 1 </td><td>Detects the SIM Type when the profile changes</td></tr><tr><td><p>AT+CFUN=4</p><p>OK</p></td><td>Disable the cellular transceiver</td></tr><tr><td><p>AT+CCID </p><p>+CCID: <strong>891480</strong>XXXXXXXXXXXXXX</p><p>OK </p></td><td>Check the ICCID and notice the <strong>891480</strong> prefix, which identifies a Verizon profile</td></tr><tr><td><p>AT+CIMI?</p><p><strong>311270</strong>XXXXXXXXX</p><p>OK</p></td><td>Check the IMSI and notice the <strong>311270</strong> prefix, which identifies a Verizon Cat-M profile.</td></tr><tr><td><p>AT+CGDCONT=3, "IPV4V6", "data.apn.name"</p><p>OK</p></td><td>Configure the class 3 APN</td></tr><tr><td><p>AT+CGDCONT? </p><p>+CGDCONT: 1, "IPV4V6", "data.apn.name", "0.0.0.0.0.0.0.0.0.0.0.0.0.0.0.0",0,0,0,0 </p><p>+CGDCONT: 2, "IPV4V6", "VZWADMIN", "0.0.0.0",0,0,0,0 </p><p>+CGDCONT: 3, "IPV4V6", "VZWINTERNET", "0.0.0.0",0,0,0,0 </p><p>+CGDCONT: 4, "IPV4V6", "VZWAPP", "0.0.0.0.0.0.0.0.0.0.0.0.0.0.0.0",0,0,0,0 </p><p>+CGDCONT: 5, "IPV4V6", "VZWEMERGENCY", "0.0.0.0.0.0.0.0.0.0.0.0.0.0.0.0",0,0,0,1 </p><p>+CGDCONT: 6, "IPV4V6", "VZWCLASS6", "0.0.0.0.0.0.0.0.0.0.0.0.0.0.0.0",0,0,0,0</p><p>OK</p></td><td>Confirm the APN settings (optional)</td></tr><tr><td>AT+CFUN=1</td><td>Restore full functionality</td></tr><tr><td>AT+CGREG?<br>+CEREG: 0,1<br>OK</td><td>Verify attachment</td></tr><tr><td>AT+CGACT=1,1<br>OK</td><td>Activate PDP context 3</td></tr></tbody></table>

**KORE OmniSIM Profiles (891039)**

{% hint style="info" %}
The KORE OmniSIM profiles require that the class 1 APN be set to the OmniSIM custom value **data.apn.name**.
{% endhint %}

<table><thead><tr><th width="460"></th><th></th></tr></thead><tbody><tr><td>+QUSIM: 1 </td><td>Detects the SIM Type when the profile changes</td></tr><tr><td><p>AT+CFUN=4</p><p>OK</p></td><td>Disable the cellular transceiver</td></tr><tr><td><p>AT+CCID </p><p>+CCID: <strong>890139</strong>XXXXXXXXXXXXXX</p><p>OK </p></td><td>Check the ICCID and notice the <strong>890139</strong> prefix, which identifies a KORE profile</td></tr><tr><td><p>AT+CGDCONT=1, "IPV4V6", "data.apn.name"</p><p>OK</p></td><td>Configure the class 1 APN</td></tr><tr><td><p>AT+CGDCONT? </p><p>+CGDCONT: 1, "IPV4V6", "data.apn.name", "",0,0,0,0 </p><p>+CGDCONT: 2, "IPV4V6", "euicc.icore.name", "",0,0,0,0 </p><p>OK</p></td><td>Confirm the APN settings (optional)</td></tr><tr><td><p>AT+CFUN=1</p><p>OK</p></td><td>Restore full functionality</td></tr><tr><td>AT+CGREG?<br>+CEREG: 0,5<br>OK</td><td>Verify attachment</td></tr><tr><td>AT+CGACT=1,1<br>OK</td><td>Activate PDP context 3</td></tr></tbody></table>

## **KORE Local Profile Management Applet**

OmniSIM includes an optional local profile management applet, which permits the host CPU to enable pre-downloaded profiles locally without using RSP. Using AT commands, the host CPU may retrieve a list of profiles available in the eUICC and enable them as needed. It also enables the host CPU to read the eUICC EID value, which can be useful in setting the correct APN value. The KORE LPM Applet obviously requires more host CPU involvement than RSP; however, it facilitates a much more powerful profile management system. Using the KORE LPM Applet, devices can select and enable a new profile according to GPS location, relative signal quality, network speed, network latency, user interface, or loss of connectivity. Please see the[ Local Profile Management Guide](/omnisim/omnisim-how-to/manage-local-profiles) for more details.

## **Conclusion**

OmniSIM enables mobile devices to change SIMs electronically using remote or local control. This powerful capability requires some degree of involvement by the host CPU, but the benefits are more than worth the development investment for many applications.


# OmniSIM 1.3 SKU Update - December 2025

The following advisory was sent out on December 16, 2025.

You are receiving this message because you have ordered a version of OmniSIM™ 1.3 SIMs that is being replaced with a new SKU version.

The new SKU version incorporates a new MSISDN (Mobile Station International Subscriber Directory Number) range into the OmniSIM product. The MSISDN prefix is +883460.

This new MSISDN is a non-geographic number, providing greater flexibility for deployments by removing location-related constraints and adding enhanced connectivity security hardening to prevent public reachability via SMS or Voice.

With this new MSISDN range, Circuit Switched Voice (over 2G and 3G networks) and direct Device to Device SMS services are no longer supported.

For full details of what’s in the new SKU versions, check out [OmniSIM 1.3 ](https://c28d404.na1.hubspotlinks.com/Ctc/2F+113/c28d404/VW7lqh71T6CPW9bHkpK2pr0wsW7qxXbD5H7pM3N179mqK3m2nnW7Y8-PT6lZ3mqW80mNwV8TZbtNW5mKvM139GpMTW71h-0l2RQCc1W6bgFl622yjwrMrGkvnz5N58W4szHRM5gvp8MW1pxh632sFTwQW2rBc0w2d1D9fW2WmqMT3sHYR9W1JFQZ93XLs_8W5X72DC4w8y07N16HlPN_zclRW8qwHZM6CFrm5W9kJ43C7hyXgZW1R_8Zv4mMXBfW84BXqS5-Xd1NW4MhM4q2d2hlBVmz9CY27tH-jW7tbP1c2qfcx2W6K2QGt22YHCCW2XZxZG2Rh7tyW3q3jPl46JllKW5NV5-c5fCsd-W5VRW78138LtLW2bwRWT8DZypZW4f2yDt5Kgr1cf7MZFfl04)and ["What is New in OmniSIM 1.3?"](https://c28d404.na1.hubspotlinks.com/Ctc/2F+113/c28d404/VW7lqh71T6CPW9bHkpK2pr0wsW7qxXbD5H7pM3N179mrj3m2nnW95jsWP6lZ3lPW9bYt4W2zsmVYW8ydD-Z3Q0fsxW5XZC9d48z9xpW4WfP263H8kH-W8yyhg-6xsF_1W2xmJ7C1SsKhzMg36679NjNVW4vKY6m6qBw3GW3yYMfX8mHH37VM99WZ85c4mDW5pJplj3PgMyTW3WJKkX1C-88yW4mr-X55XlHCPW1m-_827TSWvdVhvDW04nmb4PW4HCcCv1mdRcRW5w0w0c14kTnHW8Q5VqH61wyk1VsZ23j8jPdrwW1PhpZV6BydV6W48vkBn1z-dVXW6yDwCl82BjC9VLfQRg32fwsrVCkqHx2RTsJkW7HCn3p795DwXW7vyT7B97SdqXVg-hfV1V0N_nW214Lyd4v6mSzW3n74Jp6SF1yVW7X0mKs7Mx2C8f7g4GXz04) and ["What is New in OmniSIM 1.4?"](https://c28d404.na1.hubspotlinks.com/Ctc/2F+113/c28d404/VW7lqh71T6CPW9bHkpK2pr0wsW7qxXbD5H7pM3N179mr03m2nnW8wLKSR6lZ3k_W7y2mkw26cWv2VWW3Nr2TwBnrW8NlmZK3Nds7zW1BWQy-7mXnWSW3qh2__3H_R2MW6nzs702by77jW3k3Sds103hb_W7cJCLr7XFV0VW98JVX-95H4FnW8cgL2q7YJ6kqW7Y7mt035rgfSW3VMf6b3phg1HW8pfJVh7l5-hhW2gMSKY4hV26DW6pH9y27MNjf9W6cwmkK3JSWT6W7MCXNZ3QX6YnVmYcxN4ZPGcMW4lXKHs1_2qDxW60g9RN5vqwbJW1lK07R37t5ZXW2qc_L04kmRkdW6Vg4vz1pG1R8VwH5JW8jZYRlW2_xPkL1dHLJPW3C2x3N9kK29zW6SN-y-8CK3WqW1RwvFg8FtPhMf5ClmDg04) on KORE Docs.

## SKU Iterations

* OmniSIM Reach 1.3 SKUs are replaced with an updated version, OmniSIM Reach 1.3.1.
* OmniSIM Rush 1.3 SKUs are replaced with an updated version, OmniSIM Rush 1.4
* OmniSIM US 1.3 SKUs are replaced with an updated version, OmniSIM US 1.4.

The table below lists some replacement SKUs. For the full list of replacement SKUs, please consult the [OmniSIM Product Datasheet](https://c28d404.na1.hubspotlinks.com/Ctc/2F+113/c28d404/VW7lqh71T6CPW9bHkpK2pr0wsW7qxXbD5H7pM3N179mqK3m2nnW7Y8-PT6lZ3mLVHBMB82wj9VdW7q7H398YH17BW7wvDdb6Gtn6hW8N0n9f6cCrwlW15qJsv8pFrc9N5cTJqzZw3pjW7fHgP734nHmHN1Pkf0QXZPTFW4HJDBn5xx-V-W1Gbtwm7MMQRtN75-lpTXWt93W19g-qS6R4NllVjHpcB15pNFSW6JGvk27tM2BSVLWv0S78MBd3W1HWYQy10dtZwM2yZjBflNRRW5ZZD6h9gPkFlW12Grp64NhZ38W6ZZz8d1xr_YFW7_c__K6mvjnzW3S7MXm56jmy3W6HKw8q6kFXt8MWTP-7FNdqrW4_2-j08kfwH-W1Q0NR05D7ns0f21F2yv04).

<table><thead><tr><th valign="middle">1.3 SKU</th><th valign="middle">Replacement SKU</th></tr></thead><tbody><tr><td valign="middle">17493 - OmniSIM Reach 1.3 - Triple</td><td valign="middle">156130 - OmniSIM Reach 1.3.1 - Triple</td></tr><tr><td valign="middle">17536 - OmniSIM Reach 1.3 Embedded - MFF2</td><td valign="middle">155402 - OmniSIM Reach 1.3.1 - MFF2</td></tr><tr><td valign="middle">17496 - OmniSIM Rush 1.3 - Triple</td><td valign="middle">19128 - OmniSIM Rush 1.4 - Triple</td></tr><tr><td valign="middle">17537 - OmniSIM Rush 1.3 Embedded - MFF2</td><td valign="middle">19131 - OmniSIM Rush 1.4 - MFF2</td></tr><tr><td valign="middle">17844 - OmniSIM US 1.3 - Triple</td><td valign="middle">19134 - OmniSIM US 1.4 - Triple</td></tr><tr><td valign="middle">18195 - OmniSIM US 1.3 - 3FF</td><td valign="middle">19136 - OmniSIM US 1.4 - 3FF</td></tr></tbody></table>

As a customer, you need to be aware of the following:

* KORE customer support will transfer your eligibility to the new products. The next time you place an order, you will see the replacement products.
* Your contract and pricing remain unchanged with the new OmniSIM product, which uses your existing plans.
* Your current OmniSIM stock in your account will remain unaffected and continue to function as usual.
* In these new SKU versions, only Application to Device and Device to Application SMS service (over API or SMPP Bind) is supported and Voice service is not supported.


# Retiring OmniSIM Reach 1.1 (SKU: 14239, 14240, 14639, 16474) - 6th August 2024

The following advisory was sent out on August 6, 2024.

You are receiving this message because you have ordered a version of OmniSIM Reach that KORE has decided to retire. Future orders will now use the newer OmniSIM product launched in 2023.

The reason that we have made this decision is that the recent rezoning of the IMSI sponsors that we use to provide global connectivity has meant that the initial IMSI used by the older Reach product does not provide the same level of connectivity in the USA.  This means that the out-of-the-box experience with the older OmniSIM Reach product will take longer to connect as it will have to switch to the next IMSI.  See [OmniSIM Reach - Centralized Multi-IMSI](/omnisim/omnisim-reach/centralized-multi-imsi) for more details on how this happens. &#x20;

## OmniSIM Reach 1.3 Product Update

The multi-IMSI configuration has been updated to align IMSI order with network rules, enhancing the out-of-the-box experience in the USA.

Check out the improved documentation for [OmniSIM 1.3](/omnisim) on the KORE doc portal. For details on ["What is New in OmniSIM 1.3?",](/omnisim/omnisim-esim/release-note) please refer to the documentation. More information on other changes in OmniSIM 1.3 is also available.

## OmniSIM Reach upgrade paths

| Retired OmniSIM Reach 1.1                   | Replacement OmniSIM Reach 1.3              |
| ------------------------------------------- | ------------------------------------------ |
| 16474 - OmniSIM Reach Standard SIM - Triple | 17493 - OmniSIM Reach 1.3 - Triple         |
| 14239 - OmniSIM Reach Industrial SIM - 2FF  | 17495 - OmniSIM Reach 1.3 - 2FF            |
| 14639 - OmniSIM Reach Industrial SIM - 3FF  | 17494 - OmniSIM Reach 1.3 - 3FF            |
| 14240 - OmniSIM Reach Embedded SIM - MFF2   | 17536 - OmniSIM Reach 1.3 Embedded - MFF2  |
| n/a                                         | 18491 - OmniSIM Reach 1.3 Embedded - USON8 |

As a customer, there is nothing that you need to do.&#x20;

* KORE Support will transfer your eligibility to the new products. The next time you place an order, you will see the replacement products.
* Your contract and pricing remain unchanged with the new OmniSIM product, which uses your existing plans.
* Your current OmniSIM Reach stock in your account will remain unaffected and continue to function as usual.
* There are no changes to the other OmniSIM (Rush/KATTCC) products you may be using at this time.

If you have any questions about anything in this email, in our docs, please contact your KORE account representative or KORE customer support.

Sincerely, The KORE Team


# Super SIM®

An overview of Super SIM, a resilient, global cellular connectivity platform to connect your IoT devices around the world.

Super SIM is a global cellular connectivity platform to connect your IoT devices around the world. With a Super SIM in your device you'll be able to connect to the most comprehensive list of Tier 1 global networks available via a single SIM. Powered by KORE's own cloud-scale mobile core, you have the freedom to choose your networks, so you can optimize for coverage, performance, and price. Use highly available APIs to program your connectivity operations, from changing SIM status and tracking data consumption, to sending machine-to-machine messages to devices.

Super SIM supports 2G (GSM/GPRS), 3G (UMTS/CDMA2000), 4G (LTE), and LTE-M connections.

Explore the power of Super SIM with our [interactive demo](https://korewireless.navattic.com/supersim)—walk through every step from ordering to activation, network selection, and real-time usage insights, and see how effortlessly connectivity can work for you.

## Twilio IoT acquisition

Super SIM became one of KORE's IoT connectivity offerings after KORE acquired Twilio's IoT business unit ("Twilio IoT") in June 2023. You may still find references to the Twilio Console, APIs, or other Twilio tools within the documentation until we complete our migration which we expect to complete in early 2025.

See [Twilio IoT Acquisition](https://docs.korewireless.com/en-us/twilio-iot-acquisition) and our [migration guides](https://docs.korewireless.com/en-us/twilio-iot-acquisition/migration-guides) for more details.

## Available networks

Super SIM gives your IoT devices access to over 400 cellular networks around the world. Check out Super SIM's [available networks](/supersim/available-networks).

Looking for specific networks to connect to? You'll be able to control which networks you can connect to with [Network Access Profiles](/supersim/how-to/understanding-network-access-profiles).

## Pricing and billing

{% hint style="warning" %}
Prices shown below are for demonstration and subject to change. Refer to [Super SIM's pricing page](https://www.korewireless.com/super-sim-pricing) or your sales agreement for latest prices.
{% endhint %}

To use Super SIM, there is a one-time fee for SIM hardware, a monthly subscription fee for active Super SIMs, and usage fees that are charged on a pay-as-you-go basis. Volume pricing is available if you [talk to sales](https://www.korewireless.com/iot/help).

* **One-time SIM fee** — SIM hardware starts at $3. You can order multi-size (2FF/3FF/4FF) SIM cards or solderable embedded SIMs (MFF2) from the [Twilio Console](https://console.korewireless.com). If you need larger quantities than can be purchased in Console, [talk to sales](https://www.korewireless.com/iot/help).
* **Active SIM Subscription Fee** — Starting at $2 per `active` Super SIM per month. You can set a Super SIM to `inactive` at any time to stop this recurring fee if you don't need to use that SIM. You can reactivate at it any time. [Learn more about Super SIM states](/supersim/how-to/how-to-determine-a-super-sims-status).
* **Data Usage** — Starting at $0.10 per MB. Data usage is billed on a pay-as-you-go basis. Data usage is billed per byte — no rounding or breakage.
* **SMS Commands** — Starting at $0.05 per SMS Command sent from your device and $0.01 per SMS Command sent to your device. Use [SMS Commands](/api/products/supersim/smscommand-resource) to send machine-to-machine (M2M) SMS to and from your devices.
* **Network Access Fees** — For some networks, an additional monthly will be charged for each SIM that connects to and uses the network.

### Subscription Fee Billing and Data Limit Period

Each Super SIM has its own billing and data-usage cycle: the period is a full month beginning on the day the SIM becomes `active`. So if a Super SIM is activated on February 14th, its first cycle completes on March 14th, the second on April 14th, and so on.

As each new period begins, payment of the active SIM subscription fee is triggered and the period's count of bytes transferred starts at zero. If this count reaches the SIM's applied data limit, data transfer is suspended until the start of the next period. The SIM's data limit is set in the [Fleet](/api/products/supersim/fleet-resource) the SIM's [Sim resource](/api/products/supersim/sim-resource) has been assigned to.

If the SIM is `inactive` at the end of the current billing period, no subscription fee will be charged until the SIM is put back into the `active` state, at which point a whole new monthly billing and data-usage period starts at the date of re-activation. You can check a SIM's state by reading its Sim resource's `status` value.

### Network Access Fees

Some networks offered by Super SIM have a network access fee that is charged if any data or SMS is exchanged over the network. When usage on the network occurs, you will be charged the monthly network access fee. That network access will be good for a full month beginning from when the usage occurred. For example, if you were charged an access fee for a network on February 16th, you won't be charged another access fee for using that same network again until March 16th. If a SIM connects to multiple networks with network access fees, each will have it's own date after which you may be charged another network access fee if you continue to use it.

All data and SMS usage on the network will be charged on a pay-as-you-go basis like on any other offered network. The period between your network access fee charges is independent from the SIM's active subscription fee.

## Get started

You can follow this [step-by-step guide](/supersim/supersim-first-steps) to get started with Super SIM. You'll learn how to:

* Order Super SIMs from [KORE Shop](https://shop.korewireless.com/SIM/Super-SIM).
* Configure your Super SIMs using either [Console](https://console.korewireless.com) or via [the API](/api/products/supersim).&#x20;
* Set up your device by [configuring the APN](/supersim/how-to/apn-configuration) and [enabling roaming](/supersim/how-to/how-enable-roaming).

If you need a helping hand to begin working with Super SIM, why not try one or more of our brief tutorials?

### Super SIM in general

* [Get Started with Super SIM, the Raspberry Pi 4, and the Sixfab Base Hat.](/supersim/supersim-first-steps/get-started-with-super-sim-the-raspberry-pi-4-and-the-sixfab-base-hat)
* [Get Started with Super SIM, the Raspberry Pi 4, and the Waveshare 4G Hat.](/supersim/supersim-first-steps/get-started-with-super-sim-the-raspberry-pi-4-and-the-waveshare-4g-hat)
* [Get Starter with Super SIM and the Raspberry Pi Pico.](/supersim/supersim-first-steps/get-started-with-data-comms-and-the-raspberry-pi-pico)

### SMS Commands

* [Get Started with Super SIM SMS Commands and the Raspberry Pi.](/supersim/supersim-first-steps/get-started-with-super-sim-sms-commands-and-the-raspberry-pi-4)
* [Get Started with Super SIM SMS Commands and the Raspberry Pi Pico.](/supersim/supersim-first-steps/get-started-with-super-sim-sms-commands-and-the-raspberry-pi-pico)

### IP Commands

* [Get Started with Super SIM IP Commands and the Raspberry Pi.](/supersim/supersim-first-steps/get-started-with-super-sim-ip-commands-and-the-raspberry-pi)
* [Get Started with Super SIM IP Commands and the Raspberry Pi Pico.](/supersim/supersim-first-steps/get-started-with-super-sim-ip-commands-and-the-raspberry-pi-pico)

### Advanced features

* [Get Started with Super SIM eSIM Profiles for eUICCs.](https://docs.korewireless.com/en-us/supersim/get-started/get-started-with-super-sim-esim-profiles-for-euiccs)

## Move into production

Whatever stage you've reached in your journey from IoT prototype to product, you must consider how to work with Super SIM at scale. We have resources to help you overcome to the obstacles that taking your IoT project to the next level will place before you.

* [Prepare for Production Deployments with Super SIM.](/supersim/into-production/prepare-for-production-deployments-with-super-sim)

## Advanced functionality

Once you've mastered the basics, learn more about how Super SIM works, and take advantage of the advanced functionality offered by Super SIM.

* [Read about Super SIM's IMSI-switching applet.](/supersim/supersim-multi-imsi-applet)
* [Learn about how Super SIM over-the-air updates work.](/supersim/over-the-air-updates)
* [Find out how and why you can set Super SIM's network attach priority list.](/supersim/how-to/how-and-why-to-set-super-sims-uplmn-table)

## Learn more about API resources

To build with Super SIM you'll use the following API resources.

* [Sim](/api/products/supersim/sim-resource) — Digital representation of a physical Super SIM.
* [Sim BillingPeriod sub-resource](/api/products/supersim/sim-resource/billingperiod-resource) — The actions a Super SIM was billed for in a fixed period.
* [UsageRecord](/api/products/supersim/usage-record-resource) — See how much data your Super SIMs used over time.
* [eSimProfile](/api/products/supersim/esimprofile-resource) — Access Super SIM functionality via eUICCs.[ Learn more about eSIM profiles](https://docs.korewireless.com/en-us/supersim/get-started/get-started-with-super-sim-esim-profiles-for-euiccs).
* [Fleet](/api/products/supersim/fleet-resource) — Control a group of Super SIMs. Use Fleets to control how hundreds or thousands or your Super SIMs connect.
* [Network](/api/products/supersim/network-resource) — Represents a cellular network to which a Super SIM can connect.
* [NetworkAccessProfile](/api/products/supersim/networkaccessprofile-resource) — Each Fleet's Network Access Profile specifies the Networks you want your Super SIMs to be able to connect to. [Learn more about Network Access Profiles](/supersim/how-to/understanding-network-access-profiles).
* [NetworkAccessProfile Network sub-resource](/api/products/supersim/networkaccessprofile-resource/network-resource) — A cellular network as stored in a SIM's Fleet's Network Access Profile.
* [SMSCommand](/api/products/supersim/smscommand-resource) — Send M2M SMS to and from your devices.
* [IPCommand](/api/products/supersim/ipcommand-resource) — Send UDP messages to and from your devices.

Learn how to [get started with the Super SIM API here](/api/products/supersim).

## Help and support

For guidance on specific topics, check out the **Super SIM > Help and Support** section in the navbar on the left.

If you have any questions, please contact KORE Support.


# Super SIM's Available Networks

Learn about all the cellular networks from around the world that Super SIM can connect to

{% hint style="warning" %}
This page lists the available networks for Super SIM versions 1.x.0 and 2.x.0. To view network availability for Super SIM version 3.0.0, please visit the [Super SIM version 3.0.0 Available Networks](https://docs.korewireless.com/supersim/available-networks/super-sim-version-3.0.0-available-networks) page.
{% endhint %}

Super SIM can connect to [**over 400 networks** in **188 countries**](#network-availability) across the world.

Jump straight to the following continents for lists of the networks located there which can be accessed via Super SIM, or read on for more general information.

* [Africa](#africa)
* [Asia](#asia)
* [Central and South America](#central-and-south-america)
* [Europe](#europe)
* [North America](#north-america)
* [Oceania](#oceania)

For a list of radio frequencies supported by each network, see [frequencycheck.com](https://www.frequencycheck.com/).

For coverage maps for each network, refer to their website or alternative tools such as [OpenSignal](https://opensignal.com/networks).

## How to set the networks your Super SIM will use

You can choose which networks your Super SIMs can connect to by configuring a [Network Access Profile](/api/products/supersim/network-resource) (NAP) which you assign to your Super SIM Fleet. Each network may have a different price per MB of data used, or per SMS Command sent or received.

Add the networks that provide connectivity in your target countries and whose pricing matches your business use case to your Fleet's NAP to make those networks accessible to your Super SIM-powered devices.

Please refer to Super SIM pricing for details of the SIMs themselves.

{% hint style="info" %}
If you have trouble connecting to a network, double check that it is enabled in your Fleet's NAP. You can also follow this [step-by-step guide for getting started with Super SIM](/supersim/supersim-first-steps).&#x20;
{% endhint %}

## Super SIM's multi-IMSI approach

To give you access to the broadest range of cellular networks possible, Super SIM leverages multiple international mobile subscriber identities (IMSIs) which are stored on each SIM. The SIM will automatically reconfigure itself, serving a different IMSI to your device, to give you access to the best networks in a country or to provide access to backup networks and paths between your device and the Internet if it is unable to connect on the current IMSI.

When discussing which network availability, there are two important categorizations of IMSIs:

* **Preferred IMSI** — The preferred IMSI is one the SIM is instructed to switch to when a device is deployed in a given country to give access to the collection of networks that, in general, offers the best connectivity experience.
* **Backup IMSIs** — All of the other IMSIs on the SIM that are not the preferred IMSI for a given country. These will be used if the device is unable to connect with the preferred IMSI. Backup IMSIs can provide redundant access to a network that is also supported on the preferred IMSI, access to other networks not available on the preferred IMSI, or both.

{% hint style="info" %}
For more information on IMSI switching, please refer to our deeper dive into IMSIs and [Super SIM's multi-IMSI solution](/supersim/supersim-multi-imsi-applet).
{% endhint %}

## Network availability

The following tables list the networks available to Super SIM in each global region. Networks are listed by country. Each network will be either **Available** or **Backup**:

* **Available** — The Super SIM should be able to connect quickly to this network.
* **Backup** — This network can be used by the Super SIM but is only available via one of the backup IMSIs that are utilized if your device has not been able to connect within a couple of minutes.

It is **not** recommended to only have backup networks enabled in a country as to connect to one of those networks the SIM would have had to fallback to the backup IMSIs on the SIM after failing to connect on the preferred IMSI for the country. Super SIMs will attempt to switch back to the preferred IMSI for a country at least every 24 hours. When this occurs, your device will not be able to reconnect to that network until the SIM once again switches to a backup IMSI that supports that network. If you require a network that is listed as a backup network due to coverage or compatibility issues, you can [speak with a sales specialist](https://www.korewireless.com/iot/help) to discuss options to improve the experience.

## Available networks

***Last Updated: January 29, 2026***

The following list of available networks and their availability statuses are based on the most recent Super SIM settings and are subject to change. SIMs with different settings currently installed on them can be updated over-the-air. Learn more about Super SIM's over-the-air updates [here](/supersim/over-the-air-updates).

{% hint style="info" %}
If there are any networks listed below that are not visible to you in the Super SIM Console or that you have trouble connecting to, please contact your sales specialist or customer support.
{% endhint %}

### Africa

See above to [learn about network availability](https://docs.korewireless.com/en-us/supersim/available-networks#network-availability).

| Country                          | Network Name                        | Network Availability |
| -------------------------------- | ----------------------------------- | -------------------- |
| Algeria                          | Mobilis                             | Available            |
| Algeria                          | Djezzy                              | Available            |
| Algeria                          | Ooredoo                             | Available            |
| Benin                            | Moov                                | Available            |
| Botswana                         | BTC                                 | Available            |
| Botswana                         | Mascom                              | Available            |
| Burkina Faso                     | Orange                              | Available            |
| Burundi                          | Viettel                             | Backup               |
| Cameroon                         | MTN                                 | Available            |
| Cape Verde                       | CV Movel                            | Available            |
| Cape Verde                       | T+                                  | Available            |
| Chad                             | Airtel                              | Available            |
| Democratic Republic of the Congo | Vodacom                             | Available            |
| Democratic Republic of the Congo | Airtel                              | Available            |
| Egypt                            | Etisalat                            | Available            |
| Egypt                            | Orange                              | Backup               |
| Equatorial Guinea                | GreenCom                            | Available            |
| Ethiopia                         | Ethio Telecom                       | Available            |
| Gabon                            | Airtel                              | Available            |
| Gambia                           | Africell                            | Available            |
| Gambia                           | Qcell                               | Available            |
| Ghana                            | MTN                                 | Available            |
| Ghana                            | Airtel Tigo                         | Backup               |
| Ghana                            | Vodafone                            | Backup               |
| Guinea                           | Areeba MTN                          | Available            |
| Guinea-Bissau                    | MTN                                 | Available            |
| Ivory Coast                      | MTN                                 | Available            |
| Kenya                            | Airtel                              | Available            |
| Kenya                            | Safaricom                           | Available            |
| Kenya                            | Telkom                              | Available            |
| Lesotho                          | Econet Telecom                      | Available            |
| Liberia                          | Lonestar Communications Corporation | Backup               |
| Madagascar                       | Airtel                              | Available            |
| Malawi                           | Airtel                              | Available            |
| Mauritania                       | Chinguitel                          | Available            |
| Mauritius                        | Orange                              | Available            |
| Mauritius                        | Emtel                               | Available            |
| Morocco                          | Orange                              | Available            |
| Morocco                          | Inwi                                | Available            |
| Morocco                          | Maroc Telecom                       | Backup               |
| Namibia                          | Telecom Namibia                     | Available            |
| Niger                            | Orange                              | Available            |
| Nigeria                          | Airtel                              | Available            |
| Nigeria                          | MTN                                 | Available            |
| Nigeria                          | 9mobile                             | Backup               |
| Nigeria                          | Glo                                 | Backup               |
| Republic of the Congo            | Airtel                              | Available            |
| Rwanda                           | Airtel                              | Available            |
| Rwanda                           | MTN                                 | Backup               |
| Senegal                          | Sonatel                             | Available            |
| Senegal                          | Expresso                            | Available            |
| Senegal                          | Tigo                                | Backup               |
| Seychelles                       | Airtel                              | Available            |
| Somalia                          | Telesom                             | Available            |
| South Africa                     | Vodacom                             | Available            |
| South Africa                     | Cell C                              | Available            |
| South Africa                     | MTN                                 | Backup               |
| South Africa                     | Telekom                             | Backup               |
| South Sudan                      | MTN                                 | Available            |
| Swaziland                        | MTN                                 | Available            |
| Tanzania                         | Airtel                              | Available            |
| Tanzania                         | Smart                               | Backup               |
| Tunisia                          | Ooredoo                             | Available            |
| Tunisia                          | Orange                              | Available            |
| Tunisia                          | Tunisie Telecom                     | Available            |
| Uganda                           | Airtel                              | Available            |
| Uganda                           | MTN                                 | Available            |
| Uganda                           | Uganda Telecom                      | Backup               |
| Zambia                           | Airtel                              | Available            |
| Zimbabwe                         | Econet                              | Available            |
| Zimbabwe                         | Telcell                             | Available            |

### Asia

See above to [learn about network availability](https://docs.korewireless.com/en-us/supersim/available-networks#network-availability).

| Country              | Network Name           | Network Availability |
| -------------------- | ---------------------- | -------------------- |
| Afghanistan          | AWCC                   | Available            |
| Afghanistan          | Etisalat               | Available            |
| Afghanistan          | MTN                    | Available            |
| Afghanistan          | TDCA                   | Available            |
| Armenia              | Ucom                   | Available            |
| Armenia              | Beeline                | Available            |
| Azerbaijan           | Bakcell                | Available            |
| Azerbaijan           | Azercell               | Backup               |
| Bahrain              | MTC-Vodafone           | Backup               |
| Bangladesh           | GrameenPhone           | Available            |
| Brunei               | DST                    | Available            |
| Cambodia             | Metfone                | Available            |
| China                | China Mobile           | Available            |
| China                | China Unicom           | Backup               |
| Georgia              | Geocell                | Backup               |
| Hong Kong            | China Mobile Hong Kong | Available            |
| Hong Kong            | SmarTone               | Available            |
| Hong Kong            | CSL                    | Available            |
| Hong Kong            | H3G                    | Backup               |
| India                | Bharti Airtel          | Available            |
| India                | Vodafone               | Available            |
| India                | IDEA                   | Available            |
| India                | BSNL                   | Backup               |
| India                | Jio                    | Backup               |
| Indonesia            | Telkomsel              | Available            |
| Indonesia            | Indosat Ooredoo        | Backup               |
| Indonesia            | H3G                    | Backup               |
| Indonesia            | XL Axiata              | Backup               |
| Israel               | Hot Mobile             | Available            |
| Israel               | Orange                 | Available            |
| Israel               | Pelephone              | Backup               |
| Japan                | NTT Docomo             | Available            |
| Japan                | Softbank               | Available            |
| Jordan               | Umniah                 | Available            |
| Jordan               | Zain                   | Backup               |
| Jordan               | Orange                 | Backup               |
| Kazakhstan           | Beeline                | Available            |
| Kazakhstan           | K-Cell                 | Available            |
| Kazakhstan           | MTS                    | Available            |
| Kuwait               | Zain                   | Available            |
| Kuwait               | Ooredoo                | Available            |
| Laos                 | ETL                    | Available            |
| Laos                 | Lao Telecom            | Available            |
| Macao                | CTM                    | Available            |
| Macao                | H3G                    | Available            |
| Macao                | SmarTone               | Available            |
| Malaysia             | DiGi                   | Available            |
| Malaysia             | U Mobile               | Available            |
| Malaysia             | Celcom                 | Backup               |
| Malaysia             | Maxis                  | Backup               |
| Mongolia             | Unitel                 | Backup               |
| Myanmar              | MPT                    | Available            |
| Nepal                | Nepal Telecom          | Backup               |
| Oman                 | Oman Mobile            | Available            |
| Oman                 | Narwas                 | Available            |
| Pakistan             | Ufone                  | Available            |
| Pakistan             | Telenor                | Available            |
| Pakistan             | Mobilink               | Backup               |
| Philippines          | Globe                  | Available            |
| Philippines          | Smart                  | Available            |
| Qatar                | Ooredoo                | Available            |
| Qatar                | Vodafone               | Backup               |
| Russia               | Megafon                | Available            |
| Russia               | MTS                    | Available            |
| Russia               | Beeline                | Available            |
| Saudi Arabia         | Mobily                 | Available            |
| Saudi Arabia         | Zain                   | Available            |
| Saudi Arabia         | STC                    | Backup               |
| Singapore            | SingTel                | Available            |
| Singapore            | StarHub                | Available            |
| South Korea          | SK Telecom             | Available            |
| South Korea          | LG U+                  | Available            |
| South Korea          | KT                     | Backup               |
| Sri Lanka            | Airtel                 | Available            |
| Sri Lanka            | Dialog                 | Available            |
| Sri Lanka            | Mobitel                | Available            |
| Sri Lanka            | H3G                    | Backup               |
| State of Palestine   | Jawwal                 | Available            |
| Taiwan               | Chunghwa               | Available            |
| Taiwan               | FarEasTone             | Available            |
| Taiwan               | Taiwan Mobile          | Available            |
| Taiwan               | T Star                 | Available            |
| Tajikistan           | Tacom                  | Available            |
| Tajikistan           | Tcell                  | Backup               |
| Thailand             | AIS                    | Available            |
| Thailand             | TrueMove               | Available            |
| Thailand             | TrueMove               | Available            |
| Thailand             | DTAC                   | Backup               |
| Turkey               | Turkcell               | Available            |
| Turkey               | Avea                   | Available            |
| Turkey               | Vodafone               | Available            |
| United Arab Emirates | Etisalat               | Available            |
| United Arab Emirates | du                     | Available            |
| Uzbekistan           | Beeline                | Backup               |
| Vietnam              | MobiFone               | Available            |
| Vietnam              | Vinaphone              | Available            |
| Vietnam              | Viettel                | Available            |

### Central and South America

See above to [learn about network availability](https://docs.korewireless.com/en-us/supersim/available-networks#network-availability).

| Country                             | Network Name | Network Availability |
| ----------------------------------- | ------------ | -------------------- |
| Anguilla                            | C+W LIME     | Available            |
| Antigua and Barbuda                 | C+W LIME     | Available            |
| Argentina                           | Telefonica   | Available            |
| Argentina                           | Personal     | Available            |
| Argentina                           | Claro        | Available            |
| Aruba                               | Setar        | Available            |
| Bahamas                             | Aliv         | Available            |
| Bahamas                             | BTC          | Available            |
| Barbados                            | C+W LIME     | Available            |
| Belize                              | Speednet     | Backup               |
| Bolivia, The Plurinational State of | Nuevatel     | Available            |
| Brazil                              | Vivo         | Available            |
| Brazil                              | TIM          | Backup               |
| British Virgin Islands              | C+W LIME     | Available            |
| Caribbean Netherlands               | TelCell      | Backup               |
| Cayman Islands                      | C+W LIME     | Available            |
| Chile                               | Entel        | Available            |
| Chile                               | Telefonica   | Available            |
| Chile                               | Claro        | Available            |
| Colombia                            | Telefonica   | Available            |
| Colombia                            | Tigo         | Backup               |
| Colombia                            | Claro        | Backup               |
| Costa Rica                          | ICE          | Available            |
| Costa Rica                          | Telefonica   | Backup               |
| Dominica                            | C+W LIME     | Available            |
| Dominican Republic                  | Orange       | Available            |
| Dominican Republic                  | Viva         | Available            |
| Dominican Republic                  | Claro        | Available            |
| Ecuador                             | Telefonica   | Available            |
| Ecuador                             | CNT          | Backup               |
| El Salvador                         | Telefonica   | Available            |
| El Salvador                         | Claro        | Available            |
| Grenada                             | C+W LIME     | Available            |
| Guadeloupe<sup>1</sup>              | Orange       | Backup               |
| Guatemala                           | Claro        | Available            |
| Guyana                              | Digicel      | Available            |
| Haiti                               | Digicel      | Available            |
| Honduras                            | Tigo         | Available            |
| Honduras                            | Claro        | Backup               |
| Jamaica                             | Digicel      | Available            |
| Jamaica                             | C+W LIME     | Available            |
| Montserrat                          | C+W LIME     | Available            |
| Nicaragua                           | Telefonica   | Available            |
| Panama                              | Telefonica   | Available            |
| Paraguay                            | Personal     | Available            |
| Paraguay                            | Tigo         | Available            |
| Paraguay                            | Claro        | Available            |
| Peru                                | Telefonica   | Available            |
| Peru                                | Claro        | Available            |
| Puerto Rico                         | Claro        | Available            |
| Saint Kitts and Nevis               | C+W LIME     | Available            |
| Saint Lucia                         | C+W LIME     | Available            |
| Saint Vincent and the Grenadines    | C+W LIME     | Available            |
| Suriname                            | Telesur      | Available            |
| Trinidad and Tobago                 | Digicel      | Available            |
| Trinidad and Tobago                 | Dauphin      | Available            |
| Turks and Caicos Islands            | C+W LIME     | Available            |
| Uruguay                             | Telefonica   | Available            |
| Uruguay                             | Antel        | Available            |
| Uruguay                             | Claro        | Available            |
| Venezuela                           | Telefonica   | Backup               |

<sup>1</sup> Covered Area: French Guiana, Guadeloupe, Martinique, Saint Barthélemy, Saint Martin (French part), La Desirade, Les Saintes, Marie-Galante, St Barts

### Europe

See above to [learn about network availability](https://docs.korewireless.com/en-us/supersim/available-networks#network-availability).

| Country                | Network Name           | Network Availability |
| ---------------------- | ---------------------- | -------------------- |
| Albania                | ALBtelecom Mobile      | Available            |
| Albania                | Telekom Albania        | Available            |
| Albania                | Vodafone               | Backup               |
| Austria                | A1                     | Available            |
| Austria                | H3G                    | Backup               |
| Austria                | T-Mobile               | Backup               |
| Belarus                | MTS                    | Available            |
| Belarus                | A1                     | Available            |
| Belgium                | Base                   | Available            |
| Belgium                | Orange                 | Available            |
| Belgium                | Proximus               | Available            |
| Bosnia and Herzegovina | BH Telecom             | Available            |
| Bosnia and Herzegovina | Eronet                 | Available            |
| Bulgaria               | A1                     | Available            |
| Bulgaria               | Vivacom                | Available            |
| Bulgaria               | Globul                 | Available            |
| Croatia                | A1                     | Available            |
| Croatia                | T-Mobile               | Available            |
| Croatia                | Tele2                  | Available            |
| Cyprus                 | Cytamobile-Vodafone    | Available            |
| Cyprus                 | MTN                    | Available            |
| Cyprus                 | PrimeTel               | Available            |
| Czech Republic         | O2                     | Available            |
| Czech Republic         | T-Mobile               | Available            |
| Czech Republic         | Vodafone               | Available            |
| Denmark                | Hi3G                   | Available            |
| Denmark                | Telenor                | Available            |
| Denmark                | Telia                  | Available            |
| Denmark                | TDC                    | Backup               |
| Estonia                | Tele2                  | Available            |
| Estonia                | Telia Eesti            | Available            |
| Faroe Islands          | Faroese Telecom        | Available            |
| Finland                | Elisa                  | Available            |
| Finland                | Telia                  | Available            |
| Finland                | DNA                    | Available            |
| France                 | Orange                 | Available            |
| France                 | SFR                    | Available            |
| France                 | Bouygues Telecom       | Available            |
| France                 | Free Mobile            | Available            |
| Germany                | Telefonica O2          | Available            |
| Germany                | Vodafone               | Available            |
| Germany                | Telekom                | Backup               |
| Gibraltar              | Gibtel                 | Available            |
| Greece                 | Cosmote                | Available            |
| Greece                 | Vodafone               | Available            |
| Greece                 | Wind Hellas            | Available            |
| Greenland              | TELE Greenland         | Available            |
| Hungary                | Magyar Telekom         | Available            |
| Hungary                | Telenor                | Available            |
| Hungary                | Vodafone               | Backup               |
| Iceland                | Siminn                 | Available            |
| Iceland                | Vodafone               | Available            |
| Iceland                | Nova                   | Available            |
| Iceland                | IMC                    | Backup               |
| Ireland                | Eir                    | Available            |
| Ireland                | H3G                    | Available            |
| Ireland                | Vodafone               | Available            |
| Italy                  | Vodafone Omnitel       | Available            |
| Italy                  | TIM                    | Available            |
| Italy                  | Wind Tre               | Available            |
| Italy                  | Iliad Italia           | Backup               |
| Latvia                 | LMT                    | Available            |
| Latvia                 | Bite Latvia            | Available            |
| Latvia                 | Tele2                  | Available            |
| Liechtenstein          | Mobilkom Liechtenstein | Available            |
| Liechtenstein          | Orange                 | Backup               |
| Lithuania              | Omnitel                | Available            |
| Lithuania              | Bite Lithuania         | Available            |
| Lithuania              | Tele2                  | Available            |
| Luxembourg             | P\&T Luxembourg        | Available            |
| Luxembourg             | Orange                 | Available            |
| Luxembourg             | Tango                  | Available            |
| Malta                  | Go Mobile              | Available            |
| Malta                  | Vodafone               | Available            |
| Moldova                | Moldcell               | Available            |
| Moldova                | Orange                 | Available            |
| Monaco                 | Monaco Telecom         | Available            |
| Monaco                 | Monaco Telecom         | Available            |
| Montenegro             | Crnogorski Telekom     | Available            |
| Montenegro             | MTEL                   | Available            |
| Montenegro             | Telenor                | Available            |
| Netherlands            | T-Mobile               | Available            |
| Netherlands            | KPN                    | Available            |
| Netherlands            | Vodafone               | Available            |
| North Macedonia        | VIP Operator           | Available            |
| North Macedonia        | T-Mobile               | Available            |
| Norway                 | Telenor                | Available            |
| Norway                 | Telia Norge            | Available            |
| Norway                 | TDC                    | Backup               |
| Poland                 | Orange Polska          | Available            |
| Poland                 | Play                   | Available            |
| Poland                 | Plus                   | Available            |
| Poland                 | T-Mobile Polska        | Available            |
| Portugal               | TMN                    | Available            |
| Portugal               | Optimus                | Available            |
| Portugal               | Vodafone               | Available            |
| Romania                | Orange                 | Available            |
| Romania                | Vodafone               | Available            |
| Romania                | Telekom Romania        | Available            |
| Romania                | Digi                   | Backup               |
| Serbia                 | Telenor                | Available            |
| Serbia                 | Vip Mobile             | Available            |
| Slovakia               | Orange                 | Available            |
| Slovakia               | O2                     | Available            |
| Slovakia               | Telekom                | Available            |
| Slovenia               | A1                     | Available            |
| Slovenia               | Mobitel                | Available            |
| Spain                  | Orange                 | Available            |
| Spain                  | Telefonica             | Available            |
| Spain                  | Vodafone               | Available            |
| Sweden                 | Tele2                  | Available            |
| Sweden                 | Telia                  | Available            |
| Sweden                 | H3G                    | Available            |
| Sweden                 | Telenor                | Available            |
| Switzerland            | Swisscom               | Available            |
| Switzerland            | Sunrise                | Available            |
| Switzerland            | Salt                   | Available            |
| Ukraine                | KyivStar               | Available            |
| Ukraine                | Lifecell               | Available            |
| Ukraine                | Vodafone               | Available            |
| United Kingdom         | Telefonica O2          | Available            |
| United Kingdom         | Vodafone               | Available            |
| United Kingdom         | Jersey Telecom         | Backup               |
| United Kingdom         | H3G                    | Backup               |
| United Kingdom         | Airtel-Vodafone        | Backup               |
| United Kingdom         | EE                     | Backup               |
| United Kingdom         | Manx                   | Backup               |
| United Kingdom         | C+W Sure               | Backup               |

### North America

See above to [learn about network availability](https://docs.korewireless.com/en-us/supersim/available-networks#network-availability).

| Country                  | Network Name    | Network Availability |
| ------------------------ | --------------- | -------------------- |
| Canada                   | Videotron       | Available            |
| Canada                   | Telus           | Available            |
| Canada                   | Bell            | Available            |
| Canada                   | Rogers Wireless | Available            |
| Mexico                   | AT\&T Mexico    | Available            |
| Mexico                   | Telefonica      | Available            |
| Mexico                   | TelCel          | Available            |
| United States of America | AT\&T           | Available            |
| United States of America | T-Mobile        | Available            |
| United States of America | Verizon         | Available            |
| United States of America | Alaska Wireless | Available            |
| United States of America | Union Telecom   | Backup               |

### Oceania

See above to [learn about network availability](https://docs.korewireless.com/en-us/supersim/available-networks#network-availability).

| Country          | Network Name | Network Availability |
| ---------------- | ------------ | -------------------- |
| Australia        | Telstra      | Available            |
| Australia        | Optus        | Available            |
| Australia        | Vodafone     | Available            |
| Fiji             | Digicel      | Available            |
| Fiji             | Vodafone     | Available            |
| Guam             | IT\&E        | Available            |
| New Zealand      | 2degrees     | Available            |
| New Zealand      | Spark        | Available            |
| New Zealand      | Vodafone     | Available            |
| Papua New Guinea | Bmobile      | Available            |
| Papua New Guinea | Digicel      | Available            |
| Samoa            | Digicel      | Available            |
| Solomon Islands  | Bmobile      | Available            |
| Tonga            | Digicel      | Available            |
| Vanuatu          | Digicel      | Available            |

## Network Details

### Using Verizon

\[α] Your SIM may need to receive a Settings Update before being able to connect to Verizon. The `base-settings` Settings Package installed on your SIM must be at least version 1.2.0 if its version starts with a 1 or version 2.2.0 if its version starts with a 2. All newly ordered SIMs already come with `base-settings` on version 2.2.0 or higher and do not need to receive an update before connecting to Verizon. If your SIM needs to be updated, the update will be delivered over-the-air which means that your device will need to connect to another cellular network first, such as AT\&T or T-Mobile in the US, and allow the SIM to retrieve the update. Learn more about SIM Settings and Settings Updates here.

### Telefonica O2 UK LTE-M Roaming Blocked

\[b] On November 30, 2023, we reported an incident that inbound roaming onto Telefonica O2 LTE-M network in the United Kingdom was blocked. This impacted not just Super SIM but also the connectivity offerings from many other providers. We are continuing to work with our Tier 1 connectivity partners to restore LTE-M connectivity on this network and gain access to LTE-M networks from other operators in the UK as they are deployed.


# Super SIM version 3.0.0 Available Networks

In July 2026, KORE started rolling out the new Super SIM with an updated coverage profile for new SIMs, as referenced in the June advisory: [New KORE Super SIM SKU and IMSI Update - June 2026](https://docs.korewireless.com/supersim/super-sim-advisories/new-kore-super-sim-sku-and-imsi-update-june-2026). The updated coverage is designed to support long-term product continuity while maintaining a strong global coverage footprint.

KORE continuously works to simplify and improve the Super SIM experience for future deployments, offering more resilient coverage aligned with the next generation of Super SIM products.

## **What's Changing**

KORE is upgrading the network profile of its Super SIM product to improve performance, reliability, and connectivity resiliency without disrupting existing deployments. The transition is seamless for most customers, affecting only new orders with no physical SIM swaps needed. Customers with custom IMSI-based logic receive clear advance notice and guidance for a smooth cutover.

### Key points include:

* New SKUs replace legacy Super SIM SKUs for all new orders
* New IMSI range: updated network identifiers for new SIMs
* SPN (network name) changes from `Twilio` to `KORE Super SIM`
* MCC/MNC values differ on new SIMs
* ICCID prefix remains unchanged

### **Legacy Products (2.x.0, 1.x.0)**

Existing SIM cards leveraging on multi-IMSI will maintain the existing Network Coverag&#x65;**.** SIMs currently deployed will continue to operate without interruption. No action is required for existing devices. The multi-IMSI network coverage footprint remains fully supported and unchanged. If you need to reference the complete list of networks available to multi-IMSI SIMs, please visit the [Super SIM Available Networks](https://docs.korewireless.com/supersim/available-networks) page.

## **3.0.0 New Country Coverage Added**

The following countries have been added to the new coverage footprint. Review this list to identify newly supported destinations for your future Super SIM deployments.

**MEA**

* Angola
* Central African Republic
* Libya
* Mali
* Mozambique
* Sierra Leone
* Sudan
* Togo

**EUROPE**

* Andorra
* Kosovo

**APAC**

* Myanmar
* French Polynesia

## **3.0.0 Network Coverage by Region**

#### Africa

Refer to the [network availability definitions](https://docs.korewireless.com/en-us/supersim/available-networks#network-availability).

| Country                          | Network Name                        | Network Availability |
| -------------------------------- | ----------------------------------- | -------------------- |
| Algeria                          | Mobilis                             | Available            |
| Algeria                          | Ooredoo                             | Available            |
| Algeria                          | Djezzy                              | Available            |
| Angola                           | Unitel                              | Available            |
| Benin                            | Moov                                | Available            |
| Benin                            | MTN                                 | Available            |
| Botswana                         | Orange Botswana (Pty) Ltd           | Available            |
| Botswana                         | Mascom                              | Backup               |
| Burkina Faso                     | Orange                              | Available            |
| Burundi                          | Viettel                             | Available            |
| Cameroon                         | Orange                              | Available            |
| Cameroon                         | MTN                                 | Backup               |
| Cape Verde                       | CV Movel                            | Available            |
| Cape Verde                       | T+                                  | Available            |
| Central African Republic         | Orange                              | Available            |
| Chad                             | Airtel                              | Available            |
| Democratic Republic of the Congo | Orange                              | Available            |
| Democratic Republic of the Congo | Tigo                                | Available            |
| Democratic Republic of the Congo | Vodacom                             | Available            |
| Democratic Republic of the Congo | Airtel                              | Backup               |
| Egypt                            | Orange                              | Available            |
| Egypt                            | Vodafone                            | Backup               |
| Gabon                            | Airtel                              | Available            |
| Gambia                           | Qcell                               | Available            |
| Ghana                            | MTN                                 | Available            |
| Ghana                            | Vodafone                            | Available            |
| Guinea                           | Orange                              | Available            |
| Guinea                           | Areeba MTN                          | Backup               |
| Guinea-Bissau                    | MTN                                 | Available            |
| Ivory Coast                      | Orange Cote d Ivoire S.A.           | Available            |
| Ivory Coast                      | MTN                                 | Backup               |
| Kenya                            | Airtel                              | Available            |
| Kenya                            | Telkom                              | Available            |
| Liberia                          | Orange Liberia                      | Available            |
| Liberia                          | Lonestar Communications Corporation | Backup               |
| Libya                            | Al Madar                            | Available            |
| Madagascar                       | Airtel                              | Available            |
| Madagascar                       | Orange Madagascar S.A.              | Available            |
| Malawi                           | Airtel                              | Available            |
| Mali                             | Orange                              | Available            |
| Mauritania                       | MAURITEL MOBILES                    | Available            |
| Mauritius                        | Orange                              | Available            |
| Mauritius                        | Emtel                               | Available            |
| Mauritius                        | MTML                                | Available            |
| Morocco                          | Inwi                                | Available            |
| Morocco                          | Orange                              | Available            |
| Morocco                          | Maroc Telecom                       | Available            |
| Mozambique                       | Vodacom                             | Available            |
| Namibia                          | Telecom Namibia                     | Available            |
| Niger                            | Orange                              | Available            |
| Nigeria                          | \[LR] Airtel                        | Available            |
| Nigeria                          | \[LR] MTN                           | Available            |
| Republic of the Congo            | Airtel                              | Available            |
| Réunion                          | Orange la Reunion                   | Available            |
| Réunion                          | SFR / SRR                           | Backup               |
| Rwanda                           | Airtel                              | Available            |
| Rwanda                           | MTN                                 | Backup               |
| Senegal                          | Sonatel                             | Available            |
| Senegal                          | Tigo                                | Backup               |
| Seychelles                       | C+W                                 | Available            |
| Seychelles                       | Airtel                              | Backup               |
| Sierra Leone                     | Orange                              | Available            |
| Sierra Leone                     | Africell                            | Backup               |
| South Africa                     | MTN                                 | Available            |
| South Africa                     | Vodacom                             | Available            |
| Sudan                            | Zain                                | Available            |
| Sudan                            | MTN                                 | Available            |
| Swaziland                        | MTN                                 | Available            |
| Tanzania                         | Vodacom                             | Available            |
| Tanzania                         | Airtel                              | Backup               |
| Togo                             | Togocel                             | Available            |
| Tunisia                          | Tunisie Telecom                     | Available            |
| Tunisia                          | Orange                              | Available            |
| Tunisia                          | Ooredoo                             | Available            |
| Uganda                           | Airtel                              | Available            |
| Uganda                           | MTN                                 | Available            |
| Zambia                           | Telecel Zambia Ltd.                 | Available            |
| Zambia                           | Airtel                              | Backup               |
| Zimbabwe                         | Econet                              | Available            |

#### Asia

Refer to the [network availability definitions](https://docs.korewireless.com/en-us/supersim/available-networks#network-availability).

<table data-header-hidden="false" data-header-sticky><thead><tr><th>Country</th><th>Network Name</th><th>Network Availability</th></tr></thead><tbody><tr><td>Afghanistan</td><td>MTN</td><td>Available</td></tr><tr><td>Afghanistan</td><td>Etisalat</td><td>Available</td></tr><tr><td>Armenia</td><td>Ucom</td><td>Available</td></tr><tr><td>Armenia</td><td>Beeline</td><td>Backup</td></tr><tr><td>Azerbaijan</td><td>Bakcell</td><td>Available</td></tr><tr><td>Azerbaijan</td><td>Azercell</td><td>Backup</td></tr><tr><td>Bahrain</td><td>STC</td><td>Available</td></tr><tr><td>Bahrain</td><td>MTC-Vodafone</td><td>Available</td></tr><tr><td>Bangladesh</td><td>GrameenPhone</td><td>Available</td></tr><tr><td>Brunei</td><td>DST</td><td>Available</td></tr><tr><td>Brunei</td><td>Progresif</td><td>Available</td></tr><tr><td>Cambodia</td><td>Metfone</td><td>Available</td></tr><tr><td>Cambodia</td><td>MobiTel</td><td>Available</td></tr><tr><td>Cambodia</td><td>Smart Axiata</td><td>Available</td></tr><tr><td>China</td><td>[60] China Unicom</td><td>Available</td></tr><tr><td>China</td><td>[60][U] China Mobile</td><td>Available</td></tr><tr><td>China</td><td>[60][U] China Telecommunications</td><td>Backup</td></tr><tr><td>Georgia</td><td>Magti GSM</td><td>Available</td></tr><tr><td>Georgia</td><td>Beeline</td><td>Available</td></tr><tr><td>Georgia</td><td>Geocell</td><td>Backup</td></tr><tr><td>Hong Kong</td><td>China Mobile Hong Kong</td><td>Available</td></tr><tr><td>Hong Kong</td><td>CSL</td><td>Available</td></tr><tr><td>Hong Kong</td><td>PCCW Mobile</td><td>Available</td></tr><tr><td>Hong Kong</td><td>H3G</td><td>Backup</td></tr><tr><td>India</td><td>[90] Bharti Airtel</td><td>Available</td></tr><tr><td>India</td><td>[90] Vodafone</td><td>Available</td></tr><tr><td>Indonesia</td><td>H3G</td><td>Available</td></tr><tr><td>Indonesia</td><td>Indosat Ooredoo</td><td>Available</td></tr><tr><td>Indonesia</td><td>Telkomsel</td><td>Available</td></tr><tr><td>Indonesia</td><td>XL Axiata</td><td>Backup</td></tr><tr><td>Iraq</td><td>Asia Cell</td><td>Available</td></tr><tr><td>Iraq</td><td>Zain</td><td>Available</td></tr><tr><td>Israel</td><td>Pelephone</td><td>Available</td></tr><tr><td>Israel</td><td>Cellcom</td><td>Available</td></tr><tr><td>Israel</td><td>Hot Mobile</td><td>Available</td></tr><tr><td>Japan</td><td>NTT Docomo</td><td>Available</td></tr><tr><td>Japan</td><td>Softbank</td><td>Available</td></tr><tr><td>Japan</td><td>KDDI</td><td>Available</td></tr><tr><td>Jordan</td><td>Orange</td><td>Available</td></tr><tr><td>Jordan</td><td>Zain</td><td>Backup</td></tr><tr><td>Kazakhstan</td><td>Beeline</td><td>Available</td></tr><tr><td>Kazakhstan</td><td>MTS</td><td>Available</td></tr><tr><td>Kuwait</td><td>Zain</td><td>Available</td></tr><tr><td>Kuwait</td><td>Ooredoo</td><td>Available</td></tr><tr><td>Laos</td><td>Unitel</td><td>Available</td></tr><tr><td>Laos</td><td>Lao Telecom</td><td>Available</td></tr><tr><td>Macao</td><td>H3G</td><td>Available</td></tr><tr><td>Macao</td><td>SmarTone</td><td>Backup</td></tr><tr><td>Malaysia</td><td>DiGi</td><td>Available</td></tr><tr><td>Malaysia</td><td>Celcom</td><td>Backup</td></tr><tr><td>Mongolia</td><td>Unitel</td><td>Available</td></tr><tr><td>Myanmar</td><td>Telenor</td><td>Available</td></tr><tr><td>Nepal</td><td>Ncell</td><td>Available</td></tr><tr><td>Oman</td><td>[90] Oman Mobile</td><td>Available</td></tr><tr><td>Oman</td><td>[90] Narwas</td><td>Available</td></tr><tr><td>Pakistan</td><td>Mobilink</td><td>Available</td></tr><tr><td>Pakistan</td><td>Telenor</td><td>Available</td></tr><tr><td>Philippines</td><td>Smart</td><td>Available</td></tr><tr><td>Philippines</td><td>Globe</td><td>Available</td></tr><tr><td>Qatar</td><td>Vodafone</td><td>Available</td></tr><tr><td>Qatar</td><td>Ooredoo</td><td>Available</td></tr><tr><td>Russia</td><td>[U] Beeline</td><td>Available</td></tr><tr><td>Russia</td><td>[U] Megafon</td><td>Available</td></tr><tr><td>Saudi Arabia</td><td>[90] Zain</td><td>Available</td></tr><tr><td>Saudi Arabia</td><td>[90] Mobily</td><td>Available</td></tr><tr><td>Singapore</td><td>[90] StarHub</td><td>Available</td></tr><tr><td>Singapore</td><td>[90] SingTel</td><td>Backup</td></tr><tr><td>Singapore</td><td>[90] M1</td><td>Backup</td></tr><tr><td>South Korea</td><td>KT</td><td>Available</td></tr><tr><td>South Korea</td><td>SK Telecom</td><td>Available</td></tr><tr><td>Sri Lanka</td><td>Dialog</td><td>Available</td></tr><tr><td>Sri Lanka</td><td>Mobitel</td><td>Available</td></tr><tr><td>Sri Lanka</td><td>H3G</td><td>Available</td></tr><tr><td>State of Palestine</td><td>Ooredoo</td><td>Available</td></tr><tr><td>Taiwan</td><td>Chunghwa</td><td>Available</td></tr><tr><td>Taiwan</td><td>Taiwan Mobile</td><td>Available</td></tr><tr><td>Taiwan</td><td>FarEasTone</td><td>Available</td></tr><tr><td>Tajikistan</td><td>Tcell</td><td>Available</td></tr><tr><td>Thailand</td><td>TrueMove</td><td>Available</td></tr><tr><td>Thailand</td><td>AIS</td><td>Available</td></tr><tr><td>Thailand</td><td>DTAC</td><td>Backup</td></tr><tr><td>Turkey</td><td>[90] Avea</td><td>Available</td></tr><tr><td>Turkey</td><td>[90] Turkcell</td><td>Available</td></tr><tr><td>Turkey</td><td>[90] Vodafone</td><td>Available</td></tr><tr><td>United Arab Emirates</td><td>[90] Etisalat</td><td>Available</td></tr><tr><td>United Arab Emirates</td><td>[90] du</td><td>Available</td></tr><tr><td>Uzbekistan</td><td>Beeline</td><td>Available</td></tr><tr><td>Vietnam</td><td>Viettel</td><td>Available</td></tr><tr><td>Vietnam</td><td>Vietnamobile</td><td>Backup</td></tr><tr><td>Vietnam</td><td>Vinaphone</td><td>Backup</td></tr><tr><td>Yemen</td><td>MTN</td><td>Available</td></tr></tbody></table>

#### Central and South America

Refer to the [network availability definitions](https://docs.korewireless.com/en-us/supersim/available-networks#network-availability).

<table data-header-hidden="false" data-header-sticky><thead><tr><th>Country</th><th>Network Name</th><th>Network Availability</th></tr></thead><tbody><tr><td>Anguilla</td><td>C+W LIME</td><td>Available</td></tr><tr><td>Antigua and Barbuda</td><td>APUA PCS (Antigua Public Utilities Authority) / imobile</td><td>Available</td></tr><tr><td>Antigua and Barbuda</td><td>C+W LIME</td><td>Available</td></tr><tr><td>Argentina</td><td>Telefonica</td><td>Available</td></tr><tr><td>Argentina</td><td>Personal</td><td>Available</td></tr><tr><td>Argentina</td><td>[P] Claro</td><td>Available</td></tr><tr><td>Aruba</td><td>Setar</td><td>Available</td></tr><tr><td>Bahamas</td><td>BTC</td><td>Available</td></tr><tr><td>Bahamas</td><td>Aliv</td><td>Available</td></tr><tr><td>Barbados</td><td>C+W LIME</td><td>Available</td></tr><tr><td>Belize</td><td>DigiCell</td><td>Available</td></tr><tr><td>Bermuda</td><td>M3 Wireless</td><td>Available</td></tr><tr><td>Bolivia, The Plurinational State of</td><td>Nuevatel</td><td>Available</td></tr><tr><td>Bolivia, The Plurinational State of</td><td>Tigo</td><td>Available</td></tr><tr><td>Brazil</td><td>[60] Vivo</td><td>Available</td></tr><tr><td>Brazil</td><td>[60] TIM</td><td>Backup</td></tr><tr><td>British Virgin Islands</td><td>C+W LIME</td><td>Available</td></tr><tr><td>British Virgin Islands</td><td>[P] Digicel</td><td>Available</td></tr><tr><td>Caribbean Netherlands</td><td>[P] Digicel</td><td>Available</td></tr><tr><td>Caribbean Netherlands</td><td>UTS</td><td>Backup</td></tr><tr><td>Cayman Islands</td><td>C+W LIME</td><td>Available</td></tr><tr><td>Chile</td><td>Entel</td><td>Available</td></tr><tr><td>Chile</td><td>Telefonica</td><td>Available</td></tr><tr><td>Chile</td><td>[U] Claro</td><td>Backup</td></tr><tr><td>Colombia</td><td>[U] Claro</td><td>Available</td></tr><tr><td>Colombia</td><td>Telefonica</td><td>Available</td></tr><tr><td>Colombia</td><td>Tigo</td><td>Available</td></tr><tr><td>Costa Rica</td><td>Telefonica</td><td>Available</td></tr><tr><td>Costa Rica</td><td>ICE</td><td>Backup</td></tr><tr><td>Dominica</td><td>C+W LIME</td><td>Available</td></tr><tr><td>Dominican Republic</td><td>Orange</td><td>Available</td></tr><tr><td>Dominican Republic</td><td>[U] Claro</td><td>Backup</td></tr><tr><td>Dominican Republic</td><td>Viva</td><td>Backup</td></tr><tr><td>Ecuador</td><td>Telefonica</td><td>Available</td></tr><tr><td>El Salvador</td><td>Telefonica</td><td>Available</td></tr><tr><td>El Salvador</td><td>[U] Claro</td><td>Backup</td></tr><tr><td>El Salvador</td><td>Tigo</td><td>Backup</td></tr><tr><td>Falkland Islands</td><td>Cable</td><td>Available</td></tr><tr><td>Grenada</td><td>C+W LIME</td><td>Available</td></tr><tr><td>Guadeloupe</td><td>Orange</td><td>Available</td></tr><tr><td>Guadeloupe</td><td>[P] Digicel</td><td>Backup</td></tr><tr><td>Guatemala</td><td>[U] Claro</td><td>Available</td></tr><tr><td>Guatemala</td><td>[U] Telefonica</td><td>Available</td></tr><tr><td>Guatemala</td><td>Tigo</td><td>Available</td></tr><tr><td>Guyana</td><td>Guyana Telephone</td><td>Available</td></tr><tr><td>Guyana</td><td>[P] Digicel</td><td>Available</td></tr><tr><td>Honduras</td><td>[U] Claro</td><td>Available</td></tr><tr><td>Honduras</td><td>Tigo</td><td>Available</td></tr><tr><td>Jamaica</td><td>C+W LIME</td><td>Available</td></tr><tr><td>Jamaica</td><td>[P] Digicel</td><td>Available</td></tr><tr><td>Montserrat</td><td>C+W LIME</td><td>Available</td></tr><tr><td>Nicaragua</td><td>Telefonica</td><td>Available</td></tr><tr><td>Panama</td><td>Telefonica</td><td>Available</td></tr><tr><td>Panama</td><td>Cable &#x26; Wireless</td><td>Backup</td></tr><tr><td>Paraguay</td><td>Personal</td><td>Available</td></tr><tr><td>Paraguay</td><td>Tigo</td><td>Available</td></tr><tr><td>Paraguay</td><td>[U] Claro</td><td>Backup</td></tr><tr><td>Peru</td><td>Telefonica</td><td>Available</td></tr><tr><td>Peru</td><td>[U] Claro</td><td>Backup</td></tr><tr><td>Puerto Rico</td><td>[U] Claro</td><td>Available</td></tr><tr><td>Saint Kitts and Nevis</td><td>C+W LIME</td><td>Available</td></tr><tr><td>Saint Lucia</td><td>C+W LIME</td><td>Available</td></tr><tr><td>Saint Vincent and the Grenadines</td><td>C+W LIME</td><td>Available</td></tr><tr><td>Suriname</td><td>[P] Digicel</td><td>Available</td></tr><tr><td>Trinidad and Tobago</td><td>[P] Digicel</td><td>Available</td></tr><tr><td>Trinidad and Tobago</td><td>Dauphin</td><td>Backup</td></tr><tr><td>Turks and Caicos Islands</td><td>C+W LIME</td><td>Available</td></tr><tr><td>Uruguay</td><td>Telefonica</td><td>Available</td></tr><tr><td>Uruguay</td><td>Antel</td><td>Available</td></tr><tr><td>Uruguay</td><td>Claro</td><td>Available</td></tr><tr><td>Venezuela</td><td>Telefonica</td><td>Available</td></tr></tbody></table>

#### Europe

Refer to the [network availability definitions](https://docs.korewireless.com/en-us/supersim/available-networks#network-availability).

<table data-header-hidden="false" data-header-sticky data-search="true"><thead><tr><th>Country</th><th>Network Name</th><th>Network Availability</th></tr></thead><tbody><tr><td>Albania</td><td>Telekom Albania</td><td>Available</td></tr><tr><td>Albania</td><td>ALBtelecom Mobile</td><td>Available</td></tr><tr><td>Andorra</td><td>Andorra Telecom</td><td>Available</td></tr><tr><td>Austria</td><td>H3G</td><td>Available</td></tr><tr><td>Austria</td><td>A1</td><td>Available</td></tr><tr><td>Belarus</td><td>A1</td><td>Available</td></tr><tr><td>Belarus</td><td>Beltelecom</td><td>Available</td></tr><tr><td>Belarus</td><td>MTS</td><td>Backup</td></tr><tr><td>Belgium</td><td>Proximus</td><td>Available</td></tr><tr><td>Belgium</td><td>Orange</td><td>Available</td></tr><tr><td>Belgium</td><td>Base</td><td>Available</td></tr><tr><td>Bosnia and Herzegovina</td><td>BH Telecom</td><td>Available</td></tr><tr><td>Bosnia and Herzegovina</td><td>m:tel</td><td>Available</td></tr><tr><td>Bosnia and Herzegovina</td><td>Eronet</td><td>Backup</td></tr><tr><td>Bulgaria</td><td>Vivacom</td><td>Available</td></tr><tr><td>Bulgaria</td><td>A1</td><td>Available</td></tr><tr><td>Bulgaria</td><td>Globul</td><td>Available</td></tr><tr><td>Croatia</td><td>Tele2</td><td>Available</td></tr><tr><td>Croatia</td><td>A1</td><td>Available</td></tr><tr><td>Croatia</td><td>T-Mobile</td><td>Available</td></tr><tr><td>Cyprus</td><td>Cytamobile-Vodafone</td><td>Available</td></tr><tr><td>Cyprus</td><td>MTN</td><td>Backup</td></tr><tr><td>Czech Republic</td><td>O2</td><td>Available</td></tr><tr><td>Czech Republic</td><td>Vodafone</td><td>Available</td></tr><tr><td>Czech Republic</td><td>T-Mobile</td><td>Backup</td></tr><tr><td>Denmark</td><td>Telenor</td><td>Available</td></tr><tr><td>Denmark</td><td>Telia</td><td>Available</td></tr><tr><td>Denmark</td><td>Hi3G</td><td>Available</td></tr><tr><td>Denmark</td><td>TDC</td><td>Available</td></tr><tr><td>Estonia</td><td>Tele2</td><td>Available</td></tr><tr><td>Estonia</td><td>Telia Eesti</td><td>Available</td></tr><tr><td>Estonia</td><td>Elisa</td><td>Available</td></tr><tr><td>Faroe Islands</td><td>Faroese Telecom</td><td>Available</td></tr><tr><td>Finland</td><td>DNA</td><td>Available</td></tr><tr><td>Finland</td><td>Telia</td><td>Available</td></tr><tr><td>France</td><td>Orange</td><td>Available</td></tr><tr><td>France</td><td>SFR</td><td>Backup</td></tr><tr><td>France</td><td>Bouygues Telecom</td><td>Backup</td></tr><tr><td>France</td><td>Free Mobile</td><td>Backup</td></tr><tr><td>Germany</td><td>Telefonica O2</td><td>Available</td></tr><tr><td>Germany</td><td>Vodafone</td><td>Available</td></tr><tr><td>Germany</td><td>Telekom</td><td>Backup</td></tr><tr><td>Gibraltar</td><td>Gibtel</td><td>Available</td></tr><tr><td>Greece</td><td>Vodafone</td><td>Available</td></tr><tr><td>Greece</td><td>Wind Hellas</td><td>Backup</td></tr><tr><td>Greece</td><td>Cosmote</td><td>Backup</td></tr><tr><td>Greenland</td><td>TELE Greenland</td><td>Available</td></tr><tr><td>Hungary</td><td>Telenor</td><td>Available</td></tr><tr><td>Hungary</td><td>Vodafone</td><td>Available</td></tr><tr><td>Hungary</td><td>Magyar Telekom</td><td>Backup</td></tr><tr><td>Iceland</td><td>Siminn</td><td>Available</td></tr><tr><td>Iceland</td><td>Nova</td><td>Backup</td></tr><tr><td>Ireland</td><td>Eir</td><td>Available</td></tr><tr><td>Ireland</td><td>H3G</td><td>Available</td></tr><tr><td>Ireland</td><td>Vodafone</td><td>Available</td></tr><tr><td>Italy</td><td>Wind Tre</td><td>Available</td></tr><tr><td>Italy</td><td>Iliad Italia</td><td>Available</td></tr><tr><td>Italy</td><td>Vodafone Omnitel</td><td>Available</td></tr><tr><td>Italy</td><td>TIM</td><td>Available</td></tr><tr><td>Kosovo</td><td>IPKO</td><td>Available</td></tr><tr><td>Latvia</td><td>Tele2</td><td>Available</td></tr><tr><td>Latvia</td><td>LMT</td><td>Available</td></tr><tr><td>Liechtenstein</td><td>Mobilkom Liechtenstein</td><td>Available</td></tr><tr><td>Liechtenstein</td><td>Orange</td><td>Available</td></tr><tr><td>Lithuania</td><td>Tele2</td><td>Available</td></tr><tr><td>Lithuania</td><td>Omnitel</td><td>Available</td></tr><tr><td>Luxembourg</td><td>Tango</td><td>Available</td></tr><tr><td>Luxembourg</td><td>Orange</td><td>Available</td></tr><tr><td>Luxembourg</td><td>P&#x26;T Luxembourg</td><td>Available</td></tr><tr><td>Malta</td><td>Go Mobile</td><td>Available</td></tr><tr><td>Malta</td><td>Vodafone</td><td>Available</td></tr><tr><td>Moldova</td><td>Orange</td><td>Available</td></tr><tr><td>Moldova</td><td>Moldcell</td><td>Backup</td></tr><tr><td>Monaco</td><td>Monaco Telecom</td><td>Available</td></tr><tr><td>Montenegro</td><td>MTEL</td><td>Available</td></tr><tr><td>Montenegro</td><td>Crnogorski Telekom</td><td>Backup</td></tr><tr><td>Netherlands</td><td>KPN</td><td>Available</td></tr><tr><td>Netherlands</td><td>Vodafone</td><td>Available</td></tr><tr><td>Netherlands</td><td>T-Mobile</td><td>Backup</td></tr><tr><td>North Macedonia</td><td>VIP Operator</td><td>Available</td></tr><tr><td>North Macedonia</td><td>T-Mobile</td><td>Backup</td></tr><tr><td>Norway</td><td>Telenor</td><td>Available</td></tr><tr><td>Norway</td><td>Telia Norge</td><td>Available</td></tr><tr><td>Poland</td><td>Orange Polska</td><td>Available</td></tr><tr><td>Poland</td><td>Plus</td><td>Available</td></tr><tr><td>Poland</td><td>Play</td><td>Backup</td></tr><tr><td>Poland</td><td>T-Mobile Polska</td><td>Backup</td></tr><tr><td>Portugal</td><td>Optimus</td><td>Available</td></tr><tr><td>Portugal</td><td>Vodafone</td><td>Available</td></tr><tr><td>Portugal</td><td>TMN</td><td>Backup</td></tr><tr><td>Romania</td><td>Orange</td><td>Available</td></tr><tr><td>Romania</td><td>Vodafone</td><td>Available</td></tr><tr><td>Romania</td><td>Digi</td><td>Backup</td></tr><tr><td>Serbia</td><td>Vip Mobile</td><td>Available</td></tr><tr><td>Serbia</td><td>Telenor</td><td>Available</td></tr><tr><td>Serbia</td><td>Telekom Srbija</td><td>Available</td></tr><tr><td>Slovakia</td><td>O2</td><td>Available</td></tr><tr><td>Slovakia</td><td>Orange</td><td>Available</td></tr><tr><td>Slovenia</td><td>A1</td><td>Available</td></tr><tr><td>Slovenia</td><td>Mobitel</td><td>Available</td></tr><tr><td>Slovenia</td><td>Telemach</td><td>Backup</td></tr><tr><td>Spain</td><td>Orange</td><td>Available</td></tr><tr><td>Spain</td><td>Vodafone</td><td>Available</td></tr><tr><td>Spain</td><td>Telefonica</td><td>Available</td></tr><tr><td>Sweden</td><td>Telenor</td><td>Available</td></tr><tr><td>Sweden</td><td>H3G</td><td>Available</td></tr><tr><td>Sweden</td><td>Telia</td><td>Available</td></tr><tr><td>Sweden</td><td>Tele2</td><td>Backup</td></tr><tr><td>Switzerland</td><td>[P] Salt</td><td>Available</td></tr><tr><td>Switzerland</td><td>[P] Sunrise</td><td>Available</td></tr><tr><td>Ukraine</td><td>[U] KyivStar</td><td>Available</td></tr><tr><td>Ukraine</td><td>[U] Vodafone</td><td>Available</td></tr><tr><td>Ukraine</td><td>Lifecell</td><td>Backup</td></tr><tr><td>United Kingdom</td><td>Jersey Telecom</td><td>Available</td></tr><tr><td>United Kingdom</td><td>EE</td><td>Available</td></tr><tr><td>United Kingdom</td><td>Vodafone</td><td>Available</td></tr><tr><td>United Kingdom</td><td>H3G</td><td>Available</td></tr><tr><td>United Kingdom</td><td>Telefonica O2</td><td>Available</td></tr><tr><td>United Kingdom</td><td>[P] C+W Sure</td><td>Backup</td></tr><tr><td>United Kingdom</td><td>Airtel-Vodafone</td><td>Backup</td></tr><tr><td>United Kingdom</td><td>Manx</td><td>Backup</td></tr></tbody></table>

#### North America

Refer to the [network availability definitions](https://docs.korewireless.com/en-us/supersim/available-networks#network-availability).

<table data-header-hidden="false" data-header-sticky><thead><tr><th>Country</th><th>Network Name</th><th>Network Availability</th></tr></thead><tbody><tr><td>Canada</td><td>Bell</td><td>Available</td></tr><tr><td>Canada</td><td>Rogers Wireless</td><td>Available</td></tr><tr><td>Canada</td><td>Telus</td><td>Available</td></tr><tr><td>Canada</td><td>Videotron</td><td>Available</td></tr><tr><td>Mexico</td><td>[U] TelCel</td><td>Available</td></tr><tr><td>Mexico</td><td>Telefonica</td><td>Available</td></tr><tr><td>Mexico</td><td>AT&#x26;T Mexico</td><td>Backup</td></tr><tr><td>United States of America</td><td>AT&#x26;T</td><td>Available</td></tr><tr><td>United States of America</td><td>Union Telecom</td><td>Available</td></tr><tr><td>United States of America</td><td>Verizon</td><td>Available</td></tr><tr><td>United States of America</td><td>T-Mobile</td><td>Available</td></tr><tr><td>United States of America</td><td>[U] Alaska Wireless</td><td>Available</td></tr></tbody></table>

#### Oceania

Refer to the [network availability definitions](https://docs.korewireless.com/en-us/supersim/available-networks#network-availability).

<table data-header-hidden="false" data-header-sticky><thead><tr><th>Country</th><th>Network Name</th><th>Network Availability</th></tr></thead><tbody><tr><td>Australia</td><td>[P] Telstra</td><td>Available</td></tr><tr><td>Australia</td><td>Optus</td><td>Available</td></tr><tr><td>Fiji</td><td>Digicel</td><td>Available</td></tr><tr><td>French Polynesia</td><td>Pacific Mobile Telecom</td><td>Available</td></tr><tr><td>French Polynesia</td><td>Vini</td><td>Available</td></tr><tr><td>New Zealand</td><td>Vodafone</td><td>Available</td></tr><tr><td>New Zealand</td><td>2degrees</td><td>Backup</td></tr><tr><td>New Zealand</td><td>Spark</td><td>Backup</td></tr><tr><td>Papua New Guinea</td><td>Digicel</td><td>Available</td></tr><tr><td>Samoa</td><td>Digicel</td><td>Available</td></tr><tr><td>Tonga</td><td>Digicel</td><td>Available</td></tr><tr><td>Vanuatu</td><td>Digicel</td><td>Available</td></tr></tbody></table>

## **Permanent Roaming Condition**

* \[U] Upfront permission needed for IoT deployments: KORE has to request approval and get approval from the IMSI partners in advance of IoT deployments.
* \[P] Upfront permission needed for permanent roaming. In case of permanent roaming whereby the IMSI is more than 30 consecutive days in the same visited network an approval is required from the IMSI sponsor.
* \[60] Roaming is restricted to 60 days: Not allowed to roam longer than 60 consecutive days.
* \[90] Roaming is restricted to 90 days: Not allowed to roam longer than 90 consecutive days.
* \[AC] Permanent Roaming is allowed subject to an additional charge/fee. In case of permanent roaming whereby the IMSI is more than 30 consecutive days in the same visited network an additional charge/fee is applied to KORE from the IMSI sponsor.
* \[LR] Roaming is restricted subject to local registration.

## References

* [Super SIM Available Networks (4-IMSI)](https://docs.korewireless.com/supersim/available-networks)
* [New KORE Super SIM SKU & IMSI Update - June 2026](https://docs.korewireless.com/supersim/super-sim-advisories/new-kore-super-sim-sku-and-imsi-update-june-2026)


# Super SIM’s Multi-IMSI Applet

Super SIM's multi-IMSI technology enables access to the best networks with redundant backup access to keep your devices connected

Believe it or not, SIMs (Subscriber Identity Modules) are able to run small applications, called applets. Every Super SIM contains an applet which can switch the IMSI used in order to give you access to the widest selection of networks and redundant paths over which your data can be sent. To have the best experience with Super SIM, it's important to understand how this applet interacts with your device.

## What is an IMSI?

An International Mobile Subscriber Identity (IMSI) identifies a single user of the cellular network. When a device connects to a cellular network, that network uses the IMSI to check with the SIM's home network to query what privileges the network should allow the SIM: whether it can use data, whether it can use SMS — and even whether it's allowed to attach to that network at all.

## Single IMSI SIMs

A SIM generally contains only one IMSI. If that IMSI's home network doesn't have a roaming agreement with the network to which one of your devices is trying to attach, then the device will not be able to connect to that network. Neither will any of your other devices.

There's another problem inherent in having just one IMSIs: the operator of your home network is a single point of failure. All of your data has to be transmitted through its infrastructure. If anything goes wrong there, your devices will not be able to connect to your backend even if the local network that your device is attached to is performing perfectly.

## Super SIM's multi-IMSI approach

To bypass these limitations, each Super SIM holds multiple IMSIs. The SIM uses the multi-IMSI applet to switch between these IMSIs in order to give you access to the best selection of networks at the best rates in whatever country your device is currently located. Super SIM might therefore use one IMSI in the United States and a completely different IMSI when the device is moved to Australia because of either better network availability or better pricing.

### IMSI switching with Super SIM

There are a number of different situations that will cause a Super SIM to switch its IMSI. When an IMSI switch occurs, the applet will communicate with your device using "proactive commands" — instructions sent by the SIM to the device — offered by the [Card Application Toolkit](https://en.wikipedia.org/wiki/SIM_Application_Toolkit), a component of the standard [GSM](https://en.wikipedia.org/wiki/GSM) system.

{% hint style="info" %}
When a Super SIM changes its IMSI, the applet sends a `REFRESH` proactive command to the host device. This instructs the device to re-read the data on the SIM, including the new IMSI. Take a look at [**The REFRESH Proactive Command**](#the-refresh-proactive-command), below, for more details on how this works.
{% endhint %}

**Scenario 1: the device is in a new location**

Each Super SIM has a table that indicates which IMSI it should use in a given country. If the applet detects a Location Status event, a Status command, or an update to the LOCI (LOCation Information) files on your device, it will use the location data and the table to determine if it is using the preferred IMSI for that country. If it is not, the applet will switch to the preferred IMSI.

**Scenario 2: the device is unable to connect to all visible networks**

Many devices record the networks they have attempted to attach to but were not able to do so. This ensures they don't waste time attempting to connect to those networks in future. The record is called a forbidden networks (FPLMN) list. When all of the networks currently visible to the device are listed as forbidden networks, the applet on the SIM will switch IMSI to try to attach again with a different IMSI.

{% hint style="info" %}
On each IMSI switch, the FPLMN list will be cleared just before the `REFRESH` proactive command is sent.
{% endhint %}

**Scenario 3: The SIM's onboard timer expires**

Super SIMs are able to handle host devices that don't support either of the IMSI switching mechanisms outlined above. If the Super SIM enters Limited Service mode — because the device has not been unable to attach to any networks — it starts a timer. If the timer expires and the SIM is still in Limited Service, the applet now switches the IMSI and sends a `REFRESH` proactive command to the device.

The duration of the timer is approximately 180 seconds (three minutes).

{% hint style="warning" %}
If your device automatically restarts after a specified period of time during which it wasn't able to establish a data connection, make sure that the period is greater than the Super SIM's IMSI switching timer duration, or the applet's timer will not fire and the IMSI will not change accordingly. This is because your device may reset the onboard timer when it restarts.
{% endhint %}

### The REFRESH proactive command

When a Super SIM's multi-IMSI applet switches the IMSI, a `REFRESH` proactive command is sent to the host device. This instruction informs the device that the contents or structure of the Elementary Files (EFs) on the SIM have been changed. This command instructs the device to refresh the information it holds about the SIM and is therefore expected to reload the EFs and other data, including the IMSI, from the SIM.

The Super SIM multi-IMSI applet follows the [ETSI Technical Specification 102 223 Release 6](https://www.etsi.org/deliver/etsi_ts/102200_102299/102223/06.14.00_60/ts_102223v061400p.pdf). The `REFRESH` proactive command sent by the applet uses command qualifier `00 - NAA Initialization and Full File Change Notification`.

{% hint style="warning" %}
Later releases of ETSI TS 102 223 discourage the use of command qualifier `00`. However, using the suggested alternative command qualifier, `04 - UICC Reset`, can result in the device resetting and prompting the user for the SIM PIN, leaving the device disconnected from the network. To avoid this, the multi-IMSI applet continues to use command qualifier `00`.
{% endhint %}

## Example

Here is an example of Super SIM's multi-IMSI applet in action.

1. The SIM is initially provisioned with IMSI 1 as the active IMSI.
2. The SIM attaches to a German network (MCC 262).
3. Later, the SIM travels to Argentina (MCC 722).
4. The SIM tries to attach to a network in Argentina using the active IMSI, IMSI 1. However, no roaming agreement is in place, so IMSI 1 is rejected by the visited network.
5. The SIM applet finds Argentina (MCC 722) as the new location.
6. The SIM applet overwrites the active IMSI: IMSI 1 is replaced with IMSI 3 according to IMSI Selection Table.
7. The SIM sends the `REFRESH` proactive command to the device and a new network attach is performed using IMSI 3 .
8. The SIM is connected with IMSI 3 on an Argentine network partner.

## Advanced: Using local AT commands to control applet

You can use local AT commands issued to the SIM via your modem to control the multi-IMSI applet. Each `AT+CSIM` command can be used to trigger some action within the SIM. It instructs the module to relay to the SIM an embedded Application Protocol Data Unit (APDU) `ENVELOPE` command. This, in turn, contains proprietary instructions for the SIM.

{% hint style="warning" %}
As of April 2025, we are in the process of updating our SIM applets. Later in 2025, we will begin producing SIM hardware and SIM profiles with new applets. Additionally, we intend to over-the-air (OTA) update existing SIMs with the new applets. The new applets will have different AT commands. Be sure to take this into consideration before implementing any regular use of these AT commands in your device's firmware.

To learn about other planned changes to the SIM hardware and applets as part of this initiative, see our [migration guide](/twilio-iot-acquisition/migration-guides/migrating-to-the-new-super-sim-hardware).

The table below documents both the current SIM applet command and new command that will be needed to trigger the action in the new applet to be released later in 2025.
{% endhint %}

<table><thead><tr><th width="187">Command Name</th><th>Description</th><th width="186.51171875">Current SIM Applets</th><th>New SIM Applets</th></tr></thead><tbody><tr><td><strong>Query SIM Status</strong></td><td>Request details about the multi-IMSI applet such as whether or not the applet is in automatic switching mode.</td><td><p>Request:</p><p><code>AT+CSIM=26,"80C2000008CF06020282814C00"</code></p><p></p><p>Response: </p><p>See <a href="#query-sim-status-responses">Query SIM Status Responses </a>below</p></td><td><p>Request: <code>AT+CSIM=28,"80C2000009CF0702028281B30100"</code></p><p></p><p>Response: </p><p>See <a href="#query-sim-status-responses">Query SIM Status Responses</a> below</p></td></tr><tr><td><strong>Force IMSI Switch</strong></td><td>Switch to the next IMSI. If the IMSI you switch to is not the Preferred IMSI for the current location, this will be a temporary change. Will return to automatic mode at Return to Priority Timer or the device is rebooted.</td><td><p>Request: <code>AT+CSIM=28,"80C2000009CF07020282814E0101"</code> </p><p></p><p>Response:</p><p><code>+CSIM: 4, "910B"</code></p></td><td><p>Request:</p><p><code>AT+CSIM=28,"80C2000009CF0702028281A001AA"</code></p><p></p><p>Responses:</p><p> <code>+CSIM: 4,"9000"</code> </p><p>or</p><p><code>+CSIM: 4,"6109"</code> if there is a response with 9 byte</p></td></tr><tr><td><strong>Return to Automatic Switching</strong></td><td>Set the SIM to automatic switching mode.</td><td><p>Request: <code>AT+CSIM=36,"80C200000DCF0B020282814F050190000000"</code></p><p></p><p>Response:</p><p><code>+CSIM: 4, "9000</code></p></td><td><p>Request: <code>AT+CSIM=28,"80C2000009CF0702028281A001EE"</code></p><p></p><p>Responses:</p><p><code>+CSIM: 4,"9000"</code> </p><p>or</p><p><code>+CSIM: 4,"6109"</code> if there is a response with 9 bytes</p></td></tr><tr><td><strong>Lock IMSI</strong></td><td><p>Disables automatic switching so the SIM will only use the current IMSI. </p><p></p><p><strong>Warning: this</strong> <strong>persists</strong> <strong>through device/modem reboots.</strong> </p><p></p><p>To restore Super SIM’s normal behavior, you must use the Return to Automatic Switching command.</p></td><td>Not available</td><td><p>Request: <code>AT+CSIM=28,"80C2000009CF0702028281A001BB"</code></p><p></p><p>Responses:</p><p><code>+CSIM: 4,"9000"</code> </p><p>or</p><p><code>+CSIM: 4,"6109"</code> if there is a response with 9 byte</p></td></tr><tr><td><strong>Switch to Last Working IMSI</strong></td><td>Will return to automatic mode at Return to Priority Timer or the device is rebooted.</td><td>Not available</td><td><p>Request: <code>AT+CSIM=28,"80C2000009CF0702028281A001CC"</code></p><p></p><p>Responses: </p><p><code>+CSIM: 4,"9000"</code> </p><p>or</p><p><code>+CSIM: 4,"6109"</code> if there is a response with 9 bytes</p></td></tr><tr><td><strong>Switch to Preferred IMSI</strong></td><td><p>Switches to the Preferred IMSI for the current location.</p><p></p><p>Will return to automatic mode at Return to Priority Timer or the device is rebooted.</p></td><td>Not available</td><td><p>Request: <code>AT+CSIM=28,"80C2000009CF0702028281A001DD"</code> </p><p></p><p>Responses:</p><p><code>+CSIM: 4,"9000"</code></p><p>or</p><p><code>+CSIM: 4,"6109"</code> if there is a response with 9 bytes</p></td></tr></tbody></table>

### **Query SIM status responses**

#### **Current Applet**

The crucial point is that you can use the returned data to check applet status. Look at the first hexadecimal byte of the response. This should be `80`, which indicates that the SIM is set to switch IMSIs automatically. The value is a bitfield. Bit 7 should always be set; bit 0 indicates the applet's current operation mode: if it is clear, the applet will switch IMSIs automatically.

```bash
AT+CSIM=26,"80C2000008CF06020282814C00"

+CSIM: 24,"80FF200000000F00009000"
```

Some modems may require a second command to read the response you're after. If your modem returns `+CSIM: 4, "6109"` you will need to issue a second command to read the response.

```bash
AT+CSIM=26,"80C2000008CF06020282814C00"
+CSIM: 4, "6109"

AT+CSIM=10,"00C0000009"
+CSIM: 24,"80FF200000000F00009000"
```

If you get the SIM status after forcing the SIM to switch to the next IMSI, the first byte of the response should no longer be 80. Common values are A1 and 82 depending on the point in the process at which you complete the query, but other values may be seen.

A1 means that the applet's timer is in operation (bit 6 is set) and the applet is in Default IMSI mode (bit 0 is set). When the timer fires, the applet will switch to Automatic mode.

82 indicates that the applet has switched from Default IMSI mode to Automatic mode. Bit 1 is set when the applet mode changes.

If you query the SIM's status again after running the command to put it back into automatic IMSI switching mode, the first byte of the response will once more be `80` — IMSI switching will take place automatically.

#### **New Applet**

If you run the query SIM status command, you will get a response from which you can decode various settings on the SIM. Note that the response below is an example.

```bash
AT+CSIM=28,"80C2000009CF0702028281B30100"
+CSIM: 4,"6109" #Command Executed and there is a response data of 9 bytes

AT+CSIM=10,"00C0000009"
+CSIM: 22,"010403029500FF95759000" #Example repsonse. Yours will be different.
```

Use the table below to understand what different bytes of the response convey:

<table><thead><tr><th width="96.744140625">Byte</th><th>Description</th><th>Values</th></tr></thead><tbody><tr><td>1</td><td>Automatic switch mode status</td><td><code>00</code>= Disabled<br><code>01</code>= Enabled</td></tr><tr><td>2</td><td>Current active IMSI. Indicates the position of the IMSI in the IMSI list starting from <code>01</code>.</td><td><code>01</code>, <code>02</code>, <code>03</code>, ...</td></tr><tr><td>3</td><td>Last working IMSI. Indicates the position of the IMSI in the IMSI list starting from <code>01</code>.</td><td><code>01</code>, <code>02</code>, <code>03</code>, ...</td></tr><tr><td>4-6</td><td>Timer left for switch back to preferred IMSI. 3 bytes in swap format.</td><td>Example: <code>029500</code></td></tr><tr><td>7-9</td><td>First network latch time from TP.</td><td>Example: <code>FF9575</code></td></tr></tbody></table>

### Advanced example: Using manual AT commands

The example below shows how to use the AT Commands to combine multiple local commands to understand the status of the multi-IMSI applet and force the SIM to switch to the next IMSI.

{% hint style="warning" %}
This example uses the AT Commands of the current multi-IMSI applet as of April 2025. Later in 2025, we will begin producing SIM hardware and SIM profiles with new applets. Additionally, we intend to over-the-air (OTA) update existing SIMs with the new applets. The new applets will have different AT commands. Be sure to take this into consideration before implementing any regular use of these AT commands in your device's firmware.

To learn about other planned changes to the SIM hardware and applets as part of this initiative, see our [migration guide](https://docs.korewireless.com/en-us/twilio-iot-acquisition/migration-guides/migrating-to-the-new-super-sim-hardware).
{% endhint %}

**Query SIM status**

The following `AT+CSIM` command can be used to read the status of the multi-IMSI applet. It instructs the module to relay to the SIM an embedded Application Protocol Data Unit (APDU) `ENVELOPE` command. This, in turn, contains proprietary instructions for the SIM.

The crucial point is that you can use the returned data to check applet status. Look at the first hexadecimal byte of the response. This should be `80`, which indicates that the SIM is set to switch IMSIs automatically. The value is a bitfield. Bit 7 should always be set; bit 0 indicates the applet's current operation mode: if it is clear, the applet will switch IMSIs automatically.

{% code lineNumbers="true" %}

```bash
AT+CSIM=26,"80C2000008CF06020282814C00"

+CSIM: 24,"80FF200000000F00009000"
```

{% endcode %}

Some modems may require a second command to read the response you're after. If your modem returns `+CSIM: 4, "6109"` you will need to issue a second command to read the response.

{% code lineNumbers="true" %}

```bash
AT+CSIM=26,"80C2000008CF06020282814C00"
+CSIM: 4, "6109"

AT+CSIM=10,"00C0000009"
+CSIM: 24,"80FF200000000F00009000"
```

{% endcode %}

**Force a switch to the next IMSI**

The following command causes the SIM to provide a new IMSI to the module. It will be the next IMSI in its list. This may not be usable in the device's current location, in which case the module will fail to connect, ultimately triggering a further IMSI switch.

{% code lineNumbers="true" %}

```bash
AT+CSIM=28,"80C2000009CF07020282814E0101"

+CSIM: 4,"910B"
```

{% endcode %}

If you query the SIM's status again, the first byte of the response should no longer be `80`. Common values are `A1` and `82` depending on the point in the process at which you complete the query, but other values may be seen.

`A1` means that the applet's timer is in operation (bit 6 is set) and the applet is in Default IMSI mode (bit 0 is set). When the timer fires, the applet will switch to Automatic mode.

`82` indicates that the applet has switched from Default IMSI mode to Automatic mode. Bit 1 is set when the applet mode changes.

**Return to automatic IMSI switching**

As long as the SIM is not already using the preferred IMSI for its location, the following command will cause the SIM to provide a new IMSI to the module. Either way, the multi-IMSI applet will once again be in automatic mode.

{% code lineNumbers="true" %}

```bash
AT+CSIM=36,"80C200000DCF0B020282814F050190000000"

+CSIM: 4,"9000"
```

{% endcode %}

If you query the SIM's status again, the first byte of the response will once more be `80` — IMSI switching will take place automatically.

{% hint style="info" %}
You can find full information on the structure of APDU commands and the responses they may yield by consulting [ETSI Technical Specification 102 221](https://www.etsi.org/deliver/etsi_ts/102200_102299/102221/16.03.00_60/ts_102221v160300p.pdf).
{% endhint %}


# Over-the-Air Updates

Learn when, how and why KORE pushes updates to the settings and applets stored on every Super SIM.

From time to time, KORE will issue updates to Super SIMs to enable new features or to make adjustments to the SIMs' settings, such as which International Mobile Subscriber Identifier (IMSI) the [multi-IMSI applet running on each SIM](/supersim/supersim-multi-imsi-applet) should use in certain circumstances. These are called over-the-air updates (OTA) because they are sent conveniently via the cellular network rather than requiring physical access to the SIM.

{% hint style="info" %}
You can learn more about the different Settings Packages that may be installed on your SIMs, how to determine which Settings Packages and which versions are installed on your SIM, how your SIMs' behavior may change when different versions are installed, and how to check if there are any updates for your SIMs [here](/supersim/how-to/sim-settings).
{% endhint %}

## Updates to network settings

The most frequent updates applied to a Super SIM make changes to its network settings. These settings include which IMSI is to be used in a given country, and which cellular network should be tried first when the host device is attempting to connect. We update these settings regularly as new networks become available and as our commercial partnerships evolve. This approach ensures that you always have the best experience using Super SIM.

{% hint style="warning" %}
As a result of new settings updates applied via OTA updates, the IMSIs on a given Super SIM may change over time. Consequently, it's critical that your devices do not depend on any specific IMSI or on the Mobile Country Code (MCC) and Mobile Network Code (MNC) values that make up the IMSI's prefix[ to determine the Access Point Name (APN) to use](/supersim/how-to/apn-configuration). Always stick with `super`.&#x20;
{% endhint %}

## How the OTA update system works

OTA updates are typically applied using a "pull" method. An applet running on the SIM will periodically establish a dedicated PDP context, and use it to contact the KORE cloud and to check if there are any updates pending. If we have staged an update, the applet will download and install it onto the SIM.

To establish this dedicated connection, the SIM will send the proactive command `OPEN CHANNEL` to your device's cellular module. A dedicated APN, `ota.super`, is used to reach the remote server. Once the check is complete, and any pending update has been retrieved, another proactive command, `CLOSE CHANNEL`, is issued to the modem to instruct it to close the data connection.

{% hint style="info" %}
For more information on the SIM Toolkit and the proactive commands it includes, please see the [ETSI Card Application Toolkit manual](https://www.etsi.org/deliver/etsi_ts/102200_102299/102223/06.14.00_60/ts_102223v061400p.pdf) (PDF).
{% endhint %}

## Advanced: take control of OTA updates

When a cellular module fitted with a Super SIM is powered up, a period of a minute or two will elapse before the OTA update applet asks the modem to establish the data connection it requires to check for pending updates. If the modem sleeps or is powered down before this check is completed, the SIM won't be updated, even if an update is pending. If the module remains powered up, the applet will periodically repeat the checking process, typically about once a week. Power-cycling the modem will normally reset the timer maintained by the applet and cause the applet to contact the server a minute or two after the restart. Power-cycling a device in order to force a update check is not always practical, so a better approach is to force the applet itself to initiate the checking process.&#x20;

You can use a local `AT+CSIM` command issued to the SIM via your modem to trigger the OTA update applet. It instructs the module to relay to the SIM an embedded Application Protocol Data Unit (APDU) `ENVELOPE` command. This, in turn, contains proprietary instructions for the SIM.

{% hint style="warning" %}
As of November 2025, we are in the process of updating our SIM applets. Later in 2026, we will begin producing SIM hardware and SIM profiles with new applets. Additionally, we intend to over-the-air (OTA) update existing SIMs with the new applets. The new applets will have different AT commands. Be sure to take this into consideration before implementing any regular use of these AT commands in your device's firmware.

To learn about other planned changes to the SIM hardware and applets as part of this initiative, see our [migration guide](https://docs.korewireless.com/en-us/twilio-iot-acquisition/migration-guides/migrating-to-the-new-super-sim-hardware).

The table below documents both the current SIM applet command and new command that will be needed to trigger the action in the new applet to be released later in 2026.
{% endhint %}

| Command Name             | Description                                                                                                                               | Current SIM Applets                           | New SIM Applets                                                                                                                                                                                                   |
| ------------------------ | ----------------------------------------------------------------------------------------------------------------------------------------- | --------------------------------------------- | ----------------------------------------------------------------------------------------------------------------------------------------------------------------------------------------------------------------- |
| **Check for OTA Update** | Triggers the Super SIM to open a connection and check-in with the over-the-air update service to see if there are pending updates for it. | `AT+CSIM=30,"80C200000AFD08020282814F020900"` | <p>Request: <code>AT+CSIM=28,"80C2000009CF0702028281A001000"</code></p><p></p><p>Response:</p><p><code>+CSIM: 4,"9000"</code> </p><p>or</p><p><code>+CSIM: 4,"6109"</code> if there is a response with 9 byte</p> |

Manually triggering a check for a pending OTA update this way can be especially useful for devices with limited battery life. This is because this type of device typically transmits in short bursts: it aims to wake up, transmit, and return to sleep as quickly as possible, to preserve its charge. Such approach to transmission is power efficient, but it may not give the SIM time to check for updates.

To allow it to do so, your application can issue the command above to the SIM and set a timer to allow time for the data connection to the `ota.super` APN to be established and for any updates to be installed. When the timer fires, the device can return to sleep.

Some updates may open the `ota.super` context multiple times, usually to update different services or if the size of the data being pushed to the card requires the update is dispatched in multiple blocks. These subsequent updates are opened almost immediately after the first one closes. Your timer setting should allow for any such follow-on connections.

This check does not not need to be made every time the devices wakes, but can be scheduled periodically — once a week, for example — to avoid the cost of bringing up and maintaining the connection for the duration of the timer when there are no updates staged.

This technique allows you to manage your application's power usage — there's no need to leave devices connected for prolonged periods of time — while also ensuring that your SIMs always remain up to date.


# Get Started with Super SIM

Follow step-by-step instructions to create your KORE account, order your first Super SIM, and begin using it.

This guide will walk you through the process of creating your KORE account, ordering your first Super SIM and preparing it for use. Once you've performed these straightforward but essential tasks, you'll be ready to try out Super SIM in an IoT device.

We have a [series of guides](https://docs.korewireless.com/en-us/supersim/supersim-first-steps#test-drive-your-super-sim) which you can follow to get commonly used IoT hardware development platforms connected to KORE's seamless global cellular network — just pick the guide that matches the platform you intend to use to prototype your own IoT hardware, or one you're familiar with, so you can quickly put Super SIM through its paces.

You can also review our [interactive Super SIM demo](https://korewireless.navattic.com/supersim) to explore the entire process, from ordering a SIM to network selection, activation, and usage reporting.&#x20;

The very first step is to obtain a Super SIM and activate it.

## Create Your KORE Account <a href="#create-your-kore-account" id="create-your-kore-account"></a>

Your first step will be to [register](https://docs.korewireless.com/en-us/iam/get-started/first-account) for a KORE Account. You can follow this [step-by-step guide](https://docs.korewireless.com/en-us/iam/get-started/first-account) for instructions on how to create your first Account.

Once you've created your account and are successfully logged in you'll be greeted by [KORE Console](https://console.korewireless.com/) Dashboard.

<figure><img src="https://open.gitbook.com/~gitbook/image?url=https%3A%2F%2F778147064-files.gitbook.io%2F%7E%2Ffiles%2Fv0%2Fb%2Fgitbook-x-prod.appspot.com%2Fo%2Fspaces%252FuQQbnJlSgjMIxsWK06ol%252Fuploads%252Fn5nQ2cAtDU2jyrF7eyug%252Fimage.png%3Falt%3Dmedia%26token%3D8e046ecc-e851-4d26-8372-4af5b5d54e0d&#x26;width=768&#x26;dpr=4&#x26;quality=100&#x26;sign=e27fbd42&#x26;sv=2" alt=""><figcaption></figcaption></figure>

You can now access the Super SIM Console to learn more about the product but you won't be able to do much until you have a Super SIM to use. If you already received a Super SIM from an event, a meeting with a member of our sales team, or requested a free one, you can [register that SIM](#register-a-super-sim) and get started right away. If you don't have one yet, you can [order one from KORE Shop](https://shop.korewireless.com/SIM/Super-SIM).

## Register a Super SIM <a href="#register-a-super-sim" id="register-a-super-sim"></a>

This section only applies if you received a Super SIM from an event, from a member of our sales team, or if you requested a free one. Super SIMs ordered through KORE Shop arrive registered to your account. If you need to order a Super SIM, check out the section [below](https://docs.korewireless.com/en-us/supersim/supersim-first-steps#order-a-super-sim).

If you already have a Super SIM that you received at a developer event, conference, or in-person meeting, or that you received through some other channel, you may need to [register your Super SIM within KORE Console](https://supersim-app.korewireless.com/register-sim).

<figure><img src="/files/SCAFUOEuctQgRRtaSqlf" alt=""><figcaption></figcaption></figure>

Once you have your Super SIM added to your account, you can jump to [how to prepare it for use](https://docs.korewireless.com/en-us/supersim/supersim-first-steps#prepare-a-super-sim-for-use).

## Order a Super SIM <a href="#order-a-super-sim" id="order-a-super-sim"></a>

You can order Super SIMs from the [KORE Shop](https://shop.korewireless.com/SIM/Super-SIM), which you can access either the KORE Console Dashboard or clicking the cart icon on the top navigation bar in the Super SIM Console.&#x20;

<figure><img src="/files/mIiq57ViNAGY6ues9aKQ" alt=""><figcaption></figcaption></figure>

### Quick Guide

Here is a [quick guided tour](https://korewireless.navattic.com/w11a0ufe?g=cmqu9cekv000000iq950uwryx\&s=1) to placing your order in [KORE Shop](https://shop.korewireless.com/SIM).

First, navigate to **SIMS** > **Super SIM** > **Multi-Size (2FF/3FF/4FF)**. Then, follow these three phases to complete your purchase:

#### 1. Select Your Product

1. Select the SIM: Click on **Super SIM - Hardware - Multi-Size SIM**.
2. Set the quantity: Enter your desired number of SIMs in the **Quantity** field.
3. Add to cart: Click **Add To Cart**, then select **View Cart & Checkout**.

#### 2. Begin Checkout

1. Initiate checkout: Click **Proceed to Checkout**.
2. Set shipping: Choose your **Shipping Address** and preferred **Delivery Method**.
3. Set billing: Select your **Payment Method** and **Billing Address**.

#### 3. Review & Place Order

1. **Final review:** Carefully **Review your Order** details for accuracy.
2. **Submit:** Click the **Place Order** button to complete your purchase.

Once your Super SIM has shipped, it will be automatically added to your KORE account. In the meantime, you can start completing some of the steps in the next section straight away to be ready to use it when it arrives — you don't need to have your Super SIM in front of you to complete them.

## Prepare a Super SIM for Use <a href="#prepare-a-super-sim-for-use" id="prepare-a-super-sim-for-use"></a>

### 1. Create a Network Access Profile <a href="#id-1.-create-a-network-access-profile" id="id-1.-create-a-network-access-profile"></a>

Network Access Profiles give you control over which cellular networks your Super SIMs can connect to around the world. You can either start from scratch with a new, empty Network Access Profile and add the networks that best suit your needs, or generate one that starts with all of our cheapest networks around the world already enabled. You can update your Network Access Profile's list of enabled networks at any time.

1. Go to [**Network Access Profiles**](https://supersim.korewireless.com/supersim/network-access-profiles):

<figure><img src="https://open.gitbook.com/~gitbook/image?url=https%3A%2F%2F778147064-files.gitbook.io%2F%7E%2Ffiles%2Fv0%2Fb%2Fgitbook-x-prod.appspot.com%2Fo%2Fspaces%252FuQQbnJlSgjMIxsWK06ol%252Fuploads%252FHcd6Rz9BHkvfwfcV5iks%252Fimage.png%3Falt%3Dmedia%26token%3D7bc4bad9-61e1-4361-b0d9-1ec7de53972c&#x26;width=768&#x26;dpr=4&#x26;quality=100&#x26;sign=20ddfefc&#x26;sv=2" alt=""><figcaption></figcaption></figure>

1. Click the **Create Network Access Profile** button.
2. Give your new Network Access Profile a memorable **Unique Name** to make it easy to identify in future:

   <figure><img src="https://open.gitbook.com/~gitbook/image?url=https%3A%2F%2F778147064-files.gitbook.io%2F%7E%2Ffiles%2Fv0%2Fb%2Fgitbook-x-prod.appspot.com%2Fo%2Fspaces%252FuQQbnJlSgjMIxsWK06ol%252Fuploads%252FwnLJ901hrAvax1TEyfGo%252Fimage.png%3Falt%3Dmedia%26token%3D74ee6406-8944-4a40-8cac-6a6d065fdf43&#x26;width=768&#x26;dpr=4&#x26;quality=100&#x26;sign=140635d6&#x26;sv=2" alt=""><figcaption></figcaption></figure>
3. We recommend you **start from scratch** and explore the networks available to your country and those you're looking to deploy. You can easily enable the networks you want to test out with a few clicks. Alternatively, you can select **Instant global access** to create a Network Access Profiles to start with all of the networks that currently have our lowest data and SMS Command usage rates enabled.
4. Click the **Create** button.
5. You will see the new Network Access Profile's **Networks** tab. This shows a list of mobile networks organized by continent and country. Only networks which have been selected will be accessed by Super SIMs using this Network Access Profile:

   <figure><img src="https://open.gitbook.com/~gitbook/image?url=https%3A%2F%2F778147064-files.gitbook.io%2F%7E%2Ffiles%2Fv0%2Fb%2Fgitbook-x-prod.appspot.com%2Fo%2Fspaces%252FuQQbnJlSgjMIxsWK06ol%252Fuploads%252FWpj6XHD1axBFnJSd0B7X%252Fimage.png%3Falt%3Dmedia%26token%3D34635d1a-f6dc-4e4c-886a-c40fe81dee52&#x26;width=768&#x26;dpr=4&#x26;quality=100&#x26;sign=ded6a815&#x26;sv=2" alt=""><figcaption></figcaption></figure>

If you selected **Instant global access** in step 4, a number of networks will already be enabled for you. If you selected **To start from Scratch**, you will have to select some networks yourself. If you make any changes to the list of selected networks, click the **Update Networks** button at the bottom of the page.

You can update a Network Access Profile's list of networks at any time, using [Console](https://supersim.korewireless.com/supersim/network-access-profiles) or the[ Super SIM API](https://docs.korewireless.com/en-us/api/products/supersim). You can delete Network Access Profiles in [Console](https://supersim.korewireless.com/supersim/network-access-profiles) provided it has not been assigned to a Fleet. If you'd like to know more about Network Access Profiles, take a look at [How to Use Super SIM Fleets and Network Access Profiles](https://docs.korewireless.com/en-us/supersim/how-to/understanding-network-access-profiles).

### 2. Create a Fleet <a href="#id-2.-create-a-fleet" id="id-2.-create-a-fleet"></a>

A Fleet is a way of bringing together one or more Super SIMs to set their behavior as a group. For example, you might want a set of Super SIMs to have their data usage billed the same way and to all accept [SMS Commands](https://docs.korewireless.com/en-us/api/products/supersim/smscommand-resource). Rather than apply these settings to each Super SIM individually — imagine hundreds of thousands of these integrated into IoT devices in the field — you just update the Fleet, and all the Super SIMs in that Fleet automatically adopt the new configuration. Easy.

All Super SIMs inherit their capabilities from the Fleet they've been assigned to, so you need to create a Fleet and add your Super SIM to it before you can use that SIM. The mobile networks a Fleet can use is set through its own Network Access Profile, so you will need to select this too.

You can create a new Fleet using the [Super SIM API](https://docs.korewireless.com/en-us/api/products/supersim) or the [Console](https://supersim.korewireless.com/supersim/fleets). We'll use the latter here because it works well with single Super SIMs, but the [API documentation](https://docs.korewireless.com/en-us/api/products/supersim/fleet-resource) will show you how to work with Fleets when you're managing large volumes of Super SIMs.

1. Go to [**Fleets**](https://supersim.korewireless.com/supersim/fleets).
2. Click the **Create Fleet** button at the top:

   <figure><img src="https://open.gitbook.com/~gitbook/image?url=https%3A%2F%2F778147064-files.gitbook.io%2F%7E%2Ffiles%2Fv0%2Fb%2Fgitbook-x-prod.appspot.com%2Fo%2Fspaces%252FuQQbnJlSgjMIxsWK06ol%252Fuploads%252FEJOhGx2eI824DtF0ry7Y%252Fimage.png%3Falt%3Dmedia%26token%3D35413c17-832a-4218-a377-d1c00ebceac4&#x26;width=768&#x26;dpr=4&#x26;quality=100&#x26;sign=2d136fc6&#x26;sv=2" alt=""><figcaption></figcaption></figure>
3. Give the Fleet a unique, memorable name to make it easy to identify in future:

   <figure><img src="https://open.gitbook.com/~gitbook/image?url=https%3A%2F%2F778147064-files.gitbook.io%2F%7E%2Ffiles%2Fv0%2Fb%2Fgitbook-x-prod.appspot.com%2Fo%2Fspaces%252FuQQbnJlSgjMIxsWK06ol%252Fuploads%252FSS2H6tOSdP5ISOuTQYvf%252Fimage.png%3Falt%3Dmedia%26token%3Db6698428-a63e-4ab9-813f-2e571003c16f&#x26;width=768&#x26;dpr=4&#x26;quality=100&#x26;sign=438066c3&#x26;sv=2" alt=""><figcaption></figcaption></figure>
4. The Console automatically enables the Fleet's **Data** and **SMS Commands** services; leave these as they are for now. In future, you can use these settings to block all the Super SIMs in the Fleet from transferring data across the network, or from receiving [SMS Commands](https://docs.korewireless.com/en-us/api/products/supersim/smscommand-resource).
5. Under **Network Access Profile** select the NAP you created in [Step 1 — Create a Network Access Profile](https://docs.korewireless.com/en-us/supersim/supersim-first-steps#id-1.-create-a-network-access-profile).
6. The Console automatically sets the Fleet's **Data Limit** to 1GB (1,000MB) per month. Each Super SIM assigned to the Fleet can use 1GB of data. This number may be too high or low, depending on your use case. If you have a better estimate for how much data your IoT device needs each month, put that number here now — or update your data limit later if your figure turns out to be a little wide of the mark after testing.
7. Scroll down and click the **Create** button.

You're now ready to activate your Super SIM when it dispatches.

### 3. Assign your Super SIM to the Fleet and activate it <a href="#id-3.-assign-your-super-sim-to-the-fleet-and-activate-it" id="id-3.-assign-your-super-sim-to-the-fleet-and-activate-it"></a>

Once your Super SIM has been shipped, you'll be able to see it in your KORE Account. Now, you can finish configuring it even though you may not have received it yet.

1. Go to [**Super SIM > SIMs**](https://supersim.korewireless.com/supersim/sims)
2. In the list of SIMs, you should see a single Super SIM, which is the one you ordered earlier. Click anywhere on the SIM's row.

<figure><img src="https://open.gitbook.com/~gitbook/image?url=https%3A%2F%2F778147064-files.gitbook.io%2F%7E%2Ffiles%2Fv0%2Fb%2Fgitbook-x-prod.appspot.com%2Fo%2Fspaces%252FuQQbnJlSgjMIxsWK06ol%252Fuploads%252FtdmsftOLRkujrpg1ZgMu%252Fimage.png%3Falt%3Dmedia%26token%3Da699c1c6-6d84-429a-9f76-c545611a11eb&#x26;width=768&#x26;dpr=4&#x26;quality=100&#x26;sign=d32e243e&#x26;sv=2" alt=""><figcaption></figcaption></figure>

1. Take this opportunity, if you haven't already, to give the Super SIM a unique, memorable name — this will make it easier to locate in the future.

   <figure><img src="https://open.gitbook.com/~gitbook/image?url=https%3A%2F%2F778147064-files.gitbook.io%2F%7E%2Ffiles%2Fv0%2Fb%2Fgitbook-x-prod.appspot.com%2Fo%2Fspaces%252FuQQbnJlSgjMIxsWK06ol%252Fuploads%252F2Vu7726ue0xcHR6aGcUG%252Fimage.png%3Falt%3Dmedia%26token%3D2fa8022a-fbc6-4937-a6d5-2d264de178f2&#x26;width=768&#x26;dpr=4&#x26;quality=100&#x26;sign=cc72784d&#x26;sv=2" alt=""><figcaption></figcaption></figure>
2. From the **Fleet** menu, select the Fleet you created in [Step 2 — Create a Fleet](https://docs.korewireless.com/en-us/supersim/supersim-first-steps#id-2.-create-a-fleet).
3. Change the SIM's **Status** from **New** to **Active**.
4. Click the **Save** button.

We've worked through the process for a single SIM, but if you have a larger number of new SIMs to set up, you can use the Bulk Actions functionality provided by the console.

For example, to assign a number of SIMs to the Fleet you created earlier, check the SIMs you want to update, click the **Update SIMs** button, and in the panel that appears, select your new Fleet. Click **Continue** and then confirm the change, and all the selected SIMs will be assigned to the chosen Fleet. You can set the status of those SIMs at the same time.

For full details, please see [**How to Use Console Bulk Actions to Update Multiple Super SIMs**.](https://docs.korewireless.com/en-us/supersim/how-to/how-to-use-console-bulk-actions-to-update-multiple-super-sims)

When you activate a Super SIM by changing its status in the Console from **New** to **Active** (or `new` to `active`, if you're using the API), you will incur a monthly active SIM fee of $2.00. You can change the Super SIM's status to **Inactive** (Console) or `inactive` (API) at any time to disable the SIM and stop incurring the monthly fee. You can reactivate at any time by switching the status back to **Active** /`active`.

### 4. Set your device's APN <a href="#id-4.-set-your-devices-apn" id="id-4.-set-your-devices-apn"></a>

Whichever IoT development hardware you're using, you'll need to set its Access Point Name (APN) to `super`.

This is a straightforward process, but different devices place the settings in different locations, so please follow [these instructions](https://docs.korewireless.com/en-us/supersim/how-to/apn-configuration), which will help you set up your type of device.

#### 5. Enable roaming <a href="#id-5.-enable-roaming" id="id-5.-enable-roaming"></a>

All devices using Super SIM must be set to allow roaming across mobile networks, even if they are only going to be used in the US.

Again, this isn't a complex task, but it will require different steps depending on which device you have added your Super SIM to. Please follow [the instructions](https://docs.korewireless.com/en-us/supersim/how-to/how-enable-roaming) here for your device.

## Test-drive your Super SIM <a href="#test-drive-your-super-sim" id="test-drive-your-super-sim"></a>

Your Super SIM is now ready to be used as the basis for your IoT device's global cellular connectivity — why not try it out with one of our quickstart guides?

* [Get Started with Super SIM, the Raspberry Pi 4, and the Sixfab Base Hat](https://docs.korewireless.com/en-us/supersim/supersim-first-steps/get-started-with-super-sim-the-raspberry-pi-4-and-the-sixfab-base-hat)
* [Get Started with Super SIM, the Raspberry Pi 4, and the Waveshare 4G Hat](https://docs.korewireless.com/en-us/supersim/supersim-first-steps/get-started-with-super-sim-the-raspberry-pi-4-and-the-waveshare-4g-hat)
* [Get Started with Super SIM and the Raspberry Pi Pico](https://docs.korewireless.com/en-us/supersim/supersim-first-steps/get-started-with-data-comms-and-the-raspberry-pi-pico)
* [Get Started with Super SIM SMS Commands and the Raspberry Pi](https://docs.korewireless.com/en-us/supersim/supersim-first-steps/get-started-with-super-sim-sms-commands-and-the-raspberry-pi-pico)
* [Get Started with Super SIM SMS Commands and the Raspberry Pi Pico](https://docs.korewireless.com/en-us/supersim/supersim-first-steps/get-started-with-super-sim-sms-commands-and-the-raspberry-pi-pico)
* [Get Started with Super SIM IP Commands and the Raspberry Pi](https://docs.korewireless.com/en-us/supersim/supersim-first-steps/get-started-with-super-sim-ip-commands-and-the-raspberry-pi)
* [Get Started with Super SIM IP Commands and the Raspberry Pi Pico](https://docs.korewireless.com/en-us/supersim/supersim-first-steps/get-started-with-super-sim-sms-commands-and-the-raspberry-pi-pico)
* [Get Started with Super SIM Connection Events](https://docs.korewireless.com/en-us/supersim/supersim-first-steps/get-started-with-super-sim-esim-profiles-for-euiccs)
* [Get Started with Super SIM eSIM Profiles for eUICC](https://docs.korewireless.com/en-us/supersim/supersim-first-steps/get-started-with-super-sim-esim-profiles-for-euiccs)

## Monitor your Super SIM's Usage <a href="#become-a-super-sim-specialist" id="become-a-super-sim-specialist"></a>

Monitor your Super SIM's usage, which includes information about data uploaded/downloaded and costs over a given timeframe. Select type of insights you'd like to monitor, you can also apply filters to limit scope and groupings to pivot around multiple dimensions. Here are the data insights available to you:

* Usage By Time - select a specific date to get your hourly data.&#x20;
* Usage By SIM - select a 30-day or fewer to get your data by SIM.
* Usage By Fleet - select a date range to get your data by Fleet.
* Usage By Country - select a date range to get your data by Country.
* Usage By Network - select a date range to get your data by Network.

Usage data is available for the last 18 months, starting from July 1st, 2024.

<figure><img src="/files/143zB7upNMkgbSRWClDl" alt=""><figcaption><p>Data Insights: Usage By SIM</p></figcaption></figure>

## Become a Super SIM specialist <a href="#become-a-super-sim-specialist" id="become-a-super-sim-specialist"></a>

All the information you need to become a proficient Super SIM user is right here in the [KORE documentation](https://docs.korewireless.com/en-us/supersim). In particular, check out the [Super SIM API documentation](https://docs.korewireless.com/en-us/api/products/supersim) to get a thorough grounding in how the API can help you wrangle all of your IoT products' Super SIMs.

To discover how Super SIM works and to understand its behaviors, take a look at the left-hand navigation menu's **Help and Support** section, in particular:

* [Super SIM Multi-IMSI](https://docs.korewireless.com/en-us/supersim/supersim-multi-imsi-applet)
* [Super SIM Over-the-Air Updates](https://docs.korewireless.com/en-us/supersim/over-the-air-updates)
* [Super SIM States](https://docs.korewireless.com/en-us/supersim/how-to/how-to-determine-a-super-sims-status)
* [Super SIM Partner Networks](https://docs.korewireless.com/en-us/supersim/available-networks)
* [Super SIM Network Attach Priority Lists](https://docs.korewireless.com/en-us/supersim/how-to/how-and-why-to-set-super-sims-uplmn-table)
* [Super SIM Console Bulk Actions](https://docs.korewireless.com/en-us/supersim/how-to/how-to-use-console-bulk-actions-to-update-multiple-super-sims)

If you need assistance using Super SIM with a specific cellular modem, be sure to investigate the [**Cellular Module Knowledgebase**](https://docs.korewireless.com/en-us/supersim/cellular-module-knowledgebase). It contains configuration and usage information for an array of devices from different manufacturers, and it's growing all the time. It also contains handy generic guidance, which can be invaluable if your chosen module is not yet one of the ones we've detailed.


# Overview

Follow step-by-step instructions to create your KORE account, order your first Super SIM, and begin using it.

This guide will walk you through the process of creating your KORE account, ordering your first Super SIM and preparing it for use. Once you've performed these straightforward but essential tasks, you'll be ready to try out Super SIM in an IoT device.

We have a [series of guides](https://docs.korewireless.com/en-us/supersim/supersim-first-steps#test-drive-your-super-sim) which you can follow to get commonly used IoT hardware development platforms connected to KORE's seamless global cellular network — just pick the guide that matches the platform you intend to use to prototype your own IoT hardware, or one you're familiar with, so you can quickly put Super SIM through its paces.

You can also review our [interactive Super SIM demo](https://korewireless.navattic.com/supersim) to explore the entire process, from ordering a SIM to network selection, activation, and usage reporting.&#x20;

The very first step is to obtain a Super SIM and activate it.

## Create Your KORE Account <a href="#create-your-kore-account" id="create-your-kore-account"></a>

Your first step will be to [register](https://docs.korewireless.com/en-us/iam/get-started/first-account) for a KORE Account. You can follow this [step-by-step guide](https://docs.korewireless.com/en-us/iam/get-started/first-account) for instructions on how to create your first Account.

Once you've created your account and are successfully logged in you'll be greeted by [KORE Console](https://console.korewireless.com/) Dashboard.

<figure><img src="https://open.gitbook.com/~gitbook/image?url=https%3A%2F%2F778147064-files.gitbook.io%2F%7E%2Ffiles%2Fv0%2Fb%2Fgitbook-x-prod.appspot.com%2Fo%2Fspaces%252FuQQbnJlSgjMIxsWK06ol%252Fuploads%252Fn5nQ2cAtDU2jyrF7eyug%252Fimage.png%3Falt%3Dmedia%26token%3D8e046ecc-e851-4d26-8372-4af5b5d54e0d&#x26;width=768&#x26;dpr=4&#x26;quality=100&#x26;sign=e27fbd42&#x26;sv=2" alt=""><figcaption></figcaption></figure>

You can now access the Super SIM Console to learn more about the product but you won't be able to do much until you have a Super SIM to use. If you already received a Super SIM from an event, a meeting with a member of our sales team, or requested a free one, you can [register that SIM](#register-a-super-sim) and get started right away. If you don't have one yet, you can [order one from KORE Shop](https://shop.korewireless.com/SIM/Super-SIM).

## Register a Super SIM <a href="#register-a-super-sim" id="register-a-super-sim"></a>

This section only applies if you received a Super SIM from an event, from a member of our sales team, or if you requested a free one. Super SIMs ordered through KORE Shop arrive registered to your account. If you need to order a Super SIM, check out the section [below](https://docs.korewireless.com/en-us/supersim/supersim-first-steps#order-a-super-sim).

If you already have a Super SIM that you received at a developer event, conference, or in-person meeting, or that you received through some other channel, you may need to [register your Super SIM within KORE Console](https://supersim-app.korewireless.com/register-sim).

<figure><img src="/files/SCAFUOEuctQgRRtaSqlf" alt=""><figcaption></figcaption></figure>

Once you have your Super SIM added to your account, you can jump to [how to prepare it for use](https://docs.korewireless.com/en-us/supersim/supersim-first-steps#prepare-a-super-sim-for-use).

## Order a Super SIM <a href="#order-a-super-sim" id="order-a-super-sim"></a>

You can order Super SIMs from the [KORE Shop](https://shop.korewireless.com/SIM/Super-SIM), which you can access either the KORE Console Dashboard or clicking the cart icon on the top navigation bar in the Super SIM Console.&#x20;

<figure><img src="/files/mIiq57ViNAGY6ues9aKQ" alt=""><figcaption></figcaption></figure>

### Quick Guide

Here is a [quick guided tour](https://korewireless.navattic.com/w11a0ufe?g=cmqu9cekv000000iq950uwryx\&s=1) to placing your order in [KORE Shop](https://shop.korewireless.com/SIM).

First, navigate to **SIMS** > **Super SIM** > **Multi-Size (2FF/3FF/4FF)**. Then, follow these three phases to complete your purchase:

#### 1. Select Your Product

1. Select the SIM: Click on **Super SIM - Hardware - Multi-Size SIM**.
2. Set the quantity: Enter your desired number of SIMs in the **Quantity** field.
3. Add to cart: Click **Add To Cart**, then select **View Cart & Checkout**.

#### 2. Begin Checkout

1. Initiate checkout: Click **Proceed to Checkout**.
2. Set shipping: Choose your **Shipping Address** and preferred **Delivery Method**.
3. Set billing: Select your **Payment Method** and **Billing Address**.

#### 3. Review & Place Order

1. **Final review:** Carefully **Review your Order** details for accuracy.
2. **Submit:** Click the **Place Order** button to complete your purchase.

Once your Super SIM has shipped, it will be automatically added to your KORE account. In the meantime, you can start completing some of the steps in the next section straight away to be ready to use it when it arrives — you don't need to have your Super SIM in front of you to complete them.

## Prepare a Super SIM for Use <a href="#prepare-a-super-sim-for-use" id="prepare-a-super-sim-for-use"></a>

### 1. Create a Network Access Profile <a href="#id-1.-create-a-network-access-profile" id="id-1.-create-a-network-access-profile"></a>

Network Access Profiles give you control over which cellular networks your Super SIMs can connect to around the world. You can either start from scratch with a new, empty Network Access Profile and add the networks that best suit your needs, or generate one that starts with all of our cheapest networks around the world already enabled. You can update your Network Access Profile's list of enabled networks at any time.

1. Go to [**Network Access Profiles**](https://supersim.korewireless.com/supersim/network-access-profiles):

<figure><img src="https://open.gitbook.com/~gitbook/image?url=https%3A%2F%2F778147064-files.gitbook.io%2F%7E%2Ffiles%2Fv0%2Fb%2Fgitbook-x-prod.appspot.com%2Fo%2Fspaces%252FuQQbnJlSgjMIxsWK06ol%252Fuploads%252FHcd6Rz9BHkvfwfcV5iks%252Fimage.png%3Falt%3Dmedia%26token%3D7bc4bad9-61e1-4361-b0d9-1ec7de53972c&#x26;width=768&#x26;dpr=4&#x26;quality=100&#x26;sign=20ddfefc&#x26;sv=2" alt=""><figcaption></figcaption></figure>

1. Click the **Create Network Access Profile** button.
2. Give your new Network Access Profile a memorable **Unique Name** to make it easy to identify in future:

   <figure><img src="https://open.gitbook.com/~gitbook/image?url=https%3A%2F%2F778147064-files.gitbook.io%2F%7E%2Ffiles%2Fv0%2Fb%2Fgitbook-x-prod.appspot.com%2Fo%2Fspaces%252FuQQbnJlSgjMIxsWK06ol%252Fuploads%252FwnLJ901hrAvax1TEyfGo%252Fimage.png%3Falt%3Dmedia%26token%3D74ee6406-8944-4a40-8cac-6a6d065fdf43&#x26;width=768&#x26;dpr=4&#x26;quality=100&#x26;sign=140635d6&#x26;sv=2" alt=""><figcaption></figcaption></figure>
3. We recommend you **start from scratch** and explore the networks available to your country and those you're looking to deploy. You can easily enable the networks you want to test out with a few clicks. Alternatively, you can select **Instant global access** to create a Network Access Profiles to start with all of the networks that currently have our lowest data and SMS Command usage rates enabled.
4. Click the **Create** button.
5. You will see the new Network Access Profile's **Networks** tab. This shows a list of mobile networks organized by continent and country. Only networks which have been selected will be accessed by Super SIMs using this Network Access Profile:

   <figure><img src="https://open.gitbook.com/~gitbook/image?url=https%3A%2F%2F778147064-files.gitbook.io%2F%7E%2Ffiles%2Fv0%2Fb%2Fgitbook-x-prod.appspot.com%2Fo%2Fspaces%252FuQQbnJlSgjMIxsWK06ol%252Fuploads%252FWpj6XHD1axBFnJSd0B7X%252Fimage.png%3Falt%3Dmedia%26token%3D34635d1a-f6dc-4e4c-886a-c40fe81dee52&#x26;width=768&#x26;dpr=4&#x26;quality=100&#x26;sign=ded6a815&#x26;sv=2" alt=""><figcaption></figcaption></figure>

If you selected **Instant global access** in step 4, a number of networks will already be enabled for you. If you selected **To start from Scratch**, you will have to select some networks yourself. If you make any changes to the list of selected networks, click the **Update Networks** button at the bottom of the page.

You can update a Network Access Profile's list of networks at any time, using [Console](https://supersim.korewireless.com/supersim/network-access-profiles) or the[ Super SIM API](https://docs.korewireless.com/en-us/api/products/supersim). You can delete Network Access Profiles in [Console](https://supersim.korewireless.com/supersim/network-access-profiles) provided it has not been assigned to a Fleet. If you'd like to know more about Network Access Profiles, take a look at [How to Use Super SIM Fleets and Network Access Profiles](https://docs.korewireless.com/en-us/supersim/how-to/understanding-network-access-profiles).

### 2. Create a Fleet <a href="#id-2.-create-a-fleet" id="id-2.-create-a-fleet"></a>

A Fleet is a way of bringing together one or more Super SIMs to set their behavior as a group. For example, you might want a set of Super SIMs to have their data usage billed the same way and to all accept [SMS Commands](https://docs.korewireless.com/en-us/api/products/supersim/smscommand-resource). Rather than apply these settings to each Super SIM individually — imagine hundreds of thousands of these integrated into IoT devices in the field — you just update the Fleet, and all the Super SIMs in that Fleet automatically adopt the new configuration. Easy.

All Super SIMs inherit their capabilities from the Fleet they've been assigned to, so you need to create a Fleet and add your Super SIM to it before you can use that SIM. The mobile networks a Fleet can use is set through its own Network Access Profile, so you will need to select this too.

You can create a new Fleet using the [Super SIM API](https://docs.korewireless.com/en-us/api/products/supersim) or the [Console](https://supersim.korewireless.com/supersim/fleets). We'll use the latter here because it works well with single Super SIMs, but the [API documentation](https://docs.korewireless.com/en-us/api/products/supersim/fleet-resource) will show you how to work with Fleets when you're managing large volumes of Super SIMs.

1. Go to [**Fleets**](https://supersim.korewireless.com/supersim/fleets).
2. Click the **Create Fleet** button at the top:

   <figure><img src="https://open.gitbook.com/~gitbook/image?url=https%3A%2F%2F778147064-files.gitbook.io%2F%7E%2Ffiles%2Fv0%2Fb%2Fgitbook-x-prod.appspot.com%2Fo%2Fspaces%252FuQQbnJlSgjMIxsWK06ol%252Fuploads%252FEJOhGx2eI824DtF0ry7Y%252Fimage.png%3Falt%3Dmedia%26token%3D35413c17-832a-4218-a377-d1c00ebceac4&#x26;width=768&#x26;dpr=4&#x26;quality=100&#x26;sign=2d136fc6&#x26;sv=2" alt=""><figcaption></figcaption></figure>
3. Give the Fleet a unique, memorable name to make it easy to identify in future:

   <figure><img src="https://open.gitbook.com/~gitbook/image?url=https%3A%2F%2F778147064-files.gitbook.io%2F%7E%2Ffiles%2Fv0%2Fb%2Fgitbook-x-prod.appspot.com%2Fo%2Fspaces%252FuQQbnJlSgjMIxsWK06ol%252Fuploads%252FSS2H6tOSdP5ISOuTQYvf%252Fimage.png%3Falt%3Dmedia%26token%3Db6698428-a63e-4ab9-813f-2e571003c16f&#x26;width=768&#x26;dpr=4&#x26;quality=100&#x26;sign=438066c3&#x26;sv=2" alt=""><figcaption></figcaption></figure>
4. The Console automatically enables the Fleet's **Data** and **SMS Commands** services; leave these as they are for now. In future, you can use these settings to block all the Super SIMs in the Fleet from transferring data across the network, or from receiving [SMS Commands](https://docs.korewireless.com/en-us/api/products/supersim/smscommand-resource).
5. Under **Network Access Profile** select the NAP you created in [Step 1 — Create a Network Access Profile](https://docs.korewireless.com/en-us/supersim/supersim-first-steps#id-1.-create-a-network-access-profile).
6. The Console automatically sets the Fleet's **Data Limit** to 1GB (1,000MB) per month. Each Super SIM assigned to the Fleet can use 1GB of data. This number may be too high or low, depending on your use case. If you have a better estimate for how much data your IoT device needs each month, put that number here now — or update your data limit later if your figure turns out to be a little wide of the mark after testing.
7. Scroll down and click the **Create** button.

You're now ready to activate your Super SIM when it dispatches.

### 3. Assign your Super SIM to the Fleet and activate it <a href="#id-3.-assign-your-super-sim-to-the-fleet-and-activate-it" id="id-3.-assign-your-super-sim-to-the-fleet-and-activate-it"></a>

Once your Super SIM has been shipped, you'll be able to see it in your KORE Account. Now, you can finish configuring it even though you may not have received it yet.

1. Go to [**Super SIM > SIMs**](https://supersim.korewireless.com/supersim/sims)
2. In the list of SIMs, you should see a single Super SIM, which is the one you ordered earlier. Click anywhere on the SIM's row.

<figure><img src="https://open.gitbook.com/~gitbook/image?url=https%3A%2F%2F778147064-files.gitbook.io%2F%7E%2Ffiles%2Fv0%2Fb%2Fgitbook-x-prod.appspot.com%2Fo%2Fspaces%252FuQQbnJlSgjMIxsWK06ol%252Fuploads%252FtdmsftOLRkujrpg1ZgMu%252Fimage.png%3Falt%3Dmedia%26token%3Da699c1c6-6d84-429a-9f76-c545611a11eb&#x26;width=768&#x26;dpr=4&#x26;quality=100&#x26;sign=d32e243e&#x26;sv=2" alt=""><figcaption></figcaption></figure>

1. Take this opportunity, if you haven't already, to give the Super SIM a unique, memorable name — this will make it easier to locate in the future.

   <figure><img src="https://open.gitbook.com/~gitbook/image?url=https%3A%2F%2F778147064-files.gitbook.io%2F%7E%2Ffiles%2Fv0%2Fb%2Fgitbook-x-prod.appspot.com%2Fo%2Fspaces%252FuQQbnJlSgjMIxsWK06ol%252Fuploads%252F2Vu7726ue0xcHR6aGcUG%252Fimage.png%3Falt%3Dmedia%26token%3D2fa8022a-fbc6-4937-a6d5-2d264de178f2&#x26;width=768&#x26;dpr=4&#x26;quality=100&#x26;sign=cc72784d&#x26;sv=2" alt=""><figcaption></figcaption></figure>
2. From the **Fleet** menu, select the Fleet you created in [Step 2 — Create a Fleet](https://docs.korewireless.com/en-us/supersim/supersim-first-steps#id-2.-create-a-fleet).
3. Change the SIM's **Status** from **New** to **Active**.
4. Click the **Save** button.

We've worked through the process for a single SIM, but if you have a larger number of new SIMs to set up, you can use the Bulk Actions functionality provided by the console.

For example, to assign a number of SIMs to the Fleet you created earlier, check the SIMs you want to update, click the **Update SIMs** button, and in the panel that appears, select your new Fleet. Click **Continue** and then confirm the change, and all the selected SIMs will be assigned to the chosen Fleet. You can set the status of those SIMs at the same time.

For full details, please see [**How to Use Console Bulk Actions to Update Multiple Super SIMs**.](https://docs.korewireless.com/en-us/supersim/how-to/how-to-use-console-bulk-actions-to-update-multiple-super-sims)

When you activate a Super SIM by changing its status in the Console from **New** to **Active** (or `new` to `active`, if you're using the API), you will incur a monthly active SIM fee of $2.00. You can change the Super SIM's status to **Inactive** (Console) or `inactive` (API) at any time to disable the SIM and stop incurring the monthly fee. You can reactivate at any time by switching the status back to **Active** /`active`.

### 4. Set your device's APN <a href="#id-4.-set-your-devices-apn" id="id-4.-set-your-devices-apn"></a>

Whichever IoT development hardware you're using, you'll need to set its Access Point Name (APN) to `super`.

This is a straightforward process, but different devices place the settings in different locations, so please follow [these instructions](https://docs.korewireless.com/en-us/supersim/how-to/apn-configuration), which will help you set up your type of device.

#### 5. Enable roaming <a href="#id-5.-enable-roaming" id="id-5.-enable-roaming"></a>

All devices using Super SIM must be set to allow roaming across mobile networks, even if they are only going to be used in the US.

Again, this isn't a complex task, but it will require different steps depending on which device you have added your Super SIM to. Please follow [the instructions](https://docs.korewireless.com/en-us/supersim/how-to/how-enable-roaming) here for your device.

## Test-drive your Super SIM <a href="#test-drive-your-super-sim" id="test-drive-your-super-sim"></a>

Your Super SIM is now ready to be used as the basis for your IoT device's global cellular connectivity — why not try it out with one of our quickstart guides?

* [Get Started with Super SIM, the Raspberry Pi 4, and the Sixfab Base Hat](https://docs.korewireless.com/en-us/supersim/supersim-first-steps/get-started-with-super-sim-the-raspberry-pi-4-and-the-sixfab-base-hat)
* [Get Started with Super SIM, the Raspberry Pi 4, and the Waveshare 4G Hat](https://docs.korewireless.com/en-us/supersim/supersim-first-steps/get-started-with-super-sim-the-raspberry-pi-4-and-the-waveshare-4g-hat)
* [Get Started with Super SIM and the Raspberry Pi Pico](https://docs.korewireless.com/en-us/supersim/supersim-first-steps/get-started-with-data-comms-and-the-raspberry-pi-pico)
* [Get Started with Super SIM SMS Commands and the Raspberry Pi](https://docs.korewireless.com/en-us/supersim/supersim-first-steps/get-started-with-super-sim-sms-commands-and-the-raspberry-pi-pico)
* [Get Started with Super SIM SMS Commands and the Raspberry Pi Pico](https://docs.korewireless.com/en-us/supersim/supersim-first-steps/get-started-with-super-sim-sms-commands-and-the-raspberry-pi-pico)
* [Get Started with Super SIM IP Commands and the Raspberry Pi](https://docs.korewireless.com/en-us/supersim/supersim-first-steps/get-started-with-super-sim-ip-commands-and-the-raspberry-pi)
* [Get Started with Super SIM IP Commands and the Raspberry Pi Pico](https://docs.korewireless.com/en-us/supersim/supersim-first-steps/get-started-with-super-sim-sms-commands-and-the-raspberry-pi-pico)
* [Get Started with Super SIM Connection Events](https://docs.korewireless.com/en-us/supersim/supersim-first-steps/get-started-with-super-sim-esim-profiles-for-euiccs)
* [Get Started with Super SIM eSIM Profiles for eUICC](https://docs.korewireless.com/en-us/supersim/supersim-first-steps/get-started-with-super-sim-esim-profiles-for-euiccs)

## Monitor your Super SIM's Usage <a href="#become-a-super-sim-specialist" id="become-a-super-sim-specialist"></a>

Monitor your Super SIM's usage, which includes information about data uploaded/downloaded and costs over a given timeframe. Select type of insights you'd like to monitor, you can also apply filters to limit scope and groupings to pivot around multiple dimensions. Here are the data insights available to you:

* Usage By Time - select a specific date to get your hourly data.&#x20;
* Usage By SIM - select a 30-day or fewer to get your data by SIM.
* Usage By Fleet - select a date range to get your data by Fleet.
* Usage By Country - select a date range to get your data by Country.
* Usage By Network - select a date range to get your data by Network.

Usage data is available for the last 18 months, starting from July 1st, 2024.

<figure><img src="/files/143zB7upNMkgbSRWClDl" alt=""><figcaption><p>Data Insights: Usage By SIM</p></figcaption></figure>

## Become a Super SIM specialist <a href="#become-a-super-sim-specialist" id="become-a-super-sim-specialist"></a>

All the information you need to become a proficient Super SIM user is right here in the [KORE documentation](https://docs.korewireless.com/en-us/supersim). In particular, check out the [Super SIM API documentation](https://docs.korewireless.com/en-us/api/products/supersim) to get a thorough grounding in how the API can help you wrangle all of your IoT products' Super SIMs.

To discover how Super SIM works and to understand its behaviors, take a look at the left-hand navigation menu's **Help and Support** section, in particular:

* [Super SIM Multi-IMSI](https://docs.korewireless.com/en-us/supersim/supersim-multi-imsi-applet)
* [Super SIM Over-the-Air Updates](https://docs.korewireless.com/en-us/supersim/over-the-air-updates)
* [Super SIM States](https://docs.korewireless.com/en-us/supersim/how-to/how-to-determine-a-super-sims-status)
* [Super SIM Partner Networks](https://docs.korewireless.com/en-us/supersim/available-networks)
* [Super SIM Network Attach Priority Lists](https://docs.korewireless.com/en-us/supersim/how-to/how-and-why-to-set-super-sims-uplmn-table)
* [Super SIM Console Bulk Actions](https://docs.korewireless.com/en-us/supersim/how-to/how-to-use-console-bulk-actions-to-update-multiple-super-sims)

If you need assistance using Super SIM with a specific cellular modem, be sure to investigate the [**Cellular Module Knowledgebase**](https://docs.korewireless.com/en-us/supersim/cellular-module-knowledgebase). It contains configuration and usage information for an array of devices from different manufacturers, and it's growing all the time. It also contains handy generic guidance, which can be invaluable if your chosen module is not yet one of the ones we've detailed.


# Get Started with Super SIM, the Raspberry Pi 4 and the Waveshare 4G Hat

[Super SIM](https://docs.korewireless.com/en-us/supersim) can empower a huge range of IoT devices. This guide focuses on just one of them: [Waveshare's SIM7600G-H 4G Hat](https://www.waveshare.com/wiki/SIM7600G-H_4G_HAT), a development board which equips a low-cost Raspberry Pi computer with a Simcom 7600G-H cellular modem.

<figure><img src="https://www.twilio.com/_next/image?url=https%3A%2F%2Fdocs-assets.prod.twilio.com%2F51c52a98ba8a2e105d0c59588a08ae7bd1fccbe7e7377ec780852a82f33b4085.jpg&#x26;w=3840&#x26;q=75" alt=""><figcaption></figcaption></figure>

{% hint style="info" %}
This guide requires a **configured** [Super SIM](https://docs.korewireless.com/en-us/supersim). If you haven't set up your Super SIM in the [Console](https://supersim.korewireless.com/supersim/sims), please do so now. The [Super SIM First Steps guide](https://docs.korewireless.com/en-us/supersim/get-started/supersim-first-steps) has help if you need it.
{% endhint %}

***

## The hardware <a href="#the-hardware" id="the-hardware"></a>

In addition to your [configured Super SIM](https://docs.korewireless.com/en-us/supersim/get-started/supersim-first-steps), you will need the following hardware to proceed with this guide:

* A Waveshare [SIM7600G-H 4G HAT](https://www.waveshare.com/wiki/SIM7600G-H_4G_HAT) . This is the global version; there are [variants](https://www.waveshare.com/wiki/Main_Page#Wireless_Communication) that target specific territories.
* A [Raspberry Pi](https://www.raspberrypi.org/products/raspberry-pi-4-model-b/). This guide was written using the Pi 4 Model B, but there are other versions of the Pi available — it should work with any of them, but we've only tested the 4. The SIM7600G-H 4G Hat works with all but the very first Pi. To run the Pi, you will also need:
  * A Micro SD card of 8GB or above.
  * A monitor and an HDMI-to-micro-HDMI cable.
  * A keyboard and a mouse
  * A 5V, 2A (10W) USB-C AC adaptor.

### Hardware setup: the Raspberry Pi <a href="#hardware-setup-the-raspberry-pi" id="hardware-setup-the-raspberry-pi"></a>

The Raspberry Pi has its own setup procedure which involves downloading and installing its Linux operating system, called Raspberry Pi OS, onto the Micro SD card. The Raspberry Pi Foundation has [a very good walkthrough](https://projects.raspberrypi.org/en/projects/raspberry-pi-setting-up) of its own that covers this process — you should use this to get your Pi ready before proceeding to the next stage of this guide.

<figure><img src="https://www.twilio.com/_next/image?url=https%3A%2F%2Fdocs-assets.prod.twilio.com%2F3e3712865d24d69738ee181d9d8287bc71f9193560ed1c3df87cd177395b4741.jpg&#x26;w=3840&#x26;q=75" alt=""><figcaption></figcaption></figure>

{% hint style="info" %}
During setup you should connect your Pi 4 to your WiFi network as you will need to download extra software later. We'll disable WiFi in due course to demonstrate data access over cellular.
{% endhint %}

### Hardware setup: the SIM7600G-H 4G Hat <a href="#hardware-setup-the-sim7600g-h-4g-hat" id="hardware-setup-the-sim7600g-h-4g-hat"></a>

The SIM7600G-H 4G Hat ships with all you need to fit it onto the Pi. Just follow these steps to set everything up:

1. Fit your Super SIM into the SIM7600G-H 4G Hat's SIM retainer. This takes a full-size SIM, so take care removing your Super SIM from its mount, or use an adapter if you have removed the Super SIM as a 4FF Nano SIM:&#x20;

   <div data-full-width="true"><figure><img src="/files/sJuSRfZP1D6t4YwNr8Ws" alt=""><figcaption></figcaption></figure></div>

   Lock the SIM retainer in place to keep the Super SIM secure:&#x20;

   <figure><img src="/files/53Cs6P0ApDh3kxFawOac" alt=""><figcaption></figcaption></figure>
2. If it's powered up, turn off the Pi.

* If you're at the command line, enter `sudo shutdown -h` now.
* If you're at the desktop, select **Shutdown…** from the **Raspberry** menu and then click **Shutdown** .
* Remove the power cable when the Pi's activity LED has flashed ten times.

3. Slot the SIM7600G-H 4G Hat onto the Pi's GPIO header:

<figure><img src="/files/pH9LiORtDY4U03VudySO" alt=""><figcaption></figcaption></figure>

4. Connect the supplied USB cable to the micro USB port marked just **USB** on the SIM7600G-H 4G Hat and a USB port on the Pi:

<figure><img src="/files/vTOmrZKJuRRu794C0CUH" alt=""><figcaption></figcaption></figure>

5. Assemble and connect the bundled cellular antenna to the SIM7600G-H 4G Hat. Connect it to the LTE connector marked **MAIN** on the board:

<figure><img src="/files/OYE2nrNNspxa6gCdxutA" alt=""><figcaption></figcaption></figure>

Here's a close-up:

<figure><img src="/files/zkeKbarxXVJ3YSBH5VuT" alt=""><figcaption></figcaption></figure>

6. Finally, power up the Pi by re-inserting the power cable.

***

## Software setup <a href="#software-setup" id="software-setup"></a>

We now need to run through a few steps to get the Pi ready to talk to the SIM7600G-H 4G Hat. Some of these will require you to restart the Pi.

### 1. Configure Pi serial port access <a href="#id-1-configure-pi-serial-port-access" id="id-1-configure-pi-serial-port-access"></a>

1. If you're at the Raspberry Pi desktop, select **Accessories > Terminal** from the **Raspberry** menu.
2. Run `sudo raspi-config` .
3. Use the cursor keys to highlight **Interfacing Options**, then hit **Enter**:

   <figure><img src="https://twilio-cms-prod.s3.amazonaws.com/images/2020-11-09-121826_1920x1080_scrot.original.png" alt=""><figcaption></figcaption></figure>
4. Now highlight **Serial Port** and hit **Enter**:

   <figure><img src="https://twilio-cms-prod.s3.amazonaws.com/images/2020-11-10-130059_1920x1080_scrot.original.png" alt=""><figcaption></figcaption></figure>
5. When you are asked **Would you like a login shell to be accessible over serial?** select **No** and hit **Enter**:

   <figure><img src="https://twilio-cms-prod.s3.amazonaws.com/images/2020-11-10-130107_1920x1080_scrot.original.png" alt=""><figcaption></figcaption></figure>
6. When you are asked **Would you like the serial port hardware to be enabled?** select **Yes** and hit **Enter**:

   <figure><img src="https://twilio-cms-prod.s3.amazonaws.com/images/2020-11-10-130935_1920x1080_scrot.original.png" alt=""><figcaption></figcaption></figure>
7. Select **Finish** .
8. The `raspi-config` utility will offer to restart the Pi — accept its suggestion.

### 2. Power up the Hat <a href="#id-2-power-up-the-hat" id="id-2-power-up-the-hat"></a>

When the Pi is back up, you should see that the SIM7600G-H 4G Hat's **PWR** LED is lit. Now press the **PWRKEY** button on the board — after a brief moment, the **NET** LED should light up.

At the command line or in a desktop Terminal run:

```bash
ls /dev/ttyUSB*
```

You should see a list of items all beginning with `ttyUSB` and including `ttyUSB2`, which is the device you'll use in subsequent steps. If you don't see a list of TTYs, first check that the SIM7600G-H 4G Hat's **PWR** and **NET** LEDs are lit. Make sure your USB cable is not connected to **USB TO UART** on the Hat.

### 3. Attach to a cellular network <a href="#id-3-attach-to-a-cellular-network" id="id-3-attach-to-a-cellular-network"></a>

The SIM7600G-H 4G Hat can be controlled using [AT commands](https://docs.korewireless.com/en-us/supersim/cellular-module-knowledgebase/about-at-commands) issued through a command-line serial console tool which communicates with the Hat's cellular module. We'll use Minicom here, but if you prefer to use an alternative tool, such as Screen, that's fine. At the command line or in a desktop Terminal run:

```bash
sudo apt update
sudo apt install minicom -y
```

Enter `minicom -D /dev/ttyUSB2` to open a connection to the modem. If Minicom posts an error indicating that `/dev/ttyUSB2` is inaccessible, please [check your SIM7600G-H 4G Hat setup](#hardware-setup-the-sim7600g-h-4g-hat).

{% hint style="info" %}
The SIM7600G-H may not be set to echo back what you type in, so you won't be able to see your side of the conversation. Type in `ATE1` and hit **Enter** . You'll get an `OK` back, and when you follow the remaining steps you'll see what you type!
{% endhint %}

Just hit **Enter** after keying in each of the following commands. Wait for the modem to respond before moving on to the next command.

```bash
AT+CGDCONT=1,"IP","super"
AT+COPS?
```

You should see something like `+COPS: 0,0,"Vodafone UK Twilio",7` which tells you which network you're connecting through. You should also see the Hat's **NET** light flashing.

### 4. Connect to the Internet <a href="#id-4-connect-to-the-internet" id="id-4-connect-to-the-internet"></a>

Now you know you have a cellular connection, you can connect to the Internet. You need to install the PPP (Point-to-Point Protocol) software the PI will use to establish the connection, and to configure it. First run the following commands at the command line:

```bash
sudo apt install ppp -y
sudo cp /etc/ppp/peers/provider /etc/ppp/peers/provider.bak
sudo nano /etc/ppp/peers/provider
```

The last of these commands opens the primary configuration file in a text editor so you can make the required changes. Make sure the file contains the following lines. Some may be missing, others may be present depending on the version of `ppp` you've installed:

```bash
nocrtscts
debug
nodetach
ipcp-accept-local
ipcp-accept-remote
```

In the same file, look for lines like these and update them so they match what's shown here:

```bash
connect '/usr/sbin/chat -s -v -f /etc/chatscripts/gprs -T super'

/dev/ttyUSB2
```

The last line above is [the value you determined earlier](#id-2-power-up-the-hat).

To initiate an Internet connection, at the command line or in a desktop terminal run:

```bash
sudo pon
```

You'll see a stack of lines displayed at the command line.

Meantime, open a fresh terminal and enter:

```bash
sudo route add -net "0.0.0.0" ppp0
```

When the prompt is back, you're ready to try out the Internet connection:

* If you're at the desktop, select **Turn off Wireless LAN** from the network menu at the top right.
* If you're at the command line, run `sudo ifconfig wlan0 down` .
* At the command line or in a desktop terminal, enter `ifconfig` and look for the `ppp0` entry — it should have a valid IP address listed under `inet`:

<figure><img src="/files/AAfJmbAfyftsARtQ8jSl" alt=""><figcaption></figcaption></figure>

* Open up a browser and navigate to [**korewireless.com**](https://www.korewireless.com/):

<figure><img src="/files/u00HtaxQFeyNGoUnFHwk" alt=""><figcaption></figcaption></figure>

Well done! You now have a Raspberry Pi computer that's connected to the Internet via Super SIM. You can now start experimenting with cellular Internet connectivity, or begin developing your own IoT application proof-of-concept.

***

## Next steps <a href="#next-steps" id="next-steps"></a>

Your Raspberry Pi and Waveshare SIM7600G-H 4G Hat are now able to access the cellular network. Over to you: what are you going to build? We can't wait to find out.

In the meantime, here are some suggestions for things to try:

* Write some code to get data from a cloud service API via cellular. Here's a good selection of [public APIs](https://github.com/public-apis/public-apis) .
* Use the [Console](https://supersim.korewireless.com/supersim/sims) or [Super SIM API](https://docs.korewireless.com/en-us/api/products/supersim/usage-record-resource) to monitor your Super SIM's data usage.
* Check out our guide Introduction to [AT commands](https://docs.korewireless.com/en-us/supersim/cellular-module-knowledgebase/about-at-commands) and try sending to your modem some of the more useful commands it lists.


# Get Started with Super SIM, the Raspberry Pi 4 and the Sixfab Base Hat

Super SIM can empower a huge range of IoT devices. This guide focuses on just one of them: [Sixfab's 3G-4G/LTE Base Hat](https://sixfab.com/product/raspberry-pi-base-hat-3g-4g-lte-minipcie-cards/), a development board which allows the low-cost Raspberry Pi computer to utilize a variety of cellular modules on Mini-PCIe cards. Among the many modems available is the [Tellit ME910C1-WW](https://www.telit.com/me910c1/). It's the one we'll use in this tutorial. It's a good modem with which to try out Super SIM: it supports the key IoT-oriented cellular standard enabled by Super SIM, Cat-M.

<figure><img src="/files/9DuVRriLTIhJPwT98FiM" alt=""><figcaption></figcaption></figure>

This guide will walk you through connecting the modem card to the Base Hat, and the Base Hat to a Raspberry Pi. It will show you how to install the required software, and get the whole kit and kaboodle online to provide the Raspberry Pi with Internet connectivity.

{% hint style="info" %}
This guide requires a **configured** Super SIM. If you haven't set up your Super SIM in the [Console](https://supersim.korewireless.com/supersim/sims), please do so now. The [Super SIM First Steps guide](https://docs.korewireless.com/en-us/supersim#get-started) has help if you need it.
{% endhint %}

***

## The hardware <a href="#the-hardware" id="the-hardware"></a>

In addition to your configured Super SIM, you will need the following hardware to proceed with this guide:

* A Sixfab [Base Hat](https://sixfab.com/product/raspberry-pi-base-hat-3g-4g-lte-minipcie-cards/) . This comes with GPIO extenders and a USB cable.
* A [Tellit ME910C1-WW Mini-PCIe card](https://sixfab.com/product/telit-me910c1-ww-mini-pcie-lte-m-module/) .
* An LTE antenna if your chosen modem doesn't come with one bundled.
* A [Raspberry Pi](https://www.raspberrypi.org/products/raspberry-pi-4-model-b/). This guide was written using the Pi 4 Model B, but there are other versions of the Pi available — it should work with any of them, but we've only tested the 4 and 400. The Base Hat works with the Pis 4, 3, 2, B+, A+, and Zero. To run the Pi, you will also need:
  * A Micro SD card of 8GB or above.
  * A monitor and an HDMI-to-micro-HDMI cable.
  * A keyboard and a mouse
  * A 5V, 2A (10W) USB-C AC adaptor.

### Hardware setup: the Raspberry Pi <a href="#hardware-setup-the-raspberry-pi" id="hardware-setup-the-raspberry-pi"></a>

The Raspberry Pi has its own setup procedure which involves downloading and installing its Linux operating system, called Raspberry Pi OS, onto the Micro SD card. The Raspberry Pi Foundation has [an excellent walkthrough](https://projects.raspberrypi.org/en/projects/raspberry-pi-setting-up) of its own that covers this process — you should use this to get your Pi ready before proceeding to the next stage of this guide.

<figure><img src="/files/EGcExJGZhCkPOu9E4K40" alt=""><figcaption></figcaption></figure>

{% hint style="info" %}
During setup you should connect your Pi 4 to your WiFi network as you will need to download extra software later. We'll disable WiFi in due course to demonstrate data access over cellular.
{% endhint %}

### Hardware setup: the Base Hat <a href="#hardware-setup-the-base-hat" id="hardware-setup-the-base-hat"></a>

The Base Hat ships with all you need to fit it onto the Pi. Just follow these steps to set everything up:

1. If it's powered up, turn off the Pi.
   * If you're at the command line, enter `sudo shutdown -h` now.
   * If you're at the desktop, select **Shutdown…** from the **Raspberry** menu and then click **Shutdown** .
   * Remove the power cable when the Pi's activity LED has flashed yellow ten times.
2. Fit the modem card into the Base Hat's connector. It will slide in best at an angle:<br>

   <figure><img src="/files/HjCFoHcAf7bAV9SXXcpf" alt=""><figcaption></figcaption></figure>
3. Push the end free end of the card down toward the board until it clicks into place under the two latches:<br>

   <figure><img src="https://www.twilio.com/_next/image?url=https%3A%2F%2Fdocs-assets.prod.twilio.com%2F33e1050edb6562ce7d971f83a3c5e30ab122cf6ed43e81d9884db3f04cce642d.jpg&#x26;w=3840&#x26;q=75" alt=""><figcaption></figcaption></figure>

   <figure><img src="/files/3e0f18BS9xZgrNXe4G5A" alt=""><figcaption></figcaption></figure>
4. Fit your Super SIM into the Base Hat's SIM slot. The slot takes a 3FF Micro SIM, so take care removing your Super SIM from its mount, or use an adapter if you have removed the Super SIM as a 4FF Nano SIM:<br>

   <figure><img src="/files/ktVQ7Au9TlbGd6zCkh36" alt=""><figcaption></figcaption></figure>
5. Fit either of the two headers supplied with the Hat to the Pi's paired row of GPIO pins and then slot the Base Hat onto the extended header pins:<br>

   <figure><img src="/files/NTEhz7feTgK1KzurtJpi" alt=""><figcaption></figcaption></figure>
6. Connect the bundled cellular antenna to the Base Hat. The names of the u.FL connectors are not marked on the Hat, so we've marked it in the image below. Match up the LTE line on the antenna with the u.FL connector in the **middle the board**. This guide doesn't use the GPS antenna but we recommend fitting both antennas to reduce the strain on a single connector:

   <figure><img src="/files/0EmZNtWY7Fto6hDfhqbc" alt=""><figcaption></figcaption></figure>
7. Connect the supplied USB cable to the micro USB port on the Base Hat and a USB port on the Pi:<br>

   <figure><img src="/files/of1Gqeh2HIQaP2PbcPuI" alt=""><figcaption></figcaption></figure>
8. Finally, power up the Pi by re-inserting the power cable.

***

## Software setup <a href="#software-setup" id="software-setup"></a>

We now need to run through a few steps to get the Pi ready to talk to the Base Hat. Some of these will require you to restart the Pi.

### 1. Set up serial port access <a href="#id-1-set-up-serial-port-access" id="id-1-set-up-serial-port-access"></a>

1. At the command line run `sudo raspi-config` .
2. Use the cursor keys to highlight **Interfacing Options**, then hit **Enter**:

   <figure><img src="https://twilio-cms-prod.s3.amazonaws.com/images/2020-11-09-121826_1920x1080_scrot.original.png" alt=""><figcaption></figcaption></figure>
3. Now highlight **Serial Port** and hit **Enter**:

   <figure><img src="https://twilio-cms-prod.s3.amazonaws.com/images/2020-11-10-130059_1920x1080_scrot.original.png" alt=""><figcaption></figcaption></figure>
4. When you are asked **Would you like a login shell to be accessible over serial?** select **No** and hit **Enter**:

   <figure><img src="https://twilio-cms-prod.s3.amazonaws.com/images/2020-11-10-130107_1920x1080_scrot.original.png" alt=""><figcaption></figcaption></figure>
5. When you are asked **Would you like the serial port hardware to be enabled?** select **Yes** and hit **Enter**:

   <figure><img src="https://twilio-cms-prod.s3.amazonaws.com/images/2020-11-10-130935_1920x1080_scrot.original.png" alt=""><figcaption></figcaption></figure>
6. Select **Finish** .
7. The `raspi-config` utility will offer to restart the Pi — accept its suggestion.

### 2. Power up the Hat <a href="#id-2-power-up-the-hat" id="id-2-power-up-the-hat"></a>

When the Pi is back up, you should see that the Base Hat's **PWR** Led is lit red:<br>

<figure><img src="/files/m8IuSqjAmfTRyhc5bn0H" alt=""><figcaption></figcaption></figure>

At the command line or in a desktop Terminal run:

```bash
ls /dev/ttyUSB*
```

You should see a list of items all beginning with `ttyUSB` and including `ttyUSB2`, which is the device you will use in subsequent steps.<br>

<figure><img src="/files/HKz7cp7F9nrMsnOpOgjv" alt=""><figcaption></figcaption></figure>

If you don't see a list of TTYs, check that the Base Hat's **PWR** LED is lit, and it its USB cable is connected.

### 3. Connect to the Internet <a href="#id-3-connect-to-the-internet" id="id-3-connect-to-the-internet"></a>

Now we know we have a cellular connection, we can connect to the Internet. We can set up the Pi's required PPP (Point-to-Point Protocol) connection using software. Let's install it now. Run the following at the command line or in a desktop Terminal:

```bash
wget https://raw.githubusercontent.com/sixfab/Sixfab_PPP_Installer/master/ppp_install_standalone.sh
```

The script will take a second or two to download. Now run:

```bash
chmod +x ppp_install_standalone.sh
```

and then:

```bash
sudo ./ppp_install_standalone.sh
```

The script will prompt you for setup information:

* When it asks **Please choose your Sixfab Shield/HAT** , enter `6` for the Base Hat.
* When it asks **What is your carrier APN?** , enter `super` .
* When it asks if you need to enter a username and password, just hit `n` .
* When it asks **What is your device communication PORT?** , enter `ttyUSB2` .

Last of all, the script will also ask **Do you want to activate auto connect/reconnect service at R.Pi boot up?** You can enter `y` (yes) or `n` (no) according to preference. If you select no, you will need to start the PPP connection manually — this is what the remainder of this section of the tutorial assumes you have chosen. However, if you select yes, you can reboot the Pi and jump straight to testing.

When the installation is done you'll see the message **Press ENTER key to reboot** — do so.

After the Pi has rebooted, you're all set to access the Internet over cellular. To be sure it's working, turn off WiFi — this is easiest to do this from the icon in the Desktop menu bar.

To initiate an Internet connection, at the command line or in a desktop terminal run:

```bash
sudo pon
```

You'll see a stack of lines displayed at the command line.

When the prompt is back, you're ready to try out the Internet connection:

* Open up a browser and navigate to **korewireless.com**:

  <figure><img src="/files/4VwLSN0WVTweQLUJWViV" alt=""><figcaption></figcaption></figure>
* At the command line or in a desktop terminal, enter `ifconfig` and look for the `ppp0` entry — it should have a valid IP address listed under `inet`:

  <figure><img src="https://twilio-cms-prod.s3.amazonaws.com/images/2020-11-09-131802_1920x1080_scrot.original.png" alt=""><figcaption></figcaption></figure>

Well done! You now have a Raspberry Pi computer that's connected to the Internet via Super SIM. You can now start experimenting with cellular Internet connectivity, or begin developing your own IoT application proof-of-concept.

***

## Next steps <a href="#next-steps" id="next-steps"></a>

Your Raspberry Pi is now able to access the cellular network. Over to you: what are you going to build? We can't wait to find out.

In the meantime, here are some suggestions for things to try:

* Write some code to get data from a cloud service API via cellular. Here's a good selection of [public APIs](https://github.com/public-apis/public-apis) you might like to experiment with.
* [Try out Super SIM's SMS Commands API](https://docs.korewireless.com/en-us/supersim/get-started/get-started-with-super-sim-sms-commands-and-the-raspberry-pi-4) , which you can use to exchange machine-to-machine (M2M) messages between your cloud and your IoT devices.
* Use the [Console](https://supersim.korewireless.com/supersim/sims) or [Super SIM API](https://docs.korewireless.com/en-us/api/products/supersim) to monitor your Super SIM's data usage.


# Get Started with Data Comms and the Raspberry Pi Pico

The Raspberry Pi Pico would be a great Internet of Things device but for one thing: [it has no Internet connectivity](#note). Fortunately, we can fix that with a Super SIM and an add-on cellular module such as Waveshare's Pico SIM7080.<br>

<figure><img src="/files/kc1ZNUm5ayc8V8wlVCic" alt=""><figcaption></figcaption></figure>

In our tutorial [Get Started with SMS Commands and the Raspberry Pi Pico](https://docs.korewireless.com/en-us/supersim/get-started/get-started-with-super-sim-sms-commands-and-the-raspberry-pi-pico), we combined the Pico, the Waveshare Pico SIM7080 cellular module board, an MCP9808 temperature sensor, and a four-digit, seven-segment LED display into a prototype Internet of Things (IoT) development device.

This device uses Super SIM's [SMS Commands API](https://docs.korewireless.com/en-us/api/products/supersim/smscommand-resource) to receive commands over-the-air and, when instructed, to send back information. This works very well for device-to-user communications routed through your cloud, but what if you want the device to be able to reach out to other Internet resources? For that you need a data connection and the ability to make HTTP requests — `GET`, `POST`, `PUT`, etc. — and parse the remote server's response.

This tutorial will take you through the process of adding exactly this functionality to your IoT application.

{% hint style="warning" %}
This guide requires a KORE Console account. [Sign up here now if you don't have one](https://console.korewireless.com/register). It also requires a **configured** Super SIM. If you haven't set up your Super SIM in the [Console](https://supersim.korewireless.com/supersim/sims), please do so now. Our [Super SIM First Steps guide](https://docs.korewireless.com/en-us/supersim#get-started) has extra help if you need it.
{% endhint %}

***

## 1. Set up the hardware and software <a href="#id-1-set-up-the-hardware-and-software" id="id-1-set-up-the-hardware-and-software"></a>

If you have already completed [Get Started with SMS Commands and the Raspberry Pi Pico](https://docs.korewireless.com/en-us/supersim/get-started/get-started-with-super-sim-sms-commands-and-the-raspberry-pi-pico), you're ready to [jump straight to Step 2](#id-2-prepare-the-initial-python-code), below. If not, run through the [SMS Commands tutorial's first four steps](https://docs.korewireless.com/en-us/supersim/get-started/get-started-with-super-sim-sms-commands-and-the-raspberry-pi-pico#id-1-gather-your-components), which cover the crucial hardware and software setup that you will need to undertake in order to complete this tutorial.

[Head there now](https://docs.korewireless.com/en-us/supersim/get-started/get-started-with-super-sim-sms-commands-and-the-raspberry-pi-pico#id-1-gather-your-components) and then come back here when you've completed **Step 4**.

***

## 2. Prepare the initial Python code <a href="#id-2-prepare-the-initial-python-code" id="id-2-prepare-the-initial-python-code"></a>

Throughout this tutorial, you'll be pasting code from this page into a text editor, first the code below and then additional functions as you progress through the guide. At each stage, you'll copy the current code from your editor and paste it across to the Pico. The code included here entirely replaces hat from the previous tutorial in the series.

At this point, you should have a Pico with MicroPython installed. It should be fitted to the Waveshare board and connected to your computer by USB cable. You should have fired up Minicom (Mac/Linux) or PuTTY (Windows) and have the MicroPython REPL prompt, `>>>`. Hit **Ctrl-C** to exit the running program, if you don't see the prompt.

As a reminder, hit **Ctrl-E** to enter MicroPython's 'paste mode', paste in code copied from your text editor, and then hit **Ctrl-D** to start running it.

Alternatively, if you're a Mac or Linux user, you can use the `pyboard.py` tool to beam it over for you and relay the output to your terminal — [details here](https://docs.korewireless.com/en-us/supersim/get-started/get-started-with-super-sim-sms-commands-and-the-raspberry-pi-pico).

Here's the base code listing. Copy it — click on the copy icon in the top right corner of the listing; it'll appear as you mouse over the code — and paste it into your text editor.

{% hint style="info" %}
You can find the a complete listing of the code, including all subsequent additions, [at our public GitHub repo](https://github.com/korewireless/super-sim-raspberry-pi-pico-demos/).
{% endhint %}

Don't send it over to the Pico just yet — you'll need to complete Step 3 first.

To save scrolling, [click here](https://docs.korewireless.com/en-us/supersim/get-started/get-started-with-super-sim-sms-commands-and-the-raspberry-pi-pico) to jump to the rest of the tutorial.

{% code lineNumbers="true" %}

```javascript
from machine import UART, Pin, I2C
from utime import ticks_ms, sleep
import json

class MCP9808:
    """
    A simple driver for the I2C-connected MCP9808 temperature sensor.
    This release supports MicroPython.
    """

    # *********** PRIVATE PROPERTIES **********

    i2c = None
    address = 0x18

    # *********** CONSTRUCTOR **********

    def __init__(self, i2c, i2c_address=0x18):
        assert 0x00 <= i2c_address < 0x80, "ERROR - Invalid I2C address in MCP9808()"
        self.i2c = i2c
        self.address = i2c_address

    # *********** PUBLIC METHODS **********

    def read_temp(self):
        # Read sensor and return its value in degrees celsius.
        temp_bytes = self.i2c.readfrom_mem(self.address, 0x05, 2)
        # Scale and convert to signed value.
        temp_raw = (temp_bytes[0] << 8) | temp_bytes[1]
        temp_cel = (temp_raw & 0x0FFF) / 16.0
        if temp_raw & 0x1000: temp_cel -= 256.0
        return temp_cel

class HT16K33:
    """
    A simple, generic driver for the I2C-connected Holtek HT16K33 controller chip.
    This release supports MicroPython and CircuitPython

    Version:    3.0.2
    Bus:        I2C
    Author:     Tony Smith (@smittytone)
    License:    MIT
    Copyright:  2020
    """

    # *********** CONSTANTS **********

    HT16K33_GENERIC_DISPLAY_ON = 0x81
    HT16K33_GENERIC_DISPLAY_OFF = 0x80
    HT16K33_GENERIC_SYSTEM_ON = 0x21
    HT16K33_GENERIC_SYSTEM_OFF = 0x20
    HT16K33_GENERIC_DISPLAY_ADDRESS = 0x00
    HT16K33_GENERIC_CMD_BRIGHTNESS = 0xE0
    HT16K33_GENERIC_CMD_BLINK = 0x81

    # *********** PRIVATE PROPERTIES **********

    i2c = None
    address = 0
    brightness = 15
    flash_rate = 0

    # *********** CONSTRUCTOR **********

    def __init__(self, i2c, i2c_address):
        assert 0x00 <= i2c_address < 0x80, "ERROR - Invalid I2C address in HT16K33()"
        self.i2c = i2c
        self.address = i2c_address
        self.power_on()

    # *********** PUBLIC METHODS **********

    def set_blink_rate(self, rate=0):
        """
        Set the display's flash rate.
        """
        assert rate in (0, 0.5, 1, 2), "ERROR - Invalid blink rate set in set_blink_rate()"
        self.blink_rate = rate & 0x03
        self._write_cmd(self.HT16K33_GENERIC_CMD_BLINK | rate << 1)

    def set_brightness(self, brightness=15):
        """
        Set the display's brightness (ie. duty cycle).
        """
        if brightness < 0 or brightness > 15: brightness = 15
        self.brightness = brightness
        self._write_cmd(self.HT16K33_GENERIC_CMD_BRIGHTNESS | brightness)

    def draw(self):
        """
        Writes the current display buffer to the display itself.
        """
        self._render()

    def update(self):
        """
        Alternative for draw() for backwards compatibility
        """
        self._render()

    def clear(self):
        """
        Clear the buffer.
        """
        for i in range(0, len(self.buffer)): self.buffer[i] = 0x00
        return self

    def power_on(self):
        """
        Power on the controller and display.
        """
        self._write_cmd(self.HT16K33_GENERIC_SYSTEM_ON)
        self._write_cmd(self.HT16K33_GENERIC_DISPLAY_ON)

    def power_off(self):
        """
        Power on the controller and display.
        """
        self._write_cmd(self.HT16K33_GENERIC_DISPLAY_OFF)
        self._write_cmd(self.HT16K33_GENERIC_SYSTEM_OFF)

    # ********** PRIVATE METHODS **********

    def _render(self):
        """
        Write the display buffer out to I2C
        """
        buffer = bytearray(len(self.buffer) + 1)
        buffer[1:] = self.buffer
        buffer[0] = 0x00
        self.i2c.writeto(self.address, bytes(buffer))

    def _write_cmd(self, byte):
        """
        Writes a single command to the HT16K33. A private method.
        """
        self.i2c.writeto(self.address, bytes([byte]))

class HT16K33Segment(HT16K33):
    """
    Micro/Circuit Python class for the Adafruit 0.56-in 4-digit,
    7-segment LED matrix backpack and equivalent Featherwing.

    Version:    3.0.2
    Bus:        I2C
    Author:     Tony Smith (@smittytone)
    License:    MIT
    Copyright:  2020
    """

    # *********** CONSTANTS **********

    HT16K33_SEGMENT_COLON_ROW = 0x04
    HT16K33_SEGMENT_MINUS_CHAR = 0x10
    HT16K33_SEGMENT_DEGREE_CHAR = 0x11
    HT16K33_SEGMENT_SPACE_CHAR = 0x00

    # The positions of the segments within the buffer
    POS = (0, 2, 6, 8)

    # Bytearray of the key alphanumeric characters we can show:
    # 0-9, A-F, minus, degree
    CHARSET = b'\x3F\x06\x5B\x4F\x66\x6D\x7D\x07\x7F\x6F\x5F\x7C\x58\x5E\x7B\x71\x40\x63'

    # *********** CONSTRUCTOR **********

    def __init__(self, i2c, i2c_address=0x70):
        self.buffer = bytearray(16)
        super(HT16K33Segment, self).__init__(i2c, i2c_address)

    # *********** PUBLIC METHODS **********

    def set_colon(self, is_set=True):
        """
        Set or unset the display's central colon symbol.
        """
        self.buffer[self.HT16K33_SEGMENT_COLON_ROW] = 0x02 if is_set is True else 0x00
        return self

    def set_glyph(self, glyph, digit=0, has_dot=False):
        """
        Present a user-defined character glyph at the specified digit.
        """
        assert 0 <= digit < 4, "ERROR - Invalid digit (0-3) set in set_glyph()"
        assert 0 <= glyph < 0xFF, "ERROR - Invalid glyph (0x00-0xFF) set in set_glyph()"
        self.buffer[self.POS[digit]] = glyph
        if has_dot is True: self.buffer[self.POS[digit]] |= 0x80
        return self

    def set_number(self, number, digit=0, has_dot=False):
        """
        Present single decimal value (0-9) at the specified digit.
        """
        assert 0 <= digit < 4, "ERROR - Invalid digit (0-3) set in set_number()"
        assert 0 <= number < 10, "ERROR - Invalid value (0-9) set in set_number()"
        return self.set_character(str(number), digit, has_dot)

    def set_character(self, char, digit=0, has_dot=False):
        """
        Present single alphanumeric character at the specified digit.
        """
        assert 0 <= digit < 4, "ERROR - Invalid digit set in set_character()"
        char = char.lower()
        char_val = 0xFF
        if char == "deg":
            char_val = HT16K33_SEGMENT_DEGREE_CHAR
        elif char == '-':
            char_val = self.HT16K33_SEGMENT_MINUS_CHAR
        elif char == ' ':
            char_val = self.HT16K33_SEGMENT_SPACE_CHAR
        elif char in 'abcdef':
            char_val = ord(char) - 87
        elif char in '0123456789':
            char_val = ord(char) - 48
        assert char_val != 0xFF, "ERROR - Invalid char string set in set_character()"
        self.buffer[self.POS[digit]] = self.CHARSET[char_val]
        if has_dot is True: self.buffer[self.POS[digit]] |= 0x80
        return self

'''
Send an AT command - return True if we got an expected
response ('back'), otherwise False
'''
def send_at(cmd, back="OK", timeout=1000):
    # Send the command and get the response (until timeout)
    buffer = send_at_get_resp(cmd, timeout)
    if len(buffer) > 0: return (back in buffer)
    return False

'''
Send an AT command - just return the response
'''
def send_at_get_resp(cmd, timeout=1000):
    # Send the AT command
    modem.write((cmd + "\r\n").encode())

    # Read and return the response (until timeout)
    return read_buffer(timeout)

'''
Read in the buffer by sampling the UART until timeout
'''
def read_buffer(timeout):
    buffer = bytes()
    now = ticks_ms()
    while (ticks_ms() - now) < timeout and len(buffer) < 1025:
        if modem.any():
            buffer += modem.read(1)
    return buffer.decode()

'''
Module startup detection
Send a command to see if the modem is powered up
'''
def boot_modem():
    state = False
    count = 0
    while count < 20:
        if send_at("ATE1"):
            print("The modem is ready")
            return True
        if not state:
            print("Powering the modem")
            module_power()
            state = True
        sleep(4)
        count += 1
    return False

'''
Power the module on/off
'''
def module_power():
    pwr_key = Pin(14, Pin.OUT)
    pwr_key.value(1)
    sleep(1.5)
    pwr_key.value(0)

'''
Check we are attached
'''
def check_network():
    is_connected = False
    response = send_at_get_resp("AT+COPS?")
    line = split_msg(response, 1)
    if "+COPS:" in line:
        is_connected = (line.find(",") != -1)
        if is_connected: print("Network information:", line)
    return is_connected

'''
Configure the modem
'''
def configure_modem():
    # NOTE AT commands can be sent together, not one at a time.
    # Set the error reporting level, set SMS text mode, delete left-over SMS
    # select LTE-only mode, select Cat-M only mode, set the APN to 'super' for Super SIM
    send_at("AT+CMEE=2;+CMGF=1;+CMGD=,4;+CNMP=38;+CMNB=1;+CGDCONT=1,\"IP\",\"super\"")
    # Set SSL version, SSL no verify, set HTTPS request parameters
    send_at("AT+CSSLCFG=\"sslversion\",1,3;+SHSSL=1,\"\";+SHCONF=\"BODYLEN\",1024;+SHCONF=\"HEADERLEN\",350")
    print("Modem configured for Cat-M and Super SIM")

'''
Open/close a data connection to the server
'''
def open_data_conn():
    # Activate a data connection using PDP 0,
    # but first check it's not already open
    response = send_at_get_resp("AT+CNACT?")
    line = split_msg(response, 1)
    status = get_field_value(line, 1)

    if status == "0":
        # Inactive data connection so start one up
        success = send_at("AT+CNACT=0,1", "ACTIVE", 2000)
    elif status in ("1", "2"):
        # Active or operating data connection
        success = True

    print("Data connection", "active" if success else "inactive")
    return success

def close_data_conn():
    # Just close the connection down
    send_at("AT+CNACT=0,0")
    print("Data connection inactive")

'''
Start/end an HTTP session
'''
def start_session(server):
    # Deal with an existing session if there is one
    if send_at("AT+SHSTATE?", "1"):
        print("Closing existing HTTP session")
        send_at("AT+SHDISC")

    # Configure a session with the server...
    send_at("AT+SHCONF=\"URL\",\"" + server + "\"")

    # ...and open it
    resp = send_at_get_resp("AT+SHCONN", 2000)
    # The above command may take a while to return, so
    # continue to check the UART until we have a response,
    # or 90s passes (timeout)
    now = ticks_ms()
    while ((ticks_ms() - now) < 90000):
        #if len(resp) > 0: print(resp)
        if "OK" in resp: return True
        if "ERROR" in resp: return False
        resp = read_buffer(1000)
    return False

def end_session():
    # Break the link to the server
    send_at("AT+SHDISC")
    print("HTTP session closed")

'''
Set a standard request header
'''
def set_request_header():
    global req_head_set

    # Check state variable to see if we need to
    # set the standard request header
    if not req_head_set:
        send_at("AT+SHCHEAD")
        send_at("AT+SHAHEAD=\"Content-Type\",\"application/x-www-form-urlencoded\";+SHAHEAD=\"User-Agent\",\"twilio-pi-pico/1.0.0\"")
        send_at("AT+SHAHEAD=\"Cache-control\",\"no-cache\";+SHAHEAD=\"Connection\",\"keep-alive\";+SHAHEAD=\"Accept\",\"*/*\"")
        req_head_set = True

'''
Make a request to the specified server
'''
def issue_request(server, path, body, verb):
    result = ""

    # Check the request verb
    code = 0
    verbs = ["GET", "PUT", "POST", "PATCH", "HEAD"]
    if verb.upper() in verbs:
        code = verbs.index(verb) + 1
    else:
        print("ERROR -- Unknown request verb specified")
        return ""

    # Attempt to open a data session
    if start_session(server):
        print("HTTP session open")
        # Issue the request...
        set_request_header()
        print("HTTP request verb code:",code)
        if body != None: set_request_body(body)
        response = send_at_get_resp("AT+SHREQ=\"" + path + "\"," + str(code))
        start = ticks_ms()
        while ((ticks_ms() - start) < 90000):
            if "+SHREQ:" in response: break
            response = read_buffer(1000)

        # ...and process the response
        lines = split_msg(response)
        for line in lines:
            if len(line) == 0: continue
            if "+SHREQ:" in line:
                status_code = get_field_value(line, 1)
                if int(status_code) > 299:
                    print("ERROR -- HTTP status code",status_code)
                    break

                # Get the data from the modem
                data_length = get_field_value(line, 2)
                if data_length == "0": break
                response = send_at_get_resp("AT+SHREAD=0," + data_length)

                # The JSON data may be multi-line so store everything in the
                # response that comes after (and including) the first '{'
                pos = response.find("{")
                if pos != -1: result = response[pos:]
        end_session()
    else:
        print("ERROR -- Could not connect to server")
    return result

'''
Flash the Pico LED
'''
def led_blink(blinks):
    for i in range(0, blinks):
        led_off()
        sleep(0.25)
        led_on()
        sleep(0.25)

def led_on():
    led.value(1)

def led_off():
    led.value(0)

'''
Split a response from the modem into separate lines,
removing empty lines and returning all that's left or,
if 'want_line' has a non-default value, return that one line
'''
def split_msg(msg, want_line=99):
    lines = msg.split("\r\n")
    results = []
    for i in range(0, len(lines)):
        if i == want_line:
            return lines[i]
        if len(lines[i]) > 0:
            results.append(lines[i])
    return results

'''
Extract the SMS index from a modem response line
'''
def get_sms_number(line):
    return get_field_value(line, 1)

'''
Extract a comma-separated field value from a line
'''
def get_field_value(line, field_num):
    parts = line.split(",")
    if len(parts) > field_num:
        return parts[field_num]
    return ""

'''
Blink the LED n times after extracting n from the command string
'''
def process_command_led(msg):
    blinks = msg[4:]
    print("Blinking LED",blinks,"time(s)")
    try:
        led_blink(int(blinks))
    except:
        print("BAD COMMAND:",blinks)

'''
Display the decimal value n after extracting n from the command string
'''
def process_command_num(msg):
    value = msg[4:]
    print("Setting",value,"on the LED")
    try:
        # Extract the decimal value (string) from 'msg' and convert
        # to a hex integer for easy presentation of decimal digits
        hex_value = int(value, 16)
        display.set_number((hex_value & 0xF000) >> 12, 0)
        display.set_number((hex_value & 0x0F00) >>  8, 1)
        display.set_number((hex_value & 0x00F0) >>  4, 2)
        display.set_number((hex_value & 0x000F), 3).update()
    except:
        print("BAD COMMAND:",value)

'''
Get a temperature reading and send it back as an SMS
'''
def process_command_tmp():
    print("Sending a temperature reading")
    celsius_temp = "{:.2f}".format(sensor.read_temp())
    if send_at("AT+CMGS=\"000\"", ">"):
        # '>' is the prompt sent by the modem to signal that
        # it's waiting to receive the message text.
        # 'chr(26)' is the code for ctrl-z, which the modem
        # uses as an end-of-message marker
        r = send_at_get_resp(celsius_temp + chr(26))

'''
Make a request to a sample server
'''
def process_command_get():
    print("Requesting data...")
    server = "YOUR_BEECEPTOR_URL"
    endpoint_path = "/api/v1/status"

    # Attempt to open a data connection
    if open_data_conn():
        result = issue_request(server, endpoint_path, None, "GET")
        if len(result) > 0:
            # Decode the received JSON
            try:
                response = json.loads(result)
                # Extract an integer value and show it on the display
                if "status" in response:
                    process_command_num("NUM=" + str(response["status"]))
            except:
                print("ERROR -- No JSON data received. Raw:\n",result)
        else:
            print("ERROR -- No JSON data received")

        # Close the open connection
        close_data_conn()

'''
Listen for incoming SMS Commands
'''
def listen():
    print("Listening for Commands...")
    while True:
        # Did we receive a Unsolicited Response Code (URC)?
        buffer = read_buffer(5000)
        if len(buffer) > 0:
            lines = split_msg(buffer)
            for line in lines:
                if "+CMTI:" in line:
                    # We received an SMS, so get it...
                    num = get_sms_number(line)
                    msg = send_at_get_resp("AT+CMGR=" + num, 2000)

                    # ...and process it for commands
                    cmd = split_msg(msg, 2).upper()
                    if cmd.startswith("LED="):
                        process_command_led(cmd)
                    elif cmd.startswith("NUM="):
                        process_command_num(cmd)
                    elif cmd.startswith("TMP"):
                        process_command_tmp()
                    elif cmd.startswith("GET"):
                        process_command_get()
                    else:
                        print("UNKNOWN COMMAND:",cmd)
                    # Delete all SMS now we're done with them
                    send_at("AT+CMGD=,4")

# Globals
req_head_set = False

# Set up the modem UART
modem = UART(0, 115200)

# Set up I2C and the display
i2c = I2C(1, scl=Pin(3), sda=Pin(2))
display = HT16K33Segment(i2c)
display.set_brightness(2)
display.clear().draw()

# Set up the MCP9808 sensor
sensor = MCP9808(i2c=i2c)

# Set the LED and turn it off
led = Pin(25, Pin.OUT)
led_off()

# Start the modem
if boot_modem():
    configure_modem()

    # Check we're attached
    state = True
    while not check_network():
        if state:
            led_on()
        else:
            led_off()
        state = not state

    # Light the LED
    led_on()

    # Begin listening for commands
    listen()
else:
    # Error! Blink LED 5 times
    led_blink(5)
    led_off()

```

{% endcode %}

This is the basis of the code you'll work on through the remainder of the guide. What does it do? Much of it is the code you worked on last time, so let's focus on the additions.

To communicate with Internet resources, the modem needs to establish a data connection through the cellular network, and then an HTTP connection to the target server. Lastly, it creates and sends an HTTP request to that server, and reads back the response.

The function `open_data_conn()` handles the first part, by sending the AT command `CNACT=0,1`. The `0` is the 'Packet Data Protocol (PDP) context', essentially one of a number of IP channels the modem provides. The `1` is the instruction to enable the data connection.

When the data connection is up, the code calls `start_session()` to open an HTTP connection to a specific server, which is passed in as an argument. The server is set using `AT+SHCONF="URL","<SERVER_DOMAIN>"` and the connection then opened with `AT+SHCONN`.

Requests are made through the function `issue_request()`. It calls `start_session()` and then sets up the request: we build the header on the modem (and keep it for future use) and then send `AT+SHREQ=` with the path to a resource and the value `1` as parameters — the `1` indicates it is a `GET` request.

The response returned by the modem contains information about the data returned by the server, which is stored on the modem. The code uses this information to get the HTTP status code — to check the request was successful — and the response's length. If the latter is non-zero, the code sends `AT+SHREAD=` to retrieve that many bytes from the modem's cache. `issue_request()` extracts any JSON in the response and returns it.

All this is triggered by the receipt of an SMS command, `GET`, which causes the function `process_command_get()` to be called. This function calls `open_data_conn()` and then `issue_request()`. It parses the received data as JSON and displays the value of a certain field on the LED display using code you worked on in the previous tutorial.

{% hint style="info" %}
When the code runs, it turns off the Pico's built-in LED. The LED will flash rapidly five times if there was a problem booting the modem.

The LED is turned on when the device is attached to the network. If the LED is flashing slowly, that means it has not yet attached. Please be patient; it will attach shortly.
{% endhint %}

***

## 3. Set up a data source <a href="#id-3-set-up-a-data-source" id="id-3-set-up-a-data-source"></a>

Before you can run the code, you need to set up the data that will be retrieved. You're going to use [Beeceptor](https://beeceptor.com/) as a proxy for the Internet resource your IoT device will be communicating with. In a real-world application, you would sign up to use a specific service and access that, but Beeceptor makes a very handy stand-in. Let's set it up to receive HTTP `GET` requests from the device.

1. In a web browser tab, [go to Beeceptor](https://beeceptor.com/) .
2. Enter an endpoint name in the large text field and click **Create Endpoint**:

   <figure><img src="/files/LVFjGxV4rgScTxJrxtQx" alt=""><figcaption></figcaption></figure>
3. On the screen that appears next, click on the upper of the two clipboard icons to copy the endpoint URL:<br>

   <figure><img src="/files/l7m01lJw0XP5E8sV2gWD" alt=""><figcaption></figcaption></figure>
4. Keep the tab open.
5. Jump back to your text editor and locate the `process_command_get()` function in the Python code. Paste the endpoint URL you got from step 3, in place of `YOUR_BEECEPTOR_URL` .
6. Save the file and then transfer it over to the Pico.
7. Hop back to Beeceptor and click on **Mocking Rules (0)** in the page shown above and then click **Create New Rule** .
8. In the third field, add `api/v1/status` right after the `/` that's already there.
9. Under **Response Body**, paste the following JSON, your test API's sample output:&#x20;

{% code overflow="wrap" %}

```json
{ "userId":10,"status":1234,"title":"delectus aut autem","completed":false,"datapoints":[1,2,3,4,5,6,7,8,9,0] }
```

{% endcode %}

10. The panel should look like this:<br>

    <figure><img src="/files/kfLDDmXwVCa8KyLx2k7i" alt=""><figcaption></figcaption></figure>
11. Click **Save Rule** and then close the **Mocking Rules** panel by clicking the **X** in the top right corner.
12. Again, keep the tab open.

***

## 4. Try out the code <a href="#id-4-try-out-the-code" id="id-4-try-out-the-code"></a>

Switch over to Minicom (or PuTTY). When you see the `Listening for commands...` message, open a separate terminal tab or window and enter the following command using `curl`:

{% code overflow="wrap" %}

```bash
curl -X POST "https://supersim.api.korewireless.com/v1/SmsCommands" 
  -H "Content-Type: application/x-www-form-urlencoded" 
  -H "Authorization: Bearer <YOUR_AUTH_TOKEN>" 
  --data-urlencode "Sim=<Sid>" 
  --data-urlencode "Payload=GET"
```

{% endcode %}

You'll need to replace the sections in angle brackets (`<` and `>`) with your own information, just as you did last time. Your SIM's SID — or friendly name if you've set one — and specify the auth token generated from your [KORE Build API client](https://build.korewireless.com/clients). To know more about API clients, we've created a quick guide for you [here](https://docs.korewireless.com/en-us/developers/api-management/api-clients).

This command uses the Super SIM API's SMS Commands API to send a machine-to-machine message to the Pico. The `--payload` parameter tells the API what the body of the SMS should be: it's whatever comes after the equals sign. In this case, that's `GET`, the command to which we want the Pico to respond.

The `listen()` function in your Python code keeps an ear open for incoming SMS messages, which are signalled by the module transmitting a string that includes the characters `+CMTI:`. If it appears, the code sends a new AT command to the modem to get the message (`AT+CMGR`) and then awaits a response. When the response comes, the code processes it and extracts the `GET` — which tells the device to make an HTTP request of that type.

You'll see all this in your terminal window:<br>

<figure><img src="/files/zS6jRfJRtw1vIPM3euJg" alt=""><figcaption></figcaption></figure>

You should also see 1234 displayed on the LED — one part of the data received from the API you connected to!

{% hint style="info" %}
The code listed above will output state messages, but if you want to see the full flow of AT command requests and their responses, you'll need to add a handful of extra lines. To do so, drop in this function:

```python
'''
Output raw data
'''
def debug_output(msg):
    for line in split_msg(msg): print(">>> ",line)
```

and add this line right before the final `return` in the function `read_buffer()`:

```bash
debug_output(buffer.decode())
```

The output will now look like this:<br>
{% endhint %}

<figure><img src="/files/60LIkO1wlRBkt2Mbrun7" alt=""><figcaption></figcaption></figure>

***

## 5. Post data from the device <a href="#id-5-post-data-from-the-device" id="id-5-post-data-from-the-device"></a>

Reaching out across the Internet and requesting information is only half of the story: you also want to push data out to the cloud. Our Pico-based IoT demo is well prepared to be a source of information: it includes a temperature sensor which you can read and transmit the result by SMS if you send the command TMP by text message.

Not all data receivers accept input by SMS, however. Most will accept `POST` requests, though, so let's add the code to the application to support that. There are a number of changes and additions to make.

Add the following code right below the `def set_request_header():` function definition:

{% code lineNumbers="true" %}

```python
'''
Set request body
'''
def set_request_body(body):
    send_at("AT+SHCPARA;+SHPARA=\"data\",\"" + body + "\"")

'''
Make a GET, POST requests to the specified server
'''
def get_data(server, path):
    return issue_request(server, path, None, "GET")

def send_data(server, path, data):
    return issue_request(server, path, data, "POST")
```

{% endcode %}

Replace the existing `issue_request()` function with this code:

{% code lineNumbers="true" %}

```python
def issue_request(server, path, body, verb):
    result = ""

    # Check the request verb
    code = 0
    verbs = ["GET", "PUT", "POST", "PATCH", "HEAD"]
    if verb.upper() in verbs:
        code = verbs.index(verb) + 1
    else:
        print("ERROR -- Unknown request verb specified")
        return ""

    # Attempt to open a data session
    if start_session(server):
        print("HTTP session open")
        # Issue the request...
        set_request_header()
        print("HTTP request verb code:",code)
        if body != None: set_request_body(body)
        response = send_at_get_resp("AT+SHREQ=\"" + path + "\"," + str(code))
        start = ticks_ms()
        while ((ticks_ms() - start) < 90000):
            if "+SHREQ:" in response: break
            response = read_buffer(1000)

        # ...and process the response
        lines = split_msg(response)
        for line in lines:
            if len(line) == 0: continue
            if "+SHREQ:" in line:
                status_code = get_field_value(line, 1)
                if int(status_code) > 299:
                    print("ERROR -- HTTP status code",status_code)
                    break

                # Get the data from the modem
                data_length = get_field_value(line, 2)
                if data_length == "0": break
                response = send_at_get_resp("AT+SHREAD=0," + data_length)

                # The JSON data may be multi-line so store everything in the
                # response that comes after (and including) the first '{'
                pos = response.find("{")
                if pos != -1: result = response[pos:]
        end_session()
    else:
        print("ERROR -- Could not connect to server")
    return result
```

{% endcode %}

Replace the `process_command_get()` function with all of the following code:

{% code lineNumbers="true" %}

```python
'''
Make a request to a sample server
'''
def process_command_get():
    print("Requesting data...")
    server = "YOUR_BEECEPTOR_URL"
    endpoint_path = "/api/v1/status"
    process_request(server, endpoint_path)

def process_command_post():
    print("Sending data...")
    server = "YOUR_BEECEPTOR_URL"
    endpoint_path = "/api/v1/logs"
    process_request(server, endpoint_path, "{:.2f}".format(sensor.read_temp()))

def process_request(server, path, data=None):
    # Attempt to open a data connection
    if open_data_conn():
        if data is not None:
            result = send_data(server, path, data)
        else:
            result = get_data(server, path)

        if len(result) > 0:
            # Decode the received JSON
            try:
                response = json.loads(result)
                # Extract an integer value and show it on the display
                if "status" in response:
                    process_command_num("NUM=" + str(response["status"]))
            except:
                print("ERROR -- No JSON data received. Raw:\n",result)
        else:
            print("ERROR -- No JSON data received")

        # Close the open connection
        close_data_conn()
```

{% endcode %}

When you've done that, copy and paste your Beeceptor endpoint URL into the places marked `YOUR_BEECEPTOR_URL`.

Finally, add the following lines to the `listen()` function, right below the code that looks for a `GET` command:

{% code lineNumbers="true" %}

```python
elif cmd.startswith("POST"):
    process_command_post()
```

{% endcode %}

Finally, transfer the updated program to the Pico.

***

## 6. Set up a data sink <a href="#id-5-set-up-a-data-sink" id="id-5-set-up-a-data-sink"></a>

You can't send data without somewhere to post it, so set that up now. Once more, Beeceptor comes to our assistance: you're going to add a mocking rule as a stand-in for an application server that will take in the data the device posts and return a status message.

1. Switch to the web browser tab showing [Beeceptor](https://beeceptor.com/) .
2. Click on **Mocking Rules (1)** and then **Create New Rule** .
3. Under **Method** , select **POST** .
4. In the third field, add `api/v1/logs` right after the `/` that's already there.
5. Under **Response Body**, paste the following JSON:

{% code lineNumbers="true" %}

```
{ "status":4567 }
```

{% endcode %}

6. The panel should look like this:<br>

   <figure><img src="/files/0HhGbMFLqBbA80fMcyRT" alt=""><figcaption></figcaption></figure>
7. Click **Save Rule** and then close the **Mocking Rules** panel by clicking the **X** in the top right corner.
8. Again, keep the tab open.

***

## 7. Try out the code — part deux <a href="#id-6-try-out-the-code--part-deux" id="id-6-try-out-the-code--part-deux"></a>

Switch over to Minicom (or PuTTY). When you see the `Listening for commands...` message, open a separate terminal tab or window and enter the following command, filling in your details where necessary:

```bash
curl -X POST "https://supersim.api.korewireless.com/v1/SmsCommands" 
  -H "Content-Type: application/x-www-form-urlencoded" 
  -H "Authorization: Bearer <YOUR_AUTH_TOKEN>" 
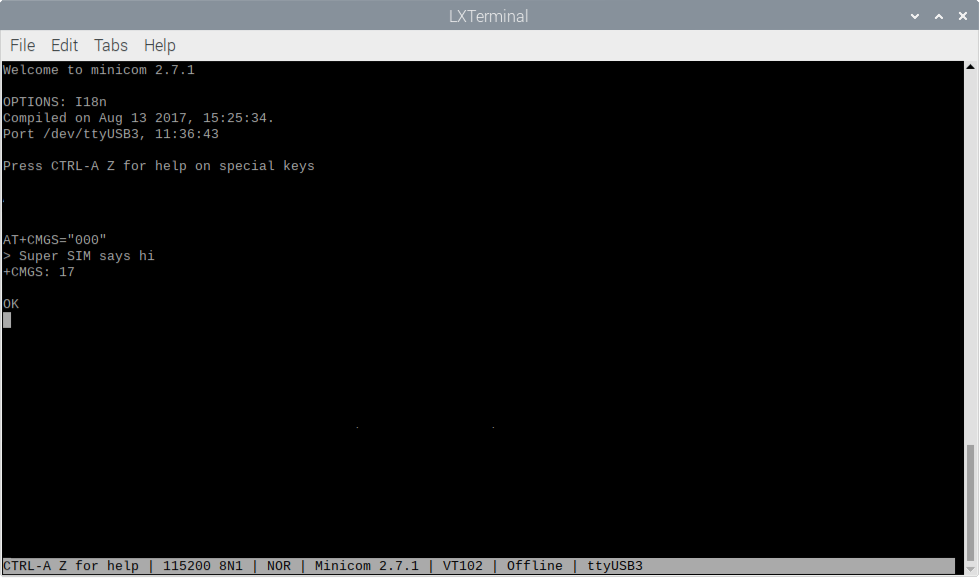
  --data-urlencode "Sim=<Sid>" 
  --data-urlencode "Payload=POST"
```

This time, you'll see all this in your terminal window:<br>

<figure><img src="/files/bnQCJUwXfbxZlFbv4gja" alt=""><figcaption></figcaption></figure>

You should also see 4567 displayed on the LED — one part of the data received bacl from the API. Speaking of the API, what did it see? Take a look at Beeceptor. It records the receipt of a `POST` request to `/api/v1/logs`, and if you click on the entry in the table, then the JSON icon (**{:}**) above the **Request body** panel, you'll see the celsius temperature as received data:<br>

<figure><img src="/files/Xo9pjMmSCrnOAFvJ5OoZ" alt=""><figcaption></figcaption></figure>

***

## 8. Next steps <a href="#id-7-next-steps" id="id-7-next-steps"></a>

You now have a Raspberry Pi Pico-based IoT device that can send and receive data across the Internet. In this demo, you've used test APIs for getting and posting data, and triggered both by manually sending an SMS command. Why not adapt the code not only to make use of different APIs — perhaps one you might make use of in your production IoT device — but also to do so automatically, at a time appropriate to the application? For example, you might include a regular weather forecast update, or pull in the output from a Slack channel. You might post device status data to your own cloud.

Wherever you take your Raspberry Pi Pico-based IoT device next, we can't wait to see what you build!

***

### Note <a href="#note" id="note"></a>

When this was written, of course: the [Pico W](https://www.raspberrypi.com/products/raspberry-pi-pico/) has been release since then.


# Get Started with Super SIM SMS Commands and the Raspberry Pi 4

**SMS Commands** is a Super SIM API that has been designed to allow you to exchange machine-to-machine (M2M) SMS messages with your Super SIM-connected devices. Look forward to further Commands APIs using other transports in future!

This short guide will show you how to set up and sample SMS Commands. Perhaps you'd like to see if it might be a useful addition to your application right now, or you'd like to see how it might be incorporated in the future. If you want to cut to the chase and start developing the feature into your application immediately, [check out the full API documentation and sample code](https://docs.korewireless.com/en-us/api/products/supersim/smscommand-resource).

<figure><img src="https://www.twilio.com/_next/image?url=https%3A%2F%2Fdocs-assets.prod.twilio.com%2F84435001bc31d9c3cb576db6f0c0929134e762a30c5ed836cc1dcaa60f35749d.jpg&#x26;w=3840&#x26;q=75" alt=""><figcaption></figcaption></figure>

To demonstrate SMS Commands, we'll use a Raspberry Pi 4 Linux computer and a [Waveshare's SIM7600G-H add-on board](https://www.waveshare.com/wiki/SIM7600G-H_4G_HAT), which incorporates a Simcom 7600-G global LTE modem. Please [head over to the Super SIM Quickstart now](https://docs.korewireless.com/en-us/supersim/get-started/get-started-with-super-sim-the-raspberry-pi-4-and-the-waveshare-4g-hat) for a list of the hardware you need and guidance on putting it together. When you've reached Step 4, jump back here and finish the Quickstart later.

{% hint style="info" %}
If you'd like to try SMS Commands with different hardware, we have a tutorial that focuses on the Raspberry Pi Pico, and which also makes use of SMS Commands to send instructions to the device and receive data back. You can [check it out here](https://docs.korewireless.com/en-us/supersim/get-started/get-started-with-super-sim-sms-commands-and-the-raspberry-pi-pico).
{% endhint %}

{% hint style="info" %}
You can also run this tutorial if you're using the [Sixfab 3G-4G/LTE Base Hat](https://docs.korewireless.com/en-us/supersim/get-started/get-started-with-super-sim-the-raspberry-pi-4-and-the-sixfab-base-hat). In this case, you communicate with the Hat's cellular module using `minicom -D /dev/ttyUSB2`.

This tutorial was originally written to make use of the Sixfab Cellular IoT Hat, which has since been EOL'd. If you have a Cellular IoT Hat and would like to use this tutorial, the key change you need to note is in the section on preparing the device for use: you communicate with the Cellular IoT Hat using `minicom -D /dev/ttyUSB3`.
{% endhint %}

You can perform all of the following steps using the Raspberry Pi as both the target device — i.e., the one with the modem — and as a stand-in for your cloud or app. You can also use your main computer as the latter, but using the Pi for both saves moving between machines.

You will first need to install `curl` or your favorite API client on whichever machine you use to send commands to the device.

{% hint style="info" %}
This guide also requires a **configured** Super SIM. If you haven't set up your Super SIM in the [Console](https://supersim.korewireless.com/supersim/sims), please do so now. The [Super SIM First Steps guide](https://docs.korewireless.com/en-us/supersim/get-started/supersim-first-steps) has help if you need it.
{% endhint %}

***

## Send SMS Commands to the device <a href="#send-sms-commands-to-the-device" id="send-sms-commands-to-the-device"></a>

### 1. Prepare the device <a href="#id-1-prepare-the-device" id="id-1-prepare-the-device"></a>

To send or receive messages, first power up the device's cellular module.

1. Check the Waveshare Hat's red **NET** LED — if it's unlit, press the Hat's **PWRKEY** button.
2. By default, the Raspberry Pi will boot to the desktop. If it's one you've used before and set to boot to the command line, just run `startx` to launch the desktop.
3. Select **Accessories > Terminal** from the **Raspberry** menu.
4. You'll use a command-line serial console tool called Minicom to communicate with the Hat's cellular module. If you would prefer to use an alternative tool, such as Screen, that's fine, but it may have a slightly different device-selection procedure than the one outlined here. Install Minicom with these two commands:

```
sudo apt update
sudo apt install minicom -y
```

5. Enter `minicom -D /dev/ttyUSB2` to open a connection to the modem. If Minicom posts an error indicating that `/dev/ttyUSB2` is inaccessible, please [check your Hat setup](https://docs.korewireless.com/en-us/supersim/get-started/get-started-with-super-sim-the-raspberry-pi-4-and-the-waveshare-4g-hat#hardware-setup-the-sim7600g-h-4g-hat) .
6. The SIM7600-G module probably isn't set to echo back what you type in, so you won't be able to see your side of the conversation, so type in `ATE1` and hit **Enter** . You'll get an `OK` back, and when you follow the remaining steps you'll see what you type.

### 2. Send an SMS Command to the device <a href="#id-2-send-an-sms-command-to-the-device" id="id-2-send-an-sms-command-to-the-device"></a>

{% tabs %}
{% tab title="Using the Super SIM Console SMS" %}
Use the ICCID, SIM SID, or unique name to search for your SIM in Super SIM Console. After locating it, load its details to proceed. At the bottom right of your page, you will see the Send M2M Commands card.

<figure><img src="/files/6sDb4UsC8XkYfYyzmmiU" alt=""><figcaption><p>Super SIM SIM Details: Send M2M Commands Card</p></figcaption></figure>

Load the Send SMS Command dialog by clicking the button from Send M2M Commands.

***

<figure><img src="/files/zHzqe2jenoTw1W4Uhe6I" alt=""><figcaption><p>Super SIM SMS Command UI</p></figcaption></figure>

Enter the payload and, optionally, you can add the Callback URL to get a feedback from after the SMS command. If the fleet the SIM is assigned to supports SMS and other validation passes, it will be queued for sending:

***

<figure><img src="/files/OykE8rVcm7KbCjPeo6aY" alt=""><figcaption><p>Super SIM SMS Command Details</p></figcaption></figure>

As you can see, the message's status is `queued`: it's in KORE's message queue waiting to be sent. When the SMS Command leaves the KORE Mobile Core for the network the device is attached to, its status will become `sent` and then `delivered` when it has been confirmed by the network that the message was delivered. Later on, you'll use a webhook, which you'll set up in the next section, to receive notifications about message status changes as they happen.
{% endtab %}

{% tab title="Using the SMS Commands API endpoint" %}
Sending an SMS Command to the device is just a matter of making a `POST` request to the SMS Commands API endpoint, `https://supersim.api.korewireless.com/v1/SmsCommands`. You need to provide your command, the SID of the [Sim resource](https://docs.korewireless.com/en-us/api/products/supersim/sim-resource) representing the Super SIM it's being sent to, and of course your KORE authorization details.

1. Open a second LX Terminal instance on the Pi, or a terminal on your main machine.
2. Let's say this is the message you want to send to the device:\\

```
{ "command": "wake", "timestamp": "2024-03-08-04-02-49" }
```

It's a command encoded in JSON, though you can use any other textual format and with whatever combination of keys and values that's appropriate for your application. The only restriction is that each Command can contain no more than 160 single-byte characters. You can send this message to your device using `curl` command line tool as follows:

<pre class="language-bash" data-overflow="wrap"><code class="lang-bash"><strong>curl -L -X POST "https://supersim.api.korewireless.com/v1/SmsCommands" \
</strong><strong>  --data-urlencode "Sim=&#x3C;YOUR_SIM_SID>" \
</strong>  --data-urlencode "Payload=&#x3C;YOUR_PAYLOAD>" \
  --header "Authorization: Bearer &#x3C;YOUR_AUTH_TOKEN>"
</code></pre>

3. Copy and paste the `curl` command to the command line then edit it to fill in the identifier of the Super SIM you're using (you can get this from the [Console](https://supersim.korewireless.com/supersim/sims) if you don't have it handy), and your account credentials (also available from the [Console](https://build.korewireless.com/clients), or for more guided instruction on the [KORE API](https://docs.korewireless.com/en-us/developers/get-started/apis)). The message is `<YOUR_PAYLOAD>` data specified as your `Payload` parameter.

The response, posted to the terminal by `curl`, will be something like this:

{% code overflow="wrap" %}

```json
{
    "account_sid": "ACaaaaaaaaaaaaaaaaaaaaaaaaaaaaaaaa",
    "sid": "HCaaaaaaaaaaaaaaaaaaaaaaaaaaaaaaaa",
    "payload": "{\"command\":\"wake up\",\"timestamp\":\"2024-03-08-14-02-49}\"",
    "sim_sid": "HSaaaaaaaaaaaaaaaaaaaaaaaaaaaaaaaa",
    "direction": "to_sim",
    "status": "queued",
    "date_created": "2024-03-08T14:28:19Z",
    "date_updated": "2024-03-08T14:28:19Z",
    "url": "https://supersim.api.korewireless.com/v1/SmsCommands/HCaaaaaaaaaaaaaaaaaaaaaaaaaaaaaaaa"
}
```

{% endcode %}
{% endtab %}
{% endtabs %}

You know your test device is connected to the cellular network, but a device in the field might not yet have connected when the message request was sent. If it's a mobile device, it might have briefly passed out of cellular range. Consequently, KORE will continue to attempt to send each new SMS Command for a period of up to 24 hours. If sending fails, the Command will remain in the queue. After 24 hours, it will be sent again, marked as `failed` and removed from the queue.

### 3. Read the SMS Command on the device <a href="#id-3-read-the-sms-command-on-the-device" id="id-3-read-the-sms-command-on-the-device"></a>

The message you just sent will probably already have arrived on the device, but you can check with an AT command sent to the cellular module. In the terminal running Minicom, enter `AT+CSCS="IRA"` and hit **Enter**. This tells the module to display characters in the International Reference Alphabet (IRA). We need this to view the braces in the JSON as they are not part of the standard GSM character set, which is the module's default.

<figure><img src="https://www.twilio.com/_next/image?url=https%3A%2F%2Fdocs-assets.prod.twilio.com%2F34dcc2391afd00de13533b4b4a7da1ffdd203d25abfb49a8ae3573b49d768ca4.png&#x26;w=1920&#x26;q=75" alt=""><figcaption></figcaption></figure>

Now enter `AT+CMGF=1` to set the 7600G's input mode to text, and then enter `AT+CMGL="ALL"` to list all of the SMS messages held on the device. Among them — or possibly the only one — you should see something like:

```
+CMGL: 0,"REC UNREAD","000",,
"21/04/19,15:04:26+00","{"command":"wake","time":"2021-04-19-15-03-49"}"
```

The first value after the command name (`+CMGL:`) is `0` here, but it might be a different number if your Super SIM has received other SMS messages before. This is this message's index in the cellular module's message store, and you can use it to read the specific message using it with this command:

```
AT+CMGR=<message_index>
```

Of course, a real-world application would handle these AT commands itself by talking directly to the cellular module. It would also parse the command embedded in the message and then perform the required action.

If you're wondering what the `"000"` in the third parameter of the message listed above is, it's KORE's SMS Commands number. All SMS Commands your devices receive will have come from this number, which you'll now use to send a message back from the device.

***

## Receive an SMS Command from the device <a href="#receive-an-sms-command-from-the-device" id="receive-an-sms-command-from-the-device"></a>

The SMS Commands API provides a specific phone number, `000`, to which all SMS messages, from every device are sent. KORE relays the ones it has received from your SIMs on to you. How does it know exactly where to send them? You specify a webhook address.

Super SIMs are organized into Fleets: groups of SIMs that have common settings, such as which networks they are able to connect to and whether they can make use of cellular data services. Fleets are represented in the Super SIM API by [Fleet resources](https://docs.korewireless.com/en-us/api/products/supersim/fleet-resource), and SMS Commands adds properties to each Fleet resource in which you can store your SMS Commands webhook address and, optionally, the HTTP method it uses.

So before you can send a message from the device, you need to set up a webhook target URL and add it to your Super SIM's Fleet.

### 1. Set up a webhook target <a href="#id-1-set-up-a-webhook-target" id="id-1-set-up-a-webhook-target"></a>

[Beeceptor](https://beeceptor.com/) is a handy service for testing webhooks. It's designed for developing and testing APIs of your own and offers free mock servers — virtual endpoints that can receive webhook calls. Let's set one up to receive messages from the device.

1. In a web browser tab, go to [Beeceptor](https://beeceptor.com/) .
2. Enter an endpoint name in the large text field and click **Create Endpoint** :

   <figure><img src="/files/jZoYrNflONLawqAVenQv" alt=""><figcaption></figcaption></figure>
3. On the screen that appears next, click on the upper of the two clipboard icons to copy the endpoint URL:

   <figure><img src="/files/5ARqkloRGvIx5qj0YlWa" alt=""><figcaption></figcaption></figure>
4. Keep the tab open.

### 2. Update your Super SIM's Fleet <a href="#id-2-update-your-super-sims-fleet" id="id-2-update-your-super-sims-fleet"></a>

Now you update your Super SIM's Fleet to add an SMS Commands webhook. You can [do this with the API](https://docs.korewireless.com/en-us/api/products/supersim/fleet-resource), but we'll use the Console for this demo.

1. Open a second web browser tab and log into the KORE [Console](https://console.korewireless.com) .
2. Click the Super SIM tile and then go to [**Fleets**](https://supersim.korewireless.com/supersim/fleets) and select the Fleet containing the Super SIM you are using.
3. Scroll down to **SMS Commands Callback URL** and paste in your webhook URL from the previous section. By default, webhooks are triggered with a `POST` request. Leave it unchanged for now, but if you need to use another method for your own application, you can change it later:

   <figure><img src="/files/NKVXmSbBqURXwg7JwjAP" alt=""><figcaption></figcaption></figure>
4. Click **Save** .
5. Close the tab if you like.

### 3. Send an SMS Command from the device <a href="#id-3-send-an-sms-command-from-the-device" id="id-3-send-an-sms-command-from-the-device"></a>

1. In the LX Terminal instance running Minicom — the one you're using to talk to the 7600G — enter the following command: `AT+CMGS="000"`\
   This tells the module to read in what you're going to type in next and then send it as an SMS message to the number `000` .
2. Minicom will now display a `>` prompt to show you that the 7600G is awaiting some text. Key in a Command — `Super SIM says hi`, for example — and then hold down the **ctrl** key and hit **Z** . The 7600G will attempt to send the Command, and you'll see a readout of the number of characters sent and `OK` if it succeeded:

   <figure><img src="https://www.twilio.com/_next/image?url=https%3A%2F%2Fdocs-assets.prod.twilio.com%2F744dac953c5b5d83fb89c9caca393f6b952fcddfc25b707319123954919e6099.png&#x26;w=2048&#x26;q=75" alt=""><figcaption></figcaption></figure>

### 4. Read the transmitted Command <a href="#id-4-read-the-transmitted-command" id="id-4-read-the-transmitted-command"></a>

1. Jump back to the Beeceptor tab in the browser. You should see — or will shortly see — the endpoint has received a `POST` request. Click on it to see the request body, then on the JSON icon, **{:}** , to view the data more clearly.
2. Look for the line beginning `Payload=` — right after it is the message you sent:

<figure><img src="/files/GOg4prmYsQxYt0Fm6Clj" alt=""><figcaption></figcaption></figure>

You'll also see that the `Direction` parameter now reads `from_sim`.

***

## Monitor SMS Message transmission <a href="#monitor-sms-message-transmission" id="monitor-sms-message-transmission"></a>

The webhook URL you just put in place was set up to receive SMS Commands from the device. You can also use it in a tutorial context for monitoring messages being sent to the device. Using the same technique you applied in the Send messages to the device section, above, but this time add the following extra parameter to the `twilio` call, adding `CallbackUrl=<YOUR_WEBHOOK_URL>` and `CallbackMethod=<YOUR_WEBHOOK_METHOD>` with your Beeceptor endpoint to the `curl` command:

```bash
curl -L -X POST "https://supersim.api.korewireless.com/v1/SmsCommands" \
  --data-urlencode "Sim=<YOUR_SIM_SID>" \
  --data-urlencode "Payload=<YOUR_PAYLOAD>" \
  --data-urlencode "CallbackUrl=<YOUR_WEBHOOK_URL>" \
  --data-urlencode "CallbackMethod=<YOUR_WEBHOOK_METHOD>" \
  --header "Authorization: Bearer <YOUR_AUTH_TOKEN>"
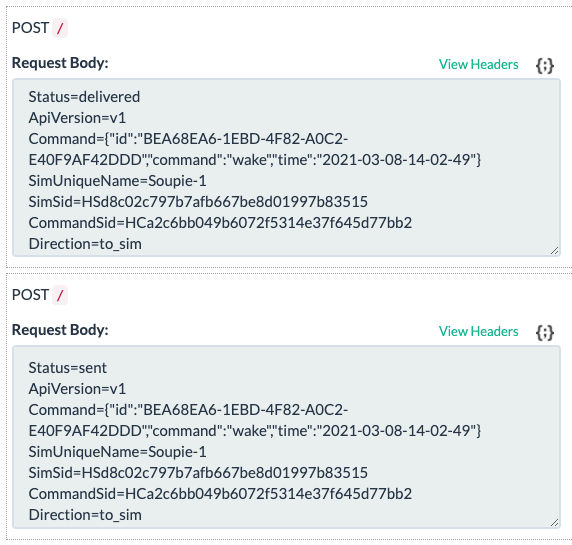
```

This time, you'll receive a series of notification messages as the SMS Command's status moves from `queued` to `sent` to `delivered`:

<figure><img src="https://www.twilio.com/_next/image?url=https%3A%2F%2Fdocs-assets.prod.twilio.com%2Fed88934abf4d55e26889ddc62a526dfddd04e7b636dae6580703cfe31e95dbe0.png&#x26;w=1200&#x26;q=75" alt=""><figcaption></figcaption></figure>

***

## Next steps <a href="#next-steps" id="next-steps"></a>

You've set up a SImcom 7600G cellular modem to send and receive M2M SMS messages, and you've sent messages to the device and back again, all through KORE Super SIM's SMS Commands API. You've also used the API's webhook mechanism to keep track of Command delivery.

The next stage, of course, is to build a device-side app that listens for commands, parses them, and triggers actions accordingly. You may also want to create a server app that's able to request information from devices: it sends a request command which causes the device to send a second, data-bearing message back. Or you might code up a mobile app that uses SMS Commands to control the device remotely.

We can't wait to see what you build with Super SIM SMS Commands!<br>


# Get Started with Super SIM SMS Commands and the Raspberry Pi Pico

The Raspberry Pi Pico would be a great Internet of Things device but for one thing: it has no cellular Internet connectivity. Fortunately, we can fix that with a Super SIM and an add-on cellular module such as Waveshare's Pico SIM7080.

These three components provide an excellent development platform for IoT. And with the Pico's RP2040 microcontroller available in commercial quantities, the development work you do can readily form the basis for production devices later.<br>

<figure><img src="/files/XkBix5Gnyd7Ke7uzOnex" alt=""><figcaption></figcaption></figure>

The Pico has another advantage: it's highly programmable. Though it's intended for traditional embedded applications, and therefore supports C/C++ development, it can also be used with [MicroPython](https://micropython.org/), a version of the popular language that's been tailored for use with microcontrollers rather than full PCs. This means that anyone who's used Python can quickly begin prototyping their own IoT devices with the Pico and Super SIM.

This guide will show you how to build just such a sample IoT device. You can control it remotely, and you can receive data and status messages back. We'll focus on the basic functionality, and use a single Super SIM API, [SMS Commands](https://docs.korewireless.com/en-us/api/products/supersim/smscommand-resource), but it'll nonetheless give you a firm base from which to explore other Super SIM APIs and more sophisticated device-cloud communications.

{% hint style="warning" %}
This guide requires a KORE Console account. [Sign up here now if you don't have one](https://console.korewireless.com/register). It also requires a **configured** and **active** Super SIM. If you haven't set up your Super SIM in the [Console](https://supersim.korewireless.com/supersim/sims), please do so now. Our [Super SIM First Steps guide](https://docs.korewireless.com/en-us/supersim#get-started) has extra help if you need it.
{% endhint %}

***

## 1. Gather your components <a href="#id-1-gather-your-components" id="id-1-gather-your-components"></a>

{% hint style="warning" %}
This tutorial involves some soldering work. Please make sure you have the right equipment and you're confident to continue.
{% endhint %}

To complete this tutorial, you will need:

* A [Raspberry Pi Pico](https://www.raspberrypi.org/products/raspberry-pi-pico/)
  * These are widely available from many online electronics suppliers.
* A Waveshare Pico SIM7080 cellular modem
  * You can [order one direct from Waveshare](https://www.waveshare.com/pico-sim7080g-cat-m-nb-iot.htm) .
* An HT16K33-based four-digit, seven-segment LED
  * Adafruit [sells a good one here](https://www.adafruit.com/product/879) .
* An MCP9808 temperature sensor
  * Adafruit has [one of these too](https://www.adafruit.com/product/1782) .
* A micro USB cable to power the hardware and connect it to your computer.
* Some jumper wires, and either a large solderless breadboards or two smaller boards clipped together.
* You will also need to install `curl` for your [platform](https://curl.se/docs/install.html).

***

## 2. Assemble the hardware <a href="#id-2-assemble-the-hardware" id="id-2-assemble-the-hardware"></a>

The components that require soldering are the Pico, the Waveshare board, the four-digit LED, and the sensor. All you'll need to do is fix connector pins to each device and, in the case of the LED, fit the LED itself to the supplied circuit board.

For the Waveshare Pico SIM7080, we recommend fitting the bundled female header. They're fitted with the Simcom module facing upward as shown in the picture below. You'll need to take a little extra care with the unit's GND pins because the way they're wired means they require extra heat to get the solder to flow around each pin into and into the board. If your solder is sticking to the pin but not the board, you know you haven't got the join hot enough. Place the soldering iron's tip against each of the board's GND holes for a little longer, to get it up to the right temperature.<br>

<figure><img src="/files/sWphetANkJBtQb438RwN" alt=""><figcaption></figcaption></figure>

The Pico itself takes two rows of male header pins so it will slot onto the Waveshare board. You can use the header that came with the module and carefully break it into two even sections. Solder each section to one side of the Pico:<br>

<figure><img src="/files/2W9QoWflcvjE2Wy3voiY" alt=""><figcaption></figcaption></figure>

Solder the supplied header pins to the MCP9808 board. For the LED, fit and solder the LED block to the board first, clip the LED's pins, and then solder in the header pins. Make sure you orient the LED correctly: insert it into board so that the four decimal point indicators are adjacent to the 0.56" 7-segment… text on the board. Adafruit has [a great guide to show you how to do this](https://learn.adafruit.com/adafruit-led-backpack/0-dot-56-seven-segment-backpack-assembly) if you need more detail.<br>

<figure><img src="/files/1d6gFU1CEEGHTe8RSpCg" alt=""><figcaption></figcaption></figure>

When you're done soldering, turn the Waveshare board over and fit your Super SIM into the spring-loaded slot. Push out the smallest SIM card from the Super SIM's large plastic mount. It goes in logo face up:<br>

<figure><img src="/files/XwrTxzWlTk9ZIDvaamau" alt=""><figcaption></figcaption></figure>

Now turn it back over and fit the Pico. Make sure the Pico's micro USB connector is at the opposite end to the Simcom SIM7080 module:<br>

<figure><img src="/files/tsV0RfDJKS6RcCYqyUTC" alt=""><figcaption></figcaption></figure>

Fit the combined unit to a breadboard so you have space either side for wiring. Screw one of the thin whip cables that came with the Waveshare board into the large antenna and then clip the other end of the cable to the module's LTE connector. Take care as the U.FL antenna connector is very fragile:<br>

<figure><img src="/files/alUQInXIC2Lvy1JFOEYt" alt=""><figcaption></figcaption></figure>

For the first part of the guide, you're going to use the four-digit LED only, so plug it into a free area of the breadboard and wire it up to the Pico using the wires like this:<br>

<figure><img src="/files/Ajc9uMNxnbh5ULnug8Rc" alt=""><figcaption></figcaption></figure>

***

## 3. Install MicroPython on the Pico <a href="#id-3-install-micropython-on-the-pico" id="id-3-install-micropython-on-the-pico"></a>

1. Visit the MicroPython site and download the latest stable build for the Pico. You can [find it here](https://micropython.org/download/rp2-pico/) . The file will be named something like `rp2-pico-20220618-v1.19.1.uf2` .
2. While holding down the button on the Pico marked **BOOTSEL** , connect the Pico to your computer with the micro USB cable. Now release the button.
3. Depending on your OS, you may see a disk called `RPI-RP2` mounted on your desktop, or it might appear elsewhere in your computer's file system. Copy the `.uf2` file you downloaded in step 1 to the drive, either by using a command-line copy program like `cp`, or by dragging and dropping.
   * Windows 10 includes drivers for UF2 devices, but earlier versions will require additional drivers to be installed. This tutorial only covers Windows 10.
4. If the drive doesn't eject automatically, eject it now. Unplug it and reconnect it, this time without holding down BOOTSEL.

***

## 4. Talk to the Pico <a href="#id-4-talk-to-the-pico" id="id-4-talk-to-the-pico"></a>

Select your computer's operating system from among the tabs below and follow the instructions.

{% tabs %}
{% tab title="Linux" %}

1. Open your distribution's terminal app.
2. Get the Pico's device file. It should be `/dev/ttyACM0` . You may need to ensure you have access to the serial port: on most distributions this can be done by adding your user account to the `dialout` user group.
3. You'll use a command-line serial console tool called Minicom to communicate with the Pico. Install Minicom using your operating system's package manager, such as `apt` , `rpm` , `dpkg` , or similar, e.g., `sudo apt install minicom` .
4. Enter `minicom -o -D /dev/ttyACM0` to open a connection to the module. If Minicom posts an error indicating that the device is inaccessible, check that you've connected the Pico to your computer and that you copied its device file name correctly.
   {% endtab %}

{% tab title="macOS" %}

1. Open the Terminal app.
2. Get the Pico's device file. Enter `ls /dev/cu*` . You should see an entry like: `/dev/cu.usbmodem14244201` . This is the Pico's device file, which you'll use shortly.
3. You'll use a command-line serial console tool called Minicom to communicate with the Pico. Install Minicom using [Homebrew](https://brew.sh/) with the command `brew install minicom` .
4. Enter `minicom -o -D <PICO_DEVICE_FILE>` to open a connection to the module. `<PICO_DEVICE_FILE>` is the filename you got in step 1. If Minicom posts an error indicating that the device is inaccessible, please check that you've connected the Pico to your computer and that you copied its device file name correctly.
   {% endtab %}

{% tab title="Windows 10" %}

1. Open Windows 10's Device Manager. It will show the Pico as a USB Serial Device in the **Ports (COM & LPT)** section. Note its COM number.
2. Right-click on the Pico's entry in the Device Manager list and select **Properties...** . Select the **Port Settings** tab and note the **Bits per second:** value.
3. [Download and install PuTTY](https://www.chiark.greenend.org.uk/~sgtatham/putty/latest.html) , a terminal emulator for Windows.
4. Run PuTTY, select **Serial** as the **Connection type** , and enter the COM number from step 1 (for example, `COM3` ) in the **Serial line** field. Make sure the **Speed** field is set to match the **Bits per second:** value you got from Device Manager.
5. Click **Open** .
6. In the terminal window that appears, hit **Enter** to get the MicroPython REPL.
7. Finally, when you see references to Minicom in the remainder of the tutorial, make sure you perform the tasks using your open PuTTY window.
   {% endtab %}
   {% endtabs %}

***

## 5. Pause for breath <a href="#id-5-pause-for-breath" id="id-5-pause-for-breath"></a>

You've done a lot of work to get this far, and there is plenty more to come. So take five and consider what you'll do in the remaining steps. MicroPython doesn't support the Simcom SIM7078G module directly, so you will need to write code that tells the module what you want it to do: to apply certain settings, and to transfer some information, for example.

The Pico and the modem connect using four data pins, two of which are a serial link that you'll program to communicate with the module shortly. The other two are used to wake the module and to tell it to power down.

{% hint style="info" %}
These are the pins that connect the Pico and the Waveshare board. Black lines are `GND`; red `PWR`. This tutorial's code makes use of the `RX`, `TX` and `PWR_EN` pins.

{% endhint %}

<figure><img src="/files/tjOMWig2iCRygrxZi3i7" alt=""><figcaption></figcaption></figure>

With the communication link between MicroPython and module established, your code will send commands — called 'AT commands' — to the module and process the responses. We won't go into detail about AT commands here, but there's [a good introduction available](https://docs.korewireless.com/en-us/supersim/cellular-module-knowledgebase/about-at-commands) if you want to learn more. If you already know about AT commands, you can find the [Simcom SIM7080's instruction set documented here](https://www.waveshare.com/w/upload/3/39/SIM7080_Series_AT_Command_Manual_V1.02.pdf). These are handy resources for further study, but you don't need to read them to complete this tutorial.

***

## 6. Send the Pico some Python code <a href="#id-6-send-the-pico-some-python-code" id="id-6-send-the-pico-some-python-code"></a>

In Minicom (or PuTTY if you're using Windows 10), hit **Ctrl-C** to break to the Python REPL. You won't use the REPL directly, but it provides a way to enter large blocks of MicroPython code easily. Now hit **Ctrl-E**. This makes MicroPython ready to accept a full Python program pasted in. Click on the button at the top right of the code listing below to copy it and then paste it into Minicom. The copy button will appear when you mouse over the code. When you've pasted the code, hit **Ctrl-D** to tell MicroPython to run the code.

{% hint style="info" %}
You can find the a complete listing of the code, including all subsequent additions, [at our public GitHub repo](https://github.com/korewireless/super-sim-raspberry-pi-pico-demos/).
{% endhint %}

To save scrolling, [click here](#id-7-listen-for-sms-commands) to jump to the rest of the tutorial.

{% code lineNumbers="true" %}

```python
from machine import UART, Pin, I2C
from utime import ticks_ms, sleep

'''
Send an AT command - return True if we got an expected
response ('back'), otherwise False
'''
def send_at(cmd, back="OK", timeout=1000):
    # Send the command and get the response (until timeout)
    buffer = send_at_get_resp(cmd, timeout)
    if len(buffer) > 0: return (back in buffer)
    return False

'''
Send an AT command - just return the response
'''
def send_at_get_resp(cmd, timeout=1000):
    # Send the AT command
    modem.write((cmd + "\r\n").encode())

    # Read and return the response (until timeout)
    return read_buffer(timeout)

'''
Read in the buffer by sampling the UART until timeout
'''
def read_buffer(timeout):
    buffer = bytes()
    now = ticks_ms()
    while (ticks_ms() - now) < timeout and len(buffer) < 1025:
        if modem.any():
            buffer += modem.read(1)
    return buffer.decode()

'''
Module startup detection
Send a command to see if the modem is powered up
'''
def boot_modem():
    state = False
    count = 0
    while count < 20:
        if send_at("ATE1"):
            print("The modem is ready")
            return True
        if not state:
            print("Powering the modem")
            module_power()
            state = True
        sleep(4)
        count += 1
    return False

'''
Power the module on/off
'''
def module_power():
    pwr_key = Pin(14, Pin.OUT)
    pwr_key.value(1)
    sleep(1.5)
    pwr_key.value(0)

'''
Check we are attached
'''
def check_network():
    is_connected = False
    response = send_at_get_resp("AT+COPS?")
    line = split_msg(response, 1)
    if "+COPS:" in line:
        is_connected = (line.find(",") != -1)
        if is_connected: print("Network information:", line)
    return is_connected

'''
Attach to the network
'''
def configure_modem():
    # AT commands can be sent together, not just one at a time.
    # Set the error reporting level, set SMS text mode, delete left-over SMS
    # select LTE-only mode, select Cat-M only mode, set the APN to 'super' for Super SIM
    send_at("AT+CMEE=2;+CMGF=1;+CMGD=,4;+CNMP=38;+CMNB=1;+CGDCONT=1,\"IP\",\"super\"")
    print("Modem configured for Cat-M and Super SIM")

'''
Flash the Pico LED
'''
def led_blink(blinks):
    for i in range(0, blinks):
        led_off()
        sleep(0.25)
        led_on()
        sleep(0.25)

def led_on():
    led.value(1)

def led_off():
    led.value(0)

'''
Split a response from the modem into separate lines,
removing empty lines and returning all that's left or,
if 'want_line' has a non-default value, return that one line
'''
def split_msg(msg, want_line=99922222122222222):
    lines = msg.split("\r\n")
    results = []
    for i in range(0, len(lines)):
        if i == want_line:
            return lines[i]
        if len(lines[i]) > 0:
            results.append(lines[i])
    return results

# Set up the modem UART
modem = UART(0, 115200)

# Set the LED and turn it off
led = Pin(25, Pin.OUT)
led_off()

# Start the modem
if boot_modem():
    configure_modem()

    # Check we're attached
    state = True
    while not check_network():
        if state:
            led_on()
        else:
            led_off()
        state = not state

    # Light the LED
    led_on()
else:
    # Error! Blink LED 5 times
    led_blink(5)
    led_off()
```

{% endcode %}

This is the basis of the code you'll work on through the remainder of the guide. What does it do? It defines some useful functions to turn on the modem, configure the modem, and send AT commands and check the responses. It turns the Pico's LED on if it succeeds — otherwise the LED will flash five times as a signal that something went wrong: consult what's being reported in Minicom.

{% hint style="info" %}
When the code runs, it turns off the Pico's built-in LED. The LED will flash rapidly five times if there was a problem booting the modem.

The LED is turned on when the device is attached to the network. If the LED is flashing slowly, that means it has not yet attached. Please be patient; it will attach shortly, though this can take many minutes in certain circumstances.
{% endhint %}

***

## 7. Listen for SMS Commands <a href="#id-7-listen-for-sms-commands" id="id-7-listen-for-sms-commands"></a>

The device code isn't doing much, so let's extend it to listen out for incoming text messages, check them for useful commands, and action any that are received.

First, though, paste the code you copied into a text editor file. You'll make quite a few changes to this as we go, and it'll be easier to do so on a text editor. You'll also be able to grab the code at each stage and paste the latest version into Minicom and over to the Pico.

With the code in your editor, paste the following right after the final function definition, `def split_msg(msg, want_line=99):`

{% code lineNumbers="true" %}

```python
'''
Extract the SMS index from a modem response line
'''
def get_sms_number(line):
    p = line.split(",")
    if len(p) > 0:
        return p[1]
    return 0

'''
Blink the LED n times after extracting n from the command string
'''
def process_command_led(msg):
    blinks = msg[4:]
    print("Blinking LED",blinks,"time(s)")
    try:
        led_blink(int(blinks))
    except:
        print("BAD COMMAND:",blinks)

'''
Listen for incoming SMS Commands
'''
def listen():
    print("Listening for Commands...")
    while True:
        # Did we receive a Unsolicited Response Code (URC)?
        buffer = read_buffer(5000)
        if len(buffer) > 0:
            lines = split_msg(buffer)
            for line in lines:
                if "+CMTI:" in line:
                    # We received an SMS, so get it...
                    num = get_sms_number(line)
                    msg = send_at_get_resp("AT+CMGR=" + num, 2000)

                    # ...and process it for commands
                    cmd = split_msg(msg, 2)
                    if cmd.startswith("LED="):
                        process_command_led(cmd)
                    else:
                        print("UNKNOWN COMMAND:",cmd)
                    # Delete all SMS now we're done with them
                    send_at("AT+CMGD=,4")

```

{% endcode %}

Now add this line right after `#Light the LED` and `led_on()` in the section headed `# Start the modem`:

{% code lineNumbers="true" %}

```python
# Begin listening for commands
listen()
```

{% endcode %}

Copy all the code. Go back to Minicom and you should see the `>>>` prompt. Hit **Ctrl-E**, paste in the new Python, and then hit **Ctrl-D** to run it.

This time, you won't see `>>>` in Minicom but rather the line `Listening for Commands...`. The Pico is waiting for instructions — let's send it something.

If you get tired of all this cutting and pasting, grab the MicroPython utility [Pyboard](https://raw.githubusercontent.com/micropython/micropython/master/tools/pyboard.py). Save it to your computer and make the file executable. You can then call it as follows:

**Linux/macOS**

```bash
python pyboard.py -d /dev/ttyACM0 -f cp my_code.py :main.py
```

**Windows 10**

```bash
python pyboard.py -d COM3 -b 9600 -f cp my_code.py :main.py
```

where `my_code.py` is the saved version of the code you're assembling in your text editor. Mac users wlll need to change the device file name. Windows 10 users shoud confirm their device COM port and quit PuTTY if it's still running.

Pyboard will transfer the code to the Pico and present the program's output. It can also be used to transfer files to the Pico's filesystem, but we're not going to need that functionality here. You can read more about Pyboard's features at the [MicroPython docs website](https://docs.micropython.org/en/latest/reference/pyboard.py.html).

***

## 8. Send an SMS Command to the Pico <a href="#id-8-send-an-sms-command-to-the-pico" id="id-8-send-an-sms-command-to-the-pico"></a>

Open up a new terminal window or tab (or open Command Prompt in Windows) and paste in the following command:

```bash
curl -X POST "https://supersim.api.korewireless.com/v1/SmsCommands" \ 
  -H "Content-Type: application/x-www-form-urlencoded" \
  -H "Authorization: Bearer <YOUR_AUTH_TOKEN>" \
  --data-urlencode "Sim=<Sid>" \
  --data-urlencode "Payload="LED=10""
```

{% hint style="info" %}
Windows 10 folk, when you copy the example above — and others later on — make sure you either remove each \  so all the elements are on the same line, or replace them with a `^` and a space. The space is important: Windows won't recognize the command as a multi-line entry without it.
{% endhint %}

You'll need to replace the sections in angle brackets (`<` and `>`) with your own information. Your SIM's SID — or friendly name if you've set one — and specify the auth token generated from your [KORE Build API client](https://build.korewireless.com/clients). To know more about API clients, we've created a quick guide for you [here](https://docs.korewireless.com/en-us/developers/api-management/api-clients).

This command uses the Super SIM API's [SMS Commands](https://docs.korewireless.com/en-us/api/products/supersim/smscommand-resource) feature to send a machine-to-machine message to the Pico by way of the cellular module and its Super SIM. The key part is the `payload="LED=10"` part. The `payload` parameter tells KORE to send the portion in the double-quotes as the body of the message. In this case, that's `LED=10`.

The `listen()` function in your Python code keeps an ear open for incoming SMS messages, which are signaled by the module transmitting a string that includes the characters `+CMTI`. If it appears, the code sends a new AT command to the modem to get the message (`AT+CMGR`) and then awaits a response. When the response comes, the code processes it and extracts the `LED=10` — which tells the device to flash its LED ten times.

***

## 9. Display numeric data <a href="#id-9-display-numeric-data" id="id-9-display-numeric-data"></a>

Flashing the LED is a good start, but you can't use it to display readily readable informations. Let's make use of the four-digit display so show some values in bold color.

The display needs code to drive it. Rather than include it all here, just grab the code you need [from this public GitHub repo](https://github.com/smittytone/HT16K33-Python). You'll need the contents of two files — click the links below to view the raw code in your browser, then copy and paste each one into your text editor, right below the `import` statements at the top.

* [ht16k33.py](https://raw.githubusercontent.com/smittytone/HT16K33-Python/main/ht16k33.py)
* [ht16k33segment.py](https://raw.githubusercontent.com/smittytone/HT16K33-Python/main/ht16k33segment.py)

{% hint style="warning" %}
With the second file, make sure you only copy the class — don't include the first two lines above it (starting `# Import the base class`...)
{% endhint %}

You also need to add the following functions further down, and make some changes to `listen()`. So just copy the following code and use it to replace all of your existing `listen()` function:

{% code lineNumbers="true" %}

```python
'''
Display the decimal value n after extracting n from the command string
'''
def process_command_num(msg):
    value = msg[4:]
    print("Setting",value,"on the LED")
    try:
        # Extract the decimal value (string) from 'msg' and convert
        # to a hex integer for easy presentation of decimal digits
        hex_value = int(value, 16)
        display.set_number((hex_value & 0xF000) >> 12, 0)
        display.set_number((hex_value & 0x0F00) >>  8, 1)
        display.set_number((hex_value & 0x00F0) >>  4, 2)
        display.set_number((hex_value & 0x000F), 3).update()
    except:
        print("BAD COMMAND:",value)

'''
Listen for incoming SMS Commands
'''
def listen():
    print("Listening for Commands...")
    while True:
        # Did we receive a Unsolicited Response Code (URC)?
        buffer = read_buffer(5000)
        if len(buffer) > 0:
            lines = split_msg(buffer)
            for line in lines:
                if "+CMTI:" in line:
                    # We received an SMS, so get it...
                    num = get_sms_number(line)
                    msg = send_at_get_resp("AT+CMGR=" + num, 2000)

                    # ...and process it for commands
                    cmd = split_msg(msg, 2)
                    if cmd.startswith("LED="):
                        process_command_led(cmd)
                    elif cmd.startswith("NUM="):
                        process_command_num(cmd)
                    else:
                        print("UNKNOWN COMMAND:",cmd)
                    # Delete all SMS now we're done with them
                    _ = send_at("AT+CMGD=,4")

```

{% endcode %}

Finally, add the following lines after the `# Setup the modem UART` block:

{% code lineNumbers="true" %}

```
# Set up I2C and the display
i2c = I2C(1, scl=Pin(3), sda=Pin(2))
display = HT16K33Segment(i2c)
display.set_brightness(2)
display.clear().draw()
```

{% endcode %}

Copy all the new code from your text editor and paste it to the Pico in the usual way.

Now send a slightly different command via SMS:

{% code lineNumbers="true" %}

```bash
curl -X POST "https://supersim.api.korewireless.com/v1/SmsCommands" \
  -H "Content-Type: application/x-www-form-urlencoded" \
  -H "Authorization: Bearer <YOUR_AUTH_TOKEN>" \
  --data-urlencode "Sim=<Sid>" \
  --data-urlencode "Payload=NUM=2021""
```

{% endcode %}

Again, you'll need to do this in a separate terminal tab or window, and replace the `<...>` sections with your own data.

After a moment or two you should see 2021 appear on the LED. If it doesn't appear after a short time, check you have the LED wired to the Pico correctly — take a look at the diagram above. If you see `Setting 2021 on the LED` in Minicom, you know the command was received. If not, did you enter the command above correctly? Perhaps you mis-typed the payload value. You'll see an error message in Minicom in this case.

It should be clear what's happening: the code dissects the incoming text message for a command and a value. Before, only the `LED` command was supported; now so is `NUM`. For the latter, the value is written to the display.

Now it's time to make the conversation two way.

***

## 10. Send SMS Commands from the device <a href="#id-10-send-sms-commands-from-the-device" id="id-10-send-sms-commands-from-the-device"></a>

Slot the MCP9808 temperature sensor into the breadboard and wire it up as follows:<br>

<figure><img src="/files/SR4eQD8PQ1HccRUqsZWG" alt=""><figcaption></figcaption></figure>

We've shown an expanded layout to make clear where the connections go, but you can adjust it as you prefer, especially if you're working with a smaller breadboard.

Now for the code. Add the sensor's driver code — paste all of the following code after the `import` statements at the top:

{% code lineNumbers="true" %}

```python
class MCP9808:
    """
    A simple driver for the I2C-connected MCP9808 temperature sensor.
    This release supports MicroPython.
    """

    # *********** PRIVATE PROPERTIES **********

    i2c = None
    address = 0x18

    # *********** CONSTRUCTOR **********

    def __init__(self, i2c, i2c_address=0x18):
        assert 0x00 <= i2c_address < 0x80, "ERROR - Invalid I2C address in MCP9808()"
        self.i2c = i2c
        self.address = i2c_address

    # *********** PUBLIC METHODS **********

    def read_temp(self):
        # Read sensor and return its value in degrees celsius.
        temp_bytes = self.i2c.readfrom_mem(self.address, 0x05, 2)
        # Scale and convert to signed value.
        temp_raw = (temp_bytes[0] << 8) | temp_bytes[1]
        temp_cel = (temp_raw & 0x0FFF) / 16.0
        if temp_raw & 0x1000: temp_cel -= 256.0
        return temp_cel
```

{% endcode %}

Add the following function below the `def process_command_num(msg):` function definition:

{% code lineNumbers="true" %}

```python
'''
Get a temperature reading and send it back as an SMS
'''
def process_command_tmp():
    print("Sending a temperature reading")
    celsius_temp = "{:.2f}".format(sensor.read_temp())
    if send_at("AT+CMGS=\"000\"", ">"):
        # '>' is the prompt sent by the modem to signal that
        # it's waiting to receive the message text.
        # 'chr(26)' is the code for ctrl-z, which the modem
        # uses as an end-of-message marker
        r = send_at_get_resp(celsius_temp + chr(26))
```

{% endcode %}

{% code lineNumbers="true" %}

```python
'''
Get a temperature reading and send it back as an SMS
'''
def process_command_tmp():
    print("Sending a temperature reading")
    celsius_temp = "{:.2f}".format(sensor.read_temp())
    if send_at("AT+CMGS=\"000\"", ">"):
        # '>' is the prompt sent by the modem to signal that
        # it's waiting to receive the message text.
        # 'chr(26)' is the code for ctrl-z, which the modem
        # uses as an end-of-message marker
        r = send_at_get_resp(celsius_temp + chr(26))
```

{% endcode %}

Add these lines to the command checking sequence within the `listen()` function:

{% code lineNumbers="true" %}

```python
elif cmd.startswith("TMP"):
    process_command_tmp()
```

{% endcode %}

Finally, you need to instantiate the sensor for use, so add these lines below the `# Set up I2C and the display` block:

```python
# Set up the MCP9808 sensor
sensor = MCP9808(i2c=i2c)
```

Once again, copy all the source code from your editor and paste it over to the Pico. Assuming you made no text entry or pasting errors, the code will run, and you'll shortly see `Listening for Commands…` as usual.

Your device is now ready to receive TMP commands, which will cause it to send an SMS Command containing the current temperature of the air around it. But you're not quite ready to send the command yet: you need to configure your Super SIM's fleet to relay device-originated messages to your server.

The SMS Commands API provides a specific phone number, `000`, to which all SMS messages, from every device, are sent. KORE relays the ones it has received from your SIMs on to you. How does it know exactly where to send them? You specify a webhook address.

Super SIMs are organized into Fleets: groups of SIMs that have common settings, such as which networks they are able to connect to and whether they can make use of cellular data services. Fleets are represented in the Super SIM API by [Fleet resources](https://docs.korewireless.com/en-us/api/products/supersim/fleet-resource), and SMS Commands adds properties to each Fleet resource in which you can store your SMS Commands webhook address and, optionally, the HTTP method it uses.

So before you can send a message from the device, you need to set up a webhook target URL and add it to your Super SIM's Fleet.

[Beeceptor](https://beeceptor.com/) is a handy service for testing webhooks. It's designed for developing and testing APIs of your own, and offers free mock servers — virtual endpoints that can receive webhook calls. Let's set one up to receive messages from the device.

1. In a web browser tab, go to [Beeceptor](https://beeceptor.com/) .
2. Enter an endpoint name in the large text field and click **Create Endpoint**:<br>

   <figure><img src="/files/G0OVMU1duNZ8vxwtgEN9" alt=""><figcaption></figcaption></figure>
3. On the screen that appears next, click on the upper of the two clipboard icons to copy the endpoint URL:<br>

   <figure><img src="/files/x3pJbipILPGtcUTqGbhG" alt=""><figcaption></figcaption></figure>
4. Keep the tab open.

Now you update your Super SIM's Fleet to add an SMS Commands webhook. You can do this with the API, but we'll use the [Super SIM Console](https://supersim.korewireless.com) for this demo.

1. Open a second web browser tab and log into the [Super SIM Console](https://supersim.korewireless.com) .
2. Go to [**Super SIM > Fleets**](https://supersim.korewireless.com/supersim/fleets) and select the Fleet containing the Super SIM you are using.
3. Scroll down to **SMS Commands Callback URL** and paste in your webhook URL from the previous section. By default, webhooks are triggered with a `POST` request. Leave it unchanged for now, but if you need to use another method for your own application, you can change it later:<br>

   <figure><img src="/files/S1zIattrA0aTF3mJ60WT" alt=""><figcaption></figcaption></figure>
4. Click **Save** .
5. Close the tab if you like.

In a new terminal tab or window, send this API command:

```bash
curl -X POST "https://supersim.api.korewireless.com/v1/SmsCommands" \
  -H "Content-Type: application/x-www-form-urlencoded" \
  -H "Authorization: Bearer <YOUR_AUTH_TOKEN>" \
  --data-urlencode "Sim=<YOUR_SIM_NAME_OR_SID>" \
  --data-urlencode "Payload=TMP"
```

Again, you'll need to replace the `<...>` sections with your own settings.

## 11. Read the received temperature <a href="#id-4-read-the-received-temperature" id="id-4-read-the-received-temperature"></a>

1. Jump back to the Beeceptor tab in the browser. You should see — or will shortly see — the endpoint has received a `POST` request. Click on it to see the request body, then on the JSON icon, **{:}** , to view the data more clearly.
2. Look for the line beginning `Payload=` — right after it is the temperature as sent by your device:

   <figure><img src="/files/ecFet3cn4wG3frTX2LBO" alt=""><figcaption></figcaption></figure>
3. Read the temperature measured by the device's sensor.

***

## Next steps <a href="#next-steps" id="next-steps"></a>

Well done! You've come a long way, but you now have a Raspberry Pi Pico that can communicate with an attached Simcom SIM7080 modem. It can receive and parse commands relayed using Super SIM's SMS Commands array to activate its LED and a connected display. It can retrieve readings from a connected temperature sensor peripheral, and send them back to base — again via SMS Commands. In short, you have an IoT device with two-way communication with your server-side application.

That's not the end of the process. For a start, you have to build that very server-side application. You might also want to produce a mobile or web app to allow your end-users to control elements of your IoT product themselves.

That's in the future, though. For now, you may want to consider ways to expand the testbed you've built today. Try adding some other sensors, output devices, or actuators to allow the unit to affect the physical world.

The code doesn't check connection state. Tell the modem to send you cellular registration notifications and update the `listen()` function to watch form the. Our guide [**Four Best Practices for Cellular Module Registration**](https://docs.korewireless.com/en-us/supersim/cellular-module-knowledgebase/four-best-practices-for-cellular-module-registration) has guidance to help you.

The current command processor is basic — why not try to extend it to support commands, data, and other information, such as timestamps, via a JSON package? Hint: use an encoding technique like base 64 to convert your JSON strings into characters within the 7-bit SMS character set. Third-party libraries can help you with this.

You might also want to allow the device to communicate with Internet-hosted resources directly, to `GET` or `POST` data. We're going to cover just that in an upcoming tutorial based on the device you assembled and got running today.

Wherever you take your Raspberry Pi Pico-based IoT device next, we can't wait to see what you build!

{% hint style="info" %}
Check out our follow-up tutorial: [Get Started with Super SIM: Raspberry Pi Pico Data Comms](https://docs.korewireless.com/en-us/supersim/get-started/get-started-with-data-comms-and-the-raspberry-pi-pico).
{% endhint %}


# Get Started with Super SIM IP Commands and the Raspberry Pi

**IP Commands** is a new Super SIM feature that allows your cloud to communicate with your IoT devices by exchanging IP/UDP messages. You can use IP Commands to send server-initiated IP messages from your cloud to your Super SIM-connected devices. The best part is that you don't actually need to know a device's IP address — KORE will handle that for you. Nor do you need to maintain a persistent connection between a device and your server.

You can think of IP Commands as a lightweight alternative to using a Virtual Private Network (VPN) to reach a device from your cloud and exchange information.

This information is transferred in the form of User Datagram Protocol (UDP) messages. UDP provides basic, 'fire and forget' data exchange: there's no connection established between sender and receiver — and no guarantee that the message will be delivered. This simplicity makes UDP ideal for lightweight IoT applications: it's a great way to send commands ("change the air con setting to 40C") to a connected device. Such commands might come from your cloud, or from your app running on an end-user's mobile device. They would be more structured than the colloquial example shown above, and completely flexible: your application not the transport defines the command-response interaction.

This short guide will take you through setting up IP Commands so you can try it out. If you just want to cut to the chase and start developing the feature into your application, check out the [API documentation and sample code](https://docs.korewireless.com/en-us/api/products/supersim/ipcommand-resource).

To demonstrate IP Commands, we'll use a Raspberry Pi 4 Linux computer and a [Waveshare's SIM7600G-H add-on board](https://www.waveshare.com/wiki/SIM7600G-H_4G_HAT), which incorporates a Simcom 7600G global LTE modem. Please [head over to the Super SIM Quickstart now](https://docs.korewireless.com/en-us/supersim/get-started/get-started-with-super-sim-the-raspberry-pi-4-and-the-waveshare-4g-hat) for a list of the hardware you need and guidance on putting it together. When you've reached Step 4, jump back here and finish the Quickstart later.

{% hint style="info" %}
If you'd like to try IP Commands with different hardware, we have a tutorial that focuses on the [Raspberry Pi Pico microcontroller board](https://docs.korewireless.com/en-us/supersim/get-started/get-started-with-super-sim-ip-commands-and-the-raspberry-pi-pico).
{% endhint %}

{% hint style="info" %}
This tutorial was originally written to make use of the original Sixfab Cellular IoT Hat, which has since been EOL'd. If you have a Cellular IoT Hat, you can find the AT commands used by its BG96 cellular module at the [end of the tutorial.](#appendix-other-modems)
{% endhint %}

<figure><img src="/files/hTWrsi67UpZ3mfAhNJq0" alt=""><figcaption></figcaption></figure>

{% hint style="info" %}
This guide also requires a **configured** Super SIM. If you haven't set up your Super SIM in the [Console](https://supersim.korewireless.com/supersim/sims), please do so now. The [Super SIM First Steps guide](https://docs.korewireless.com/en-us/supersim/get-started/supersim-first-steps) has help if you need it.
{% endhint %}

You can perform all of the following steps using the Raspberry Pi as both the target device — i.e., the one with the modem — and as a stand-in for your cloud or app. You can also use your main computer for the latter, but using the Pi for both saves moving between machines.

## Send IP Commands to the device <a href="#send-ip-commands-to-the-device" id="send-ip-commands-to-the-device"></a>

### 1. Prepare the device

To send or receive messages, you need to set up the device's 7600G module for UDP communication.

1. First, check the Waveshare Hat's **NET** LED — if it's not lit, press its **PWRKEY** button. **NET** should light up.
2. By default, the Raspberry Pi will boot to the desktop. If it's one you've used before and set to boot to the command line, just run `startx` to launch the desktop.
3. Select **Accessories > Terminal** from the **Raspberry** menu.
4. You'll use a command-line serial console tool called Minicom to communicate with the Hat's cellular module. If you would prefer to use an alternative tool, such as Screen, that's fine, but it may have a slightly different device-selection procedure than the one outlined here. Install Minicom with these two commands:

{% code fullWidth="false" %}

```sh
sudo apt update
sudo apt install minicom -y
```

{% endcode %}

5. Enter `minicom -D /dev/ttyUSB2` to open a connection to the 7600G module. If Minicom posts an error indicating that `/dev/ttyUSB2` is inaccessible, please [check your Hat setup](https://docs.korewireless.com/en-us/supersim/get-started/get-started-with-super-sim-the-raspberry-pi-4-and-the-waveshare-4g-hat#hardware-setup-the-sim7600g-h-4g-hat).
6. Enter `AT+CSCS="IRA"` to change the module's display character set. It tells the module to display characters in the International Reference Alphabet (IRA). We need this to view the braces in the JSON as they are not part of the standard GSM character set, which is the module's default.

{% hint style="info" %}
The 7600G probably isn't set to echo back what you type in, so you won't be able to see your side of the conversation. Type in `ATE1` and hit **Enter** . You'll get an `OK` back, and when you follow the remaining steps you'll see what you type!
{% endhint %}

### 2.Set up a UDP socket on the device

To establish a UDP socket on the device, you need to configure and activate a cellular data connection (a 'PDP context') and then open the socket. These three steps are achieved with the following commands — key them in one by one, hitting **Enter** after each:

```html
AT+CGDCONT=1,"IP","super"
AT+CIPCCFG=10,0,,1,1,,500
AT+NETOPEN
AT+CIPOPEN=1,"UDP",,,3030
```

What do these AT commands do? The first configures a connection to Super SIM's APN, `super`. The first `1` is the PDP context ID we want to use. The second parameter indicates that we're using an IP link.

The second AT command configures a number of socket parameters.

The third AT commands opens the socket.

The fourth AT command opens a connection over the socket. The first `1` is the link number. The string `"UDP"` tells the 7600G the type the socket to create. The `3030` at the end is the local port for incoming traffic — we'll make use of this in the next step.

If the socket setup process succeeds, you'll eventually see `+CIPOPEN: 1,0` displayed in the terminal.

### 3. Send an IP Command to the device

1. Open a second LX Terminal instance on the Pi, or a terminal on your main machine.
2. Let's say this is the payload we want to send to the device:

```json
{ "command": "wake up", "timestamp": "2024-03-08-14-02-49" }
```

It's a command encoded in JSON, though you can use any other textual format and with whatever combination of keys and values that's appropriate for your application. You can send this message to your device using the `curl` tool as follows:

{% code overflow="wrap" %}

```bash
curl -X POST "https://supersim.api.korewireless.com/v1/IpCommands" \
--data "Sim=<YOUR_SIM_NAME_OR_SID>" \
--data-urlencode "Payload=<YOUR_PAY_LOAD>" \
--data "DevicePort=3030" \
--header "Authorization: Bearer <YOUR_AUTH_TOKEN>"
```

{% endcode %}

Copy and paste the `curl` command to the command line then edit it to fill in the identifier of the Super SIM you're using (you can get this from the [Console](https://supersim.korewireless.com/supersim/sims) if you don't have it handy), and your account credentials (also available from the [Build](https://build.korewireless.com/clients) portal). The message is the value of the payload parameter. Make sure you set the `--device-port` value to the one you chose when you configured the UDP socket in the previous section.

The response, posted to the terminal by `curl`, will be something like this:

```json
{
    "account_sid": "<YOUR_ACCOUNT_SID>",
    "sid": "<SID>",
    "sim_sid": "<SIM_SID>",
    "sim_iccid": "<SIM_ICCID>",
    "date_created": "2024-10-22T17:45:31.199149Z",
    "date_updated": "2024-10-22T17:45:31.199149Z",
    "device_port": 3030,
    "payload": "{command:wake up,timestamp:2024-03-08-14-02-49}",
    "payload_type": "text",
    "status": "queued",
    "device_ip": null,
    "error_code": null,
    "direction": "to_sim",
    "url": "https://supersim.api.korewireless.com/v1/IpCommands/<SID>"
}
```

As you can see, the message's status is `queued`: it's in KORE's message queue waiting to be sent. When the IP Command leaves the KORE Mobile Core for the network the device is attached to, its status will become `sent`. Later on, you'll use a webhook, which you'll set up in the next section, to receive notifications about message status changes as they happen. For details of the possible status values you may see, take a look at [the API documentation](https://docs.korewireless.com/en-us/api/products/supersim/ipcommand-resource#status-values).

### 4. Read the IP Command on the device

The message will probably already have arrived. You'll know it has because you should see it displayed in Minicom:

```sh
RECV FROM:100.64.0.1:3030
+RECEIVE,1,50
{"command":"wake up","time":"2024-03-08-14-02-49"}
```

Decoding this input, the top line's `100.64.0.1` is the KORE IP address it has been relayed from, and `3030` is the port you chose when you configured the socket. On the next line, the `50` is the number of bytes in the message. The third line is the message you sent.

You don't have to send text — IP Commands supports binary data too. To send information in this form, just add the `--payload-type` parameter to your `curl` call and add the value `"binary"`:

```shell
curl -X POST "https://supersim.api.korewireless.com/v1/IpCommands" \
--data "Sim=<YOUR_SIM_NAME_OR_SID>" \
--data-urlencode "Payload=<YOUR_PAY_LOAD>" \
--data-urlencode "Payload_Type=binary" \
--data "DevicePort=3030" \
--header "Authorization: Bearer <YOUR_AUTH_TOKEN>"
```

Of course, in a real-world application the message would come from your server, not be sent manually, and your device-side application would be actively checking for incoming messages and parsing any that arrive, but the demo gives you a picture of the flow.

However, IP Commands isn't a one-way route — let's see how messages can travel in the opposite direction, from the device.

## Receive an IP Command from the device <a href="#receive-an-ip-command-from-the-device" id="receive-an-ip-command-from-the-device"></a>

The IP Commands API provides a specific IP address, `100.60.0.1`, to which all IP Commands, from every device are sent. KORE uses a little bit of magic to streamline the relay of your messages to your cloud. How does it know where to send them? You specify a webhook address.

Super SIMs are organized into Fleets: groups of SIMs that have common settings, such as which networks they are able to connect to and whether they can make use of cellular data services. Fleets are represented in the Super SIM API by [Fleet resources](https://docs.korewireless.com/en-us/api/products/supersim/fleet-resource), and IP Commands adds a property to each Fleet resource in which you can store your IP Commands webhook address.

So before we can send a message, we need to set up a webhook target URL and add that to your Super SIM's Fleet.

#### 1. Set up a webhook target <a href="#id-1-set-up-a-webhook-target" id="id-1-set-up-a-webhook-target"></a>

[Beeceptor](https://beeceptor.com/) is a handy service for testing webhooks. It's designed for developing and testing APIs of your own, and offers free mock servers — virtual endpoints that can receive webhook calls. Let's set one up to receive messages from the device.

1. In a web browser tab, go to [Beeceptor](https://beeceptor.com/).
2. Enter an endpoint name and click **Create Endpoint**:

<figure><img src="/files/jZoYrNflONLawqAVenQv" alt=""><figcaption></figcaption></figure>

3. On the screen that appears next, click on the upper of the two clipboard icons to copy the endpoint URL:

<figure><img src="/files/GBaCzGbDQ1GieBMpGQOd" alt=""><figcaption></figcaption></figure>

3. Keep the tab open.

#### 2. Update your Super SIM's Fleet <a href="#id-2-update-your-super-sims-fleet" id="id-2-update-your-super-sims-fleet"></a>

Now you update your Super SIM's Fleet to add an IP Commands webhook. You can [do this with the API](https://docs.korewireless.com/en-us/api/products/supersim/ipcommand-resource), but we'll use the Console for this demo.

1. Open a second web browser tab and log into the KORE [Console](https://console.korewireless.com/) and launch  [**Super SIM > Fleets**](https://supersim.korewireless.com/supersim/fleets) and select the Fleet containing the Super SIM you are using.
2. Scroll down to **IP Commands Callback URL** and paste in your webhook URL from the previous section. By default, webhooks are triggered with a `POST` request. Leave it unchanged for now, but if you need to use another method for your own application, you can change it later.
3. Click **Save**.
4. Close the tab if you like.

#### 3. Send a message <a href="#id-3-send-a-message" id="id-3-send-a-message"></a>

1. In the LX Terminal instance running Minicom — the one you're using to talk to the 7600G — enter the following command:

   ```
   AT+CIPSEND=1,15,"100.64.0.1",6969
   ```

This tells the module to take the next 15 bytes of data it will receive and send them to the specified IP address — the standard KORE entry point for IP Commands originated by the device — as a UDP message. The `1` at the start is the ID of the link number you set up earlier. The `6969` is the remote port KORE doesn't care about thus we're using a random value.

2. Minicom will display a `>` symbol to show the 7600G is awaiting some text. Key in a message — `Pi says hello!!`, for example — and the module will grab the first 15 characters and attempt to send them. You'll see `OK` if it succeeded.

{% hint style="info" %}
If you don't include a length value in the `AT+CIPSEND` command, i.e., enter `AT+CIPSEND=1,,"100.64.0.1",6969`, the module will wait for you to enter any number of characters. Just hold down **Ctrl** and hit **Z** to send the message when you're ready.
{% endhint %}

#### 4. Read the message <a href="#id-4-read-the-message" id="id-4-read-the-message"></a>

1. Jump back to the Beeceptor tab in the browser. You should see — or will shortly see — the endpoint has received a `POST` request. Click on it to see the request body, then on the JSON icon, **{:}**, to view the data more clearly.
2. Unlike messages sent to the device, which can be text or binary, messages that are sent from the device are always binary. The string you entered has been base64 encoded, so it'll need decoding before you can read it. Look for the line beginning `Payload=` and copy the characters that appear after it, up until the end of the line. It'll look something like this:

   ```
   UGkgc2F5cyBoZWxsbyEhCg==
   ```
3. Switch to a spare terminal and enter:

   ```
   echo <BASE64_ENCODED_STRING> | base64 -d
   ```

Making sure you paste the text you copied between the `echo` and the `|` symbol as indicated. You'll be presented with the message you sent from the device in the previous section: `Pi says hello!!`

***

## Monitor IP Command transmission <a href="#monitor-ip-command-transmission" id="monitor-ip-command-transmission"></a>

The webhook URL you just put in place was set up to receive IP Commands from the device. You can also use it in a tutorial context for monitoring messages being sent to the device. Use the same technique you applied in the [**Send IP Commands to the device**](#id-3.-send-an-ip-command-to-the-device) section, above, but this time add the following extra parameter to the `curl` call, adding `callback-url= <YOUR_WEBHOOK_URL>` with your Beeceptor endpoint:

```bash
curl -X POST "https://supersim.api.korewireless.com/v1/IpCommands" \
--data "Sim=<YOUR_SIM_NAME_OR_SID>" \
--data-urlencode "Payload=<YOUR_PAY_LOAD>" \
--data "DevicePort=3030" \
--data-urlencode "CallbackUrl=<YOUR_WEBHOOK_URL> \
--data "CallbackMethod=POST" \
--header "Authorization: Bearer <YOUR_AUTH_TOKEN>"
```

Now you'll receive a series of notification messages as the IP Command's status moves from `queued` to `sent`. For details of the possible status values you may see, [take a look at the API documentation](https://docs.korewireless.com/en-us/api/products/supersim/ipcommand-resource#status-values).

***

## Next steps <a href="#next-steps" id="next-steps"></a>

You've set up a Simcom SIM7600G cellular modem to send and receive UDP messages over a data connection, then you've sent messages to the device and back again, all through KORE Super SIM's IP Commands API.

You can try sending some alternative messages, including some binary data.

IP Command Resources are persisted for 30 days, so you can check your send and receive histories at any time. For example, a `GET` request made to `https://supersim.api.korewireless.com/v1/IpCommands` will fetch all existing resources for inspection. If you have the SID of a specific Command's resource, you can add it as a path value to the endpoint above. Try it now.

The next stage, of course, is to build a device-side app that listens for commands, parses them and triggers actions accordingly. You may also want to create a server app that's able to request information from devices: it sends a request command which causes the device to send a second, data-bearing message back. Or you might code up a mobile app that uses IP Commands to control the device remotely.

We can't wait to see what you build with Super SIM IP Commands!

***

## Appendix: other modems <a href="#appendix-other-modems" id="appendix-other-modems"></a>

This tutorial was originally written to make use of the original Sixfab Cellular IoT Hat, which has since been EOL'd. If you have a Cellular IoT Hat and would like to try this tutorial, the key changes you need to take note of are in the sections on preparing the device for use, setting up a UDP socket, reading messages on the device, and sending a message from the device.

To communicate with the Hat's [Quectel BG96](https://docs.korewireless.com/en-us/supersim/cellular-module-knowledgebase/quectel-supersim#bg95bg96-cat-m1-nb-iot-gsm) module, use `minicom -D /dev/ttyUSB3`.

To establish a UDP socket, enter:

```
AT+QICSGP=1,1,"super"
AT+QIACT=1
AT+QIOPEN=1,1,"UDP SERVICE","127.0.0.1",0,3030,0
```

Read a message received by the device with this command:

```
AT+QIRD=1
```

To transmit a message, enter:

```
AT+QISEND=1,15,"100.64.0.1",6969
```

***

## More Raspberry Pi <a href="#more-raspberry-pi" id="more-raspberry-pi"></a>

* [Get Started with Super SIM, the Raspberry Pi 4 and the Waveshare 4G Hat](https://docs.korewireless.com/en-us/supersim/get-started/get-started-with-super-sim-the-raspberry-pi-4-and-the-waveshare-4g-hat)
* [Get Started with Super SIM, the Raspberry Pi 4 and the Sixfab Base Hat](https://docs.korewireless.com/en-us/supersim/get-started/get-started-with-super-sim-the-raspberry-pi-4-and-the-sixfab-base-hat)
* [Get Started with Super SIM SMS Commands and the Raspberry Pi](https://docs.korewireless.com/en-us/supersim/get-started/get-started-with-super-sim-sms-commands-and-the-raspberry-pi)


# Get Started with Super SIM IP Commands and the Raspberry Pi Pico

**IP Commands** is a new Super SIM feature that allows your cloud to communicate with your IoT devices by exchanging UDP/IP messages. You can use IP Commands to send server-initiated messages from your cloud to your Super SIM-connected devices, and to have the responses directed to the endpoint of your choice. The best part is that you don't actually need to know a device's IP address — KORE will handle that for you. Nor do you need to maintain a persistent connection between a device and your server.

You can think of IP Commands as a lightweight alternative to using a Virtual Private Network (VPN) to reach a device from your cloud and exchange information.

This information is transferred in the form of User Datagram Protocol (UDP) messages. UDP provides basic, 'fire and forget' data exchange: there's no connection established between sender and receiver — but no guarantee that the message will be delivered. This simplicity makes UDP ideal for lightweight IoT applications: it's a great way to send commands (i.e., "change the air con setting to 40C", etc.) to a connected device. Such commands might come from your cloud, or from an app running on an end-user's mobile device. Typically, they would be more structured than the colloquial example shown above, but completely flexible: your application, not the transport, defines the command-response interaction.

<figure><img src="https://www.twilio.com/_next/image?url=https%3A%2F%2Fdocs-assets.prod.twilio.com%2Fb22eddc6d7b7021a7913ac30f5910463c51ab04bf80ff0b7f182d7a5c933df57.jpg&#x26;w=3840&#x26;q=75&#x26;dpl=dpl_3wAaAYk1qDEFgn1pz5dG2K3UbnHc" alt=""><figcaption></figcaption></figure>

To show you how to use Super SIM IP Commands, we're going to make use of the Raspberry Pi Pico microcontroller development board. The Pico is highly programmable. Though it's intended for traditional embedded applications, and therefore supports C/C++ development, it can also be used with [MicroPython](https://micropython.org/), a version of the popular language that's been tailored for use with microcontrollers rather than full PCs. This means that anyone who's used Python can quickly begin prototyping their own IoT devices with the Pico and Super SIM.

The Pico's RP2040 microcontroller is available in commercial quantities, so the development work you do can readily form the basis for production devices later.

{% hint style="danger" %}
This guide requires a KORE account. [Sign up here now if you don't have one](https://console.korewireless.com/register). It also requires a configured Super SIM. If you haven't set up your Super SIM in the [Console](https://console.korewireless.com/), please do so now. Our [Super SIM First Steps guide](https://docs.korewireless.com/en-us/supersim/get-started/supersim-first-steps) has extra help if you need it.
{% endhint %}

***

## Send IP Commands to the device <a href="#send-ip-commands-to-the-device" id="send-ip-commands-to-the-device"></a>

### 1. Gather your components <a href="#id-1-gather-your-components" id="id-1-gather-your-components"></a>

To complete this tutorial, you will need:

* A [Raspberry Pi Pico](https://www.raspberrypi.org/products/raspberry-pi-pico/)
  * These are widely available from many online electronics suppliers.
* A Waveshare Pico SIM7080 cellular modem
  * You can [order one direct from Waveshare](https://www.waveshare.com/pico-sim7080g-cat-m-nb-iot.htm).
* An HT16K33-based four-digit, seven-segment LED
  * Adafruit [sells a good one here](https://www.adafruit.com/product/879).
* A micro USB cable to power the hardware and connect it to your computer.
* Some jumper wires and a solderless breadboard.
* You will also need to install `curl` for your [platform](https://curl.se/docs/install.html).

{% hint style="danger" %}
This tutorial assumes your Pico has MicroPython installed. Out of the box this is not the case, but our tutorial [Get Started with Super SIM SMS Commands and the Raspberry Pi Pico](https://docs.korewireless.com/en-us/supersim/get-started/get-started-with-super-sim-sms-commands-and-the-raspberry-pi-pico) will show you how to set up your device and to prepare the other components for use. It will also show you the software you need on your computer. If this is your first Super SIM Raspberry Pi Pico tutorial, [hop over there now to get set up](https://docs.korewireless.com/en-us/supersim/get-started/get-started-with-super-sim-sms-commands-and-the-raspberry-pi-pico). Come back here when you've completed **Step 4** .

If you've already finished the Get Started tutorial, you're ready to continue here.
{% endhint %}

### 2. Enter some Python code <a href="#id-2-enter-some-python-code" id="id-2-enter-some-python-code"></a>

At this point, you should have your Pico ready to go, fitted to the Waveshare module, and connected up like this:

<figure><img src="https://www.twilio.com/_next/image?url=https%3A%2F%2Fdocs-assets.prod.twilio.com%2F04224178d08bc1af0aa54818076c07b2023e2941272a46074a67e2f3b0c315af.png&#x26;w=3840&#x26;q=75&#x26;dpl=dpl_3wAaAYk1qDEFgn1pz5dG2K3UbnHc" alt=""><figcaption></figcaption></figure>

You should have Minicom, or a similar terminal emulator, installed on your computer.

Run Minicom. Now hit **Ctrl-C** to break to the Python REPL. You won't use the REPL directly, but it provides a way to enter large blocks of MicroPython code. Hit **Ctrl-E**. This tells MicroPython to accept a full Python program pasted in. Click on the button at the top right of the following code to copy it and then paste it into Minicom. The copy button will appear when you mouse over the code. When you've pasted the code, hit **Ctrl-D**.

{% hint style="info" %}
You can find the a complete listing of the code, including all subsequent additions, [at our public GitHub repo](https://github.com/TwilioDevEd/raspberry-pi-pico-super-sim-demos/).
{% endhint %}

If you've copied the code, you can [click to jump down the page](#send-ip-commands-to-the-device).

```python
import sys
from machine import UART, Pin, I2C
from utime import ticks_ms, sleep

# Functions

'''
Send an AT command - return True if we got an expected
response ('back'), otherwise False
'''
def send_at(cmd, back="OK", timeout=500):
    # Send the command and get the response (until timeout)
    buffer = send_at_get_resp(cmd, timeout)
    if len(buffer) > 0: return (back in buffer)
    return False

'''
Send an AT command - just return the response
'''
def send_at_get_resp(cmd, timeout=500):
    # Send the AT command
    modem.write((cmd + "\r\n").encode())

    # Read and return the response (until timeout)
    return read_buffer(timeout)

'''
Read in the buffer by sampling the UART until timeout
'''
def read_buffer(timeout):
    buffer = bytes()
    now = ticks_ms()
    while (ticks_ms() - now) < timeout and len(buffer) < 1025:
        if modem.any():
            buffer += modem.read(1)
    return buffer.decode()

'''
Module startup detection
Send a command to see if the modem is powered up
'''
def boot_modem():
    state = False
    count = 0
    while count < 20:
        if send_at("ATE1"):
            print("The modem is ready")
            return True
        if not state:
            power_module()
            state = True
        sleep(4)
        count += 1
    return False

'''
Power the module on/off
'''
def power_module():
    print("Powering the modem")
    pwr_key = Pin(14, Pin.OUT)
    pwr_key.value(1)
    sleep(1.5)
    pwr_key.value(0)

'''
Check we are attached
'''
def check_network():
    is_connected = False
    response = send_at_get_resp("AT+COPS?", 1000)
    line = split_msg(response, 1)
    if "+COPS:" in line:
        is_connected = (line.find(",") != -1)
        if is_connected: print("Network information:", line)
    return is_connected

'''
Attach to the network
'''
def configure_modem():
    # AT commands can be sent together, not one at a time.
    # Set the error reporting level, set SMS text mode, delete left-over SMS
    # select LTE-only mode, select Cat-M only mode, set the APN to 'super' for Super SIM
    send_at("AT+CMEE=2;+CMGF=1;+CMGD=,4;+CNMP=38;+CMNB=1;+CGDCONT=1,\"IP\",\"super\"")
    # Set SSL version, SSL no verify, set HTTPS request parameters
    send_at("AT+CSSLCFG=\"sslversion\",1,3;+SHSSL=1,\"\";+SHCONF=\"BODYLEN\",1024;+SHCONF=\"HEADERLEN\",350")
    print("Modem configured for Cat-M and Super SIM")

'''
Open/close a data connection to the server
'''
def open_data_conn():
    # Activate a data connection using PDP 0,
    # but first check it's not already open
    response = send_at_get_resp("AT+CNACT?")
    line = split_msg(response, 1)
    status = get_field_value(line, 1)

    if status == "0":
        # There's no active data connection so start one up
        success = send_at("AT+CNACT=0,1", "ACTIVE", 2000)
    elif status in ("1", "2"):
        # Active or operating data connection
        success = True

    print("Data connection", "active" if success else "inactive")
    return success

def close_data_conn():
    # Just close the connection down
    send_at("AT+CNACT=0,0")
    print("Data connection inactive")

'''
Start a UDP session
'''
def start_udp_session():
    send_at("AT+CASERVER=0,0,\"UDP\",6969")

'''
Split a response from the modem into separate lines,
removing empty lines and returning what's left or,
if 'want_line' has a non-default value, return that one line
'''
def split_msg(msg, want_line=999):
    lines = msg.split("\r\n")
    results = []
    for i in range(0, len(lines)):
        if i == want_line:
            return lines[i]
        if len(lines[i]) > 0:
            results.append(lines[i])
    return results

'''
Extract a comma-separated field value from a line
'''
def get_field_value(line, field_num):
    parts = line.split(",")
    if len(parts) > field_num:
        return parts[field_num]
    return ""

'''
Flash the Pico LED
'''
def led_blink(blinks):
    for i in range(0, blinks):
        led_off()
        time.sleep(0.25)
        led_on()
        time.sleep(0.25)

def led_on():
    led.value(1)

def led_off():
    led.value(0)

'''
Listen for IP commands
'''
def listen():
    if open_data_conn():
        start_udp_session()
        print("Listening for IP commands...")

        # Loop to listen for messages
        while True:
            # Did we receive a Unsolicited Response Code (URC)?
            buffer = read_buffer(5000)
            if len(buffer) > 0:
                lines = split_msg(buffer)
                for line in lines:
                    if "+CANEW:" in line:
                        # We have a UDP packet, so get the data
                        resp = send_at_get_resp("AT+CARECV=0,100")
                        parts = split_msg(resp)
                        if len(parts) > 1:
                            # Split at the comma
                            item = parts[1]
                            cmd_start = item.find(",")
                            if cmd_start != -1:
                                cmd = item[cmd_start + 1:]
                                print("Command received:",cmd)
                            break
    else:
        print("ERROR -- could not open data connection")

'''
Runtime start
'''
# Set up the modem UART
modem = UART(0, 115200)

# Set the LED and turn it off
led = Pin(25, Pin.OUT)
led_off()

# Start the modem
if boot_modem():
    configure_modem()

    # Check we're attached
    state = True
    print("Attaching to cellular")
    while not check_network():
        if state:
            led_on()
        else:
            led_off()
        state = not state

    # Light the LED
    led_on()
    listen()
else:
    # Error! Blink LED 5 times
    led_blink(5)
    led_off()
```

This is the basis of the code you'll work on through the remainder of the guide, so you should also paste it into a text editor where you can make the subsequent changes and additions, and then copy everything at each stage over to the Pico as described above.

MicroPython will check the code and, if it's free of syntax errors, run it. You'll see status messages appear in Minicom as the code boots the cellular module and configures it, and then connects to the network. You know you're ready for the next step when you see the message `Listening for IP commands...` in Minicom.

These states are also reflected in the Pico's green LED. It will be off initially, but blink slowly while the device is attempting to attach to the cellular network. When the Pico has done so, the LED will stay lit.

If the LED blinks rapidly five times, the Pico could not start the module. Check your soldering and that you have connected the Pico to the module correctly.

### 3. Send an IP Command to the device <a href="#id-3-send-an-ip-command-to-the-device" id="id-3-send-an-ip-command-to-the-device"></a>

1. Open a second terminal or a new terminal tab on your computer.
2. Send a command using the `curl` tool as follows:

   <pre class="language-bash" data-overflow="wrap"><code class="lang-bash">curl -X POST "https://supersim.api.korewireless.com/v1/IpCommands" \
     --data "Sim=&#x3C;YOUR_SIM_SID>" \
     --data-urlencode "Payload=BLUE" \
     --data "PayloadType=text" \
     --data "DevicePort=6969" \
     --header "Authorization: Bearer &#x3C;YOUR_AUTH_CODE>"
   </code></pre>

   \
   Copy and paste the `curl` command to the command line then edit it to fill in the identifier of the Super SIM you're using (you can get this from the [Console](https://supersim.korewireless.com/supersim/sims) if you don't have it handy), and your account credentials (also available from the [Build](https://build.korewireless.com/clients) portal). The message is the value of the `Payload` parameter, in this example - `"BLUE"`. Make sure you set the `DevicePort` value to the one you chose when you configured the UDP socket in the previous section. \
   \
   The response from `curl`, posted to the terminal, will look something like this:<br>

   ```json
   {
       "account_sid": "<ACCOUNT_SID>",
       "sid": "<IP_COMMAND_SID>",
       "sim_sid": "<SIM_SID>",
       "sim_iccid": "<SIM_ICCID>",
       "date_created": "2024-10-22T17:45:31.199149Z",
       "date_updated": "2024-10-22T17:45:31.199149Z",
       "device_port": 6969,
       "payload": "BLUE",
       "payload_type": "text",
       "status": "queued",
       "device_ip": null,
       "error_code": null,
       "direction": "to_sim",
       "url": "https://supersim.api.korewireless.com/v1/IpCommands/<SID>"
   }
   ```

As you can see, the message's status is `queued`: it's in KORE's message queue waiting to be sent. When the IP Command leaves the KORE Mobile Core for the network the device is attached to, its status will become `sent`. Later on, you'll use a webhook, which you'll set up in the next section, to receive notifications about message status changes as they happen. For details of the possible status values you may see, take a look at [the API documentation](https://docs.korewireless.com/en-us/api/products/supersim/ipcommand-resource#sms-command-resource-status-callbacks).

{% hint style="info" %}
If you prefer to use a different port number, just change the value of `` `DevicePort` `` in the curl command above and in the Python code — it's set in the function `start_udp_session()`.
{% endhint %}

### 4. See the IP Command's effect on the device <a href="#id-4-see-the-ip-commands-effect-on-the-device" id="id-4-see-the-ip-commands-effect-on-the-device"></a>

Look at Minicom's output. Has the Pico reported that it received the command `BLUE`?

In a real-world application the IP Command would come from your server, not be sent manually, and your device-side application would parse any that arrive and perform actions accordingly. However, the demo gives you a picture of the flow. IP Commands also supports binary data. To send information in this form, you would set the `PayloadType` parameter  to `"binary"`:

```bash
curl -X POST "https://supersim.api.korewireless.com/v1/IpCommands" \
  --data "Sim=<YOUR_SIM_SID>" \
  --data-urlencode "Payload=BLUE" \
  --data "PayloadType=binary" \
  --data "DevicePort=6969" \
  --header "Authorization: Bearer <YOUR_AUTH_CODE>"
```

### 5. Display some data <a href="#id-5-display-some-data" id="id-5-display-some-data"></a>

Logging a received command is a good start, but it's not particularly exciting. Let's make use of the four-digit display so show some values in bold color.

The display needs code to drive it. Rather than include it all here, just grab the code you need from [this public GitHub repo](https://github.com/smittytone/HT16K33-Python). You want the contents of two files. Click the links below to view the raw code in your browser, then copy and paste each one into your text editor, right below the import statements at the top.

* [ht16k33.py](https://raw.githubusercontent.com/smittytone/HT16K33-Python/main/ht16k33.py)
* [ht16k33segment.py](https://raw.githubusercontent.com/smittytone/HT16K33-Python/main/ht16k33segment.py)

With the second file, make sure you copy only the class declaration — ignore the first two lines above it (starting `# Import the base class...`).

Now add the following function right after the existing `listen()` function:

```python
def process_cmd(line):
    cmd = line
    val = ""
    val_start = line.find("=")
    if val_start != -1:
        val = line[val_start + 1:]
        cmd = line[:val_start]
    cmd = cmd.upper()
    if cmd == "NUM" and len(val) < 5:
        process_command_num(val)
    else:
        print("Command not recognized")

'''
Display the decimal value n after extracting n from the command string
'''
def process_command_num(value):
    print("Setting",value,"on the LED")
    try:
        # Extract the decimal value (string) from 'msg' and convert
        # to a hex integer for easy presentation of decimal digits
        hex_value = int(value, 16)
        display.set_number((hex_value & 0xF000) >> 12, 0)
        display.set_number((hex_value & 0x0F00) >> 8,  1)
        display.set_number((hex_value & 0x00F0) >> 4,  2)
        display.set_number((hex_value & 0x000F), 3).draw()
    except:
        print("Bad value:",value)
```

Add this line to the `listen()` function, right after `print("Command received:",cmd)`:

```
process_cmd(cmd)
```

Finally, add the following lines after the `# Setup the modem UART block`:

```
# Set up I2C and the display
i2c = I2C(1, scl=Pin(3), sda=Pin(2))
display = HT16K33Segment(i2c)
display.set_brightness(2)
display.clear().draw()
```

Copy all the new code from your text editor and paste it to the Pico in the usual way.

Now send a slightly different command via the IP Commands API:

```bash
curl -X POST "https://supersim.api.korewireless.com/v1/IpCommands" \
  --data "Sim=<YOUR_SIM_SID>" \
  --data-urlencode "Payload=NUM=1234" \
  --data "PayloadType=text" \
  --data "DevicePort=6969" \
  --header "Authorization: Bearer <YOUR_AUTH_CODE>"
```

Again, you'll need to do this in a separate terminal tab or window, and replace the `<...>` sections with your own data.

After a moment or two you should see `1234` appear on the LED. If it doesn't appear after a short time, check you have the LED wired to the Pico correctly — take a look at the wiring diagram. If you see `Setting 1234 on the LED` in Minicom, you know the command was received. If not, did you enter the command above correctly? Perhaps you mis-typed the payload value. You'll see an error message in Minicom in this case.

Now it's time to make the conversation two way.

***

## Receive IP Commands from the device <a href="#receive-ip-commands-from-the-device" id="receive-ip-commands-from-the-device"></a>

The IP Commands API provides a specific IP address, `100.60.0.1`, to which all IP Commands, from every device should be sent. KORE uses a little bit of magic to streamline the relay of your messages to your cloud. How does it know where to send them? You specify a webhook address.

Super SIMs are organized into Fleets: groups of SIMs that have common settings, such as which networks they are able to connect to and whether they can make use of certain cellular services. Fleets are represented in the Super SIM API by [Fleet resources](https://supersim.korewireless.com/supersim/fleets), and IP Commands adds a property to each Fleet resource in which you can store your IP Commands webhook address.

So before we can send a message, we need to set up a webhook target URL and add that to your Super SIM's Fleet.

#### 1. Set up a webhook target <a href="#id-1-set-up-a-webhook-target" id="id-1-set-up-a-webhook-target"></a>

[Beeceptor](https://beeceptor.com/) is a handy service for testing webhooks. It's designed for developing and testing APIs of your own, and offers free mock servers — virtual endpoints that can receive webhook calls. Let's set one up to receive messages from the device.

1. In a web browser tab, go to [Beeceptor](https://beeceptor.com/).
2. Enter an endpoint name and click **Create Endpoint**:

   <figure><img src="/files/jZoYrNflONLawqAVenQv" alt=""><figcaption></figcaption></figure>
3. On the screen that appears next, click on the upper of the two clipboard icons to copy the endpoint URL:<br>

   <figure><img src="/files/GBaCzGbDQ1GieBMpGQOd" alt=""><figcaption></figcaption></figure>
4. Keep the tab open.

#### 2. Update your Super SIM's Fleet <a href="#id-2-update-your-super-sims-fleet" id="id-2-update-your-super-sims-fleet"></a>

Now you update your Super SIM's Fleet to add an IP Commands webhook. You can [do this with the API](https://docs.korewireless.com/en-us/api/products/supersim/ipcommand-resource#v1-ipcommands), but we'll use the Console for this demo.

1. Open a second web browser tab and log into the [KORE Console](https://console.korewireless.com).
2. Launch **Super SIM,** click **Fleets** and select the Fleet containing the Super SIM you are using.
3. Scroll down to **IP Commands Callback URL** and paste in your webhook URL from the previous section. By default, webhooks are triggered with a `POST` request. Leave it unchanged for now, but if you need to use another method for your own application, you can change it later.<br>

   <figure><img src="/files/ZtJWCA3CjDMLS5F6uDqO" alt=""><figcaption></figcaption></figure>
4. Click **Save**.
5. Close the tab if you like.

#### 3. Update the application <a href="#id-3-update-the-application" id="id-3-update-the-application"></a>

To add message sending to the device code, you can add following function after all the other function definitions:

<pre><code><strong>def send_data(data_string):
</strong>    data_length = len(data_string)
    if send_at("AT+CASEND=0," + str(data_length), ">"):
        # '>' is the prompt sent by the modem to signal that
        # it's waiting to receive the message text.
        resp = send_at_get_resp(data_string + chr(26))
</code></pre>

Now add these two lines into the function `process_cmd()`, right after `process_command_num(val)`:

```python
elif cmd == "SEND":
    send_data("We can\'t wait to see what you build!")
```

Finally, add this line to the end of the function `start_udp_session()`:

```python
send_at("AT+CACFG=\"REMOTEADDR\",0,100.64.0.1,6969")
```

Save the file and copy it across to the Pico.

Let's quickly take a look at that last addition as it's key. The AT command `+CACFG` is a Simcom-only command that performs a specific configuration option. That option is `"REMOTEADDR"` — it sets the remote IP address all future UDP messages will be transmitted to, at least until the value is changed.

Which address do we apply? `100.64.0.1`, the third parameter passed with the command. This is the standard IP Commands input address. The last parameter, `6969`, is the local port number.

### 4. Send an IP Command to send a message <a href="#id-4-send-an-ip-command-to-send-a-message" id="id-4-send-an-ip-command-to-send-a-message"></a>

Send a new command, `SEND`, via different command via the IP Commands API:

```python
curl -X POST "https://supersim.api.korewireless.com/v1/IpCommands" \
  --data "Sim=<YOUR_SIM_SID>" \
  --data-urlencode "Payload=SEND" \
  --data "DevicePort=6969" \
  --header "Authorization: Bearer <YOUR_AUTH_CODE>"
```

### 5. Read the message <a href="#id-5-read-the-message" id="id-5-read-the-message"></a>

Jump back to the Beeceptor tab in the browser. You should see — or will shortly see — the endpoint has received a `POST` request. Click on it to see the request body, then on the JSON icon, **{:}**, to view the data more clearly.

Unlike messages sent to the device, which can be text or binary, messages that are sent from the device always arrive in binary form. The string sent as a result of your `SEND` command has been base64 encoded, so it'll need decoding before you can read it. Look for the line beginning `Payload=` and copy the characters that appear after it, up until the end of the line. It'll look something like this:

```
V2UgY2FuJ3Qgd2FpdCB0byBzZWUgd2hhdCB5b3UgYnVpbGQh
```

Switch to a spare terminal and enter:

```
echo <BASE64_ENCODED_STRING> | base64 -d
```

making sure you paste the text you copied between the echo and the `|` symbol as indicated. You'll be presented with the message in English:

```
We can't wait to see what you build!
```

***

### Monitor IP Command transmission <a href="#monitor-ip-command-transmission" id="monitor-ip-command-transmission"></a>

The webhook URL you just put in place was set up to receive IP Commands from the device. You can also use it in a tutorial context for monitoring messages being sent to the device. Use the same technique you applied in the [**Send IP Commands to the device**](#send-ip-commands-to-the-device) section, above, but this time add the following extra command to the `curl` call: `CallbackUrl` followed by an equal sign and then your Beeceptor endpoint.

```
curl -X POST "https://supersim.api.korewireless.com/v1/IpCommands" \
  --data "Sim=<YOUR_SIM_SID>" \
  --data "DevicePort=6969" \
  --data-urlencode "Payload=SEND" \
  --data-urlencode "CallbackUrl=<YOUR_WEBHOOK_URL>" \
  --header "Authorization: Bearer <YOUR_AUTH_CODE>"
```

Now you'll receive a series of notification messages as the IP Command's status moves from `queued` to `sent`. For details of the possible status values you may see, take a look at [the API documentation](https://docs.korewireless.com/en-us/api/products/supersim/ipcommand-resource#sms-command-resource-status-callbacks).

***

## Next steps <a href="#next-steps" id="next-steps"></a>

You've set up a Raspberry Pi Pico and Simcom SIM7080 cellular module to send and receive UDP messages over a data connection, then you've actually sent those messages through KORE Super SIM's IP Commands API.

You can try sending some alternative messages, including some binary data.

Try using IP Commands to toggle GPIO pins so the Pico can begin to control things. Create a web page to call the API and trigger the commands.

IP Command Resources are persisted for 30 days, so you can check your send and receive histories at any time. For example, a `GET` request made to `https://supersim.api.korewireless.com/v1/IpCommands` will fetch all existing resources for inspection. If you have the SID of a specific Command's resource, you can add it as a path value to the endpoint above. Try it now.

The next stage, of course, is to build a device-side app that listens for a variety of commands, parses them and triggers actions accordingly. You may also want to create a server app that's able to request information from devices: it sends a request command which causes the device to send a second, data-bearing message back. Or you might code up a mobile app that uses IP Commands to control the device remotely.

We can't wait to see what you build with Super SIM IP Commands!

## More Raspberry Pi Pico <a href="#more-raspberry-pi-pico" id="more-raspberry-pi-pico"></a>

* [Get Started with Super SIM SMS Commands and the Raspberry Pi Pico](https://docs.korewireless.com/en-us/supersim/get-started/get-started-with-super-sim-sms-commands-and-the-raspberry-pi-pico)
* [Get Started with Data Comms and the Raspberry Pi Pico](https://docs.korewireless.com/en-us/supersim/get-started/get-started-with-data-comms-and-the-raspberry-pi-pico)


# Get Started with Super SIM eSIM Profiles for eUICCs

## Traditional SIMs

Whether they are in the form of cards or embedded chips, contain connectivity settings for a single connectivity provider. This provider may be a mobile network operator, such as AT\&T, or a company like KORE that leverages networks from all over the world. Regardless of who the provider is, their settings are stored in a **profile**. A traditional SIM's profile is baked in at the manufacturer and cannot be changed. There is a one-to-one correspondence between SIM and profile.

## eSIMs

eSIMs may be embedded, but they are not required to be — they are not bound to specific profiles, and the profiles they contain are not fixed in place. On the contrary, eSIMs, unlike traditional SIMs, can contain multiple profiles, switch between them, and download additional profiles over the air.

You can think of each eSIM profile as a virtual SIM card. Switching from one profile to another is the digital equivalent of swapping SIM cards.

{% hint style="info" %}
An eSIM is embodied in a physical unit called an Embedded Universal Integrated Circuit Card (eUICC). For this reason, the term 'eUICC' is often used interchangeably with 'eSIM'. We will use 'eSIM' here. eUICCs are chips and may be integrated into a cellular module or the host device, or even implemented as a SIM card.
{% endhint %}

There's a clear benefit to this ability: an eSIM-equipped device can switch from one network provider to another just by downloading and activating a new profile. This can happen entirely under the control of the application — the end-user need never know a change has taken place. For remote devices in locations where it is unfeasible to send an engineer to swap SIM cards, it enables connectivity switches.

<figure><img src="/files/BH2OkjSnKFeBmhOdQTd1" alt=""><figcaption></figcaption></figure>

*An eSIM example: the IoT device, a hire bike, powers up for the first time. It requests and downloads a Super SIM profile to its eSIM, allowing it to connect to its home base over a mobile cellular network.*

It is no wonder that device manufacturers are increasingly demanding eSIMs for their connected products. The good news is that KORE fully supports eSIMs, allowing customers who have chosen to incorporate eSIMs into their products to take full advantage of Super SIM's global connectivity via multiple Tier-1 networks.

This short guide will introduce you to working with Super SIM and an eSIM-equipped device. You can follow along to set up an eSIM-compatible tablet or phone as a stand-in for your IoT device, providing a clear picture of the device side of the process. However, all the API calls used in the walkthrough and the sequence of steps are the same, whatever hardware your IoT product is based on.

***

## Try it out <a href="#try-it-out" id="try-it-out"></a>

{% hint style="info" %}
If you're ready to implement eSIM Profiles, visit '[How to Use Super SIM eSIM Profiles](/supersim/how-to/how-to-use-super-sim-esim-profiles),' which contains more detailed information than this introductory guide and focuses on using profiles with IoT devices.
{% endhint %}

You can get a clear picture of how Super SIM's eSIM profiles work by trying them out for yourself. Many leading Android devices, such as the Google Pixel 4, 5, and 6, support eSIMs via a built-in eUICC. Additionally, iPad Pros released since 2018, as well as iPads, iPad Airs, and iPad Minis released since 2019, all feature an eUICC as well. These devices all use the consumer eSIM architecture.

There are two different types of eSIM profiles, consumer and M2M, and they are not interchangeable. Super SIM currently supports consumer profiles only.&#x20;

{% hint style="danger" %}
iOS may not always work well with Super SIM eSIM profiles. Every Super SIM will switch between multiple IMSIs depending on the country in which the device is being used. For some IMSIs, iOS, particularly on iPhones, may prevent you from changing from the APN. If you can't change the APN to `super`, you will not be able to use data. Tools like [Apple Configurator](https://apps.apple.com/app/apple-configurator-2/id1037126344?mt=12) can help you get around this limitation if iOS is preventing you from setting the APN. Unless you need to use iOS, we recommend you try Super SIM profiles on an Android device.
{% endhint %}

In addition to a mobile device containing an eSIM, you will also need a computer and an API tool to interact with the Super SIM API.&#x20;

The crucial point is that, from an API perspective, the actions you'll perform in the steps below will be the same as those you'll implement to provision the off-the-shelf eUICCs in your IoT devices.

***

## How to prepare and install an eSIM <a href="#how-to-prepare-and-install-an-esim" id="how-to-prepare-and-install-an-esim"></a>

There are several ways to install a Super SIM eSIM profile on your device. Super SIM supports the following methods:

[**Activation Code**](#activation-code) uses a code, often embedded in a QR code, which can be read using a device's camera, if it has one, or entered via a keypad. This is a more suitable method for applications built for tablets or phones. It doesn't require you to know the EID of the device that will claim the profile, which any eSIM-capable device can use — though once claimed, the profile can only be used with the device that claimed it.

[**Default SM-DP+**](#default-sm-dp) is more typically used by applications that don't need to allow the end-user to set up cellular connectivity, such as traditional IoT applications. The eSIM profile is bound to the eSIM's unique ID (EID), which you must know upfront and can only be used with that specific eSIM. That said, iOS and Android also support it, so we'll show how it's done there, too.

### Activation Code <a href="#activation-code" id="activation-code"></a>

**1. Reserve an eSIM Profile**

Choose between the two Super SIM interfaces below:

{% tabs %}
{% tab title="Super SIM Console" %}
a. In the Super SIM Overview page, under the Reserve & Manage eSIM Profiles card, click the Reserve eSIM Profiles link

<figure><img src="/files/pcJTot0BLGrWtzLWFKio" alt=""><figcaption><p>Reserve eSIM Profiles</p></figcaption></figure>

b. In the Reserve eSIM Profiles page, reserve a profile by choosing between the two download method, in this example let's select `Generate Matching ID` and enter the quantity or leave at at 1. Click Reserve when you're ready.

<figure><img src="/files/bbHuqpgNV0NoOCrsz2Go" alt=""><figcaption><p>Reserve eSIM Profiles </p></figcaption></figure>

c. This will create a new eSIM profile, with status updating from `Reserving` to `Available` - when refreshed - with information about your new eSimProfile. Make a note of its SID, which will be 32 characters long, starting with `HP`.

<figure><img src="/files/9muYZ74SaN93jHTc93wE" alt=""><figcaption><p>eSIM Profiles Page With <code>Available</code> eSIM Profile</p></figcaption></figure>
{% endtab %}

{% tab title="Super SIM API" %}
On your computer, enter the following command in a terminal:

{% code overflow="wrap" %}

```bash
curl -X POST https://supersim.api.korewireless.com/v1/ESimProfiles \
   --data-urlencode "GenerateMatchingId=true" \
   --header "Authorization: Bearer <YOUR_AUTH_TOKEN>"
```

{% endcode %}

This will create a new [eSimProfile resource](https://docs.korewireless.com/en-us/api/products/supersim/esimprofile-resource) — the API's representation of the eSIM profile you are creating. The command will display information about the new eSimProfile. The command above will display information about the new eSimProfile. Make a note of its SID, which will be 32 characters long, starting with `HP`.
{% endtab %}
{% endtabs %}

**2. Confirm the new eSIM Profile's readiness**

{% tabs %}
{% tab title="Super SIM Console" %}
a. Click the eSIM Profile SID to load the eSIM Profile Details page

<figure><img src="/files/Qm1c1oV8PVZdIAMyck8e" alt=""><figcaption><p>eSIM Profile Details Page</p></figcaption></figure>

In the eSIM Profile displayed, check the value of the `status` key. When it is `available`, you're ready for the next step, but you may see `reserving` instead. This means KORE is still in the process of setting up the new eSIM profile. Wait a couple of minutes and try again. In a real-world application, you'd add a callback URL to the API call. KORE will then post notifications to this URL whenever the eSimProfile resource's status changes and when it is eventually downloaded to an eSIM.
{% endtab %}

{% tab title="Super SIM API" %}
Run the following command:

{% tabs %}
{% tab title="Request" %}
{% code overflow="wrap" %}

```bash
curl -L  "https://supersim.api.korewireless.com/v1/ESimProfiles/<ESIM_PROFILE_SID>" \
--header "Authorization: Bearer <YOUR_AUTH_TOKEN>"
```

{% endcode %}
{% endtab %}

{% tab title="Response" %}

```json
{
    "sid": "HPaaaaaaaaaaaaaaaaaaaaaaaaaaaaaaaa",
    "account_sid": "ACnnnnnnnnnnnnnnnnnnnnnnnnnnnnnnnn",
    "eid": "nnnnnnnnnnnnnnnnnnnnnnnnnnnnnnnn",
    "status": "available",
    "iccid": "nnnnnnnnnnnnnnnnnnnn",
    "sim_sid": "HSaaaaaaaaaaaaaaaaaaaaaaaaaaaaaaaa",
    "smdp_plus_address": "twl.prod.ondemandconnectivity.com",
    "matching_id": null,
    "activation_code": null,
    "date_created": "2024-10-07T16:23:13.927149Z",
    "date_updated": "2024-10-07T16:23:15.614392Z",
    "url": "https://supersim.api.korewireless.com/v1/ESimProfiles/HPaaaaaaaaaaaaaaaaaaaaaaaaaaaaaaaa"
}
```

{% endtab %}
{% endtabs %}

In the JSON displayed, check the value of the `status` key. When it is `available`, you're ready for the next step, but you may see `reserving` instead. This means KORE is still in the process of setting up the new eSIM profile. Wait a couple of minutes and try again. In a real-world application, you'd add a callback URL to the API call. KORE will then post notifications to this URL whenever the eSimProfile resource's status changes and when it is eventually downloaded to an eSIM.
{% endtab %}
{% endtabs %}

**3. Get your eSIM Profile's Sim resource SID**

When the eSIM Profile has been reserved, KORE creates a [Sim resource](https://docs.korewireless.com/en-us/api/products/supersim/sim-resource) to represent the eSIM in your device. Note down the new SIM's SID, which is the value of the SIM SID |`sim_sid` key in the output from the previous step. Make a note too of the values of the SM-DP+ Address | `smdp_plus_address key` and Matching ID | `matching_id` keys. If you are using the API, you will need to use these values shortly to construct the Activation Code; otherwise, they are already available to you in the UI.

**4. Assign the Sim resource to a Fleet and activate it**

If you don't already have a [Fleet resource](https://docs.korewireless.com/en-us/api/products/supersim/fleet-resource), you will need to create one now and set up its Network Access Profile — a list of global cellular networks to which its member SIMs can connect. If you need assistance, refer to our Network Access Profiles guide, and we will guide you through the process. Whether you use an existing Fleet or create a new one, you'll need its SID, which [you can grab from Console](https://supersim.korewireless.com/supersim/fleets).

{% tabs %}
{% tab title="Request" %}

```bash
curl -L -X POST "https://supersim.api.korewireless.com/v1/Sims/<YOUR_SIM_SID>" \ 
  --data-urlencode "Fleet=<YOUR_FLEET_SID>" \
  --data-urlencode "Status=active" \
  --header "Authorization: Bearer <YOUR_AUTH_TOKEN>"
```

{% endtab %}

{% tab title="Response" %}

```json
{
    "sid": "HSaaaaaaaaaaaaaaaaaaaaaaaaaaaaaaaa",
    "account_sid": "ACaaaaaaaaaaaaaaaaaaaaaaaaaaaaaaaa",
    "unique_name": "<YOUR_SIM_UNIQUE_NAME>",
    "status": "active",
    "iccid": "nnnnnnnnnnnnnnnnnnnn",
    "fleet_sid": "HFaaaaaaaaaaaaaaaaaaaaaaaaaaaaaaaa",
    "date_created": "2024-10-07T16:23:15Z",
    "date_updated": "2024-11-18T18:36:20Z",
    "url": "https://supersim.api.korewireless.com/v1/Sims/HSaaaaaaaaaaaaaaaaaaaaaaaaaaaaaaaa",
    "links": {
        "billing_periods": "https://supersim.api.korewireless.com/v1/Sims/HSaaaaaaaaaaaaaaaaaaaaaaaaaaaaaaaa/BillingPeriods",
        "sim_ip_addresses": "https://supersim.api.korewireless.com/v1/Sims/HSaaaaaaaaaaaaaaaaaaaaaaaaaaaaaaaa/IpAddresses"
    }
}
```

{% endtab %}
{% endtabs %}

**5. Create the Activation Code**

Take the `smdp_plus_address` and `matching_id` values you got in [Step 3](https://www.twilio.com/docs/iot/supersim/get-started-with-super-sim-and-esim-profiles#3-get-your-esim-profiles-sim-resource-sid), and paste them into a string as follows:

```
1$<YOUR SMDP_PLUS_ADDRESS>$<YOUR_MATCHING_ID>
```

This is your eSimProfile's Activation Code. You can enter this manually into your device, but it's more fun to convert it into a QR code that your device can scan. To do so, first add `LPA:` to the start of the string — this tells the QR code scanner how to handle the decoded code:

```
LPA:1$<YOUR SMDP_PLUS_ADDRESS>$<YOUR_MATCHING_ID>
```

Paste the complete string into any QR code generation software. There are many free services on the web, or you can use an API like Google's:

{% code overflow="wrap" %}

```bash
curl -X POST https://chart.googleapis.com/chart -d cht=qr -d chs=256x256 -d chl='LPA:1$<SM-DP_ADDRESS>$<MATCHING_ID>' -o qr-code.png
```

{% endcode %}

This will save a QR code graphic in your current working directory. Open it up so it's visible on your screen.

**6. Add a new cellular data plan**

Go to your mobile device.

**Android**

{% hint style="danger" %}
Due to the numerous differences between Android versions and the OS's implementation by phone and tablet manufacturers, the following references to sections, pages, and controls in the Android UI may not fully match those on your device. However, if you find similar items, use those.
{% endhint %}

1. Go to **Settings > Network and Internet**.
2. In the **SIMs** section, tap the **+** icon on the right-hand side of the screen.
3. On the **Connect to Mobile Network** page, tap **Download a SIM instead?**.
4. You'll be asked if you want to use two SIMs — tap **Yes**.
5. On the **Download your SIM** page, just tap **Next**.
6. Scan the QR code displayed on your computer screen.
7. On the **Use** page, tap **Download**.
8. On the **Download finished** page, tap **Settings**.
9. On the **SIMs** page, under **DOWNLOADED SIM**, tap **Inactive**.
10. On the next page, turn the **Use SIM** toggle on.
11. You'll be asked if you want to turn on the SIM — tap **Yes**.
12. You'll be asked to select a SIM for mobile data — select your eSIM. This may be number 1 or number 2, depending on your device, and whether it also has a physical SIM fitted.
13. Finally, on the next screen, turn the **Roaming** toggle on.

**iOS**

1. Go to **Settings > Mobile Data** or **Settings > Cellular Data**. Which of these you'll see will depend on your region.
2. Scroll down and tap **Add Data Plan** or **Add Cellular Plan**. If you're working with a new device, you'll see a list of network providers, but just tap **Other…**.
3. Scan the QR code displayed on your computer screen.
4. On the **Add Data Plan** panel, tap the **Add Data Plan** or **Add Cellular Plan** button.
5. There will be a short period while the plan is downloaded and activated. The main **Mobile Data** settings will be disabled while activation is taking place.

**7. Enter the Super SIM APN**

**Android**

1. Go to **Settings > Mobile Networks > Advanced**.
2. Scroll down and tap **Access Point Names**.
3. Tap the three-dot menu icon and select "New APN."
4. Tap **Name**, enter `KORE` in the pop-up, then tap **OK**.
5. Tap **APN**, enter `super` in the pop-up, then tap **OK**.
6. Tap the three-dot menu icon and select "Save."
7. In the list of APNs, make sure `KORE` is selected.

**iOS**

1. Go to **Settings > Mobile Data** or **Settings > Cellular Data**. Which of these you'll see will depend on your region.
2. Tap on **Mobile Data Options** or **Cellular Data Options**. Again, which of these you see will depend on your region.
3. Enable roaming by turning on the **Data Roaming** toggle.
4. Go back to the **Mobile Data** or **Cellular Data** screen and tap on **APN Settings**.
5. Enter `super` in the first **APN** field. Don't enter a username or password.

And you are done. Your device's eSIM will now connect to the Internet via the KORE Distributed IoT Mobile Core and any of the cellular networks worldwide that you have assigned to the Network Access Profile associated with your eSIM's Fleet. Make sure the device's WiFi connectivity is turned off and try visiting some websites.

If you are not interested in the Default SM-DP+ profile installation method, you can [jump to the last section](#next-steps).

#### Default SM-DP+ <a href="#default-sm-dp" id="default-sm-dp"></a>

**1. Find your device's EID.**

Go to your mobile device.

**Android**

{% hint style="danger" %}
Due to the numerous differences between Android versions and the OS's implementation by phone and tablet manufacturers, the following references to sections, pages, and controls in the Android UI may not fully match those on your device. However, if you find similar items, use those.
{% endhint %}

1. Open the device's **Settings** app.
2. Tap **Phone > SIM status**, and scroll down to **EID**.

**iOS**

1. At the home screen, tap on **Settings**.
2. Go to **General > About** and scroll down to **EID**.

Write down your device's EID — you'll need it in the next step — or keep the unit turned on beside you.

**2. Reserve an eSIM Profile for your device's eSIM**

On your computer, enter the following command in a terminal, making sure you replace `<YOUR_DEVICE_EID>` with the value you noted down in Step 1. Enter it carefully, as it's a 32-digit number.

{% code overflow="wrap" %}

```bash
curl -L -X POST 'https://supersim.api.korewireless.com/v1/ESimProfiles' \
    --data-urlencode "Eid=<YOUR_DEVICE_EID>" \
    --header "Authorization: Bearer <YOUR_AUTH_TOKEN>"
```

{% endcode %}

This will create a new [eSimProfile resource](https://docs.korewireless.com/en-us/api/products/supersim/esimprofile-resource) — the API's representation of the eSIM profile you are creating. The command will display information about the new eSimProfile. Make a note of its SID, which will be 32 characters long, starting with `HP`. We'll use this value in the next step.

**3. Confirm the new eSIM profile's readiness**

Run the following command:

{% tabs %}
{% tab title="Request" %}

```bash
curl -L "https://supersim.api.korewireless.com/v1/ESimProfiles/<YOUR_ESIM_PROFILE_SID>" 
    --header "Authorization: Bearer <YOUR_AUTH_CODE>"
```

{% endtab %}

{% tab title="Response" %}

```json
{
    "sid": "HPaaaaaaaaaaaaaaaaaaaaaaaaaaaaaaaa",
    "account_sid": "ACnnnnnnnnnnnnnnnnnnnnnnnnnnnnnnnn",
    "eid": "nnnnnnnnnnnnnnnnnnnnnnnnnnnnnnnn",
    "status": "available",
    "iccid": "nnnnnnnnnnnnnnnnnnnn",
    "sim_sid": "HSaaaaaaaaaaaaaaaaaaaaaaaaaaaaaaaa",
    "smdp_plus_address": "twl.prod.ondemandconnectivity.com",
    "matching_id": null,
    "activation_code": null,
    "date_created": "2024-10-07T16:23:13.927149Z",
    "date_updated": "2024-10-07T16:23:15.614392Z",
    "url": "https://supersim.api.korewireless.com/v1/ESimProfiles/HPaaaaaaaaaaaaaaaaaaaaaaaaaaaaaaaa"
}
```

{% endtab %}
{% endtabs %}

In the JSON displayed, check the value of the `status` key. When it is `available`, you're ready for the next step, but you may see `reserving` instead. This means KORE is still in the process of setting up the new eSIM profile for the specified EID. Wait a couple of minutes and try again. In a real-world application, you'd add a callback URL to the API call. KORE will post notifications to this URL whenever the eSimProfile resource's status changes and when it is eventually downloaded to its target eSIM.

**4. Get your eSIM profile's Sim resource SID**

When the eSIM profile has been reserved, KORE creates a [Sim resource](https://docs.korewireless.com/en-us/api/products/supersim) to represent the eSIM in your device. From this point, you'll use this Sim resource just like any other Super SIM. The new Sim's SID is the value of the `sim_sid` key in the output from Step 3, above. Make a note of it; you'll use it in a moment to activate it and add it to a Fleet.

In addition to the `sim_sid` key, grab the value of the `smdp_plus_address` key. This is the address of the server your device will contact to download its new eSIM Profile.

**5. Assign the Sim resource to a Fleet and activate it**

If you don't already have a [Fleet resource](https://docs.korewireless.com/en-us/api/products/supersim/fleet-resource), you'll need to create one now and set up its Network Access Profile — the list of global cellular networks to which its member SIMs can connect. If you need assistance, [jump to our Network Access Profiles guide](https://docs.korewireless.com/en-us/supersim/how-to/understanding-network-access-profiles), which will show you how to do this. Whether you use an existing Fleet or create a new one, you'll need its SID, which [you can grab from Console](https://supersim.korewireless.com/supersim/fleets).

Run the following command to add the eSIM to a Fleet and to activate it. Just replace `<YOUR_SIM_SID>` with the Sim SID you retrieved in the previous step, and `<YOUR_FLEET_SID>` with the target Fleet's SID, don't forget `<YOUR_AUTH_TOKEN>`:

{% tabs %}
{% tab title="Request" %}

```bash
curl -L -X POST "https://supersim.api.korewireless.com/v1/Sims/<YOUR_SIM_SID>" 
    --data-urlencode "Fleet=<YOUR_FLEET_SID>" \
    --data-urlencode "Status=active" \ 
    --header "Authorization: Bearer <YOUR_AUTH_TOKEN>"
```

{% endtab %}

{% tab title="Response" %}

```json
{
    "sid": "HSaaaaaaaaaaaaaaaaaaaaaaaaaaaaaaaa",
    "account_sid": "ACaaaaaaaaaaaaaaaaaaaaaaaaaaaaaaaa",
    "unique_name": "<YOUR_SIM_UNIQUE_NAME>",
    "status": "active",
    "iccid": "nnnnnnnnnnnnnnnnnnnn",
    "fleet_sid": "HFaaaaaaaaaaaaaaaaaaaaaaaaaaaaaaaa",
    "date_created": "2024-10-07T16:23:15Z",
    "date_updated": "2024-11-18T18:36:20Z",
    "url": "https://supersim.api.korewireless.com/v1/Sims/HSaaaaaaaaaaaaaaaaaaaaaaaaaaaaaaaa",
    "links": {
        "billing_periods": "https://supersim.api.korewireless.com/v1/Sims/HSaaaaaaaaaaaaaaaaaaaaaaaaaaaaaaaa/BillingPeriods",
        "sim_ip_addresses": "https://supersim.api.korewireless.com/v1/Sims/HSaaaaaaaaaaaaaaaaaaaaaaaaaaaaaaaa/IpAddresses"
    }
}
```

{% endtab %}
{% endtabs %}

**6. Add a new cellular data plan**

Go back to your mobile device.

**Android**

1. the Open the device's **Settings** app.
2. Go to **Network and Internet > SIMs**, and tap the **+** icon on the right-hand side of the screen.
3. Tap **Download a SIM instead?** at the bottom of the screen.
4. On the **Use 2 SIMs?** panel that will appear, tap **Yes**.
5. On the **Download your SIM** page, tap **Next**.
6. On the **Scan QR code from network** page, tap **Need Help?** at the bottom.
7. On the **Help adding a network page**, find and tap the **Enter it manually** link.
8. On the next screen, enter the URL you received in Step 2, above, then tap **Continue**.
9. You'll be asked if you want to use the eSIM — tap **Download**.
10. There will be a short period while the eSIM profile is downloaded.
11. On the **Download Finished** screen, tap **Settings**.
12. Back at the **SIMs** page, tap the downloaded SIM.
13. Switch the **Use SIM** toggle to on, and then confirm when asked by tapping **Yes**.
14. When asked, select the eSIM for data.
15. Make sure the eSIM's **Mobile data** and **Roaming** toggles are on.

**iOS**

1. Go to **Settings > Mobile Data** or **Settings > Cellular Data**. Which of these you'll see will depend on your region.
2. Scroll down and tap **Add Data Plan** or **Add Cellular Plan**. If you're working with a new device, you'll see a list of network providers, but just tap **Other...**.
3. The iOS UI is designed to scan a QR code from an operator, but you should instead tap **Enter Details Manually** at the bottom of the screen.
4. On the **Enter Activation Code** panel, enter the value of the `smdp_plus_address` key you got earlier into the **SM-DP+ Address** field. Leave the other two fields blank.
5. Tap **Next**.
6. On the **Add Data Plan** panel, tap the **Add Data Plan** or **Add Cellular Plan** button.
7. There will be a short period while the plan — the eSIM profile, in other words — is downloaded and activated. The **Mobile Data** settings will be disabled while activation is taking place.

**7. Enter the Super SIM APN**

**Android**

1. Go to **Settings > Mobile Networks > Advanced**.
2. Scroll down and tap **Access Point Names**.
3. Tap the three dots menu icon and select **New APN**.
4. Tap **Name**, enter `KORE` in the pop up, then tap **OK**.
5. Tap **APN**, enter `super` in the pop up, then tap **OK**.
6. Tap the three dots menu icon and select **Save**.
7. In the list of APNs, make sure `KORE` is selected.

**iOS**

1. Go to **Settings > Mobile Data** or **Settings > Cellular Data**. Which of these you'll see will depend on your region.
2. Tap on **Mobile Data Options** or **Cellular Data Options**. Again, which of these you see will depend on your region.
3. Enable roaming by turning on the **Data Roaming** toggle.
4. Go back to the **Mobile Data** or **Cellular Data** screen and tap on **APN Settings**.
5. Enter `super` in the first **APN** field. Don't enter a username or password.

And you're done. Your device's eSIM will now connect to the Internet via the KORE Distributed IoT Mobile Core and any of the cellular networks worldwide that you have assigned to the Network Access Profile associated with your eSIM's Fleet. Ensure the device's Wi-Fi connectivity is turned off, and then try visiting some websites.

***

## Next steps <a href="#next-steps" id="next-steps"></a>

In this tutorial, that device was a mobile phone or tablet, but it could have been any IoT device that you or your end-users will deploy. It works just the same way. You can take any off-the-shelf eUICC hardware compatible with the consumer eSIM profile specification, create and install a Super SIM eSIM profile onto it, and by doing so, allow it to connect through mobile networks across the globe.

We can't wait to see what products you build and connect.


# Get Started with Super SIM Connection Events

KORE [Event Streams](https://docs.korewireless.com/en-us/developers/event-streams) is a new, unified mechanism for tracking your application's interactions with KORE products. It spans KORE's product line to provide a common event logging system that consistently supports product-specific event types. You use a single API to subscribe to the events that matter to you.

Super SIM provides a set of event types focused on devices' attempts to attach to cellular networks and, once they are connected, the data sessions they establish to send and receive information.

<figure><img src="/files/in1fgbVMcl4ofqWUmEtD" alt=""><figcaption></figcaption></figure>

This tutorial will show you how the Event Streams API works and how you can use it to monitor your Super SIMs. If you've already set up Event Streams for another KORE product, then you may prefer to jump straight to the documentation that [describes the event types unique to Super SIM](https://docs.korewireless.com/en-us/supersim/how-to/how-to-use-super-sim-connection-events). No problem. But if you're keen to try Event Streams for the first time to see how this API might help you monitor your IoT fleet, read on.

{% hint style="info" %}
Event Streams currently supports two destinations for your events: AWS Kinesis and webhooks. For real-world large-scale applications, you'll most likely prefer the scalability and flexibility of AWS Kinesis, but webhooks provide a starting point for smaller apps, API testing, and development, so that's the approach we're taking here.

However, for those of you looking to move to a more sophisticated setup, we have a tutorial that walks you through setting up AWS Kinesis to relay events to [ElasticSearch and using Kibana](https://docs.korewireless.com/en-us/supersim/how-to/how-to-monitor-super-sim-connection-events-using-aws-elasticsearch-and-kibana) as an events monitor dashboard.
{% endhint %}

This tutorial assumes you're on a Linux box or a Mac, but it should work under Windows. We'll note Windows-specific points as we come to them. Whatever platform you're using, we'll take it as a given that you have Python 3 installed and are familiar with the basics of the language. Likewise, using the command line on your preferred platform.

OK. Let's get started.

***

## 1. Turn your Super SIM-enabled device OFF <a href="#id-1-turn-your-super-sim-enabled-device-off" id="id-1-turn-your-super-sim-enabled-device-off"></a>

***

## 2. Set up your system <a href="#id-2-set-up-your-system" id="id-2-set-up-your-system"></a>

The first thing to do is gather the software you will need to complete the tutorial. You'll be using a specific setup to trial Event Streams with Super SIM and while this may not mirror the tools you'd use in a real-world application, it will give you a clear picture of how the system works.

1. Install and set up `curl` tool: depending on your operating system, this [guide ](https://curl.se/docs/install.html)will show you how to install it.
2. Install the Python tools Falcon and Gunicorn:

```
pip3 install falcon gunicorn
```

3. If you're using Windows but not running the [Windows Subsystem for Linux](https://docs.microsoft.com/en-us/windows/wsl/install-win10), omit `gunicorn` and install `waitress` instead.
4. [Download](https://ngrok.com/download) Ngrok then install it by unzipping the download file and moving the `ngrok` binary to your current working directory. Ngrok is free to use but it [requires you to set up an account](https://dashboard.ngrok.com/) in order to get a token to authorize its usage. Go and [sign up](https://dashboard.ngrok.com/) now.
5. Go to the [Ngrok dashboard and copy your AuthToken](https://dashboard.ngrok.com/get-started/your-authtoken).
6. Hop back to your terminal and configure `ngrok` replacing the placeholder text with the token you copied in the previous step.

```bash
  ngrok config add-authtoken <NGROK_AUTH_TOKEN> 
```

***

## 3. Set up and run your events receiver <a href="#id-3-set-up-and-run-your-events-receiver" id="id-3-set-up-and-run-your-events-receiver"></a>

With the tools in place, you need to establish a server on your machine that will receive Super SIM events streamed from KORE. This is what Falcon and Gunicorn are for. Falcon is an app server and it operates via a basic web server — Gunicorn in this case. First, though you need an app to serve, so copy the code below into a text editor then save it in your working directory as `server.py`.

```python
# 'wsgiref' is provided by Gunicorn/Waitress
from wsgiref.simple_server import make_server
import falcon, json

class Event(object):
  def on_post(self, req, resp):
    # Configure the response to KORE
    resp.status = falcon.HTTP_201
    resp.body = json.dumps({"success": True})

    # Parse the received data and extract some
    # of the information it contains
    if req.content_length:
      data = json.load(req.stream)[0]
      sim_data = data["data"]
      event_type = sim_data["event_type"]
      time_stamp = sim_data["timestamp"]
      sim_name = sim_data["sim_unique_name"]
      if not len(sim_name):
        sim_name = sim_data["sim_sid"]
      if not time_stamp in events:
        events[time_stamp] = "KORE EVENT " + event_type + " received from SIM " + sim_name
        print(events[time_stamp],"at",time_stamp)

# Main entry point
if __name__ == '__main__':
  events = {}
  app = falcon.App()
  eventHandler = Event()
  app.add_route('/events', eventHandler)

  with make_server('', 8000, app) as httpd:
    print('Serving on port 8000...')
    httpd.serve_forever()
```

This code uses Falcon to set up an endpoint for `POST` requests at the path `/events`. It then serves the endpoint on port 8000. When a `POST` request is received, it's passed into the function `on_post()`, which configures a status code 201 ('object created') response, and then prints some of the data included in the event so you can view events as they arrive.

Open a terminal on your system, navigate to the file you just saved and run this command:

```
python server.py
```

You'll see the server start and begin listening on port 8000. Remember the port number — you'll need it in the next step.

***

## 4. Serve your events receiver <a href="#id-4-serve-your-events-receiver" id="id-4-serve-your-events-receiver"></a>

Your event receiver is only accessible on your own machine. You need to expose it to the Internet so that KORE can reach it too. The most secure and anonymous way to do this is to use Ngrok, which routes over a virtual private network (VPN) to your computer any HTTP requests that are sent to a temporary public URL.

Not only is it secure, but it's also free and you don't even need to set up an account if you're happy running it for a limited period at any one time.

Open up another terminal tab or window, navigate to where you placed the `ngrok` binary you downloaded in [Step 2](#id-2-set-up-your-system), and run this command:

```
ngrok http 8000
```

You'll recognize the port number from Step 3.

`ngrok` will output a bunch of information — make a note of the https forwarding address. It'll be something like `https://0bc7bd985b0f.ngrok.io` and it will be forwarding to `http://localhost:8000` which is your event handler. It will look something like this:

<figure><img src="https://www.twilio.com/_next/image?url=https%3A%2F%2Fdocs-assets.prod.twilio.com%2F04a1cbd4dd92db9e4ce20581cac8af9d6f3cb80348b74859e89a9495aca64a38.png&#x26;w=3840&#x26;q=75&#x26;dpl=dpl_7xBchYqRxqFSCHHp1DRPBXs878c9" alt=""><figcaption></figcaption></figure>

***

## 5. Configure KORE Event Streams  <a href="#id-5-configure-twilio-event-streams-1-create-a-sink" id="id-5-configure-twilio-event-streams-1-create-a-sink"></a>

### 1: Create a Destination <a href="#id-5-configure-twilio-event-streams-1-create-a-sink" id="id-5-configure-twilio-event-streams-1-create-a-sink"></a>

A Destination is an Event Stream destination. To set up a Destination, you create a [Destination](https://docs.korewireless.com/en-us/developers/event-streams/destinations) resource using the [Event Streams](https://build.korewireless.com/event-stream/destination/create) console. Event Streams currently support two Destination types: AWS Kinesis and webhooks. The former requires an AWS account, so we're going to demo Event Streams with a webhook. To be precise, you're going to configure Event Streams to send events to your event handler via Ngrok. A quick guide on how to create a Destination is available through the [Webhook Quick Start](https://docs.korewireless.com/en-us/developers/get-started/event-streams/webhook-quick-start) guide.

You'll need to enter the Ngrok forwarding URL from Step 4. Make sure you don't overwrite the `/events` in the Destination URL field — this is the endpoint defined in your server code in Step 3. You can name your destination according to your preference, in this example, we will use the name "New-Webhook-Destination" as `Destination Name`  and "<https://0bc7bd985b0f.ngrok.io>" - same as provided for your in[ Step 4](#id-4-serve-your-events-receiver) - as your the `Destination URL`.

<figure><img src="/files/2znW1ubm1ixckj0fzWnO" alt=""><figcaption></figcaption></figure>

Click Finish. The page should create a Destination which you'll need in the next step.&#x20;

<figure><img src="/files/prhJ9wR8JZKRYIdq9BG3" alt=""><figcaption></figcaption></figure>

***

### 2: Create a streaming rule <a href="#id-6-configure-twilio-event-streams-2-subscribe-to-events" id="id-6-configure-twilio-event-streams-2-subscribe-to-events"></a>

Event Streams uses a publish-subscribe (aka 'pub-sub') model: you subscribe to the events that interest you, and KORE will publish those events to your Destination.

There are six Super SIM event types, each identified by a reverse domain format string:

| Event Type           | ID String                                                 |
| -------------------- | --------------------------------------------------------- |
| Attachment Accepted  | `com.twilio.iot.supersim.connection.attachment.accepted`  |
| Attachment Rejected  | `com.twilio.iot.supersim.connection.attachment.rejected`  |
| Attachment Failed    | `com.twilio.iot.supersim.connection.attachment.failed`    |
| Data Session Started | `com.twilio.iot.supersim.connection.data-session.started` |
| Data Session Updated | `com.twilio.iot.supersim.connection.data-session.updated` |
| Data Session Ended   | `com.twilio.iot.supersim.connection.data-session.ended`   |

The types are largely self-explanatory. The exception is Attachment Failed, which is a generic 'could not connect' error that you may encounter when your device tries to join a cellular network.

In a typical connection sequence, you would expect to receive: one Attachment Accepted, one Data Session Started, and then multiple Data Session Updated events. When your device disconnects, you'll receive a Data Session Ended event at that point.

Now let's set up some [Streaming rules](https://docs.korewireless.com/en-us/developers/event-streams/streaming-rules).

To get events posted to your new Destination, you need to create a [Streaming rule](https://docs.korewireless.com/en-us/developers/event-streams/streaming-rules). This essentially tells KORE what events you're interested in. A quick guide on how to create a Streaming rule is available through the [Webhook Quick Start](https://docs.korewireless.com/en-us/developers/get-started/event-streams/webhook-quick-start) guide.

<figure><img src="/files/5aWDuV2AuANOl92d4WZi" alt=""><figcaption></figcaption></figure>

Select the destination where these events will be delivered. In this example, we've included all but the Data Session Updated event so you don't impact your free event quota.

Click Create. The page should create the Streaming rule that will deliver the events to your destination.

<figure><img src="/files/dUGBameQBf8kgtaAikMM" alt=""><figcaption></figcaption></figure>

Are you ready? Switch back to the terminal tab running the event handler — it's the first one you opened — and…

***

## 6. Turn your Super SIM-enabled device ON <a href="#id-7-turn-your-super-sim-enabled-device-on" id="id-7-turn-your-super-sim-enabled-device-on"></a>

You'll see a series of events printed to the terminal as your device boots up, tries to connect to the network, does so, and then begins sending and receiving data. For example:

<figure><img src="https://www.twilio.com/_next/image?url=https%3A%2F%2Fdocs-assets.prod.twilio.com%2F98a2641a9c7a215ced8d8b2b334c9a01a1ad9e99d3210fba69d7adc167d7d992.png&#x26;w=3840&#x26;q=75&#x26;dpl=dpl_7xBchYqRxqFSCHHp1DRPBXs878c9" alt=""><figcaption></figcaption></figure>

{% hint style="info" %}
If you're running this guide on a Mac, you may see some errors in the output too, in particular `OSError: [Errno 41] Protocol wrong type for socket`. This is nothing to worry about, and you'll soon see the subscribed notifications appear. The errors relate to [longstanding bugs in Python's internals](https://bugs.python.org/issue33450), not to the code you've entered.
{% endhint %}

***

## 7. Tidy up <a href="#id-8-tidy-up" id="id-8-tidy-up"></a>

When you've seen enough, you should cancel this sample Event stream by deleting the Streaming rule and the Destination you created in Step 5. This ensures that KORE doesn't continue to send messages to your events handler, when you're about to shut down.&#x20;

First, Goto Streaming Rules, select the test rule, delete, and confirm.

<figure><img src="/files/H8AkHtfgUoM5fHeK3CMM" alt=""><figcaption></figcaption></figure>

&#x20;Next, delete the Destination as well because it's bound to the Ngrok input URL, which is temporary. Goto Destinations, select the Destination, delete, and confirm.

<figure><img src="/files/0RUldNpJ89IcJxrWJ3KK" alt=""><figcaption></figcaption></figure>

When done, you can switch to your Ngrok terminal and close the tool down with **Ctrl-c**. Use the same keys to shut down the event handler in the remaining terminal window or tab.

&#x20;If you restart Ngrok, you'll get a new URL. You can't update an existing Destination with an alternative destination, so you will need to create a new Destination with the new URL — just re-run the code you created in Step 4.

***

## Next steps <a href="#next-steps" id="next-steps"></a>

You've used the KORE [Build ](https://build.korewireless.com/)page, a pair of Python applications, and Ngrok to receive and display events streamed from KORE in response to actions performed by your Super SIM-connected device. Your computer and the device may only be inches apart on your desk, but you've seen how Event Streams can be used to feed you event data from any of your Super SIM-connected devices anywhere in the world.

As a next step in exploring Super SIM and Event Streams, you might try changing the event handler code to write a log file for all your SIMs, the events they generated, and when. You might also write some code to parse that log and present the results graphically.

We've only displayed a few data points in each event. When you fully harness the power of Super SIM events, you'll be able to get network and cell tower level location information, data usage reports, and [so much more](https://docs.korewireless.com/en-us/supersim/how-to/how-to-use-super-sim-connection-events).

If your want a more sophisticated setup, why not work through our [Connection Events , AWS ElasticSearch, and Kibana tutorial](https://docs.korewireless.com/en-us/supersim/how-to/how-to-monitor-super-sim-connection-events-using-aws-elasticsearch-and-kibana)? You'll set up an AWS Kinesis Destination, use it to relay Super SIM events to ElasticSearch, and then use Kibana as an events monitor dashboard.

We can't wait to see what you build with Super SIM connection events!


# How To


# How to Set a Device’s APN for Super SIM

Learn how to set a device's Access Point Name (APN) for use with your Super SIM and verify that you're connected to the network.

To configure your device using the Super SIM, you must set the server identity for data transfer. This involves setting the SIM's Access Point Name (APN).

## What is the Super SIM APN?

{% hint style="info" %}
**The default APN for Super SIM is `super`** but learn more about our distributed internet breakouts below and their respective APNs to improve your devices' latency when deployed around the world.
{% endhint %}

Super SIM data traffic will breakout to the Internet through one of our distributed internet breakout locations, either in the United States, Germany, or Australia<sup>1</sup>, based on which APN your device uses. Utilize a distributed breakout closer where your device is deployed to minimize the distance your data needs to travel, reducing latency. More locations will be added in the future.

| APN          | Internet Breakout Location |
| ------------ | -------------------------- |
| `super`      | Ashburn, Virginia, USA     |
| `de1.super`  | Frankfurt, Germany         |
| `au1.super`¹ | Sydney, Australia          |

<sup>¹ This APN and its Internet Breakout Location are supported by a limited number of IMSI sponsors.</sup>

## How to set your device's APN

If you know how to configure the APN on your device, go ahead and make the change now. If not, here are some guides to help you:

* If you are using an IoT device that supports AT Commands, [see here for details](#how-do-i-set-the-apn-with-at-commands).
* If you are using an Android device, [see here for details](#where-do-i-set-the-apn-on-my-android-device).
* If you are using an iOS device, [see here for details](#where-do-i-set-the-apn-on-my-ios-device).

In addition to configuring the APN on your device, you need to ensure that[ you have roaming enabled](/supersim/how-to/how-enable-roaming).

{% hint style="info" %}
The KORE APN does not require any authentication, so you should always **leave username and password fields blank** .&#x20;
{% endhint %}

## How do I set the APN with AT Commands?

Refer to your device's user manual to learn how to use [AT commands](/supersim/cellular-module-knowledgebase/about-at-commands), then issue the following command to your device's cellular modem:

```bash
AT+CGDCONT=1,"IP","super"
```

{% hint style="info" %}
If you need to check that a given device contains a Super SIM in order to apply the correct APN, please see [**How To determine Whether a Device Contains a Super SIM**](/supersim/how-to/check-a-device-has-super-sim) .
{% endhint %}

### Setting the APN with AT commands via SMS

If you're using a device that allows sending AT commands via SMS, you can use our [SMS Commands API resource](/api/products/supersim/smscommand-resource) to send a machine-to-machine SMS to the Super SIM.&#x20;

### Example

In this example, `AliceSmithSmartMeter` is the unique name of the SIM as set in Console. The AT command you use to set the APN is included in the `Command` field.

The optional `CallbackUrl` field takes an endpoint on your server to which KORE will send the final response once roaming has been enabled; the initial request will generate a `200 OK` response on the successful receipt of the request, or an error if the request was malformed. If an error is reported, the callback will not be triggered.

Here is the initial request, made via `curl` and containing the APN-setting AT command:

{% code lineNumbers="true" %}

```shell
curl -X POST https://supersim.api.korewireless.com/v1/SmsCommands \
  -d 'Sim=AliceSmithSmartMeter' \
  -d 'Payload=AT+CGDCONT=1,"IP","super"' \
  -d 'CallbackUrl=https://example.com/api' \
  -H 'Authentication: Bearer ACCESS_TOKEN'
```

{% endcode %}

The request will cause the following response to be posted to the optional callback URL. The `sid`, `sim_sid`, `account_sid`, and `url` fields will contain true values:

{% code lineNumbers="true" %}

```shell
HTTP/1.1 202 ACCEPTED
Content-Type: application/json

{
  "sid": "HCxxxxxxxxxxxxxxxxxxxxxxxxxxxxxxxx",
  "sim_sid": "HSxxxxxxxxxxxxxxxxxxxxxxxxxxxxxxxx",
  "payload": "AT+CGDCONT=1,\"IP\",\"super\"",
  "status": "queued",
  "date_created": "2019-05-23T15:42:04Z",
  "date_updated": "2019-05-23T15:42:04Z",
  "account_sid": "ACxxxxxxxxxxxxxxxxxxxxxxxxxxxxxxxx",
  "url": "https://supersim.api.korewireless.com/v1/SmsCommands/HCxxxxxxxxxxxxxxxxxxxxxxxxxxxxxxxx"
}
```

{% endcode %}

{% hint style="info" %}
Many devices do not support setting the APN via SMS. Refer to your device's user manual to see if this action is permitted and how to format the message.&#x20;
{% endhint %}

## Where do I set the APN on my Android device?

Whatever version of Android you are using, you set set the APN broadly like this:

1. Go to **Settings** > **More settings** > **Cellular networks** > **Access point names** .
2. Tap the menu or **+** icon to edit an access point.
3. Enter `KORE Super SIM` under **Name** and enter `super` under **APN** .
4. Tap your new KORE Super SIM APN to set it as your active APN.

Subtle differences between Android versions mean that you may not see UI elements with exactly the same names as those shown above, but they will be similar.

### Adding an APN with MCC and MNC values

Some versions of Android require you to provide a Mobile Country Code (MCC) and Mobile Network Code (MNC) for an APN. This is to help match the APN to the IMSI being used by the device. Every Super SIM has [multiple IMSIs](/supersim/supersim-multi-imsi-applet) that it will switch between depending on the country in which the device has been deployed, or whether or not it has been able to connect in the past. To ensure that you can connect with any of the IMSIs used, please add all of the following APN and MCC-MNC combinations to your device.

{% hint style="info" %}
As you enter each of these values, they may be immediately hidden by Android and so you will not see them. You must **enter all** of these entries to ensure proper operation.&#x20;
{% endhint %}

{% hint style="warning" %}
As of [November 2025 advisory](https://docs.korewireless.com/en-us/supersim/super-sim-advisories/update-on-new-super-sim-hardware-and-applets-november-2025), we are changing the [service provider name (SPN)](/supersim/how-to/check-a-device-has-super-sim#method-2-use-the-sims-spn) on newly manufactured Super SIMs to `KORE Super SIM`. We will ship SIMs with the new SPN name in **Q3 2026**. Ensure any logic in your devices or in your applications account for both the current and new SPN names as needed. Learn more about how to plan for this and other changes to our hardware [here](/twilio-iot-acquisition/migration-guides/migrating-to-the-new-super-sim-hardware#new-service-provider-name-spn).&#x20;

Ensure that you have entries for both SPN values so that your devices work with both current and future iterations of Super SIM.
{% endhint %}

<table><thead><tr><th width="127">MCC</th><th width="126">MNC</th><th width="121">MVNO Type</th><th>MVNO Value</th><th>APN</th></tr></thead><tbody><tr><td><code>204</code></td><td><code>04</code></td><td><code>SPN</code></td><td><code>Twilio</code></td><td><code>super</code></td></tr><tr><td><code>232</code></td><td><code>10</code></td><td><code>SPN</code></td><td><code>Twilio</code></td><td><code>super</code></td></tr><tr><td><code>234</code></td><td><code>10</code></td><td><code>SPN</code></td><td><code>Twilio</code></td><td><code>super</code></td></tr><tr><td><code>234</code></td><td><code>10</code></td><td><code>SPN</code></td><td><code>KORE Super SIM</code></td><td><code>super</code></td></tr><tr><td><code>234</code></td><td><code>50</code></td><td><code>SPN</code></td><td><code>Twilio</code></td><td><code>super</code></td></tr><tr><td><code>525</code></td><td><code>01</code></td><td><code>SPN</code></td><td><code>Twilio</code></td><td><code>super</code></td></tr><tr><td><code>732</code></td><td><code>123</code></td><td><code>SPN</code></td><td><code>Twilio</code></td><td><code>super</code></td></tr><tr><td><code>732</code></td><td><code>123</code></td><td><code>SPN</code></td><td><code>KORE Super SIM</code></td><td><code>super</code></td></tr><tr><td><code>901</code></td><td><code>31</code></td><td><code>SPN</code></td><td><code>Twilio</code></td><td><code>super</code></td></tr><tr><td><code>901</code></td><td><code>31</code></td><td><code>SPN</code></td><td><code>KORE Super SIM</code></td><td><code>super</code></td></tr></tbody></table>

## Where do I set the APN on my iOS device?

{% hint style="danger" %}
Every Super SIM has multiple IMSIs that it will switch between depending on the country in which the device is being used. For some IMSIs, iOS, particularly on iPhones, may prevent you from changing from the APN. If you cannot change the APN to `super` you will not be able to use data. Tools like [Apple Configurator](https://support.apple.com/apple-configurator) can help you get around this limitation if iOS is preventing you from setting the APN: [you'll find our guidance here](/supersim/how-to/how-to-set-up-iphones-ipads-for-super-sim).
{% endhint %}

The process for setting the APN depends on which version of iOS your device has.

1. If the system language is English (US/Canada), go to **Settings** > **Cellular** > **Cellular Data Network** .
2. If the system language is English (UK), go to **Settings** > **Mobile Data** > **Mobile Data Network** .
3. For other languages, use the appropriate menu path.
4. Tap **APN** and enter `super`.
5. Leave the **Username** and **Password** fields blank.

{% hint style="info" %}
You can find more information about viewing and editing APNs in iPhones and iPads on this [Apple support page](https://support.apple.com/en-us/HT201699).&#x20;
{% endhint %}

## Verify you're connected to the network

You will know your device is correctly configured if you can send and receive data. Try pinging [**www.korewireless.com**](https://www.korewireless.com/), or open your favorite web browser and navigate to [**supersim.korewireless.com**](https://supersim.korewireless.com).

If your ping is unsuccessful or if you cannot load the web page, review the instructions above and make sure you have also [enabled roaming on your device](/supersim/how-to/how-enable-roaming).


# How to Enable Device Roaming for Super SIM

Get a general idea of how to enable roaming for Super SIM on your device and see how to verify your connection.

All devices containing a Super SIM must have roaming enabled, even if they are only to be used in the US. This setting is very device specific. This guide can't include instructions for every possible device that you might use with Super SIM, but we will show you some generic steps that will get you most of the way. For the final stages, you may need to consult your device's documentation.

{% hint style="warning" %}
Super SIM requires roaming to be enabled all the time and in every country in which the host device will be used. Some countries, including Brazil, Canada, India, and China, prohibit permanent roaming, and may disconnect roaming devices that have been on a national cellular network for more than 1-3 months. These restrictions are not specific to Super SIM: all non-local connectivity providers are subject to the same restrictions.

If you expect any of your Super SIM-enabled devices to be used in a country that prohibits or restrictions permanent roaming, please [contact support](https://docs.korewireless.com/en-us/twilio-iot-acquisition/twilio-iot-is-now-part-of-kore/iot-customer-support-migration-to-kore#how-to-open-a-kore-customer-support-ticket) so we can show you how [Super SIM's multi-IMSI capability](/supersim/supersim-multi-imsi-applet) can mitigate this issue.
{% endhint %}

* If you are using an IoT device that supports AT Commands, [click here for details](#how-do-i-enable-roaming-with-at-commands).
* If you are using an Android device, [click here for details](#where-do-i-set-roaming-on-my-android-device).
* If you are using an iOS device,[ click here for details](#where-do-i-set-roaming-on-my-ios-device).

## How do I enable roaming with AT Commands?

Refer to your device's user manual to learn how to send it [AT Commands](/supersim/cellular-module-knowledgebase/about-at-commands).

The AT command for enabling roaming is modem specific, so you will need to check the documentation for the modem your device contains. However, two commonly used IoT development device cellular modems are the Quectel BG96, and the U-blox Lara, Lisa, Sara, and Toby families. These use the following AT commands to enable roaming:

### Quectel

```bash
AT+QCFG="roamservice",2
```

### U-blox

```bash
AT+UDCONF=20,1
```

### Enabling roaming with AT Commands via SMS

Some devices will action AT Commands that have been sent by SMS. For these devices, you can use our [SMS Commands API](/api/products/supersim/smscommand-resource) to send a machine-to-machine SMS via the Super SIM.&#x20;

In this example, `IoTDeviceSuperSIM` is the unique name of the Super SIM as set in Console. The AT command you use is included in the `Command` field. We'll use the BG96 roaming command.

The optional `CallbackUrl` field takes an endpoint on your server to which KORE will send the final response once roaming has been enabled; the initial request will generate a `200 OK` response on the successful receipt of the request, or an error if the request was malformed. If an error is reported, the callback will not be triggered.

Here is the initial request, made via `curl` and containing the roaming enable AT command:

```shell
curl -X POST https://supersim.api.korewireless.com/v1/SmsCommands \
     -d 'Sim=IoTDeviceSuperSIM' \
     -d 'Command=AT+QCFG=\"roamservice\",2' \
     -d 'CallbackUrl=https://example.com/api' \
     -h 'Authorization: Bearer <YOUR_AUTH_TOKEN>'
```

The request will eventually cause the following response to be posted to the optional callback URL. The `sid`, `sim_sid`, `account_sid`, and `url` fields will contain true values:

```bash
HTTP/1.1 202 ACCEPTED
Content-Type: application/json

{
  "sid": "HCxxxxxxxxxxxxxxxxxxxxxxxxxxxxxxxx",
  "sim_sid": "HSxxxxxxxxxxxxxxxxxxxxxxxxxxxxxxxx",
  "command": "AT+QCFG=\"roamservice\",2",
  "status": "queued",
  "date_created": "2020-05-23T15:42:04Z",
  "date_updated": "2020-05-23T15:42:04Z",
  "account_sid": "ACxxxxxxxxxxxxxxxxxxxxxxxxxxxxxxxx",
  "url": "https://supersim.api.korewireless.com/v1/SmsCommands/HCxxxxxxxxxxxxxxxxxxxxxxxxxxxxxxxx"
}
```

{% hint style="warning" %}
Many devices do not support sending AT Commands via SMS. Refer to your device's user manual to see if this action is permitted and how to format the message.
{% endhint %}

## Where do I set roaming on my Android device?

Depending on the version of Android installed on your device, you may see slightly different wording, but essentially you set roaming as follows:

* Go to **Settings > Wireless & networks > More > Mobile networks**.
* Make sure the **Data roaming** switch is turned on.

## Where do I set roaming on my iOS device?

The iOS UI changes in subtle ways with almost every release, so you may find the following guidance, for iOS 15, doesn't entirely match the UI on your device. However, it should help you find the setting you need.

* If your device's language setting is English (US/Canada), then go to **Settings > Cellular > Cellular Data Options**.
* If your device's language setting is English (UK), then go to **Settings > Mobile Data > Mobile Data Options**.
* For other languages, use the appropriate menu path.
* Make sure the **Data Roaming** switch is turned on.

## Verify you're connected to the network

You will know your device is correctly configured if you can send and receive data. Try pinging [**www.korewireless.com**](https://docs.korewireless.com/en-us/supersim), or open your favorite web browser and navigate to [**www.supersim.korewireless.com**](https://supersim.korewireless.com/overview).

If your ping is unsuccessful or if you cannot load the web page, review the instructions above and make sure you have also [set the correct APN](/supersim/how-to/apn-configuration).


# How to Determine Whether a Device Contains a Super SIM

Learn how to check whether a device contains a Super SIM

You need to set the Access Point Name (APN) that an IoT device's cellular modem will use for Internet connectivity. If all of your devices contain Super SIMs, this is straightforward: use the default APN `super`, or, to reduce latency in certain geographies, one of the [distributed breakout APNs](/supersim/how-to/apn-configuration).

However, if your products contain SIMs from a variety of suppliers, including KORE, your code will first need to check which SIM its host device contains so that it can set the appropriate APN for that SIM. Typically, to detect SIM type you might read back the SIM's IMSI.

One of the key advantages of Super SIM is that it includes multiple IMSIs to enable switching between different local networks in the territory in which the host device is operating.

This means you should never use the current IMSI to determine whether a device contains a Super SIM. The IMSI reported by a Super SIM at any given time can and very likely will change. Instead, use the methods outlined below. The first is the recommended one, but the second may also be used.

{% hint style="info" %}
For more detailed guidance on setting the APN, particularly for devices with integrated modules, refer to our  [APN configuration page](/supersim/how-to/apn-configuration).
{% endhint %}

## Method 1: Use the SIM's ICCID

{% hint style="warning" %}
As of March 2025, we are in the process of changing the ICCID prefix on newly manufactured Super SIMs. We expect to begin shipping SIMs with the new prefix as early as **July 1, 2025**. Ensure any logic in your devices or in your applications account for both the current and future ICCID prefixes. Learn more about how to plan for this and other changes to our hardware [here](/twilio-iot-acquisition/migration-guides/migrating-to-the-new-super-sim-hardware#new-iccid-prefix).
{% endhint %}

Every Super SIM, like all physical SIMs and eSIM profiles, has a unique identifier called an Integrated Circuit Card Identifier (ICCID). Once a SIM is produced with its ICCID, that value cannot change. It will always have that ICCID.

Super SIM ICCIDs can have the following prefixes:

* `8988307`
* `8988323`  \[α]
* `8910392`  \[β]

\[α] - Only the first 25,000 Super SIMs produced as part of a pilot batch in 2020 use this ICCID prefix. If you are a new user of Super SIM, you can likely safely ignore this prefix if you wish to.

\[β] - This new ICCID prefix will be introduced in 2025. All newly produced Super SIMs will have the **8910392** prefix going forward. Note that the first 6 characters (891039) indicate that the ICCID was issued by KORE, and other KORE SIMs may have this same prefix. The next character **—** **the "2" —** can be used to uniquely identify Super SIMs. Ensure that your device or application logic properly distinguishes Super SIM from other KORE SIMs.

{% hint style="danger" %}
Ensure your devices or applications distinguish Super SIMs from other KORE SIMs whose ICCID may start with the same 6 characters (891039). Use the first 7 characters (**8910392**) — **including the "2"** — to properly identify Super SIMs.
{% endhint %}

Your device can read the installed SIM's ICCID via your cellular module. Modules generally use this command:

```bash
AT+CCID
```

Its response will be:

<pre class="language-bash"><code class="lang-bash"><strong>+CCID: &#x3C;SIM_ICCID>
</strong></code></pre>

Some modules offer alternative commands for displaying the SIM's ICCID. For example, the Quectel modules use `AT+QCCID`; this yields the response `+QCCID: <SIM_ICCID>`.

However, you retrieve the SIM's ICCID and match its first seven digits against the ICCID prefixes above to determine if it is a Super SIM.

## Method 2: Use the SIM's SPN

{% hint style="warning" %}
As of March 2025, we are in the process of changing the service provider name (SPN) on newly manufactured Super SIMs. We expect to begin shipping SIMs with the SPN value as early as **July 1, 2025**. Ensure any logic in your devices or in your applications account for both the current and future SPN values if you used. Learn more about how to plan for this and other changes to our hardware [here](/twilio-iot-acquisition/migration-guides/migrating-to-the-new-super-sim-hardware#new-service-provider-name-spn).
{% endhint %}

The service provider name (SPN) is a value that can be read from the SIM. It is configured by the issuing connectivity provider (i.e., KORE). This is what controls what is displayed as the carrier name on handsets but can be used by your devices to automatically configure it such as setting the access point name (APN).

Super SIMs can have either of these SPN values:

* `Twilio` \[α]
* `KORE Super SIM`  \[β]

\[α] - Super SIM, along with some other products and the teams that develop and operate them, was acquired from Twilio in June 2023. We have continued to use this SPN to minimize the impact on our existing customers while we complete the decoupling of Super SIM's infrastructure from Twilio. A new SPN along with a [new ICCID prefix](#method-1-use-the-sims-iccid), both of which reference KORE, is being introduced in 2025. Already produced SIMs with the 8988307 ICCID prefix will continue to use `Twilio` as the SPN. You can learn more about the Twilio IoT acquisition and migration guides to help you plan for changes in our [Twilio IoT Acquisition](https://docs.korewireless.com/twilio-iot-acquisition/) section.

\[β] - This new SPN value will be introduced in 2025.  New SIMs produced with the 8910392 ICCID prefix will use `KORE Super SIM` as the SPN.

If you have firmware that supports SIMs from multiple providers, there may be a lookup table within the firmware to set the APN based on the SPN, such as that used by [Android](https://docs.korewireless.com/en-us/supersim/how-to/apn-configuration#adding-an-apn-with-mcc-and-mnc-values). If this is the case, ensure you have multiple entries to account for both Super SIM SPNs.

From your device, you can read the service provider name (SPN) of the installed SIM via the cellular modem. Issue the `AT+CRSM` command with the following parameters to retrieve the SPN:

<pre class="language-bash"><code class="lang-bash"><strong>AT+CRSM=176,28486,0,0,17
</strong></code></pre>

If the device's SIM is a Super SIM with `Twilio` as the SPN, this command will return:

```bash
+CRSM: 144,0,"005477696C696FFFFFFFFFFFFFFFFFFFFF"
```

If the device's SIM is a Super SIM with `KORE Super SIM` as the SPN, this command will return:

```bash
+CRSM: 144,0,"004B4F52452053757065722053494DFFFF"
```

The third, textual field provides the SPN. Each pair of characters is a hexadecimal character code. To extract the SPN, ignore the first pair of characters (`00`) and read up to the first `FF`. Now [convert each hex pair to an Ascii character](https://www.binaryhexconverter.com/hex-to-ascii-text-converter).

Here's how it decodes to `Twilio`:

| Hex  | Ascii |
| ---- | ----- |
| `54` | T     |
| `77` | w     |
| `69` | i     |
| `6C` | l     |
| `69` | i     |
| `6F` | o     |

And here's how it decodes to `KORE Super SIM`:

| Hex  | Ascii |
| ---- | ----- |
| `4B` | K     |
| `4F` | O     |
| `52` | R     |
| `45` | E     |
| `20` | Space |
| `53` | S     |
| `75` | u     |
| `70` | p     |
| `65` | e     |
| `72` | r     |
| `20` | Space |
| `53` | S     |
| `49` | I     |
| `4D` | M     |

You can shortcut this process by comparing the third field to the expected string values: `005477696C696FFFFFFFFFFFFFFFFFFFFF` or `004B4F52452053757065722053494DFFFF`. If the strings match, your code knows it is using a Super SIM and can issue the APN `super`.

{% hint style="info" %}
If you'd like to learn more about the fields included in the initial `AT+CSRM` command and how the response is formatted, check out section 4.2.12 of the [ETSI UMTS Specification](https://www.etsi.org/deliver/etsi_ts/131100_131199/131102/13.05.00_60/ts_131102v130500p.pdf). For example, the `176` in the command indicates a binary read command; the `28486` indicates that we want to receive the SPN.
{% endhint %}


# How to Set up iPhones/iPads for Super SIM

Learn how to configure iPhone APN settings the right way for Super SIM

Super SIM is a data-oriented product. Though Super SIM doesn't support direct voice calling, many customers work with these devices to run voice and messaging apps over data — great applications for Super SIM — or to help them debug issues they may be experiencing with IoT hardware they have designed. Seeing a phone get a data connection with Super SIM indicates that the problem may lie with hardware.

We recommend using an Android device for tests like these because iOS' APN (Access Point Name) management system can sometimes prevent you from entering — or retaining — the Super SIM APN, super, especially in circumstances where Super SIM's IMSI switching functionality comes into play. If you must use an iOS device, please try to use an iPad as we have found them to be 'kinder' to user-specified APNs than iPhones are.

That said, using an iPhone for phone-mediated testing may be a requirement you must meet, so this short guide provides a tested way of imposing the Super SIM APN on an iPhone which may not be retaining a manually entered APN, or falling back to older, slower radio access technologies, such as 3G.

## Pre-requisites

To follow this guide, you will need a Mac and an Apple ID for access to the macOS App Store.

## 1. Install Apple Configurator

Apple provides a free tool called *Apple Configurator 2* which is to help organizations manage fleets of iOS devices. It lets you set up a **Configuration Profile** with a pre-defined cellular APN. This Configuration Profile can then be applied to all of your iPhones.

Go to the macOS App Store (**Apple Menu > App Store...**) and enter `configurator` into the search field at the upper left of the App Store window. Hit Enter and then click the **Get** button alongside the Apple Configurator entry that will appear:<br>

<div data-with-frame="true"><figure><img src="/files/pnNCwJjEvp96pppd3ebP" alt=""><figcaption></figcaption></figure></div>

You will need to sign in using your Apple ID if you have not already done so.

## 2. Set up a Super SIM Configuration Profile

1. Click the **Open** button in App Store, or launch *Apple Configurator* from your `Applications` folder.
2. Select **New Profile** from the **File** menu.
3. Scroll down to the **Cellular** entry in the left-hand list. Tip: typing `cel` will get you there more quickly.
4. Click on the **Configure** button in center of the panel:<br>

   <div data-with-frame="true"><figure><img src="/files/6VriXBcnWVCiAzmGG3UM" alt=""><figcaption></figcaption></figure></div>
5. Apply the following settings:

* **Configuration APN Type**: **Default and Data APNs**
* **Data APN Name**: `super`
* **Data APN Supported IP Versions**: **IPv4 and IPV6**
* **Data APN Supported Roaming IP Versions**: **IPv4 and IPV6**<br>

  <div data-with-frame="true"><figure><img src="/files/tfXoa5WGItPUQp24jDWN" alt=""><figcaption></figcaption></figure></div>

{% hint style="danger" %}
Modifying the "Default APN Name" value using these steps will prevent the device from being able to use any other cellular settings unless the installed profile is removed. If removing Super SIM and the cellular configuration settings from the device, please also uninstall this profile first.

For additional instructions on how to remove a profile, please see[ Install or remove configuration profiles on iPhone](https://support.apple.com/en-gb/guide/iphone/iph6c493b19/ios).
{% endhint %}

6. *Optional* You can also apply restrictions to which settings an end-user can change, and you can use these to lock down the cellular settings to those you have chosen above.

* Click on **Restrictions** at the top of the left-hand column.
* Click on the **Configure** button in the center of the screen.
* Locate the **Allow modifying cellular data app settings (supervised only)** option and uncheck it, along with the next two options:

7. Select **Save...** from the **File** menu. Name and save the profile to a convenient place on your hard drive.

## 3. Install the profile in devices

*Apple Configurator* outputs a `.mobileconfig` configuration file which you can transfer to your devices using the same application: just connect the target device to the Mac running *Apple Configurator*. For more information, [please see Apple's Configurator User Guide](https://support.apple.com/en-gb/guide/apple-configurator-2/welcome/mac).

Alternatively, place the file on your web server and open it from within the iPhone's browser, or make the file accessible via the *Files* app or a cloud service like Dropbox, iCloud or OneDrive.


# How to Determine a Super SIM’s Status

Learn how to determine a Super SIM's status, what each of the states are, and how a Sim resource enters them.

Every [Sim resource](/api/products/supersim/sim-resource) will be in one of five possible states, each of which indicates a Super SIM's authority to connect to the cellular network while in that state. Some states are achieved automatically; others can be set by changing the Sim resource's `status` property. This guide will describe each of the states and show you how a Sim resource enters them. It will also detail some common scenarios in which you may want or need to change a Sim resource's state.

## Sim resource states

At any given moment, a Sim resource will be in one of the following states:

* `new`
* `ready`
* `active`
* `inactive`
* `scheduled`

The resource's `status` property will tell you to which of these states it is currently set — and therefore whether the Super SIM represented by the resource is able to allow its host device to access the network. The value of `status` is a string matching one of the states listed above.

Changing a Sim resource's state doesn't change the Super SIM it represents in any way, but simply governs whether partner networks permit that Super SIM to access network resources.

So what do these states represent exactly?

| State       | Meaning                                                                                                                                                                                                                                                                                                                                                                                                                                                                                                                                                                                                                                                                                                                                                                                                  |
| ----------- | -------------------------------------------------------------------------------------------------------------------------------------------------------------------------------------------------------------------------------------------------------------------------------------------------------------------------------------------------------------------------------------------------------------------------------------------------------------------------------------------------------------------------------------------------------------------------------------------------------------------------------------------------------------------------------------------------------------------------------------------------------------------------------------------------------- |
| `new`       | The Sim resource has never been activated, and the represented Super SIM can't connect to the network. A Sim resource can remain in new indefinitely at no charge. Once it has transitioned to `ready` or `active`, it can't be returned to `new`                                                                                                                                                                                                                                                                                                                                                                                                                                                                                                                                                        |
| `ready`     | The Sim resource's Super SIM can connect to the network and is capable of consuming network resources in accordance with the configuration of the [Fleet resource](/api/products/supersim/fleet-resource) to which it has been assigned (indicated by the Sim resource's `fleet_sid` property), **but no monthly subscription fee will be charged**. A Sim resource's status can only be switched to `ready` if it currently `new`. Once a `ready` Super SIM has consumed 250KB of data, five SMS Commands have been sent or received by the Super SIM, or three months have passed, the Sim resource's state will automatically transition to `active`. Use `ready` to enable and test your connectivity without incurring monthly fees before devices are sent to end-users or deployed into the field |
| `active`    | The Sim resource's Super SIM can connect to the network and is capable of consuming network resources in accordance with the configuration of the Fleet resource to which it has been assigned (indicated by the Sim resource's `fleet_sid` property)                                                                                                                                                                                                                                                                                                                                                                                                                                                                                                                                                    |
| `inactive`  | The Sim resource's Super SIM is blocked from connecting to the network. The Sim resource can be switched to `active` at any time. A Sim resource can remain in `inactive` indefinitely at no charge                                                                                                                                                                                                                                                                                                                                                                                                                                                                                                                                                                                                      |
| `scheduled` | A request to update the Sim resource's state is queued and will be processed asynchronously. The value of `status` will automatically transition to the requested state when the update operation has completed                                                                                                                                                                                                                                                                                                                                                                                                                                                                                                                                                                                          |

{% hint style="info" %}
Fleets are how Sims are organized into groups. All the Sims in a Fleet behave the same way: how their data usage is billed and whether they accept [SMS Commands](/api/products/supersim/smscommand-resource). Rather than apply these settings to each Sim individually, you just update the Fleet, and all the Sims in that Fleet automatically adopt the new configuration.
{% endhint %}

## Active Super SIMs

A yet-to-be-activated, `new` [Sim resource](/api/products/supersim/sim-resource) can be told to transition to `ready` or to`active`. When this happens, the resource's `status` will initially be set to `scheduled`. The change to the requested state is made asynchronously, and the resource's `status` property will only show the desired value when the update has actually been applied.

When a Sim's `status` is `ready` or `active`, its Super SIM can be used by a device to connect to the network and transfer data. In fact, it must be set to `ready` or `active` in order to be able to connect.

<figure><img src="/files/rWPF3vDn51ou041yMUJx" alt=""><figcaption></figcaption></figure>

As indicated in the table above, a `ready` Sim will automatically become `active` after it has consumed 250KB of data, it has sent or received five SMS Commands, or after three months in the `ready` state, whichever occurs first.

Once `active`, the Sim resource can be manually transitioned to `inactive` only by specifying that as its new state. The resource's `status` will initially be set to `scheduled`. The change to the requested state is made asynchronously, and the resource's `status` property will only show the desired value when the update has actually been applied:

### Asynchronous action notifications

When you update a Sim resource, you can include a callback URL (as the value of the query parameter `CallbackUrl`). If the Sim resource's update is handled asynchronously, this callback URL will be sent notifications when the target resource's `status` actually changes (first to `scheduled`, then to the requested value). The callback URL is used for this requested change only; it is not applied as a global setting. If the Sim resource's update is completed synchronously, no notification will be sent to the callback URL.

The following diagram shows how this asynchronous behavior operates over time:

<figure><img src="/files/QB8JsFXYOma7dufQUdZc" alt=""><figcaption></figcaption></figure>

## How to check a Sim's status

You can view a Super SIM's status in the [Console](https://supersim.korewireless.com/supersim/sims): look under the **STATUS** column for the SIM or SIMs you're interested in.

To access this information programmatically, you can make a request to the [Super SIM API](/api/products/supersim/sim-resource) using the KORE SDK for your favorite language. However you make the request, the value of the returned resource's `status` property will tell you its state.

Using `curl`:

{% tabs %}
{% tab title="Request" %}

```bash
curl -X GET https://supersim.api.korewireless.com/v1/Sims/<YOUR_SIM_SID> \
     -h"Authorization: Bearer <YOUR_AUTH_TOKEN>"
```

{% endtab %}

{% tab title="Response" %}

```json
{
    "sid": "HSaaaaaaaaaaaaaaaaaaaaaaaaaaaaaaaa",
    "account_sid": "ACaaaaaaaaaaaaaaaaaaaaaaaaaaaaaaaa",
    "unique_name": null,
    "status": "new",
    "iccid": "89nnnnnnnnnnnnnnnnnn",
    "fleet_sid": null,
    "date_created": "2024-08-05T14:13:10Z",
    "date_updated": "2024-08-05T14:13:10Z",
    "url": "https://supersim.api.korewireless.com/v1/Sims/HSaaaaaaaaaaaaaaaaaaaaaaaaaaaaaaaa",
    "links": {
	"billing_periods": "https://supersim.api.korewireless.com/v1/Sims/HSaaaaaaaaaaaaaaaaaaaaaaaaaaaaaaaa/BillingPeriods",
	"sim_ip_addresses": "https://supersim.api.korewireless.com/v1/Sims/HSaaaaaaaaaaaaaaaaaaaaaaaaaaaaaaaa/IpAddresses"
    }
}
```

{% endtab %}
{% endtabs %}

This call will return the same JSON as shown above.

As you can see, the Sim used in these examples has not yet been activated — its `status` is `new` — and it has not yet been assigned to a Fleet: the `fleet_sid` property is `null`.

## How to change a Sim's status

You can change a Sim's status in Console: go to the [list of SIMs](https://supersim.korewireless.com/supersim/sims), filter as required to narrow the list of Sims to the one you want, and click on its name or SID. On the Sim's information page, scroll down to the **Properties** section, and select the Sim's new status from the **Status** menu. Click the **Save** button to apply the change.

To make this change programmatically, make a `POST` request to the [Super SIM API](/api/products/supersim/sim-resource) using the Twilio SDK for your favorite language. In the request's URL-encoded query parameters, you include `Status` — its value is the state to which you want the Sim to transition.&#x20;

```shell
curl -X POST https://supersim.api.korewireless.com/v1/Sims/<YOUR_SIM_SID> \
     -d "Status=<NEW_STATE>" \
     -h "Authorization: Bearer <YOUR_AUTH_TOKEN>"
```

Please see the [Sim resource documentation](https://docs.korewireless.com/en-us/api/products/supersim/sim-resource#v1-sims-sid-1) to learn what other fields you can include. As noted earlier, it's a good idea to include the URL of an endpoint on your own server to which state-change notifications will be sent. Here's a fictional URL to show you how it's done:

```shell
curl -X POST https://supersim.api.korewireless.com/v1/Sims/<YOUR_SIM_SID> \
     -d "Status=<NEW_STATE>" \
     -d "CallbackUrl=https://example.com/api" \
     -h "Authorization: Bearer <YOUR_AUTH_TOKEN>"
```

The only states that a Sim resource can be manually instructed to change to are `ready`, `active`, and `inactive`. Once it is no longer `new` or `ready`, a Sim resource can never return to that state ([see the first diagram above](#active-super-sims)). The `scheduled` state is only ever set automatically, and briefly, in response to your own state-change requests.

## When to change a Sim's state

You will transition a fresh Super SIM from `new` to `ready` or `active` (via `scheduled`) when you fit it into a device, configure the device's Access Point Name (APN) setting, and connect to the network.

Transition the Sim to `ready` (rather than `active`) if you are using the Super SIM it represents for testing and would prefer not to incur monthly fees. Once the Sim has consumed 250KB of data, five SMS Commands have been sent or received by the Super SIM, or three months have passed, its state will automatically transition to `active`. Or you can switch it to `active` manually earlier.

If you have a Super SIM that you want to stop using for an extended period, so that it does not incur charges, just set its Sim resource's `status` to `inactive`. For example:

```shell
curl -X POST https://supersim.api.korewireless.com/v1/Sims/<SIM_SID> \
     -d "Status=inactive" \
     -h "Authorization: Bearer <YOUR_AUTH_TOKEN>"
```

When you're ready to use the SIM again, simply reactivate it:

```bash
curl -X POST https://supersim.twilio.com/v1/Sims/<SIM_SID> \
     -d "Status=active" \
     -h "Authorization: Bearer <YOUR_AUTH_TOKEN>"
```

Alternatively, make these status changes in Console, [as described in the previous section](#how-to-change-a-sims-status).

An `inactive` Sim resource can only reconnect if it is moved back into the `active` state, and this can only be achieved through the API, as shown above, or [Console](https://supersim.korewireless.com/supersim/sims), under your account credentials.

If a physical Super SIM is lost or stolen, switch it to `inactive` as soon as possible to prevent its use. An `inactive` Super SIM is blocked from connecting to the network.


# How to Use Console Bulk Actions to Update Multiple Super SIMs

{% hint style="warning" %}
**Bulk Actions Public Beta**

Bulk Actions is in Public Beta, so some aspects of the functionality and how the Console makes those features accessible may change before Bulk Actions becomes generally available.
{% endhint %}

Bulk Actions allows you to configure a large number of Super SIMs with just a few clicks in the [**KORE Console**](https://console.korewireless.com). For example, you can perform operations like activating thousands of SIMs, or batch-assigning them to a given Fleet. This can be done all in one go instead of updating each SIM one at a time.

Although Bulk Actions may take several moments to finish, especially for those that involve a large number of SIMs, you do not have to wait in front of the Console for them to finish. Instead, the job will run asynchronously, and we will notify you via email once it has completed. Upon completion, we provide a report in the Console detailing which SIMs, if any, could not be modified. Each of these has a corresponding error message, allowing you to easily follow up.

### How do I perform a Bulk Action?

Bulk Actions can be performed in six easy steps:

1. Open up your browser and load the [**KORE Console**](https://console.korewireless.com).
2. Click the [**Super SIM**](https://supersim.korewireless.com) tile in the Console, then click [**Sims**](https://supersim.korewireless.com/supersim/sims).
3. Optionally, apply a filter to narrow down a subset of SIMs you wish to apply a Bulk Action to. For example, you might want to list the SIMs in a particular Fleet, or those that were shipped together in an Order:<br>

   <figure><img src="/files/SjXjAOQtSMNn4gsIrUvo" alt=""><figcaption></figcaption></figure>

Click the **Filter** button to update the list of SIMs.

3. Tick the checkbox for each row that includes a SIM you want to update. Alternatively, click on **Select all x SIMs** to select every SIM that matches the filter you applied in Step 2 if you did so. If you did not specify a filter, it selects every SIM in your account:<br>

   <figure><img src="/files/52eRDveiZLEhVMK0UAOq" alt=""><figcaption></figcaption></figure>
4. Click the **Update SIMs** button to open the Bulk Actions **Update selected SIMs** panel:<br>

   <figure><img src="/files/Y1hGlcebTBcHxant1NSx" alt=""><figcaption></figcaption></figure>
5. On the **Update selected SIMs** panel, select the SIM **Status** and/or **Fleet** you want to assign to the selected SIMs:<br>

   <figure><img src="/files/wDMBG0H6cZnXeTOLKUPW" alt=""><figcaption></figcaption></figure>

Click **Continue**.

6. The panel now shows you how many SIMs you are about to update and warns you about any cost implications that your intended action may have, such as Super SIM activation fees. Please take a moment to check the cost calculation.<br>

If you are good to go, click the **Confirm changes** button, or hit **Cancel** to back out.

### When are Bulk Actions applied?

Bulk Actions are applied asynchronously and may take a few moments to complete, especially if you have selected a very large number of SIMs. We'll send an email to your account once the Bulk Action is complete. In the meantime, you can click on the **Bulk action history** tab to track its progress:<br>

<figure><img src="/files/e7BVdzyw3GAS2zFSALH0" alt=""><figcaption></figcaption></figure>

### How can I share my feedback?

Bulk Actions is currently in testing, so please don't hesitate to share your feedback with Support by opening a ticket through the [Console](https://console.korewireless.com) or [Help Center](https://korewireless.service-now.com/csm). We'd love to hear about your experience trying out Bulk Actions and learn how we can further enhance your experience.

We can't wait to see what you build with Bulk Actions!


# How to Download Bulk Super SIM Data

You can retrieve a bulk listing of all of your Super SIMs from the [**Super SIM Console**](https://supersim.korewireless.com/supersim/sims).

The data is provided as a `.csv` file containing the following information for each of your Super SIMs:

* Its SID.
* Its unique name if it has one, or an empty slot.
* Its ICCID.
* Its status.
* Its Fleet's SID.
* Its Fleet's name if it has one, or an empty slot.
* Whether data is enabled for the Fleet (`true` or `false`).
* Whether commands are enabled for the Fleet (`true` or `false`).
* The Fleet's monthly data transfer limit in megabytes per month.
* The Fleet's Network Access Profile (NAP) SID.
* The NAP's name if it has one, or an empty slot.
* The SID of the order you placed for the SIM.

To download the file, look for the **Export** button above the [list of Super SIMs in Console](https://supersim.korewireless.com/supersim/sims). Click the button next to the heading to retrieve the file.

You can set which SIMs are included in the file by applying a filter — by Status, Fleet and/or Order — before initiating the download. If you don't apply a filter, all your SIMs will be included, or the first 10,000 of them if the total number of SIMs is higher than that.

However you filter your Super SIMs, or don't, the maximum number of records you can export is 10,000. Please be aware that the more Super SIMs included, the longer it will take to generate the file. This can take up to 10 seconds.


# How to Use Super SIM Fleets and Network Access Profiles

Learn how the Super SIM API provides you with the ability to specify which mobile networks a Super SIM device is permitted to connect to.

The [Super SIM API](/api/products/supersim) provides you with the ability to specify which mobile networks a device containing a Super SIM is permitted to connect to. This guide will quickly bring you up to speed with how this works so that you will be able to apply your own lists of networks to your groups of SIMs.

Each Super SIM is represented in the Super SIM API by a [Sim resource](/api/products/supersim/sim-resource). You organize Sim resources into groups by assigning them to [Fleet resources](/api/products/supersim/fleet-resource). A Fleet is a collection of Sims with the same behavior. You can have as many Fleets as you need. You might have a Fleet per product, for example, or multiple Fleets per product with each Fleet dedicated to a specific territory and/or sub-SKU. The choice is really up to you and your use-case.

Each Fleet is assigned a[ Network Access Profile resource](/api/products/supersim/networkaccessprofile-resource). A Network Access Profile (NAP) essentially defines a collection of cellular networks which the Fleet's Sims are permitted to access. Again, you can use as many or as few (you need at least one) NAPs as you need. A given Fleet can use only one NAP at a time, but a single NAP can be shared by multiple Fleets simultaneously:

![](https://twilio-cms-prod.s3.amazonaws.com/images/NAPp.001.original.png)

Each NAP's list of the mobile networks that it provides access to is exclusive: if a particular mobile network is not on the list, it does not belong to that NAP and cannot be accessed by Sims in any Fleet using that NAP. Mobile networks are represented in the API by [Network resources](/api/products/supersim/network-resource).

How does a Super SIM know which networks it can use? From the NAP its Fleet is using. When a device attempts to initiate a cellular connection it will only be able to do so if its modem can detect one of the Networks within the relevant NAP's list of permitted networks. All other networks are considered forbidden, and the modem will not connect to them automatically. Even if the device commands its modem to connect manually, if the target network is a forbidden network, it will not connect — the network will return the error `5004/ROAMING_NOT_ALLOWED`.

## Network Access Profiles and the API

You can get and set the list of Networks a Sim can connect to at any time. For a given Sim, start by accessing its Fleet's `networkAccessProfileSid` property to get the SID of the Network Access Profile that the Fleet is currently using. Then use that SID to get the Network Access Profile itself.

A Network Access Profile resource doesn't include the list of networks as a property. Instead it provides the URL from which the list can be retrieved. Access the Network Access Profile's `links` property; its own `networks` property has the URL you require. For example:

{% code lineNumbers="true" %}

```json
{
  "unique_name": "NAP Name",
  "sid": "HAXXXXXXXXXXXXXXXXXXXXXXXXXXXXXXXX",
  "account_sid": "ACXXXXXXXXXXXXXXXXXXXXXXXXXXXXXXXX",
  "date_created": "2020-05-01T20:00:00Z",
  "date_updated": "2020-05-01T20:00:00Z",
  "url": "https://supersim.api.korewireless.com/v1/NetworkAccessProfiles/HAXXXXXXXXXXXXXXXXXXXXXXXXXXXXXXXX",
  "links": {
    "networks": "https://supersim.api.korewireless.com/v1/NetworkAccessProfiles/HAXXXXXXXXXXXXXXXXXXXXXXXXXXXXXXXX/Networks"
  }
}
```

{% endcode %}

A request sent to this URL will return a paged list of zero or more [Network resources](/api/products/supersim/network-resource) representing the networks available to the NAP. The returned JSON contains a `meta` field which holds the paging information, including the current page number, the number of entries per page and the URL of the next page of data in sequence — this will be `null` if there are no further pages. The JSON also contains a `networks` field and this is the array of Network resources. Each of these Network resources contains information about the network represented, including:

* Its `friendly_name` property, which is usually but not always the network's brand name.
* Its `iso_country` property, which will be its primary operating territory.
* Its `identifiers` property, which is an array of objects, each one of which comprises key mobile industry standard network identifiers for that network: its MCC (Mobile Country Code) and MNC (Mobile Network Code), accessed respectively through the object's `mcc` and `mnc` properties. See [**MCC and MNC**](#mcc-and-mnc) , below, for more information

Please see the [Network resource documentation](/api/products/supersim/network-resource) for a full list of resource properties..

### MCC and MNC

MCC and MNC are the standard means by which mobile network operators identify themselves. You can find a full list of MCCs and MNCs [here](https://www.mcc-mnc.com/). It's important to understand that because of the many mergers and takeovers that have taken place in the global mobile network industry over the past 30 years, a given network operator may use multiple MNCs for a given MCC. To be sure to include all of a network operator's networks in Network Access Profile, you will to include all of its MNCs in its Network resource.

For example, Vodafone in the UK (MCC 234) has three MNCs: 15, 27 and 91. So its Network resource would look something like this:

{% code lineNumbers="true" %}

```json
{ "friendly_name": "Vodafone",
   "iso_country": "gb",
   "identifiers": [
      { "mnc": 15, "mcc": 234 },
      { "mnc": 27, "mcc": 234 },
      { "mnc": 91, "mcc": 234 }
   ]
}
```

{% endcode %}

For the same reasons, you may find that a known MNC is not accompanied by an expected Friendly Name. For instance, T-Mobile USA recently acquired Sprint, which uses the MNC 530. We will continue to show Sprint as the friendly name while Sprint remains a separate entity for commercial purposes.

### Granting and denying access to networks

To allow all of a Fleet's Sims to access a network, or to block them from using one, simply update the list of Network resources within the Network Access Profile being used by the Fleet, or assign the Fleet an alternative NAP which has the required networks in its array of Network resources. However you update the list of available networks, devices currently connected to a newly-forbidden network will remain connected, but will not be allowed to connect to that network when they next attach.

You can change a Fleet's Network Access Profile by updating its `networkAccessProfileSid` property with the SID of the Network Access Profile you want the Fleet to use.

If you need to change the network list for a subset of the Fleet's Sims, you will need to assign the subset to a new Fleet that has been set to use a suitably configured Network Access Profile, which may also be a new resource or one you are using for other Fleets.

To update a Fleet's Network Access Profile directly, either `POST` a Network SID to the NAP's Networks sub-resource — see above for guidance on discovering the URL of this sub-resource — to add it, or make a `DELETE` request to the same URL and pass SID of the Network you wish to remove from the list. Updating the NAP this way will affect every Fleet that is using it.

## Fleets, Network Access Profiles, and Console

In addition to the programmatic access to Sim, Fleet, NAP, and Network resources provided by the [Super SIM API](/api/products/supersim), they can also be accessed and managed in a more human-friendly way through the [KORE Super SIM Console](https://supersim.korewireless.com/). You can create Fleets, create NAPs, and assign the latter to the former. You can change an existing NAP's list of Networks, or switch a Fleet to a different NAP, for example. Sims can be activated and assigned to Fleets.

Console can also be used to delete unwanted and unused Fleets and NAPs. In Console, click on the name of the Fleet or NAP you wish to delete, and then click the Delete link at the bottom of the page. You will be asked to confirm your action before the Fleet or NAP is deleted. Fleets to which SIMs are currently assigned cannot be deleted, nor can NAPs that are currently assigned to a Fleet.

## Summary

Network Access Profiles provide a powerful and flexible means of managing access to mobile networks. You can change the list of cellular networks to which a given Sim is permitted to use by changing the Fleet it belongs to, by switching its Fleet to a different NAP, or by updating the Fleet's NAP directly. All Fleets must have an NAP. NAPs can be shared by multiple Fleets, or used on a one-to-one basis — the choice is yours, determined by your use case.


# How to Understand the Settings on your SIM

Understand the settings installed on your Super SIM and how they influence how your devices connect.

Inside of your physical SIM or eSIM profile, there are various small applications and files that influence how your device connects to the cellular networks. There are the standard elementary files (EFs) found on all SIMs that you can read or written to via common AT Commands. There are also resources specific to Super SIM,such as our [multi-IMSI applet](/supersim/supersim-multi-imsi-applet). Each of these may impact how a SIM behaves. We'll refer to this collection of files and applications on the SIM as the SIM's "settings".

From time to time, SIMs will be manufactured with updated settings in order to:

* give you access to more networks or new radio technologies
* route data through different downstream connectivity partners to deliver an improved experience or reduced rates that we can pass onto you
* fix configuration issues on the SIM

## Updating Existing SIMs Over-the-Air

Existing SIMs will be updated over-the-air (OTA) to deliver a consistent experience across your SIMs regardless of when they were originally manufactured. Your SIM will automatically open a separate data connection to check for and download updates. Learn more about [over-the-air updates.](/supersim/over-the-air-updates)

## Settings Packages

A SIM will have one or more Settings Packages installed on it at any given time. All SIMs will have a version of `base-settings` installed on them. Additional Settings Packages may be applied in addition to the `base-settings` to deliver different customized experiences by overriding some portion of the configuration in the `base-settings`.

Each Settings Package has a version and generally follow [semantic versioning](https://semver.org/). When changes are made to a Settings Package, a new version is released.

Each Settings Package may have dedicated documentation explaining how the experience may have changed from version to version. For example, see the [documentation](/supersim/how-to/sim-settings/base-settings-package) for the `base-settings` Settings Package.

## Viewing a SIM's Settings and Updates

You can use the [SettingsUpdates](/api/products/supersim/settingsupdates-resource) API to determine what Settings Packages are [currently installed](https://docs.korewireless.com/en-us/api/products/supersim/settingsupdates-resource#determine-a-sims-current-settings) on a SIM and if there are any outstanding over-the-air (OTA) updates waiting for your SIMs.


# Base Settings Package

The `base-settings`Settings Package contains the general settings that control how a SIM behaves. This includes but is not limited to which IMSI will be chosen by Super SIM's multi-IMSI applet under different condition and the different applets installed on each SIM. If a SIM has additional Settings Packages installed on it, portions of the settings controlled by `base-settings` may be overridden to deliver a customized experience.

## Change Log

{% hint style="info" %}
We are currently maintaining parallel branches of our `base-settings` packages to support different generations of our SIM cards:

* **Version 3.x.0 (July 2026):** Optimizes global connectivity and unifies branding by introducing updated steering tables for more flexible network selection, refined IMSI mapping pointers, and an updated Service Provider Name (SPN) that displays as `KORE Super SIM`.
* **Version 2.x.0 (Pre July 2026):** Applied to ordered SIMs prior to July 2026, manufactured with upgraded applets and an additional IMSI, allowing these cards to access different roaming networks in certain countries compared to older versions.&#x20;
* **Version 1.x.0 (Legacy):** Supports legacy SIMs purchased prior to Summer 2021; these older cards continue to receive interim updates until they are eventually updated over-the-air (OTA) to align with our newer settings.
  {% endhint %}

### Super SIM's Available Networks

Use the table below to access the specific, up-to-date lists of supported global networks for your deployed SIM version:

<table data-header-hidden="false" data-header-sticky><thead><tr><th>Version 3.x.0</th><th>Version 2.x.0</th></tr></thead><tbody><tr><td><a href="https://docs.korewireless.com/supersim/available-networks/super-sim-version-3.0.0-available-networks">3-IMSI Available Networks</a></td><td><a href="https://docs.korewireless.com/supersim/available-networks">4-IMSI Available Networks</a></td></tr></tbody></table>

### 3.0.0 - July 2026

Updated steering tables to allow more flexible network selection, updating the IMSI mapping and selection pointer tables to optimize partner carrier connectivity, and changing the Service Provider Name (SPN) on the SIM to explicitly display as `KORE Super SIM`. These enhancements streamline regional and global network attachment while ensuring cohesive branding across the unified KORE product line.

### 2.5.0 - January 2025

Modified the IMSI preferred in various countries based on most recent coverage and pricing information from our suppliers.&#x20;

### 2.3.0 - April 2022

Improves ability for Cat-M devices to take advantage of eDRX to conserve battery power.

### 2.2.0 - March 2022

Fixed an issue that may have hindered devices performing combined attachments from connecting to AT\&T US. Modified which IMSI is preferred in some countries to improve the experience. Corrected the error introduced in version 2.1.0 for SIMs that already downloaded and installed the update.

### 2.1.0 - March 2022

Fixed an issue that may have hindered devices performing combined attachments from connecting to AT\&T US. Modified which IMSI is preferred in some countries to improve the experience. Introduced an error whereby in some countries an incorrect IMSI will be used limiting the networks that the device can connect to before failing over to backup IMSIs. OTA updates to this version were canceled after the error was detected and updates to version 2.2.0 were released to fix impacted SIMs.

### 2.0.1 - December 2021

Fixed an issue that may have hindered devices performing combined attachments from connecting to AT\&T US. This patch version was applied to devices that were already connecting in the United States in December 2021. A minor version update was introduced subsequently to update all SIMs using major version 2.

### 2.0.0 - August 2021

Added an additional IMSI expanding the number of networks available on Super SIM. Modified which IMSI is preferred in some countries to improve the experience.

### 1.4.0 - January 2025

Modified the IMSI preferred in various countries based on most recent coverage and pricing information from our suppliers.&#x20;

### 1.2.0 - April 2022

Fixed an issue that may have hindered devices performing combined attachments from connecting to AT\&T US. Modified which IMSI is preferred in some countries to improve the experience.

### 1.1.0 <a href="#id-110" id="id-110"></a>

Modified which IMSI is preferred in some countries to improve the experience. For SIMs that received version 1.0.1, this version erroneously undid the fix for the issue that may have hindered devices performing combined attachments from connecting to AT\&T US.

### 1.0.1 <a href="#id-101" id="id-101"></a>

Fixed an issue that may have hindered devices performing combined attachments from connecting to AT\&T US. This patch version was applied to devices that were already connecting in the United States in December 2021. A minor version update was introduced subsequently to update all SIMs using major version 1.

### 1.0.0 <a href="#id-100" id="id-100"></a>

Replaced the multi-IMSI applet with a new version allowing SIMs to correctly failover to backup IMSIs on the SIM if the device is unable to connect to a cellular network after a few minutes. SIMs can be forced to switch IMSIs by issuing AT commands to the modem.

### 0.5.0 <a href="#id-050" id="id-050"></a>

Replaced the applet responsible for managing over-the-air updates with a new version. You can prompt your SIM to check into the OTA update service and download any updates waiting for it by issuing AT commands to the modem.

### 0.4.0 <a href="#id-040" id="id-040"></a>

Modified which IMSI is preferred in some countries to improve the experience.

### 0.3.0 <a href="#id-030" id="id-030"></a>

Fixed an issue where the SIM would prefer an IMSI in the United States that did not have access to AT\&T, limiting devices to T-Mobile unless they failed over to other IMSIs.

### 0.2.0 <a href="#id-020" id="id-020"></a>

Added an additional IMSI to Super SIM improving coverage in Europe. Erroneously preferred an IMSI in the United States that did not have access to AT\&T, limiting devices to T-Mobile unless they failed over to other IMSIs.

### 0.1.0 <a href="#id-010" id="id-010"></a>

First iteration of Super SIM.<br>

### <br>


# How and Why You Can Set Super SIM’s Network Attach Priority List

Every Super SIM, like all SIMs, includes a list of operator-preferred   networks. Learn how and why to set your Super SIM's preferred network.

{% hint style="warning" %}
The functionality described in this document applies **only** to card form-factor Super SIMs shipped after September 2021.
{% endhint %}

Every Super SIM, like all SIMs, includes a list of operator-preferred networks. This list, part of the 3GPP standard, is called the **OPLMN** (Operator-controlled Public Land Mobile Network) table and it sets the order in which the SIM's host cellular module contacts visible networks to request a network connection.

For example, Super SIM-empowered modems in the US first attempt to connect to AT\&T because that's the first network (and only) listed in the OPLMN for the US. For Super SIM, the operator is, of course, KORE. Other carriers are set as the KORE-preferred network for other countries. The Super SIM OPLMN contains a single preferred network for each country.

Card form-factor Super SIMs issued after September 2021 allow you to override KORE's OPLMN. This technique takes advantage of another 3GPP-standard SIM table: an optional list of user-preferred networks. This is the **UPLMN** (User-controlled Public Land Mobile Network) table. The cellular module must always select any network set in its SIM's UPLMN table, if it has one, over those in the OPLMN table. If it can't connect to the first user-preferred network, it tries the next one. If the UPLMN lacks an entry for any network visible to the modem, the SIM falls back on the OPLMN.

With just a few AT commands, your application can set its Super SIM's UPLMN table to list the networks you would like the SIM to use in preference to those specified by KORE. This guide will show you how.

{% hint style="info" %}
The OPLMN is formally known as the 'OPLMNwAcT', and the UPLMN as the 'PLMNwAcT'. The 'wAcT' in each case is short for 'with Access Technology'. Here we'll stick with OPLMN and UPLMN, but you will see the other terms in 3GPP documentation. For full details of the encoding, please see [ETSI Technical Specification 131 102](https://www.etsi.org/deliver/etsi_ts/131100_131199/131102/15.05.00_60/ts_131102v150500p.pdf).
{% endhint %}

## Why you might choose to set the preferred network

First, let's consider why you might want to implement a UPLMN table. For the majority of customers, the network choices we have made are fine, but a small number of customers may discover during testing that an alternative network for the initial connection gives their particular choice of hardware better start-up performance. Or they are deploying in an area where KORE's preferred network offers poorer coverage than another network. They can then set the UPLMN table in each of their Super SIMs so that their devices will favor that network.

For example, you might code your application to check the signal strength and backhaul bandwidth of each visible network at a device's location. The app might find that, say, the T-Mobile signal there is much stronger than the signal shown by OPLMN-prioritized AT\&T. Or that though the AT\&T signal is stronger, its backhaul is saturated so that the weaker signal T-Mobile tower delivers better throughput. In such cases, the application could write the UPLMN table to prioritize T-Mobile for that device.

Alternatively, you might want your devices in a given country to go straight to your NAP-selected network. By setting this network at the start of the UPLMN, you ensure the modem will go to it first and thus eliminate the time spent attempting to connect to other networks and in case failing because those networks are blocked by your NAP.

It's important to note, however, that better performance with a network not included in the OPLMN is often the result of where the test device is located, and may not be experienced by products that are rolled out more widely than the test area. KORE's OPLMN choices are based on broad network coverage, not highly local coverage. Signal quality and network coverage may vary at any time, particularly when the device is moved or is in motion.

That said, your application may be location aware and therefore able to override the OPLMN with a UPLMN in certain cases where this is beneficial. Thorough testing and analysis will help you select the best network selection strategy to employ for your use case.

## How does this differ from Network Access Profile network selection?

You choose which networks to allow your devices to attach to, and which networks to block, using a given [Fleet resource](/api/products/supersim/fleet-resource)'s [Network Access Profile](/api/products/supersim/networkaccessprofile-resource) (NAP). Your network choices are enforced by the cell tower: networks blocked by your NAP will not allow the device to attach, even if that network is included in the UPLMN and/or OPLMN tables. The NAP cannot be used to create a list of networks to try in a particular order. The UPLMN is used solely to determine the order in which networks are contacted to request attachment. If there is no UPLMN, the modem will engage with the networks specified by the OPLMN. If a network is blocked by NAP, but is present in the UPLMN, the device will still try to attach to that network if it fails to connect to higher-priority networks. There is a small, but potentially significant latency in making such 'known to fail' attachment attempts, so you may wish to align your SIMs' UPLMNs to your NAP.

Here's the basic flow:

1. The modem tries to connect to the network it was previously connected to. If this succeeds, it goes to 4.
2. The modem iterates through the list of visible networks in the order set by the UPLMN and attempts to attach to each in turn. If it connects, it jumps to 4. If the network is blocked by the current NAP, the attachment attempt will fail, and the modem will move to the next network on the list. If there is no UPLMN, the modem will jump to 3.
3. The modem iterates through the list of visible networks in the order set by the OPLMN and attempts to attach to each in turn. If the network is blocked by the current NAP, the attachment attempt will fail, and the modem will move to the next network on the list.
4. The modem attaches to the network. It will reattach to this network after sleep. The modem remains attached to this network as long the signal strength allows it to do so. If there is a loss of signal, the modem returns to 1.

## How to set a SIM's UPLMN table

To read and update a SIM's data files, including the OPLMN and UPLMN tables, you use the standard AT command `+CRSM`.

SIM commands are issued as data structures called Application Protocol Data Units (APDUs). We won't cover the full data structure here — for that, we recommend you check out [ETSI Technical Specification 102 221](https://www.etsi.org/deliver/etsi_ts/102200_102299/102221/16.03.00_60/ts_102221v160300p.pdf) — but essentially it contains an instruction-type byte, a number of instruction-specific parameter values, and the number of data bytes being read or written, if any.

`+CRSM` allows you to send the key elements of an APDU to the SIM in an easy way: as the AT command's parameters. To demonstrate this, let's use `+CRSM` to read a Super SIM's OPLMN.

## Read the OPLMN

The OPLMN is stored in an 'Elementary File' (EF) on the SIM. The file is said to be 'transparent'. In other words, it consists of a sequence of bytes. Transparent files are read using the Read Binary SIM command.

{% hint style="info" %}
We'll assume you know how to issue AT commands to a cellular module. If you're not sure, this is how we did it for this guide. We connected a Sixfab 3G-4G/LTE Base Hat and Tellit ME910C1-WW module to a Raspberry 400 Linux computer, and used the minicom serial communications tool to talk to the module. See our [Super SIM Getting Started Guide](/supersim/supersim-first-steps/get-started-with-super-sim-the-raspberry-pi-4-and-the-sixfab-base-hat) for more details.
{% endhint %}

Get the first network in the OPLMN with

{% code lineNumbers="true" %}

```bash
AT+CRSM=176,28513,0,0,5
```

{% endcode %}

What does this mean? Let's decode each of the command's parameters in turn:

1. The APDU instruction. In this case it's `176` which is the Read Binary instruction.
2. The ID of the file we want to access. Here it's `28513` which is the ID of the OPLMN. In standards documentation this is usually given in its hexadecimal value, `0x6F61`. Likewise, the formal name of the file containing the OPLMN is the EFOPLMNwAcT.
3. The first of two APDU instruction-specific parameter values. For a Read Binary instruction, this is the upper byte of a two-byte offset value. We want the first network, so the offset is `0`.
4. The second APDU parameter, which in this case is the low byte of the offset. Again, it's `0`.
5. The number of bytes to be read or written. This can be zero, but here we want `5` bytes, enough for one record. OPLMN and UPLMN network records are five bytes long: three for the Mobile Country Code (MCC)/Mobile Network Code (MNU) combination that identifies the network, and two bytes for the Radio Access Technology (RAT) used.

Issuing the AT command above returns:

{% code lineNumbers="true" %}

```bash
+CRSM: 144,0,1300144080

OK
```

{% endcode %}

Again, let's decode each of the response's parts:

1. This is the first of two standard APDU status codes. The value `144` (`0x90`) indicates success.
2. The second of the two standard APDU status codes. This is `0` on success, but can indicate a specific cause if the first status code indicates an error.
3. The data returned, if any were requested. We asked for five bytes, and this was returned as five hexadecimal values. The five bytes comprise a three-byte MCC and MNC combination that indicates the PLMN, and two RAT indicator bytes.

The PLMN is coded as follows. Numbering the hex octets 1 to 6, from left to right:

MCC = octet 2 \* 100 + octet 1 \* 10 + octet 4, so, `130` decodes to 310 (US) MNC = octet 6 \* 100 + octet 5 \* 10 + octet 3, so `014` decodes to 410 (AT\&T)

{% hint style="info" %}
The standard encoding is based on three-digit MCCs and MNCs. For two-digit values, a placeholder third digit is added: the character `F`. For example, the MNC `81` is encoded as `81F`.

You can use this short Python script to convert a PLMN coding to MCC and MNC values:

{% code lineNumbers="true" fullWidth="true" %}

```
# Get a PLMN coding
plmn = input("Enter a PLMN coding: ")
if len(plmn) != 6:
    print("ERROR -- PLMN must be 6 hex digits")
else:
    # Rearrange octets and output
    mcc = (plmn[1] + plmn[0] + plmn[3]).replace("F", "")
    mnc = (plmn[5] + plmn[4] + plmn[2]).replace("F", "")
    print("MCC:", mcc)
    print("MNC:", mnc)   
```

{% endcode %}

For a complete utility that makes use of this code, see [**Super SIM UPLMN Codec**](#super-sim-uplmn-codec), below.
{% endhint %}

{% hint style="info" %}
You can find [a good list of MCCs and MNCs here](https://www.mcc-mnc.com/).
{% endhint %}

The two-byte RAT value is encoded this way. The first two digits are the hex value `40` (64), which indicates a preference for E-UTRAN (4G). The second two digits are the hex value `80` (128), which indicates GSM as a secondary radio technology preference. For full details of the encoding, please see [ETSI Technical Specification 131 102](https://www.etsi.org/deliver/etsi_ts/131100_131199/131102/15.05.00_60/ts_131102v150500p.pdf).

## Set the UPLMN table

Like the OPLMN table, the UPLMN table is placed in an Elementary File: EFPLMNwAcT, with the ID `0x6F60` (28512). The file must be 40 bytes size minimum, i.e., eight network entries formatted as described above. If that's too many entries for your needs, fill up the remaining bytes with `0xFF`. On a new Super SIM, the table already contains 40 such bytes, so you need only overwrite some of them the desired records. But bear in mind that subsequent attempts to update the UPLMN with a shorter list will need to clear any unwanted network records with `FFFFFFFFFF`.

{% hint style="info" %}
You can use this short Python script to convert entered MCC and MNC values into PLMN record hex octets:

{% code lineNumbers="true" %}

```python
# Get MCC and MNC values
mcc = input("Enter an MCC: ")
mnc = input("Enter an MNC: ")

# Assemble string
# NOTE Use 'F' for unused columns, ie. '81' -> '81F'
if len(mnc) < 3: mnc += "FFF"[:3 - len(mnc)]
if len(mcc) < 3: mcc += "FFF"[:3 - len(mcc)]
plmn = mcc + mnc

# Rearrange octets and output
plmn = plmn[1] + plmn[0] + plmn[5] + plmn[2] + plmn[4] + plmn[3]
print("UPLMN Encoding:", plmn)

```

{% endcode %}

For a complete utility that makes use of this code, see [**Super SIM UPLMN Codec**](#super-sim-uplmn-codec), below.
{% endhint %}

Let's set the UPLMN table to T-Mobile and AT\&T. The data for AT\&T we already have, from reading the OPLMN: `130014`. T-Mobile USA's MNC is 260. Encoding its MCC/MNC combination as described above yields `130062`. Using the same RAT as above, `4080`, we get:

{% code lineNumbers="true" %}

```bash
13006240801300144080
```

{% endcode %}

which we write to the UPLMN with the APDU Update Binary instruction, `214`. The File ID in decimal is `28512`. We're writing at the start of the file so the two offset bytes are once more both zero, but this time we're writing ten bytes — the sequence above shows hexadecimal octets, not a decimal value — so the final parameter is `10`:

{% code lineNumbers="true" %}

```bash
AT+CRSM=214,28512,0,0,10,"13006240801300144080"
```

{% endcode %}

If the data is written correctly, you'll see:

{% code lineNumbers="true" %}

```bash
+CRSM: 144,0

OK
```

{% endcode %}

in response.

Check the write by reading back all of the UPLMN:

{% code lineNumbers="true" %}

```bash
AT+CRSM=176,28512,0,0,10
```

{% endcode %}

The response is:

{% code lineNumbers="true" %}

```bash
+CRSM: 144,0,32F405408032F4514080

OK
```

{% endcode %}

{% hint style="info" %}
We've issued the above AT commands directly to the cellular module, just as your application might do on start-up after checking a flag to see whether it has already set the UPLMN table. Alternatively, depending on the module you're using, you may be able to issue the necessary AT commands by way of SMS messages. Not all modules support this feature, however, so please check your device's documentation first if this approach appeals to you.
{% endhint %}

## An alternative AT command

There is a potentially easier method for setting the UPLMN table than the one outlined above, 'potentially' because it's not available on all cellular modules so you will need to check the documentation for your chosen modem to see if you'll be able to use it. This alternative approach uses the `+CPOL` AT command. It stands for "Preferred Operator List", and it allows you to update the UPLMN table directly. You pass a table index value, a format marker for the next parameter, a cellular operator identifier, and the RATs enabled for it. The format marker tells the module whether the following cellular identifier is a short or long string, or a numerical code.

You can read the current UPLMN with `AT+CPOL?`, but you'll receive an error if it does not yet exist — no entries have been written to it.

To get a (long) list of operator codes, issue `AT+COPN`.

Some modems — the u-blox SARA-R5 is one example — allow you to specify which table — UPLMN, OPLMN or the HPLMN (Home Public Land Mobile Network) — `+CPOL` will write to or read from. By default it will be the former, but you can set it to another, though attempting to write to the OPLMN or HPLMN tables will result in an error. The command to change the target table is `+CPLS`. Pass `0` for the UPLMN, `1` for the OPLMN or `2` for the HPLMN.

For example, the call `AT+CPLS=1;+CPOL?;+CPLS=0` will set the OPLMN as the `+CPOL` target, read the table, and then set the target back to the UPLMN.

For more details on using `+CPOL`, please see your modem's documentation.

## Working with older Super SIMs

As noted earlier, only card form-factor Super SIMs which shipped after September 2021 include a UPLMN table to which you can add preferred networks. Earlier Super SIMs lack this table, and attempts to update it will fail so with the response:

{% code lineNumbers="true" %}

```bash
ERROR
```

{% endcode %}

However, attempts to read the UPLMN, i.e., issuing `AT+CRSM=176,28512,0,0,0`, will elicit a seemingly successful response:

{% code lineNumbers="true" %}

```bash
+CRSM: 106,130

OK
```

{% endcode %}

In fact `106` (`0x6A`) is an APDU failure code indicating a bad parameter. The second value, `130` (`0x82`), narrows this down to "file not found" — there is no UPLMN table, file EFPLMNwAcT, on this SIM.

Your application code can use this pair of values to check whether its cellular module contains an older Super SIM without a UPLMN table. Do not rely on a direct error response from the modem. ETSI Technical Specification 131 102 list the possible error codes you may encounter.

You can read the OPLMN table on any Super SIM with `AT+CRSM=176,28513,0,0,0`.

## Super SIM UPLMN Codec

You can find a complete utility to help you encode MCC-MNC pairs into UPLMN table entries, and to decode entries into MCC, MNC and RAT values, in our [public GitHub repo](https://github.com/korewireless/super-sim-uplmn-coder). The utility is written in Python 3 without further dependencies so will run on any system with Python 3 installed.


# How to Set Up and Use a Super SIM VPN

Super SIM VPN (Virtual Private Network) establishes a secure private network between KORE and your application data center, and ensures your Super SIM-connected devices use this private network for data communications.

With a regular Internet breakout, the traffic from Super SIM-connected devices will go over the Internet and get routed to your application data center. When a VPN is used, the same traffic is sent over a secure and private tunnel as shown below:<br>

<figure><img src="/files/alOLtIuflPMWF7fipSKX" alt=""><figcaption></figcaption></figure>

With a VPN, you get these benefits:

* A secure channel — The traffic moving between KORE and your cloud is strongly encrypted.
* A private end-to-end network — Your IoT devices will appear as an extension of your private application cloud.
* Extended session duration — When an IoT device's traffic goes through a VPN, there are no NAT or Firewall timers to mitigate.
* A static private IP address for each device — You can reach the device at a known address from your application cloud.

## Do I need a VPN?

Most IoT use cases don't require a VPN, and you shouldn't opt for one if your application won't benefit from it. This is because setting up and maintaining a VPN connection involves increased complexity, and it comes at an additional monthly cost. Please review your use case with your IoT specialist at KORE to determine if it warrants a VPN connection.

For example, if your use case requires sending a message from your cloud to your device,[ IP Commands](/api/products/supersim/ipcommand-resource) is a simple alternative to Super SIM VPN. Using IP Commands, you can send short IP/UDP messages from your application cloud to your Super SIM-enabled IoT devices without the device having to maintain a persistent connection to your cloud, having to use a VPN between your cloud and the cellular network, or requiring a static public IP address for each device. Take a look at our [Get Started with IP Commands](https://docs.korewireless.com/en-us/supersim/get-started/get-started-with-super-sim-ip-commands-and-the-raspberry-pi) guide to try out this feature.

If you do decide that your application needs a Super SIM VPN, this guide will show you how to set it up and use it.

## VPN compatibility and requirements

You can use whichever VPN gateway product you prefer, but it must be compliant with the well-established [IKE v1 and v2](https://en.wikipedia.org/wiki/Internet_Key_Exchange), and [IPSec](https://en.wikipedia.org/wiki/IPsec) standards.

Your peer IP needs to be static.

## Set up your VPN connection

The first step is to [contact KORE](https://www.korewireless.com/contact-us) to request access to the VPN Program.

You will receive a VPN setup questionnaire which is used to collect essential setup information, including your VPN gateway details, your encryption domains (private IP subsets used in your data center), and your IKEv1/IKEv2 and IPsec details. The setup questionnaire also provides the information you will need about KORE's VPN gateway.

The answers you provide via the setup questionnaire are used to provision your VPN on KORE's VPN gateway. Each customer gets their own VPN connection.

Once your VPN connection is established on KORE's VPN gateway, a unique pre-shared key (PSK) is generated and shared with you via KORE Secure Data Transfer System.

You can then use the PSK, KORE's VPN gateway details from the setup questionnaire, and your own encryption domains to provision your VPN gateway and initiate a VPN connection. If the gateway provisioning is performed correctly, the VPN connection will come up straight away. If this does not occur, KORE will help you find and fix any issues.

{% hint style="warning" %}
KORE will provide the range to allocate static private IP addresses for your devices. Please make sure you are not using this range for the subnets in your application cloud behind your VPN gateway. If your IoT device acts like a router and provides connectivity to other devices attached to it, please make sure you don't use the range in that subnet.
{% endhint %}

## Enable VPN for your devices

{% hint style="warning" %}
This section walks you through using your Super SIM VPN connection once setup is complete. You must be logged in to the Super SIM console. For more information about Super SIM VPN or to gain access, contact your IoT sales specialist or [KORE](https://www.korewireless.com/contact-us/).
{% endhint %}

Once the VPN connection has been established and you have received the VPN SID from KORE, complete the following steps.

1. Sign in to [KORE One](https://one.korewireless.com/dashboard) and navigate to Super SIM.

   <figure><img src="/files/MDZ3WnoAwWRsKv6eYl9k" alt=""><figcaption></figcaption></figure>
2. From the left menu, select **Fleets**.

   <figure><img src="/files/gp2b0lhNhDZsN9yiMoLa" alt=""><figcaption></figcaption></figure>
3. Choose **Create Fleet**.

   <figure><img src="/files/njROB84jCn3l1QsPzafN" alt=""><figcaption></figcaption></figure>

   1. Enter a unique name for the fleet.
   2. Choose a **Network Access Profile** from the drop-down.
   3. Enter the VPN Connection SID, shared by KORE, to associate the fleet with the VPN.
   4. Select **Create**. A confirmation message appears when the fleet is created successfully.
4. Select **SIMs** from the left menu. Existing SIMs appear on the page. Each SIM is associated with a device.
   1. Select the SIMs you want to use with the VPN and choose **Update** above the SIMs grid. The following pop-up opens.

      <figure><img src="/files/Xviui0GmLpYoNgya6Vn8" alt=""><figcaption></figcaption></figure>
   2. In the pop-up, select the fleet you created and choose **Continue**. Your devices are now assigned to the VPN.
5. Wait a few minutes for KORE One to apply the changes. A message will appear while the changes are being processed.

After processing completes:

* Check the VPN status of your devices.
* Confirm that the devices can connect through the VPN.
* If issues occur, review fleet assignment, VPN profile, and configuration details.

## Use the VPN

Any SIMs you assign to a VPN-enabled Fleet will automatically start using the Fleet's VPN connection. There is nothing more to do. When the VPN is being used, your devices can reach the application servers in your data center and vice versa through the secure VPN connection.

## Get a device's IP address

Every SIM in a VPN-enabled Fleet is assigned its own private static IPv4 address. This address is assigned to the Super SIM when it first attaches — it is the actual IP address used by SIM's host device. After the initial assignment, the IP address persists within the SIM, and your device will be assigned the same address provided that it is using the same SIM and that the SIM remains assigned to the VPN-enabled Fleet.

You can initiate sessions — SSH, browser-based HTTPS, ping, etc. — from your data center to the device using the corresponding static IP address.

There are three ways to retrieve a device's static IP address.

### 1. Super SIM console

The IP address assigned to a SIM is listed in the Super SIM console on [the SIM's details page](https://supersim.korewireless.com/supersim/sims):

<figure><img src="/files/AWWzuqUfshwWCtCR81gb" alt=""><figcaption></figcaption></figure>

### 2. The IpAddresses subresource API

The IpAddresses subresource is used to fetch the IP address assigned to a SIM. You will need the SID of the [Sim resource](/api/products/supersim/sim-resource) that represents the SIM you are interested in. Here is a sample API call:

{% code overflow="wrap" %}

```bash
curl -X GET https://supersim.api.korewireless.com/v1/Sims/HSxxxxxxxxxxxxxxxxxxxxxxxxxxxx/IpAddresses \
  -H "Authorization: Bearer <YOUR_AUTH_TOKEN>" \
  -s |jq
```

{% endcode %}

This will output a JSON object containing an `ip_addresses` object:

```json
{
  "ip_addresses": [
    {
      "ip_address": "8.8.8.8",
      "ip_address_version": "IPv4"
    }
  ]
}
```

If the SIM is not assigned to a VPN-enabled Fleet, the value of `ip_addresses` will be `null`.

For more information on using this API, please see the IpAddresses subsresource documentation.

### 3. Connection Events Stream

If you are already subscribed to Super SIM Connection Events, you will get the static IP address assigned to your SIM as part of the "Data Session Started" event. There is no need to use either of the previous two methods to obtain the IP address assigned to the SIM.

To learn more about Super SIM Connection Events, please see **Get Started with Super SIM Connection Events**.

### 4. Update your devices' APN settings

VPN usage currently requires that devices use either of the APNs `super` or `us1.super` in place of all other Super SIM APNs. If you are using the regional breakout APNs, please update your devices to use `super` or `us1.super` to access VPNs.

For more details on setting APNs, please see [**How to Set a Device's APN for Super SIM**](/supersim/how-to/apn-configuration).


# How to Configure AWS for a Super SIM VPN

Learn how to use the AWS console to connect your AWS Virtual Private Cloud to a Super SIM VPN for a secure private network between your devices and your VPC.

## Private Beta

Super SIM VPN is in **Private Beta**. Once you determine that a VPN connection is appropriate for your IoT use case, please reach out to your IoT sales specialist or [contact KORE](https://www.korewireless.com/contact-us) to learn more about the process of setting up your VPN connection.

Super SIM VPN (Virtual Private Network) establishes a secure private network between KORE and your application data center, and ensures your Super SIM-connected devices use this private network for data communications.

Your application may exist within an [Amazon Web Services (AWS) Virtual Private Cloud (VPC)](https://aws.amazon.com/vpc/). You can easily connect your AWS-hosted application to a Super SIM VPN via an [AWS Site-to-Site VPN](https://aws.amazon.com/vpn/site-to-site-vpn/). The following guide will walk you through this process using the [AWS Console](https://console.aws.amazon.com/console/home).

You should view this guide alongside [**How to Set Up and Use a Super SIM VPN**](/supersim/how-to/how-to-set-up-and-use-a-super-sim-vpn), which details the overall VPN configuration process.

{% hint style="warning" %}
To proceed, you will need information that is included with the VPN setup questionnaire that KORE will send to you and which you will complete and return to KORE to finalize your VPN connection. If you have not yet received your setup questionnaire, please [contact KORE](https://www.korewireless.com/contact-us).
{% endhint %}

## Configure AWS for a Super SIM VPN

To connect a KORE Super SIM VPN to your AWS resources there are several pieces of information you'll need to gather in order to create the new AWS objects you will need. Some of this data you need will come from the VPN setup questionnaire provided to you by KORE. Other items will come from AWS. The steps below will guide you through the process.

### 1. Determine your VPC address range

The first piece of information you'll need is your AWS VPC CIDR (Classless Inter-Domain Routing) block. This will be something like `172.31.0.0/16`, and you will have specified it when you created the VPC.

[Open your AWS Console](https://console.aws.amazon.com/console/home) and navigate to to **VPC > Your VPCs**. Select the VPC you wish to connect to the VPN.

### 2. Create your Customer Gateway

In the [AWS Console](https://console.aws.amazon.com/console/home), navigate to **VPC > Customer Gateways** and click the **Create customer gateway** button at the upper right-hand side of the screen. You'll be prompted to provide the following values:

* **Name**: This is a tag used to reference this customer gateway. It's optional, but we recommend you provided a name, e.g., `twilio-vpn-gateway-1`, to make it easier to find in future.
  * **Tip** Include a number at the end of the name — you might need to add another VPN in the future.
* **BGP ASN**: You can use the default, 65000, or pick any value between 1 and 2147483647.
* **IP address**: Enter the KORE  VPN Gateway IP Address from the your VPN setup questionnaire (e.g. `208.78.112.57`).
* **Certificate ARN**: This is not required, so please leave this field as it is.
* **Device**: This is a name for the KOREVPN device. It's optional.
  * You can use: `Twilio Juniper SRX 5400 #1`.
  * **Tip** Include a number at the end of the name — you might need to add another VPN in the future.

When you've entered the required information and any optional values you want to provide, click **Create customer gateway**.

### 3. Create a Virtual Private Gateway

In the [AWS Console](https://console.aws.amazon.com/console/home), navigate to **VPC > Virtual Private Gateways** and and click the **Create virtual private gateway** button at the upper right-hand side of the screen. You'll be prompted to provide the following values:

* **Name**: This is a tag used to reference this virtual private gateway. It's optional, but we recommend you provided a name, e.g., `twilio-virtual-private-gateway-1`, to make it easier to find in future.
  * **Tip** Include a number at the end of the name — you might need to add another VPN in the future.
* **Autonomous System Number (ASN)**: Select the Amazon default ASN.

To complete this step, click **Create virtual private gateway**.

### 4. Create the site-to-site VPN connection

The final step establishes a new VPN connection based on the Customer Gateway and Virtual Private Gateway objects you've just created. Navigate to **VPC > Site-to-Site VPN Connections**. Click the **Create VPN connection** button at the upper right-hand side of the screen. Once again, you'll be prompted to enter a series of values:

* **Name**: This is a tag used to reference this virtual private gateway. It's optional, but we recommend you provided a name, e.g., `twilio-vpn-1`, to make it easier to find in future.
  * **Tip** Include a number at the end of the name — you might need to add another VPN in the future.
* **Target Gateway Type**: Select **Virtual Private Gateway**.
* **Virtual Private Gateway**: Choose the Virtual Private Gateway you created above by its name, e.g., `twilio-virtual-private-gateway-1`.
* **Customer Gateway**: Choose **Existing**.
* **Customer Gateway ID**: Choose the Customer Gateway you created above by its name, e.g., `twilio-vpn-gateway-1`.
* **Routing Options**: Choose **Static**.
  * Where it says "Be sure to specify any private networks behind your on-premises firewall", enter the Encryption Domain (CIDR) value from the VPN setup questionnaire. The default is `100.112.0.0/12`.
* **Local IPv4 Network CIDR**: This is also the Encryption Domain (CIDR) value from the questionnaire.
* **Remote IPv4 Network CIDR**: This is your VPC IP Address CIDR. It is unique to your VPC, and is the value you retrieved from Step 1.
* **Tunnel Options**: Select **Advanced Options** then click **Edit**. Under **DPD timeout action**, select **Restart**.
  * This is the action to take when a Dead Peer Detection (DPD) timeout occurs. By default, when this happens the Internet Key Exchange (IKE) session is stopped, the tunnel goes down, and the routes are removed. However, you can instead specify that AWS must restart the IKE session after a DPD timeout, or that AWS must take no action when a DPD timeout occurs. We recommend you restart the connection.

Finally, click **Create VPN connection**.

Wait a moment while the new VPN connection state is `Pending`. When the state changes to `Available`, select the VPN connection then click on the **Tunnel Details** tab. You should see two tunnels, both with status `Down`. They are awaiting the connection to be made from the KORE end.

### 5. Send the VPN information to KORE

Click **Download Configuration** at the top right of the page. Select the following values:

* **Vendor**: Juniper Networks, Inc.
* **Platform**: SRX Routers
* **Software**: JunOS 11.0+
  * **Note** This is the only value provided.
* **IKE Version**: ikev2

Click **Download** to save the configuration. Email it to KORE, along with your completed VPN setup questionnaire.

You're now ready to continue with [**How to Set Up and Use a Super SIM VPN**](/supersim/how-to/how-to-set-up-and-use-a-super-sim-vpn).


# How to Make and Take IoT VoIP Calls via Super SIM

A demo showing how to create voice-over-data applications for IoT devices using Super SIM and Twilio services.

Super SIM provides any modem-equipped device with worldwide data connectivity. Once in place, this data channel can be used to send and receive any kind of information — and that includes voice calls.

But while voice apps are ten a penny in mobile operating system app stores, making it easy to try out Super SIM mediated voice-over-data on a phone, how might voice functionality be enabled on an IoT device?

<figure><img src="/files/lbVVrgEh65FjDmlGudeY" alt=""><figcaption></figcaption></figure>

Twilio's Programmable Voice product supports the Session Initiation Protocol (SIP) for starting, maintaining, and ending interactive sessions over IP networks, in particular voice communications sessions. Programmable Voice lets you set up a SIP Domain, which is a unique point of presence that SIP clients — say, a VoIP softphone running on a Super SIM-enabled IoT device — can connect to and call other SIP clients, and phone numbers on public switched telephone networks (PSTNs).

The result: any cellular IoT device fitted with Super SIM and suitable audio IO can participate in voice calls with similar devices and even landlines and mobiles via Twilio and the Internet. Calling is two-way: calls can be made by an IoT device and received by it too.

By way of demonstration, this guide shows you how to set up a Programmable Voice SIP Domain, set up an IoT client device, and connect them. You'll need a Twilio phone number as an entry point for inbound calls and as an outgoing Caller ID. We also make use of another Twilio product, Functions, to provide a basic admin dashboard and allow incoming calls to be routed to specific devices. A [Raspberry Pi single-board computer](https://www.raspberrypi.org/products/raspberry-pi-4-model-b/) stands in as the IoT device.

## 1. Prepare the Pi

First, you'll need a Raspberry Pi that has been set up and is ready to use. The Raspberry Pi Foundation [has a great guide to help you](https://projects.raspberrypi.org/en/projects/raspberry-pi-setting-up) if you've just unboxed your first Pi.

You'll also need a cellular module board — we'll use the same [Waveshare SIM7600X 4G Hat](https://www.waveshare.com/wiki/SIM7600G-H_4G_HAT) that's used in our main Super SIM tutorial. It will need to be fitted with a [configured Super SIM](/supersim/supersim-first-steps).

We have a[ detailed guide to bringing the Pi and the modem together](/supersim/supersim-first-steps/get-started-with-super-sim-the-raspberry-pi-4-and-the-waveshare-4g-hat). You should jump to it now and come back here when you've completed it. It will show you how to put in place the services you need to connect to the Internet using Super SIM. If you wish, you can skip Step 3, "Attach to a cellular network", to save a little time.

Finally, you'll need a USB audio adapter. The Raspberry Pi has a 3.5mm AV jack which can output to headphones, but it has no audio in. To remedy that, [fit a USB audio IO adapter like this one](https://amazon.co.uk/gp/product/B09MPM4748) and plug a headset into it. This is just one USB audio adapter — there are many, many similar ones available.

## 2. Install and configure the Twilio CLI tool

We'll interact with Twilio using the `twilio` command line tool. Unfortunately, support for `twilio` and the Serverless Toolkit plugin you'll use alongside it is not optimal on the Pi, so steps 2 through 4 need to be done on your primary computer. You may already have the Twilio CLI installed — if so, you can [jump straight to Step 3](#id-3.-install-the-serverless-toolkit).

{% tabs %}
{% tab title="Linux" %}
Install `twilio` on distributions such as Debian, Ubuntu, Linux Mint, and more with `apt`:

{% code lineNumbers="true" %}

```javascript
wget -qO- https://twilio-cli-prod.s3.amazonaws.com/twilio_pub.asc \
  | sudo apt-key add -
sudo touch /etc/apt/sources.list.d/twilio.list
echo 'deb https://twilio-cli-prod.s3.amazonaws.com/apt/ /' \
  | sudo tee /etc/apt/sources.list.d/twilio.list
sudo apt update && sudo apt install -y twilio
```

{% endcode %}
{% endtab %}

{% tab title="macOS" %}
Install `twilio` on macOS using [Homebrew](https://brew.sh/):&#x20;

{% code lineNumbers="true" %}

```
brew tap twilio/brew && brew install twilio
```

{% endcode %}
{% endtab %}

{% tab title="Windows" %}
Install `twilio` on Windows using [Scoop](https://scoop.sh/). Run [PowerShell as an administrator](https://www.techadvisor.com/how-to/windows/run-programs-as-administrator-windows-10-3632744/) and:

Add the `twilio-cli` [Bucket](https://github.com/ScoopInstaller/Scoop/wiki/Buckets):

{% code lineNumbers="true" %}

```
scoop bucket add twilio-scoop https://github.com/twilio/scoop-twilio-cli
```

{% endcode %}

Install the app:

{% code lineNumbers="true" %}

```
scoop install twilio
```

{% endcode %}
{% endtab %}
{% endtabs %}

Now you're ready to set `twilio` up with:

{% code lineNumbers="true" %}

```bash
twilio login
```

{% endcode %}

You'll be asked to name a profile — make sure you note the name and then run:

{% code lineNumbers="true" %}

```bash
twilio profiles:use <YOUR_PROFILE_NAME>
```

{% endcode %}

## 3. Install the Serverless Toolkit

Twilio's Serverless Toolkit is a `twilio` plugin that considerably simplifies the process of initializing, uploading, and starting a Twilio Functions environment. It uses the core Functions API as exposed by `twilio` and adds convenient bulk-upload functionality that will save you a lot of set up time.

Install the plugin with:

{% code lineNumbers="true" %}

```bash
twilio plugins:install @twilio-labs/plugin-serverless
```

{% endcode %}

## 4. Set up Twilio Functions

Now grab the source code files that underpin the Twilio-mediated SIP service that your IoT device will use to host calls. We have a [GitHub repo that contains all the files you need](https://github.com/korewireless/super-sim-raspberry-pi-voip-demo) and which the `twilio` tool will use to set up your service.

First, clone the repo:

{% code lineNumbers="true" %}

```bash
git clone https://github.com/korewireless/super-sim-raspberry-pi-voip-demo.git
cd super-sim-raspberry-pi-voip-demo
```

{% endcode %}

Optionally, you can edit the repo's `.env` file, which contains your application's admin and SIP client passwords. If you'd rather not use the default passwords, change these now.

Now upload and deploy the code:

{% code lineNumbers="true" %}

```bash
twilio serverless:deploy
```

{% endcode %}

## 5. Initialize the SIP service

The last command you ran will upload and deploy your Twilio Functions environment's functions and assets, and activate the environment. Look at the command's output in the terminal: there will be an `/admin/index.html` URL listed under `Assets:`. Copy the full URL and paste into into a browser window:

<figure><img src="/files/PFek7hKMGh7EiZvSozwG" alt=""><figcaption></figcaption></figure>

When the page loads, you'll first be asked to log in — use the password from the repo's `.env` file — and then be invited to initialize the environment:

<figure><img src="/files/oQpX57J0qo4KR38iJU7b" alt=""><figcaption></figcaption></figure>

Click the **Initialize...** button to do so. The underlying code will set up your SIP Domain and an associated Credential List, which you can take a look at later in the [Twilio Console under **Voice > Credential lists**](https://console.twilio.com/us1/develop/voice/manage/cls?frameUrl=%2Fconsole%2Fvoice%2Fsip%2Fcls%3Fx-target-region%3Dus1). It will also configure the voice and fax functionality of your Twilio phone number: it will be set to accept voice calls and to route them to devices via the uploaded functions. When the service is configured, the admin page will look something like this:

<figure><img src="/files/dPt4OIVppZt7CzYZSDJD" alt=""><figcaption></figcaption></figure>

{% hint style="warning" %}
If you have multiple Twilio phone numbers available, the admin page will inform you of this and provide a list of numbers from which you can select the one you want to use for incoming calls.
{% endhint %}

Scroll up the admin page and click the **View your running application** link to jump to the list of available SIP clients. These are mock users and they're defined in the repo file `assets/extensions.private.js`. It also includes the extension numbers at which they can be reached. Feel free to make changes, but make sure you re-run `twilio serverless:deploy` every time you do so.

<figure><img src="/files/zmNBgDVXvtlKDZXEankc" alt=""><figcaption></figcaption></figure>

Pick one of the users as your Raspberry Pi SIP account and make a note of the SIP Registration Domain. Alternatively, note the page's address, enter that into the browser on the Pi when you jump across to it in the next step, and then copy the domain directly.

## 6. Install a SIP softphone on the Pi

A real IoT application would have to incorporate its own code for communicating via SIP and handling the audio IO. For this demo, however, we're using a [softphone called Jami](https://jami.net/). It's open source, free, and runs on the Raspberry Pi.

1. Switch over to the Raspberry Pi. If it hasn't already booted to the desktop, just enter `startx` at the command line.
2. Select the **Raspberry > Accessories > Terminal** menu entry.
3. Enter the following lines:

   <pre class="language-bash" data-line-numbers><code class="lang-bash">sudo apt install gnupg dirmngr \
     ca-certificates curl --no-install-recommends
   curl -s https://dl.jami.net/public-key.gpg \
     | sudo tee /usr/share/keyrings/jami-archive-keyring.gpg \
     > /dev/null
   sudo sh -c "echo 'deb [signed-by=/usr/share/keyrings/jami-archive-keyring.gpg] \
     https://dl.jami.net/nightly/debian_11/ jami main' > \
     /etc/apt/sources.list.d/jami.list"
   sudo apt-get update &#x26;&#x26; sudo apt-get install -y jami
   </code></pre>
4. Launch Jami by selecting the **Raspberry > Internet > Jami** menu entry.
5. On the **Welcome to Jami** page that appears, click on **Advanced features** at the bottom:

<figure><img src="/files/iI7Oq9AVpoLTdxMFG0FO" alt=""><figcaption></figcaption></figure>

6. Click the **Add a SIP account** button:

<figure><img src="/files/bH14TbSXb9SHrAlqMotH" alt=""><figcaption></figcaption></figure>

7. Enter the account name you selected earlier, in Step 5 — or pick one of the names from your **IoT VoIP Demo** browser window — into the Jami **Username** field.
8. Enter the SIP Registered Domain from Step 5 into the Jami **Server** field.
9. Enter `ThisIs1Password!` — or your own password if you changed it earlier — into the Jami **Password** field:

<figure><img src="/files/b46sBo7ozdNraC66c2m2" alt=""><figcaption></figcaption></figure>

10. Click the **Create SIP Account** button.
11. Back at the main Jami UI, click the gearwheel icon to the left of your SIP account name, then click the **Media** button.
12. Set your Ringtone, Output and Input Device to your USB audio adapter. This may not be listed as it appears in the screenshot below, so just make sure you **don't** select **Default** , **HDMI** or **AV Jack** :

<figure><img src="/files/lQnbXFACRITF4WtTFGHJ" alt=""><figcaption></figcaption></figure>

13. Click the **<** to the left of your SIP account name to go back to the main screen.

## 7. Make a call

1. In Jami, enter your own cellphone number into the **Find or start a conversation** field in the left-hand column:

<figure><img src="/files/wOUhTSwf4c77gxA7fg2Z" alt=""><figcaption></figcaption></figure>

2. Click on the phone handset icon at the top right to call the number:

<figure><img src="/files/XmkmLng0jE1AI1ffO5Hx" alt=""><figcaption></figcaption></figure>

3. Take the call on your phone!

## 8. Receive a call

1. On your cellphone, dial the number back.
2. You'll hear a request for the extension of the party you're trying to reach. Key in `100` on your phone keypad.
3. Talk!

## What next?

You've built yourself a working demo IoT VoIP system that connects a softphone running on a Raspberry Pi computer, via a Twilio Programmable Voice SIP Domain and a cloud-side application constructed with Twilio Functions, to a cellphone for the purpose of making and taking voice calls.

The crucial point to recall, however, is that it is a demo, not a full application. But it neatly shows how you might architect such an application — imagine an industrial IoT unit in the field capable of hosting back-to-base support calls — and of what it would be capable.

Now it's over to you. We can't wait to see what you build.


# How to Use Super SIM Connection Events

Powerful network insights streamed to you

Super SIM Connection Events allow you to follow a Super SIM connected device's journey from when KORE first sees it trying to connect to our mobile core, to when it gets connected and starts to use data, to when it ends its data session. Once a device has successfully started a data session, update events will be published while the device stays connected to give you near real-time usage information for each Super SIM.

Every Super SIM Connection Event will be one of a set of specific event types. These event types are described below and use the same [schema](#connection-event-resource-properties).

## Connection Event Types

The following types of events may be emitted into the stream:

* [Attachment Accepted](#attachment-accepted)
* [Attachment Rejected](#attachment-rejected)
* [Attachment Failed](#attachment-failed)
* [Data Session Started](#data-session-started)
* [Data Session Updated](#data-session-updated)
* [Data Session Ended](#data-session-ended)
* [Data Session Failed](#data-session-failed)<br>

This flowchart shows when these events may be triggered once a device has powered up:

<figure><img src="/files/oMNdSkWwbgVs765hlUG1" alt="" width="563"><figcaption></figcaption></figure>

### Attachment Accepted

Event type string: `*.supersim.connection.attachment.accepted`

Your device successfully authenticated with a cellular network and is allowed to connect to it. This means:

* The Super SIM is `ready` or `active`.
* The network that your device is trying to connect to is allowed by the [Network Access Profile](/supersim/how-to/understanding-network-access-profiles) used by the Super SIM's Fleet.
* The IMSI being used is allowed to connect to the network.

If your device is using a valid Super SIM APN (e.g., `super`) and the device is able to establish a data connection, a [Data Session Started](#data-session-started) event will follow this event. If you receive repeated `attachment.accepted` events in quick succession, it may indicate that the device is unable to use data and is repeatedly restarting the attachment process.

This event may not be published every time your device connects. For instance, it will not be published if the device has previously authenticated with the network, which has cached the device's permission.

### Attachment Rejected

Event type string: `*.supersim.connection.attachment.rejected`

Your device's attachment request was rejected by the network. The device was unable to connect.

Rejections can occur because:

* The Super SIM is still `new` or `inactive`.
* The network that your device is trying to connect to is blocked by the [Network Access Profile](/supersim/how-to/understanding-network-access-profiles) used by the Super SIM's Fleet.
* The IMSI currently being used is not allowed to connect to the network.

To connect, your device will need to try a different network, use a different IMSI, or retry after the used by the Super SIM's Fleet has been updated to allow the network.

### Attachment Failed

Event type string: `*.supersim.connection.attachment.failed`

Your device's attachment request failed for an unknown reason.

This event usually indicates a transient error which will resolve itself in time. When the device attempts to reconnect to the network, it may get a different result.

### Data Session Started

Event type string: `*.supersim.connection.data-session.started`

Your device is connected to a network using a valid Super SIM APN, and can send and receive data.

Data session events will be published for traffic on both user APNs (e.g., `super`) and OTA APNs (e.g., `ota.super`) because all data used is billed and counts towards the Super SIM's data limit. However, `data-session.started` events will not indicate how much data was transferred by a device; this event only indicates that a data session has begun. To track data usage, subscribe to [Data Session Updated](#data-session-updated) events.

### Data Session Updated

Event type string: `*.supersim.connection.data-session.updated`

Your device has remained connected using a valid Super SIM APN, and can continue to send and receive data.

While the device remains connected, `data-session.updated` events will be published approximately every six minutes, with the first arriving approximately six minutes after the [Data Session Started](#data-session-started) event. Each `data-session.updated` event will include the number of bytes that were sent to the device (the event's `data_download` property) and the number sent by the device (`data_upload`) between the `data_session_update_start_time` and the `data_session_update_end_time`.

### Data Session Ended

Event type string: `*.supersim.connection.data-session.ended`

Your device's data session has ended. The device can no longer send or receive data until a new data session is started. This event will include the amount of data that was sent to the device (`data_download`) and from the device (`data_upload`) since the most recent [Data Session Updated](#data-session-updated)[ ](#data-session-updated)event.

The `data_session_start_time`, `data_session_end_time`, `data_session_data_download`, `data_session_data_upload`, and `data_session_data_total` properties can give you a complete picture of the data session, telling you how long the device's data session was maintained and how much data was exchanged over it.

### Data Session Failed

Event type string: `*.supersim.connection.data-session.failed`

Your device's attempt to create or maintain a data session failed. The device can no longer send or receive data until a new data session is started.

## Connection Event Resource Properties

The Super SIM events you receive are based on a common schema that defines the following properties. Some properties will not be present in every case. `error` will not be included if no error took place. Attachment-related events will not include data session-related properties. The `data_modifier` property is only included if the Super SIM has exceeded its data limit. The `location` and `imei` properties will be omitted if KORE didn't receive this information from the visited network.

<table data-header-hidden><thead><tr><th width="349">Property</th><th>Description</th></tr></thead><tbody><tr><td><code>event_sid</code></td><td>The event's SID. This is a copy of the <code>ce_id</code> header field.</td></tr><tr><td><code>event_type</code></td><td>The type of connection event. This is a copy of the <code>ce_type</code> header field.</td></tr><tr><td><code>timestamp</code></td><td>The UTC time in ISO8601 format when the event occurred.</td></tr><tr><td><code>account_sid</code></td><td>The SID of the Account that the Super SIM and this record relate to.</td></tr><tr><td><code>apn</code></td><td>The Access Point Name (APN) used to establish a data session.</td></tr><tr><td><code>data_modifier</code></td><td>Indicates if the Super SIM's data usage is blocked because the SIM has reached its data limit. Its value will be <code>blocked</code> if data use is blocked, or <code>null</code> if data usage is not blocked.</td></tr><tr><td><code>data_session_sid</code></td><td>A unique string ID identifying a data session.</td></tr><tr><td><code>data_session_start_time</code></td><td>The data session UTC start time in ISO8601 format.</td></tr><tr><td><code>data_session_end_time</code></td><td>The data session UTC end time in ISO8601 format.</td></tr><tr><td><code>data_session_update_start_time</code></td><td>The data session UTC update start time in ISO8601 format. For a <code>data-session.updated</code> or <code>data-session.ended</code> event, this time indicates the start of the window for which the update was published. The data usage values included with these events was consumed between this time and the <code>data_session_update_end_time</code>.</td></tr><tr><td><code>data_session_update_end_time</code></td><td>The data session UTC update end time in ISO8601 format. For a <code>data-session.updated</code> or <code>data-session.ended</code> event, this time indicates the end of the window for which the update was published. The data usage values included with these events was consumed between the <code>data_session_update_start_time</code> and this time.</td></tr><tr><td><code>data_download</code></td><td>The amount of data downloaded to the device in bytes between the <code>data_session_update_start_time</code> and <code>data_session_update_end_time</code>.</td></tr><tr><td><code>data_upload</code></td><td>The amount of data uploaded from the device in bytes between the <code>data_session_update_start_time</code> and <code>data_session_update_end_time</code>.</td></tr><tr><td><code>data_total</code></td><td>The total amount of data uploaded or downloaded by the device in bytes between the <code>data_session_update_start_time</code> and <code>data_session_update_end_time</code>. The sum of <code>data_download</code> and <code>data_upload</code>.</td></tr><tr><td><code>data_session_data_download</code></td><td>The cumulative amount of data downloaded to the device over the data session. The cumulative amount of data downloaded to the device in bytes between the <code>data_session_start_time</code> and <code>data_session_update_end_time</code> or <code>data_session_end_time</code> for <code>data-session.ended</code> events.</td></tr><tr><td><code>data_session_data_upload</code></td><td>The cumulative amount of data uploaded by the device over the data session. The cumulative amount of data uploaded by the device in bytes between the <code>data_session_start_time</code> and <code>data_session_update_end_time</code> or <code>data_session_end_time</code> for <code>data-session.ended</code> events.</td></tr><tr><td><code>data_session_data_total</code></td><td>The cumulative amount of data uploaded or downloaded by the device over the data session. The cumulative amount of data uploaded or downloaded by the device in bytes between the <code>data_session_start_time</code> and <code>data_session_update_end_time</code> or <code>data_session_end_time</code> for <code>data-session.ended</code> events. The sum of <code>data_session_data_download</code> and <code>data_session_data_upload</code>.</td></tr><tr><td><code>imei</code></td><td>The International Mobile Equipment Identity of the device using the Super SIM to connect. This may be <code>null</code> as it is not guaranteed that the visited network will pass on this information.</td></tr><tr><td><code>imsi</code></td><td>The International Mobile Subscriber Identity used by the Super SIM to connect.</td></tr><tr><td><code>ip_address</code></td><td>The IP address assigned to the device. This address is not publicly addressable.</td></tr><tr><td><code>sim_iccid</code></td><td>The Integrated Circuit Card Identification Number of the Super SIM this record relates to.</td></tr><tr><td><code>sim_sid</code></td><td>The Super SIM's SID.</td></tr><tr><td><code>sim_unique_name</code></td><td>The Super SIM's unique name.</td></tr><tr><td><code>fleet_sid</code></td><td>The SID of the Fleet to which the Super SIM is assigned.</td></tr><tr><td><code>location</code></td><td>An object containing information about the location of the cell to which the device was connected. This may be <code>null</code> as location information is not guaranteed to be sent by the visited network. See <a href="#location-info-properties">Location info properties</a> for more details.</td></tr><tr><td><code>network</code></td><td>An object containing information about the network that the Super SIM attempted to connect to or is connected to. See <a href="#network-info-properties">Network info properties</a> for more details.</td></tr><tr><td><code>rat_type</code></td><td>The generation of wireless ('radio access') technology that the device was using. This will be one of: <code>2G</code>, <code>3G</code>, or <code>4G LTE</code>.</td></tr><tr><td><code>error</code></td><td>An object containing information about any error encountered. See <a href="#error-info-properties">Error info properties</a> for more details.</td></tr></tbody></table>

### Location info properties <a href="#location-info-properties" id="location-info-properties"></a>

The event's `location` property provides information about the placement of the cell tower to which the device was or is connected. This information is not guaranteed to be send by the network, so this property may be `null`.

| **Property** | **Description**                                                  |
| ------------ | ---------------------------------------------------------------- |
| `cell_id`    | The unique ID of the cell tower that the device was attached to. |
| `lac`        | The location area code (LAC) of the cell tower.                  |
| `lat`        | The tower's estimated latitude.                                  |
| `lon`        | The tower's estimated longitude.                                 |

### Network info properties <a href="#network-info-properties" id="network-info-properties"></a>

The event's `network` property contains information about the visited cellular network that the device attempted to connect to or is connected to.

| **Property**    | **Description**                                                                                                                         |
| --------------- | --------------------------------------------------------------------------------------------------------------------------------------- |
| `mcc`           | The Mobile Country Code (MCC) of the network that the Super SIM attempted to connect to or is connected to.                             |
| `mnc`           | The Mobile Network Code (MNC) of the network that the Super SIM attempted to connect to or is connected to.                             |
| `friendly_name` | The human-readable name of the network to which the MCC-MNC values belong.                                                              |
| `iso_country`   | The network's ISO2 country code.                                                                                                        |
| `sid`           | The SID of the [Network resource](https://docs.korewireless.com/en-us/api/products/supersim/network-resource) representing the network. |

### Error info properties <a href="#error-info-properties" id="error-info-properties"></a>

The event's `error` property will be `null` if no error occurred. Otherwise it contains the following information.

| **Property** | **Description**                                                                                                                                                                                                                  |
| ------------ | -------------------------------------------------------------------------------------------------------------------------------------------------------------------------------------------------------------------------------- |
| `code`       | A KORE error code.                                                                                                                                                                                                               |
| `message`    | A short message indicating why the error occurred. It may include standard \[Diameter protocol]\([https://en.wikipedia.org/wiki/Diameter\_(protocol\\)](https://en.wikipedia.org/wiki/Diameter_\(protocol%5C\))) error messages. |

***

## Tips and tricks <a href="#tips-and-tricks" id="tips-and-tricks"></a>

### Start development with a Subaccount or a new Project <a href="#start-development-with-a-subaccount-or-a-new-project" id="start-development-with-a-subaccount-or-a-new-project"></a>

If you already have several devices deployed, you may quickly exceed the [first 100,000 events](https://docs.korewireless.com/en-us/developers/event-streams#pricing) offered by Event Streams. For example, `data-session.updated` events are published every six minutes if your devices maintain a persistent connection, and can therefore exceed 7,000 events per device per month. We recommend you start your development work in a separate [KORE Subaccount or Project](https://docs.korewireless.com/en-us/iam/accounts/multiple-accounts) to help manage your event streams as you scale.

You can transfer a Super SIM that is still in the `new` state to a subaccount by using [this API request](https://docs.korewireless.com/en-us/api/products/supersim/sim-resource#move-super-sims-between-child-accounts). If you wish to transfer a Super SIM in another state to a different Account (either a Subaccount or a Project), please open a [support ticket](https://docs.korewireless.com/en-us/twilio-iot-acquisition/twilio-iot-is-now-part-of-kore/iot-customer-support-migration-to-kore#how-to-open-a-kore-customer-support-ticket). A KORE Support Specialist will be able to help you get started.

### How to generate Attachment Rejected events <a href="#how-to-generate-attachment-rejected-events" id="how-to-generate-attachment-rejected-events"></a>

To generate `attachment.rejected` events, you can put a Super SIM that is either `new` or `inactive` into your device. Alternatively, update your Fleet's Network Access Profile to block all of the networks in your country.

### Get your data usage from Data Session Ended events if you can <a href="#get-your-data-usage-from-data-session-ended-events-if-you-can" id="get-your-data-usage-from-data-session-ended-events-if-you-can"></a>

If you don't need to do near real-time usage billing or metering, you may be able to use `data_session_data_upload`, `data_session_data_download`, or `data_session_data_total` properties on `data-session.ended` events to understand how much data each of your devices are using without having to subscribe to `data-session.updated` events. These fields contain the cumulative amount of data exchanged by your device over the data session. This can reduce the number of events you have to receive and process by over 90%.


# How to use Super SIM eSIM Profiles

Many Internet of Things manufacturers wish to incorporate eSIMs (eUICC SIMs) into their products rather than traditional SIMs in order to take advantage of eSIMs' remote SIM provisioning capabilities. The good news is that they can do so with Super SIM and continue to take full advantage of Super SIM's global connectivity via multiple tier-1 networks.

In fact, working with a virtual Super SIM installed in an eSIM is no different from working with a physical one in card or chip form: you use the same API calls to assign it to a [Fleet](https://docs.korewireless.com/en-us/api/products/supersim/fleet-resource) and manage its state. However, you need to follow a slightly different process to obtain the virtual SIM — called an **eSIM profile** — and to prepare for its installation on a device.

The Super SIM API provides tools for you to create, or 'reserve', Super SIM eSIM profiles, which are accessible as [eSimProfile resources](https://docs.korewireless.com/en-us/api/products/supersim/esimprofile-resource). To make use of the eSIM profiles you have created, you need **eUICC** (Embedded Universal Integrated Circuit Card) hardware to store them on your IoT device, and **Local Profile Assistant** (LPA) software, also on the device, to download profiles and manage those installed in the eUICC.

This guide will introduce you to the Super SIM API used to reserve and manage Super SIM eSIM profiles and show you the methods you can apply to install profiles onto devices. If you're new to eSIMs, you may prefer to start with the guide [**Get Started with Super SIM eSIM Profiles for eUICCs**](https://docs.korewireless.com/en-us/supersim/get-started/get-started-with-super-sim-esim-profiles-for-euiccs) and then return to this longer, more detailed document.

***

## How are eSIM profiles installed? <a href="#how-are-esim-profiles-installed" id="how-are-esim-profiles-installed"></a>

To use eSIMs, an IoT device needs LPA software. The LPA downloads eSIM profiles from an SM-DP+ (Subscription Manager Data Preparation) server, installs them in the device's eUICC, and manages switching between profiles — the digital equivalent of swapping SIM cards. The LPA may also provide an interface through which users swap the current profile for another to switch between cellular connectivity providers, if that's a choice you as a device manufacturer have chosen to grant them.

There are many ways to implement an LPA. It may be part of a mobile device operating system. For example, many Android devices are already eSIM compatible, and the OS supports the installation of third-party LPAs in addition to its own. If you are building your own IoT hardware, you will need to discuss with your cellular module supplier how to develop and install a suitable LPA. If your choice of eUICC already incorporates an LPA, you will still need to code your application to communicate with it.

The process of installing an eSIM profile goes like this:

1. You create an eSIM profile on an SM-DP+ server. This is done using the Super SIM API and is typically referred to as "reserving" a profile.
2. You provide the device's LPA with the address of the SM-DP+ server. There are several methods, discussed shortly, that you can choose from.
3. The LPA contacts the SM-DP+ server and receives the reserved eSIM profile, which it installs in the device's eUICC.

The SM-DP+ server is an online resource that allows users to download eSIM profiles. It is like a virtual warehouse full of ready-to-use digital SIMs.

***

## Profile installation methods <a href="#profile-installation-methods" id="profile-installation-methods"></a>

There are various ways of providing the LPA with the address of the SM-DP+ it should contact. Super SIM supports the following methods:

**Activation Code** also reserves an eSIM Profile on an SM-DP+ server, but rather than bind the profile to a specific device, a unique identifier called a **Matching ID** is generated to identify a specific profile that you can claim later. Any device with that ID can claim the eSIM profile, irrespective of its EID. So, when you reserve an eSIM profile, you don't need to know the identity of a target device. Additionally, the SM-DP+ address and matching ID can be combined into a single string to build the Activation Code itself, so the LPA doesn't need to be separately provisioned with this information.

As the Activation Code's value is known before installation, it can be presented in a form that simplifies providing it to the device. A common approach is to supply it as a QR code which can be scanned by devices that include a camera, and the ID and SM-DP+ server address extracted. This makes it ideal as a means to offer eSIM profiles that will be installed by end-users on mobile devices like phones and tablets.

Here is a typical call flow for downloading Super SIM profiles using the Activation Code method:

<figure><img src="/files/wxT4LhGWH3ZBHktIbKSw" alt=""><figcaption></figcaption></figure>

**SM-DP+ Default** binds the reserved profile to a specific eSIM which is identified by its eSIM ID (EID). Only that eSIM can then make use of the reserved profile. The LPA sends the host's EID to the server, which responds with the eSIM profile reserved for that EID. When you reserve eSIM profiles with this method in mind, you need to know the identity of the target device.

Here is a typical call flow for downloading Super SIM profiles using the SM-DP+ Default method:

<figure><img src="/files/tsle3aNRzgnGMY0dDjMD" alt=""><figcaption></figcaption></figure>

However the LPA gets the address of an SM-DP+ server, when it contacts the server it will receive a profile and install it in the eUICC. Once the eSIM profile has been installed and activated, the host device is able to connect to the Internet.

Let's go through each of these phases in detail.

***

## Prepare an eSIM profile <a href="#prepare-an-esim-profile" id="prepare-an-esim-profile"></a>

### 1. Reserve an eSIM profile <a href="#id-1-reserve-an-esim-profile" id="id-1-reserve-an-esim-profile"></a>

To reserve a profile, you need to send an HTTP `POST` request containing data appropriate to your chosen installation method to:

```
https://supersim.api.korewireless.com/v1/ESimProfiles
```

This will create a new [eSimProfile resource](https://docs.korewireless.com/en-us/api/products/supersim/esimprofile-resource) and initiate the process of reserving its linked eSIM profile on the SM-DP+ server.

If you wish to use the Default SM-DP+ method of profile installation, provide the target device's EID as a URL-encoded request parameter. For example, to make the request using curl:

{% code overflow="wrap" %}

```bash
curl -X POST https://supersim.api.korewireless.com/v1/ESimProfiles --data-urlencode "Eid=<DEVICE_EID>" --header "Authorization: Bearer <YOUR_AUTH_TOKEN>"
```

{% endcode %}

Alternatively, to generate an Activation Code, do not supply an EID but instead set the `GenerateMatchingId` property to `true` flag:

{% code overflow="wrap" %}

```bash
curl -X POST https://supersim.api.korewireless.com/v1/ESimProfiles --data-urlencode "GenerateMatchingId=true" -H "Authorization: Bearer <YOUR_AUTH_TOKEN>"
```

{% endcode %}

### Asynchronicity <a href="#asynchronicity" id="asynchronicity"></a>

Reserving an eSIM profile is an asynchronous operation, so the new profile will not be ready to use immediately, though the eSimProfile resource is available straight away. If you're testing the process at the desktop, you can poll the URL provided in the response to your initial request and view the `status` field of the poll response. When the status is `available`, the profile is ready for use.

A better approach for server-side code is to provide a callback URL with your initial request.

{% code overflow="wrap" %}

```bash
curl -L -X POST 'https://supersim.api.korewireless.com/v1/ESimProfiles' --data-urlencode "Eid=<YOUR_DEVICE_EID>" --data-urlencode "CallbackUrl=<YOUR_CALLBACK_ENDPOINT>" --header "Authorization: Bearer <YOUR_AUTH_TOKEN>"
```

{% endcode %}

KORE will issue a `GET` request to this URL when the eSIM profile is available for download, but you can change it using the `CallbackMethod=POST` flag.

{% code overflow="wrap" %}

```bash
curl -L -X POST 'https://supersim.api.korewireless.com/v1/ESimProfiles' --data-urlencode "Eid=<YOUR_DEVICE_EID>" --data-urlencode "CallbackUrl=<YOUR_CALLBACK_ENDPOINT>" --data-urlencode "CallbackMethod=POST" --header "Authorization: Bearer <YOUR_AUTH_TOKEN>"
```

{% endcode %}

### 2. Assign the profile's Sim to a Fleet and activate it <a href="#id-2-assign-the-profiles-sim-to-a-fleet-and-activate-it" id="id-2-assign-the-profiles-sim-to-a-fleet-and-activate-it"></a>

Part of the creation of an eSIM profile is the generation of an associated [Sim resource](https://docs.korewireless.com/en-us/api/products/supersim/sim-resource) which you use to manage the profile's SIM data. The resource's SID will be included in the poll response as the value of the `sim_sid` field once the eSimProfile resource's status has become `available`. At this point, you can also read the SM-DP+ address from the resource's `smdp_plus_address` field.

If you have asked for a Matching ID to be generated, you can read it now from the same response by extracting the value of the `matching_id` field.

Use the extracted Sim resource SID assign it to a Fleet resource and to activate it:

{% code overflow="wrap" %}

```bash
curl -X POST https://supersim.api.korewireless.com/v1/Sims/<YOUR_SIM_SID> -d "Fleet=<YOUR_FLEET_SID>" -d "Status=active" -H "Authorization: Bearer <YOUR_AUTH_TOKEN>"
```

{% endcode %}

Assignment to the Fleet and activation are shown here as a single call, but you may choose to perform these tasks separately and at different points in time, depending on your workflow and use case.

### 3. Pass the SM-DP+ address to the LPA <a href="#id-3-pass-the-sm-dp-address-to-the-lpa" id="id-3-pass-the-sm-dp-address-to-the-lpa"></a>

This stage will depend on your chosen installation method.

### Activation Code <a href="#activation-code" id="activation-code"></a>

You will have received the Matching ID alongside the SM-DP+ address. The "activation code" is what you get when you combine these values together in the following format:

```
1$<SM-DP_ADDRESS>$<MATCHING_ID>
```

{% hint style="danger" %}
The `$` symbol is a field separator, not a shell variable marker.
{% endhint %}

Extra formatting may be required depending on how you plan to make the code available. For instance, to use the Activation Code as the basis for a QR code, you need to add a protocol identifier so that QR decoder software knows how to route the extracted data. In this case, the protocol identifier is `LPA:`, producing:

```
LPA:1$<SM-DP_ADDRESS>$<MATCHING_ID>
```

This string can be passed to any QR code generation software. There are many online services available — here is an example using the [Google charts API](https://developers.google.com/chart/infographics/docs/qr_codes):

{% code overflow="wrap" %}

```bash
curl -X POST https://chart.googleapis.com/chart -d cht=qr -d chs=256x256 -d chl='LPA:1$<SM-DP_ADDRESS>$<MATCHING_ID>' -o qr-code.png
```

{% endcode %}

The `cht` parameter indicates the chart type; the `chs` parameter is its size. The `chl` parameter is the data to be encoded. By default this is a UTF-8 string. The API returns the code as a PNG format graphic.

{% hint style="danger" %}
If you use a command line tool like `curl`, make sure you include the encoded data in single quotes to prevent the shell from attempting to substitute values for what it will otherwise assume to variable names.
{% endhint %}

### Default SM-DP+ <a href="#default-sm-dp" id="default-sm-dp"></a>

You will need to provision the target device with the SM-DP+ address you received earlier. If you are working with an eSIM-compatible Android or iOS device, each OS' Settings app provides a path to enter this information manually — for more information, please see [**Get Started with Super SIM eSIM Profiles for eUICCs**](https://docs.korewireless.com/en-us/supersim/get-started/get-started-with-super-sim-esim-profiles-for-euiccs). For an embedded device, however, you will need to consult your LPA provider to learn how to code your application to provision the LPA with the address after retrieving it from your cloud.

### 3. Install the eSIM profile <a href="#id-3-install-the-esim-profile" id="id-3-install-the-esim-profile"></a>

Again, this stage will depend on your chosen download method.

### Activation Code <a href="#activation-code-2" id="activation-code-2"></a>

Devices that allow the user to input an Activation Code, either by keying in the code manually or by scanning a QR code derived from it, will extract the SM-DP+ address and Matching ID and pass them to the LPA, which will contact the server at that time and retrieve the eSIM profile.

### Default SM-DP+ <a href="#default-sm-dp-2" id="default-sm-dp-2"></a>

In the case of the Default SM-DP+ method, installation typically takes place when the LPA first starts up and there is no profile in the eUICC: it will contact the provisioned server and pass the host EID. The server will respond with the eSIM profile for installation. If the SM-DP+ server address has just been entered manually — for example, into an Android or iOS device — then the LPA will contact the server at that time.

Take a look at the guide [**Get Started with Super SIM eSIM Profiles for eUICCs**](https://docs.korewireless.com/en-us/supersim/get-started/get-started-with-super-sim-esim-profiles-for-euiccs) to see how to apply the installation methods to Android and iOS devices.

{% hint style="danger" %}
A Super SIM profile can be downloaded only once to an eSIM. Once it is downloaded, it can be used only with that eSIM. It cannot be downloaded again or used with another eSIM.
{% endhint %}


# How to Monitor Super SIM Connection Events using AWS ElasticSearch and Kibana

KORE [Event Streams](https://docs.korewireless.com/en-us/developers/event-streams) is a new, unified mechanism to help you track your application's interactions with KORE products. Event Streams spans KORE's product line to provide a common event logging system that supports product-specific event types in a consistent way. You use a single API to subscribe to the events that matter to you.

Super SIM provides a set of event types, called Connection Events, which are focused on devices' attempts to attach to cellular networks and, once they are connected, the data sessions they establish to send and receive information.

This tutorial will show you how to integrate Super SIM Connection Events into a typical business process: routing the data to AWS ElasticSearch so it can feed your Kibana dashboards. To do so, you'll set up Event Streams to send Super SIM Connection Events to an AWS Kinesis Data Stream and into ElasticSearch via AWS Kinesis Firehose.

{% hint style="info" %}
If you'd prefer to start with a more basic guide to using Super SIM connection events, or your use-case doesn't require AWS, we have another tutorial that focuses on [streaming Super SIM Connection Events to a webhook](https://docs.korewireless.com/en-us/supersim/get-started/get-started-with-super-sim-connection-events) in your cloud.
{% endhint %}

With the AWS resources in place to read and feed events to Kibana, you'll explore probing the event data, setting up visualizations to help you spot underlying trends in the data, and configuring a dashboard so you're ready to monitor event data regularly.

This tutorial assumes you're working on a Linux box or a Mac, but it should also work under Windows if you're running [Windows Subsystem for Linux](https://docs.microsoft.com/en-us/windows/wsl/about). Whatever platform you're using, we'll take it as a given that you're familiar with the command line.

You don't need to have experience of working with AWS accounts and processes, unless you plan to change or upgrade the resources configured during the tutorial. All of the AWS setup required by the tutorial is driven by a script, so you can focus on the flow rather than keying in code or navigating the AWS console. The script is fully commented so you can understand exactly what is to be installed.

{% hint style="info" %}
If you've already set up Event Streams for another KORE product, then you may prefer to jump straight to the documentation that [describes the event types unique to Super SIM](https://docs.korewireless.com/en-us/supersim/how-to/how-to-use-super-sim-connection-events). No problem.
{% endhint %}

Let's get started.

***

## 1. Review the requirements <a href="#id-1-review-the-requirements" id="id-1-review-the-requirements"></a>

To work through this tutorial, you'll need your KORE API Client setup. If you don't have these credentials handy, you can get them from the [Console](https://build.korewireless.com/clients). To learn more about KORE APIs, [getting started guides](https://docs.korewireless.com/en-us/developers/get-started/apis) are available for you.

You'll also need an [AWS account](https://signin.aws.amazon.com/) set up with an AWS user that has resource creation permissions. You'll make use of these in Steps 2 and 3.

{% hint style="danger" %}
The tutorial creates and uses AWS resources, so please be aware that this will come at a cost to your AWS account holder. We've made sure we used as few and as limited resources as possible. For more details, check out AWS' [pricing page](https://aws.amazon.com/pricing/).

You may also find that certain configurations are not available in your preferred AWS region, so you may need to modify the config you use accordingly. Make sure you thoroughly review the `supersim_events.tf` script in [Step 3](#script-3--supersim_eventstf), which has all the details of the config you'll use and will be where you'll make any changes you need.
{% endhint %}

***

## 2. Set up your machine <a href="#id-2-set-up-your-machine" id="id-2-set-up-your-machine"></a>

You may have already completed some of these tasks for other tutorials you have followed, or as part of your own workflow, so just skip those steps. For each step, we've linked to the relevant setup guide, so just jump straight there if you need further assistance then hop back here when you're done.

1. Setup and configure your KORE API Client [using this guide](https://docs.korewireless.com/en-us/developers/get-started/apis#create-your-first-api-client).
2. Install and configure the AWS CLI. Amazon has [full guidance for you](https://docs.aws.amazon.com/cli/latest/userguide/cli-chap-getting-started.html).
3. Install the JSON processor JQ [from its website](https://stedolan.github.io/jq/download/). JQ is used to process data in a script you'll run shortly to validate the Events Stream [Destination ](https://docs.korewireless.com/en-us/developers/event-streams/destinations)you set up.
4. Install the [Terraform CLI](https://www.terraform.io/downloads.html). Terraform lets you build out infrastructure using code. Because this tutorial involves the creation of many AWS resources of various types, you'll use Terraform and a ready-to-go setup script to automate this process. Terraform's developer, Hashicorp, has a [guide to get you started](https://learn.hashicorp.com/tutorials/terraform/install-cli?in=terraform/aws-get-started) with the installation process — come back here as soon as you've installed the CLI tool — there's no need to go further.

***

## 3. Build out your AWS resources <a href="#id-3-build-out-your-aws-resources" id="id-3-build-out-your-aws-resources"></a>

In this step you'll put in place all of the AWS resources you need and connect them together so that they're ready to receive your [Super SIM Connection Events](https://docs.korewireless.com/en-us/supersim/get-started/get-started-with-super-sim-connection-events) and make them available to Kibana. You will create:

* A Kinesis Data Stream as an entry point for Super SIM Connection Events.
* An ElasticSearch domain to receive, store, and work with the events, which will be presented by Kibana.
* A Kinesis Firehose to bridge the Data Stream and ElasticSearch.
* An S3 Bucket as a store for records Firehose could not pass to ElasticSearch.
* Assorted Roles and Policies to authorize KORE to write to your stream, and for the AWS components to interact with each other.

The entire set up process is automated using Terraform code-as-infrastructure technology and a script you'll download shortly. Feel free to review the script before you run it.

1. Open a terminal and run the following commands to prepare your working directory:

```bash
mkdir supersim_events
cd supersim_events
```

1. Copy [the first of the three scripts](#script-1--setup_awssh) below and save it to your `supersim_events` directory as `setup_aws.sh` and then run `chmod +x setup_aws` to make the script executable.&#x20;

   ```bash
   chmod +x setup_aws.sh
   ```
2. You'll need to update the first line of the script with your preferred AWS region.
3. Get [the second script](#script-2--validate_sinksh), save it as `validate_sink.sh`, and run `chmod +x validate_sink.sh`.

   ```bash
   chmod +x validate_sink.sh
   ```
4. Copy [the third script](#script-3--supersim_eventstf) and save it to your `supersim_events` directory as `supersim_events.tf`. This does not need to be made executable. It is read by the Terraform CLI and used to build a setup scheme. You should review this script to make sure you're happy with its role and policy settings.
5. Edit `setup_aws.sh` and set your AWS region where marked, eg. `us-east-2`.
6. You're now ready to put your AWS infrastructure into place. Remember, there is a cost implication for your account holder, which we've attempted to minimize by instantiating as few and as limited a set of AWS resources as possible. For more details, check out AWS' [pricing page](https://aws.amazon.com/pricing/).
7. Run:

   ```bash
   ./setup_aws.sh
   ```

   This script sets the variables Terraform will use and calls two Terraform CLI commands, one to check the `supersim_events.tf` script, and the other to build the infrastructure from the script, which it does via the AWS CLI. It will output what it is going to generate, and then ask you how you'd like to proceed. Review its plan, then type in `yes` and hit **Enter**.
8. As the AWS resources are created, you'll receive progress reports in the terminal, and then it will output some key data: the External ID value, the stream ARN, and the role ARN that you'll use to set up your KORE Events Stream Destination, and the URL you'll use to access Kibana. You'll need to keep all of these values handy for future steps.

{% hint style="info" %}
If you subsequently make changes to your Terraform script, just run `terraform apply` to see the changes Terraform will make and, if you agree, apply them. You don't need to run `setup_aws.sh` again, but if you wish to, just make sure you replace the `$(...)` section in line 3 with the external ID output on the first run. If you change the external ID, either via the script or manually, you will need to recreate your Destination.
{% endhint %}

Here are the scripts, or [just jump to the next step](#id-4-configure-twilio-event-streams-1-create-a-sink).

{% hint style="info" %}
You can also find all of these files in our [public GitHub repo](https://github.com/korewireless/super-sim-connection-events.git).
{% endhint %}

#### Script #1 — setup\_aws.sh <a href="#script-1--setup_awssh" id="script-1--setup_awssh"></a>

```bash
#!/bin/bash
export TF_VAR_your_aws_region='<YOUR_AWS_REGION>'
export TF_VAR_external_id=$(openssl rand -hex 40)
export TF_VAR_your_computer_external_ip=$(curl -s https://checkip.amazonaws.com/)
terraform init
terraform validate
terraform apply
```

#### Script #2 — validate\_sink.sh <a href="#script-2--validate_sinksh" id="script-2--validate_sinksh"></a>

```bash
#!/bin/bash

# Version 1.0.0
# Copyright © 2021-23, KORE Wireless
# Licence: MIT

JQ_CHECK=$(which jq)
if [ -z "$JQ_CHECK" ]; then
  echo
  echo "This script requires the jq JSON processor. Please install for your OS from https://stedolan.github.io/jq/download/"
  echo
  exit 1
fi

if [ $# -ne 1 ]; then
  echo
  echo "usage: $0 <stream_name>"
  echo
  exit 1
fi

# Set the stream name
STREAM_NAME=$1

# Choose the iterator type:
# TRIM HORIZON is for starting at the begining of the Kinesis Stream.
# This can take a while if you have a lot of records.
# To use TRIM HORIZON, uncomment the following line:
# TYPE=TRIM_HORIZON

# AT_TIMESTAMP allows you to go back to a point in time. This is set for going back one hour
# To use AT_TIMESTAMP, uncomment the following two lines:
# TIMESTAMP=$(($(date +%s) - 3600)).000
# TYPE="AT_TIMESTAMP --timestamp $TIMESTAMP"

# LATEST means start at the most current point in the stream and read forward
TYPE=LATEST

# Get a list of shards
SHARDS=$(aws kinesis list-shards --stream-name $STREAM_NAME | jq -r .Shards[].ShardId)

# Get all the starting points
SHARD_ITERATOR=()
i=0
for shard in $SHARDS ; do
  SHARD_ITERATOR[$i]=$(aws kinesis get-shard-iterator --shard-id $shard --shard-iterator-type $TYPE --stream-name $STREAM_NAME --query 'ShardIterator')
  i=$((i+1))
done

# Start getting events from all shards and display them
while [ 1 ] ; do
  len=${#SHARD_ITERATOR[@]}
  for (( i=0; i < $len; i++ )); do
    DATA=$(aws kinesis get-records --limit 50 --shard-iterator ${SHARD_ITERATOR[$i]})
    SHARD_ITERATOR[$i]=$(echo $DATA | jq -r .NextShardIterator)
    ROWS=$(echo $DATA | jq -r .Records[].Data?)
    for row in $ROWS; do
      echo $row | base64 -d | jq .
    done
  done
done
```

#### Script #3 — supersim\_events.tf <a href="#script-3--supersim_eventstf" id="script-3--supersim_eventstf"></a>

```bash
/*
 * Version 1.0.0
 * Copyright © 2021, KORE Wireless
 * Licence: MIT
 */

/*
 * Define Terraform variables
 * These are set in the 'setup_aws.sh' script
 */
variable "your_aws_region" {
  type = string
}

// This is required to give your computer access to Kibana
variable "your_computer_external_ip" {
  type    = string
}

// Randomly generated string to verify connections from KORE
variable "external_id" {
  type = string
}

/*
 * Base Terraform setup
 */
terraform {
  required_providers {
    aws = {
      source  = "hashicorp/aws"
      version = "~> 3.42.0"
    }
  }

  required_version = ">= 0.15.0"
}

provider "aws" {
  profile = "default"
  region  = var.your_aws_region
}

/*
 * Set up policies
 */

// Create a Policy to permit KORE to write records to our Kinesis Stream
resource "aws_iam_policy" "supersim_kinesis_stream_record_write_policy" {
  name           = "supersim-kinesis-stream-record-write-policy"
  policy         = jsonencode({
    Version      = "2012-10-17"
    Statement    = [
      {
        Effect   = "Allow"
        Resource = "*"
        Action   = [
          "kinesis:PutRecord",
          "kinesis:PutRecords"
        ]
      },
      {
        Effect   = "Allow"
        Resource = "*"
        Action   = [
          "kinesis:ListShards",
          "kinesis:DescribeLimits"
        ]
      }
    ]
  })
}

// Create a policy to provide read access to ElasticSearch Kibana
// NOTE We limit access to your computer's external (eg. router) IP address,
//      which is required for web access to Kibana
resource "aws_elasticsearch_domain_policy" "supersim_elasticsearch_kibana_access_policy" {
  domain_name     = aws_elasticsearch_domain.supersim_elastic_search_kibana_domain.domain_name
  access_policies = jsonencode({
    Version       = "2012-10-17"
    Statement     = [
      {
        Action    = [
            "es:ESHttp*",
            "es:DescribeElasticsearchDomain",
            "es:ListDomainNames",
            "es:ListTags"
        ]
        Effect    = "Allow"
        Resource  =  "${aws_elasticsearch_domain.supersim_elastic_search_kibana_domain.arn}/*"
        Principal = {
          "AWS": "*"
        }
        Condition = {
          "IpAddress": {
            "aws:SourceIp": [
              var.your_computer_external_ip
            ]
          }
        }
      }
    ]
  })
}

// Set up a policy to manage Firehose's access to various resources:
//   * To write records to ElasticSearch
//   * To read from ElasticSearch (may not be necessary)
//   * To write to S3 records it could not write to ElasticSearch
//   * To read records from the Kinesis Data Stream
//   * To access EC2 resources for data transfer (may not be necessary)
resource "aws_iam_policy" "supersim_firehose_rw_access_policy" {
  name           = "supersim-firehose-rw-access-policy"
  policy         = jsonencode({
    Version      = "2012-10-17"
    Statement    = [
      {
        Effect   = "Allow"
        Action   = [
          "es:DescribeElasticsearchDomain",
          "es:DescribeElasticsearchDomains",
          "es:DescribeElasticsearchDomainConfig",
          "es:ESHttpPost",
          "es:ESHttpPut"
        ]
        Resource = [
          "${aws_elasticsearch_domain.supersim_elastic_search_kibana_domain.arn}",
          "${aws_elasticsearch_domain.supersim_elastic_search_kibana_domain.arn}/*"
        ]
      },
      {
        Effect   = "Allow"
        Action   = [
          "es:ESHttpGet"
        ]
        Resource = [
          "${aws_elasticsearch_domain.supersim_elastic_search_kibana_domain.arn}",
          "${aws_elasticsearch_domain.supersim_elastic_search_kibana_domain.arn}/*"
        ]
      },
      {
        Effect   = "Allow"
        Action   = [
          "s3:AbortMultipartUpload",
          "s3:GetBucketLocation",
          "s3:GetObject",
          "s3:ListBucket",
          "s3:ListBucketMultipartUploads",
          "s3:PutObject"
        ]
        Resource = [
           "${aws_s3_bucket.supersim_failed_report_bucket.arn}",
           "${aws_s3_bucket.supersim_failed_report_bucket.arn}/*"
        ]
      },
      {
        Effect   = "Allow"
        Action   = [
          "kinesis:DescribeStream",
          "kinesis:GetShardIterator",
          "kinesis:GetRecords",
          "kinesis:ListShards"
        ]
        Resource = aws_kinesis_stream.supersim_connection_events_stream.arn
      },
      {
        Effect   = "Allow"
        Action   = [
          "ec2:DescribeVpcs",
          "ec2:DescribeVpcAttribute",
          "ec2:DescribeSubnets",
          "ec2:DescribeSecurityGroups",
          "ec2:DescribeNetworkInterfaces",
          "ec2:CreateNetworkInterface",
          "ec2:CreateNetworkInterfacePermission",
          "ec2:DeleteNetworkInterface"
        ]
        Resource = "*"
      }
    ]
  })
}


/*
 * Set up roles
 */

// Create a Role KORE will assume to access the Stream
resource "aws_iam_role" "supersim_twilio_access_role" {
  name                 = "supersim-twilio-access-role"
  assume_role_policy   = jsonencode({
    Version            = "2012-10-17"
    Statement          = [
      {
        Action         = "sts:AssumeRole"
        Effect         = "Allow"
        Principal      = {
          "AWS" = "arn:aws:iam::177261743968:root"
        }
        Condition      = {
          StringEquals = {
            "sts:ExternalId" = var.external_id
          }
        }
      }
    ]
  })
}

// Create a Role Firehose will assume to access ElasticSearch
resource "aws_iam_role" "supersim_firehose_access_role" {
  name               = "supersim-firehose-access-role"
  assume_role_policy = jsonencode({
    Version          = "2012-10-17"
    Statement        = [
      {
        Effect       = "Allow"
        Action       = "sts:AssumeRole"
        Principal    = {
          "Service" = "firehose.amazonaws.com"
        }
      }
    ]
  })
}


/*
 * Attach policies to roles
 */

// Attach the Stream write Policy to the KORE access Role
resource "aws_iam_role_policy_attachment" "supersim_attach_write_policy_to_twilio_access_role" {
  role       = aws_iam_role.supersim_twilio_access_role.name
  policy_arn = aws_iam_policy.supersim_kinesis_stream_record_write_policy.arn
}

// Attach the resource read/write/access Policy to the Firehose access Role
resource "aws_iam_role_policy_attachment" "supersim_attach_rw_policy_to_firehose_access_role" {
  role       = aws_iam_role.supersim_firehose_access_role.name
  policy_arn = aws_iam_policy.supersim_firehose_rw_access_policy.arn
}


/*
 * Set up AWS resources
 */

// Set up a Kinesis Stream to receive streamed events
// NOTE One shard is sufficient to the tutorial and testing
resource "aws_kinesis_stream" "supersim_connection_events_stream" {
  name        = "supersim-connection-events-stream"
  shard_count = 1
}

// Create our Elastic Search Domain
// This uses minimal server resources for the tutorial, but
// a real-world application would require greater resources
resource "aws_elasticsearch_domain" "supersim_elastic_search_kibana_domain" {
  domain_name           = "supersim-es-kibana-domain"
  elasticsearch_version = "7.10"

  cluster_config {
    instance_type  = "t2.small.elasticsearch"
    instance_count = 1
  }

  ebs_options {
    ebs_enabled = true
    volume_type = "standard"
    volume_size = 25
  }

  domain_endpoint_options {
      enforce_https = true
      tls_security_policy = "Policy-Min-TLS-1-2-2019-07"
  }
}

// Create an S3 Bucket
// This is used by Firehose to dump records it could not pass
// to ElasticSearch. In a real-world app, you might also choose
// to store all received records
data "aws_canonical_user_id" "current_user" {}

resource "aws_s3_bucket" "supersim_failed_report_bucket" {
    bucket        = "supersim-failed-report-bucket"
    grant {
      id          = data.aws_canonical_user_id.current_user.id
      type        = "CanonicalUser"
      permissions = ["FULL_CONTROL"]
  }
}

// Create a Kinesis Firehose to link the Kinesis Data Stream (input)
// to ElasticSearch (output)
resource "aws_kinesis_firehose_delivery_stream" "supersim_firehose_pipe" {
  name        = "supersim-firehose-pipe"
  destination = "elasticsearch"

  kinesis_source_configuration {
    kinesis_stream_arn = aws_kinesis_stream.supersim_connection_events_stream.arn
    role_arn           = aws_iam_role.supersim_firehose_access_role.arn
  }

  elasticsearch_configuration {
    domain_arn     = aws_elasticsearch_domain.supersim_elastic_search_kibana_domain.arn
    role_arn       = aws_iam_role.supersim_firehose_access_role.arn
    index_name     = "super-sim"

    processing_configuration {
      enabled = "false"
    }
  }

  s3_configuration {
    role_arn        = aws_iam_role.supersim_firehose_access_role.arn
    bucket_arn      = aws_s3_bucket.supersim_failed_report_bucket.arn
    buffer_interval = 60
    buffer_size     = 1
  }
}


/*
 * Outputs -- useful values printed at the end
 */
output "EXTERNAL_ID" {
  value       = var.external_id
  description = "The External ID you will use to create your KORE Event Streams Sink"
}

output "KIBANA_WEB_URL" {
  value       = aws_elasticsearch_domain.supersim_elastic_search_kibana_domain.kibana_endpoint
  description = "The URL you will use to access Kibana"
}

output "COMPUTER_IP_ADDRESS" {
  value       = var.your_computer_external_ip
}

output "YOUR_KINESIS_STREAM_ARN" {
  value       = aws_kinesis_stream.supersim_connection_events_stream.arn
}

output "YOUR_KINESIS_ROLE_ARN" {
  value       = aws_iam_role.supersim_twilio_access_role.arn
}
```

***

## 4. Configure your KORE Event Streams <a href="#id-4-configure-twilio-event-streams-1-create-a-sink" id="id-4-configure-twilio-event-streams-1-create-a-sink"></a>

### 1 — Stream KORE Events to your AWS Kinesis instance <a href="#id-4-configure-twilio-event-streams-1-create-a-sink" id="id-4-configure-twilio-event-streams-1-create-a-sink"></a>

KORE Event Streams currently support two Destination types: AWS Kinesis and webhooks. In this guide, you're going to configure Event Streams to send events to your AWS Kinesis.&#x20;

A quick guide on how to setup KORE Events to your AWS Kinesis is available through the [**AWS Kinesis Quick Start**](https://docs.korewireless.com/en-us/developers/get-started/event-streams/aws-kinesis-quick-start) guide. The pre-requisite to use this guide is that you must already have your AWS Kinesis `ARN`, `Role ARN`, `External ID` handy. Otherwise, you can use the [script](https://docs.korewireless.com/en-us/developers/get-started/event-streams/aws-kinesis-quick-start/script-to-create-a-kinesis-stream) - `create_kinesis_stream.sh` - to automate the creation for you.

***

### 2 — Validate your setup <a href="#id-4-configure-twilio-event-streams-1-create-a-sink" id="id-4-configure-twilio-event-streams-1-create-a-sink"></a>

AWS Kinesis Destination types need to be validated before events can be delivered to them, in contrast to Webhook Destination types. To validate a Destination, you need to tell the Destination that you want to test it. This automatically sends a test message to the Destination, which you'll then retrieve from the Destination itself and use to confirm that the Destination is operational. This validates your setup.

In one terminal tab or window, run the `validate_sink.sh` script:

```
./validate_sink.sh supersim-connection-events-stream
```

Next, send a **Test event** to your destination using the [Console](https://build.korewireless.com/event-stream/destination).

<figure><img src="/files/o5jUjR44Z7r4nl1fxPKj" alt=""><figcaption></figcaption></figure>

Switch back to yout terminal and you'll shortly see a block of JSON code. Look for the `data` key and note the value of its nested `test_id` key. You're done with the validation script, so hit **Ctrl-c** to quit from it.

Your Sink has been validated and is ready to receive Super SIM Connection Events.

***

{% hint style="danger" %}
We've included the Data Session Updated event because it will allow you to monitor your Super SIMs' data usage in Kibana, but please be aware that this event is emitted every six minutes for every Super SIM in your account so you can quickly use up your free event allowance. If this might be an issue for you, consider omitting the Data Session in your Streaming rule or you can tidy up using this [guide](https://docs.korewireless.com/en-us/supersim/get-started/get-started-with-super-sim-connection-events#id-8-tidy-up).
{% endhint %}

***

## 5. Monitor events in Kibana <a href="#id-7-monitor-events-in-kibana-1--explore-the-data" id="id-7-monitor-events-in-kibana-1--explore-the-data"></a>

### 1 — Explore the data <a href="#id-7-monitor-events-in-kibana-1--explore-the-data" id="id-7-monitor-events-in-kibana-1--explore-the-data"></a>

The URL you use to access Kibana was output at the end of [Step 3](#id-3-build-out-your-aws-resources). If it's not still visible in your terminal, navigate to the working directory, run `terraform show`, and scan the results for the `kibana_endpoint` key — its value will give you the URL you need.

If you know your way around Kibana, you can jump out of the tutorial at this point if you wish. The remainder focuses on using Kibana to explore and chart the incoming Connection Events data. You should, however, check out the [Super SIM Connection Events documentation](https://docs.korewireless.com/en-us/supersim/get-started/get-started-with-super-sim-connection-events), which describes the information contained within each event.

1. Staying with us? Good. Paste the Kibana URL into a browser and hit **Enter**.
2. Click on the hamburger menu at the top left and select **Stack Management** under **Management**.
3. Click on **Create index pattern**:

   <figure><img src="https://www.twilio.com/_next/image?url=https%3A%2F%2Fdocs-assets.prod.twilio.com%2F8d86be1acb3f03a3c7e1281e9dba435875995f6b3dd394709f2ab9ede98c86d7.png&#x26;w=1920&#x26;q=75&#x26;dpl=dpl_Cg48T7Ewf3mxUuHgUByrK9DRisQu" alt=""><figcaption></figcaption></figure>
4. Under **Index pattern name**, enter `super-sim*` and then click **Next Step**.
5. Under **Time field**, select **data.timestamp**, and then click **Create Index Pattern**. What you've done is establish the data fields Kibana can use and the particular field that it uses to track the flow and order of incoming events. Let's see what we can do with these events.
6. Click on the hamburger menu at the top left and select **Discover** under **Kibana**. This will show you the most recent records received. How recent is set by the date value at the top right of the screen; you can click this to change the time period in focus:

   <figure><img src="https://www.twilio.com/_next/image?url=https%3A%2F%2Fdocs-assets.prod.twilio.com%2F36fa83713b975e36fa70b83b12c55e26ee0ff44967c6b6db5d371dcaecb95c18.jpg&#x26;w=3840&#x26;q=75&#x26;dpl=dpl_Cg48T7Ewf3mxUuHgUByrK9DRisQu" alt=""><figcaption></figcaption></figure>
7. You can click **Refresh** to update the list of events, but it's better to click the calendar icon next to the date range, add a period under **Refresh every**, and then hit **Start**. This will refresh the data automatically:

   <figure><img src="https://www.twilio.com/_next/image?url=https%3A%2F%2Fdocs-assets.prod.twilio.com%2F12148bd0f0f7cd4f38f373b466920e2b9d4ae1ef43829aef382ee74055f75208.jpg&#x26;w=3840&#x26;q=75&#x26;dpl=dpl_Cg48T7Ewf3mxUuHgUByrK9DRisQu" alt=""><figcaption></figcaption></figure>
8. At the left, under **Available fields**, is a selection of all the data types available in each Super SIM connection event. Scroll down a little and locate **data.sim\_iccid**. Move your mouse over it to reveal a **+** symbol, which you should click.
9. The events are now segmented by each of your Super SIMs' ICCIDs. Look back at the left-hand list of data fields and add **data.network.friendly\_name** to the table (click on the **+** that appears alongside it). You can now see the networks your SIMs have connected through:

   <figure><img src="https://www.twilio.com/_next/image?url=https%3A%2F%2Fdocs-assets.prod.twilio.com%2Faebca831450e611e1bdbd604eb8e2b9949d0b811ead4b4f2639872e5fa7c1b07.jpg&#x26;w=3840&#x26;q=75&#x26;dpl=dpl_Cg48T7Ewf3mxUuHgUByrK9DRisQu" alt=""><figcaption></figcaption></figure>
10. Go to **Available fields** and add **data.rat\_type** to the table. Now you can see what cellular technologies your devices used to connect:

    <figure><img src="https://www.twilio.com/_next/image?url=https%3A%2F%2Fdocs-assets.prod.twilio.com%2F3d90de3cbcea7e93aedca6714408e712acf1a790c76e78e19af2b8938fbc8f3f.jpg&#x26;w=3840&#x26;q=75&#x26;dpl=dpl_Cg48T7Ewf3mxUuHgUByrK9DRisQu" alt=""><figcaption></figcaption></figure>
11. Pick a Super SIM and move your mouse to one of its rows. You'll see **+** and **-** icons appear at the right of the **data.sim\_iccid** column. Click the **+** and Kibana will show only events experienced by that SIM:

    <figure><img src="https://www.twilio.com/_next/image?url=https%3A%2F%2Fdocs-assets.prod.twilio.com%2Fe6999cb8ab45b2486e19d104487cca2e8941361ff8bd06e488a8ab36c98e5868.jpg&#x26;w=3840&#x26;q=75&#x26;dpl=dpl_Cg48T7Ewf3mxUuHgUByrK9DRisQu" alt=""><figcaption></figcaption></figure>
12. Filters like the one you just set up are listed above the chart; click on any filter's **X** symbol to clear it. You can do the same with column headings to remove them from the table. The **<<** and **>>** symbols you'll see when you move your mouse over a column heading allow you to reorder the columns. If you like, click **Save** — it's in the menu at the top right — and save your search parameters for use again.

***

### 2 — Looking for patterns <a href="#id-8-monitor-events-in-kibana-2--looking-for-patterns" id="id-8-monitor-events-in-kibana-2--looking-for-patterns"></a>

1. Click on the hamburger menu at the top left and select **Visualize** under **Kibana**.
2. Click **Create visualization**.
3. In the **New Visualization** dialog, locate **Vertical Bar** (it's toward the bottom of the list) and select it.
4. Under **New Line / Choose a source**, click **super-sim\***.
5. You're going to visualize how much data each of your Super SIMs have downloaded. This will be the Y axis value; you'll list the SIMs on the X axis. First, click on **Y-axis Count** under **Metrics**. Then, under **Aggregation**, click **Count**, scroll down through the list of options and click **Sum**.
6. Click on **Select a Field**, start typing `down`, and select **data.data\_download** when it's suggested:

   <figure><img src="https://www.twilio.com/_next/image?url=https%3A%2F%2Fdocs-assets.prod.twilio.com%2Ffa017846d4c281c266a34244941372fc7a0e051b5c93bd778a6b8a1594baacf6.jpg&#x26;w=3840&#x26;q=75&#x26;dpl=dpl_Cg48T7Ewf3mxUuHgUByrK9DRisQu" alt=""><figcaption></figcaption></figure>
7. Click **Add** under **Buckets**. Click on **X-axis** in the pop-up that appears, and then, under **Aggregation**, click on **Terms**.
8. Click on the **Field** text field and start typing `icc` — Kibana will suggest **data.sim\_iccid.keyword**, so select it:

   <figure><img src="https://www.twilio.com/_next/image?url=https%3A%2F%2Fdocs-assets.prod.twilio.com%2F7977b43deba73ef98f7ec4c8b07becc0d1d00f5e1d898afdb3ddb654a6c07d3f.jpg&#x26;w=3840&#x26;q=75&#x26;dpl=dpl_Cg48T7Ewf3mxUuHgUByrK9DRisQu" alt=""><figcaption></figcaption></figure>
9. Click **Update** at the bottom right of the screen. You'll now see a chart showing how much data in bytes each Super SIM has downloaded:

   <figure><img src="https://www.twilio.com/_next/image?url=https%3A%2F%2Fdocs-assets.prod.twilio.com%2F6027e61afe61b3ce012adfa03c12d89041ea4001593ec3939d2ce265c9a3000e.jpg&#x26;w=3840&#x26;q=75&#x26;dpl=dpl_Cg48T7Ewf3mxUuHgUByrK9DRisQu" alt=""><figcaption></figcaption></figure>
10. Depending on the number of Super SIMs you have, you might need to adjust the **Size** setting under **Buckets > X-axis**, and the date range you're using (this works just the way you saw in [Step 5.1](#id-7-monitor-events-in-kibana-1--explore-the-data-1)).
11. Let's include upload data volumes too. Click **Add** under **Metrics** and select **Y-axis**. Under **Aggregation**, click **Sum**.
12. Under **Field**, click **Select a field**, start typing `upload` and select **data.data\_upload** when it's suggested:

    <figure><img src="https://www.twilio.com/_next/image?url=https%3A%2F%2Fdocs-assets.prod.twilio.com%2F714c3ffe0f6060dab579b2f2aade707951d7eff740987a2d0d7d18035020911d.jpg&#x26;w=3840&#x26;q=75&#x26;dpl=dpl_Cg48T7Ewf3mxUuHgUByrK9DRisQu" alt=""><figcaption></figcaption></figure>
13. Click **Update**. You'll see something like this:

    <figure><img src="https://www.twilio.com/_next/image?url=https%3A%2F%2Fdocs-assets.prod.twilio.com%2F914b1bfbd08828b2f51da82db1641bb130812bcd30168e3e1710eac8d9cac8db.jpg&#x26;w=3840&#x26;q=75&#x26;dpl=dpl_Cg48T7Ewf3mxUuHgUByrK9DRisQu" alt=""><figcaption></figcaption></figure>
14. Again, you might need to adjust the date range to see meaningful data.

***

### 3 — Build a dashboard <a href="#id-9-monitor-events-in-kibana-3--build-a-dashboard" id="id-9-monitor-events-in-kibana-3--build-a-dashboard"></a>

Setting up visualizations for occasional use is all very well, but what you really want to do is add them to a dashboard that you can check regularly. Let's do that now with the visualization you just made.

1. Click on \*\*Save \*\*at the top right. Give the visualization the name `Super SIM Data Usage` and click the **Save** button.
2. Click on the hamburger menu at the top left and select **Dashboard** under **Kibana**.
3. Click **Create new dashboard**.
4. Kibana invites you to create a new dashboard widget — or "object" — but let's use the visualization you just created. Click **Add** in the menu at the top right, and under **Add panels** select **Super SIM Data Usage** — the visualization you just made.
5. Click the **X** in the top right of the panel to close it:

   1.Click **Save** in the top right menu to save the dashboard so it's accessible next time you visit.

   <figure><img src="https://www.twilio.com/_next/image?url=https%3A%2F%2Fdocs-assets.prod.twilio.com%2Fe1281bbc2d8d0e20ce7f1b792e20f76952b0b7e2fcda4f2d65f3a3cef2f67aed.jpg&#x26;w=3840&#x26;q=75&#x26;dpl=dpl_Cg48T7Ewf3mxUuHgUByrK9DRisQu" alt=""><figcaption></figcaption></figure>

***

## Next steps <a href="#next-steps" id="next-steps"></a>

Well done — you've come a long way. You've used Terraform to put in place your AWS infrastructure and then set up KORE Event Streams to first create a connection to your infrastructure, called a Sink. You've subscribed to a series of Super SIM Connection Events which have then begun to flow from KORE to your AWS setup as your IoT devices' Super SIMs connect to networks and transfer data.

You've used Kibana to explore the events data that has been received, from all your SIMs right down to single SIM, and you've learned how to create graphs to help you spot trends in your devices' data usage. You've added that graph to a dashboard you can use regularly to monitor the behavior of the devices in your fleet.

We've only just scratched the surface of what Kibana can do, but having real, meaningful data to work with — all those Super SIM Connection Events — will make it much easier to explore the rest to see how it can help your business.

Try adding some more visualizations to your dashboard that will help you understand which radio technologies your devices are using to connect.

Imagine you're fielding a support query from a customer. Drill down to examine how a specific Super SIM or small group of SIMs behaved around a certain point in time.

Want to know more? Kibana's developer, Elastic, has [a bunch of tutorials](https://www.elastic.co/guide/en/kibana/current/index.html) which will walk you through common scenarios and help you grow your knowledge.

We can't wait to see what business intelligence tools you build with Super SIM Connection Events!


# How to Use OpenAPI Clients with Super SIM

Learn how to use KORE's OpenAPI specification file to generate an API client that you can use to make calls to the Super SIM APIs.

In this guide, we're going to build a python script that API clients built from our OpenAPI specification file. The tool used below to generate the client, openapi-generator, supports many different programming languages, not just python.&#x20;

{% hint style="info" %}
If you're not already familiar with how to use OpenAPI specification files to generate clients or how to install and use them, LLMs like ChatGPT can be very helpful with navigating the unique aspects and build tools for your programming language.
{% endhint %}

## Create Your KORE API Client Resource

To make requests to the KORE REST APIs, you need to first create a Client resource in the [KORE Developer Portal](https://build.korewireless.com/dashboard). Note this is different than the "clients" that we'll be generating from the OpenAPI specification file and will be using to make requests to the APIs. You get your necessary credentials by creating this Client resource.

KORE's API's follow OAuth2 for authenticating to the APIs. You'll create a Client that includes Super SIM within its scoped products and then use the ID and secret of the Client to generate an access token that you'll include in your request headers to authenticate to the API endpoints.

Learn more about how to generate this Client to use with Super SIM [here](/twilio-iot-acquisition/migration-guides/migrating-to-kores-apis). You can jump to "Get Started!" section [here](/twilio-iot-acquisition/migration-guides/migrating-to-kores-apis#get-started) for the steps to create your Client. Once you have your **client ID** and **secret** return here.

{% hint style="info" %}
Your client secret will only be shown to you once so be sure to save it somewhere. Don't worry though, if you lose it you can always generate a new Client or refresh your secret.
{% endhint %}

## Generating Your Local Client

There are many options you can choose from for to generate API clients from OpenAPI specification files that may work better for your development environment or that use syntax and patterns that you may find easier to understand. How you install and use them and then use the generated clients will vary significantly from tool to tool. For this guide we'll be using the `openapi-generator` CLI tool.&#x20;

First, install the openapi-generator CLI tool.

```
brew install openapi-generator
```

Next, download a copy the [Super SIM OpenAPI](https://github.com/korewireless/kore-openapi/blob/main/SuperSIM/json/kore-supersim-v1.json) specification file from Github and save it in your project directory.

Generate a python client using the OpenAPI specification file and the generator tool.

```bash
openapi-generator generate -i ./kore-supersim-v1.json -g python -o ./clients/kore_supersim_client --package-name supersim_client
```

{% hint style="info" %}
For additional approaches to install and generate clients using the `openapi-generator` tool, such as with Windows, please refer to the [documentation](https://github.com/OpenAPITools/openapi-generator?tab=readme-ov-file#1---installation).
{% endhint %}

{% hint style="warning" %}
From this point forward, all the code and commands will be specific to Python3. Except for the final section, where we provide a comprehensive example of using multiple endpoints to generate a CSV file, we've minimized the use of Python-specific patterns or tricks. This approach makes it easier for those less familiar with Python to follow along.

We understand that not everyone is familiar with Python. If you find any sections of this guide or code difficult to follow, please use the "Was this helpful?" tool on this page and leave a comment. Your feedback helps us improve, and we'll do our best to add more clarifications or comments to the code to explain what is being done.
{% endhint %}

Create a python virtual environment to which you'll install your packages including your generated client.

```
python3 -m venv ./env
```

Activate the virtual environment.

```
source env/bin/activate
```

Install the package locally in your virtual environment.

```
pip3 install ./clients/kore_supersim_client
```

With that done, let's generate a file called `client-test.py` and make sure that we can successfully import the installed client and run the code without errors.

{% code overflow="wrap" lineNumbers="true" %}

```python
from supersim_client import ApiClient, Configuration

def main():
    print("hello world")

if __name__ == "__main__":
    main()
```

{% endcode %}

Run your code.

```
python3 client-test.py
```

If you see "hello world" successfully logged with no errors, then you should be all set to begin making API requests with your generated and installed client. We'll be doing all coding for this guide in the `client-test.py` file.

## Install Other Dependencies

```
pip3 install requests
```

## Authenticating to the KORE REST API

To access the KORE REST APIs, we'll need an access token. We'll use the client ID and secret from the Client resource you created earlier to generate a temporary token used to authenticate your requests.

We'll add a function to our code to get a token with our secrets and use it to print out the some useful properties from the access token response. Replace `<YOUR_CLIENT_ID>`  and `<YOUR_CLIENT_SECRET>`  with your unique credentials.&#x20;

{% hint style="danger" %}
Treat your client ID, secret, and access tokens like they are passwords. Do not share them with anyone and never commit them to any public code repositories.&#x20;
{% endhint %}

{% code overflow="wrap" lineNumbers="true" %}

```python
from supersim_client import ApiClient, Configuration
import requests

TOKEN_URL = "https://api.korewireless.com/api-services/v1/auth/token"
CLIENT_ID='<YOUR_CLIENT_ID>'
CLIENT_SECRET='<YOUR_CLIENT_SECRET>'

def get_access_token(client_id, client_secret, token_url):
	response = requests.post(token_url, data={
		'grant_type': 'client_credentials',
		'client_id': client_id,
		'client_secret': client_secret
	})
	token_data = response.json()
	return token_data

def main():
	token_data = get_access_token(CLIENT_ID, CLIENT_SECRET, TOKEN_URL)
	print(token_data['access_token'])
	print(token_data['expires_in'])

if __name__ == "__main__":
	main()
```

{% endcode %}

{% hint style="warning" %}
Access tokens are **temporary**. You can see how many **seconds** the token is valid for by checking the `expires_in` property the response. If you use an expired token, your requests will be rejected. When you get a new token, you'll need to regenerate the clients with a new configuration that has the updated token. We recommend creating a class that manages refreshing the token and regenerating the clients that wraps around the generated client resources in a production setting where your code is deployed and running on servers versus writing simple scripts like we are here.
{% endhint %}

### Generate API Client Instances for Each Endpoint

Now, we'll use our access token to begin generating instances of our API clients, one for each endpoint we'll be making requests to. Note that there is a module to be imported for each endpoint that you'll use to generate a client for that endpoint.

```python
from supersim_client import ApiClient, Configuration, SupersimV1SimApi, SupersimV1FleetApi
import requests

TOKEN_URL = "https://api.korewireless.com/api-services/v1/auth/token"
CLIENT_ID='<YOUR_CLIENT_ID>'
CLIENT_SECRET='<YOUR_CLIENT_SECRET>'

def get_access_token(client_id, client_secret, token_url):
	response = requests.post(token_url, data={
		'grant_type': 'client_credentials',
		'client_id': client_id,
		'client_secret': client_secret
	})
	token_data = response.json()
	return token_data

def main():
	token_data = get_access_token(CLIENT_ID, CLIENT_SECRET, TOKEN_URL)
	access_token = token_data['access_token']

	config = Configuration(
		access_token=access_token # Set your OAuth2 token here
	)
	
	# Generate base API client passed to each endpoint client
	api_client = ApiClient(config)

	# Generate clients for each endpoint
	sim_api_client = SupersimV1SimApi(api_client)
	fleet_api_client = SupersimV1FleetApi(api_client)

if __name__ == "__main__":
	main()
```

You can use the clients generated for each endpoint to list out your Sims and Fleet resources.

{% code overflow="wrap" lineNumbers="true" %}

```python
from supersim_client import ApiClient, Configuration, SupersimV1SimApi, SupersimV1FleetApi
import requests

TOKEN_URL = "https://api.korewireless.com/api-services/v1/auth/token"
CLIENT_ID='<YOUR_CLIENT_ID>'
CLIENT_SECRET='<YOUR_CLIENT_SECRET>'

def get_access_token(client_id, client_secret, token_url):
	response = requests.post(token_url, data={
		'grant_type': 'client_credentials',
		'client_id': client_id,
		'client_secret': client_secret
	})
	token_data = response.json()
	return token_data

def main():
	token_data = get_access_token(CLIENT_ID, CLIENT_SECRET, TOKEN_URL)
	access_token = token_data['access_token']

	config = Configuration(
		access_token=access_token # Set your OAuth2 token here
	)

	# Generate base API client passed to each endpoint client
	api_client = ApiClient(config)

	# Generate clients for each endpoint
	sim_api_client = SupersimV1SimApi(api_client)
	fleet_api_client = SupersimV1FleetApi(api_client)

	sims_response = sim_api_client.list_sim()
	fleets_response = fleet_api_client.list_fleet()

	print(sims_response.sims)
	print(fleets_response.fleets)

if __name__ == "__main__":
	main()
```

{% endcode %}

Go ahead and run your code.

Assuming you already have SIMs and Fleets created on your account, you should see arrays of these resources printed out when you run your code. If you have more than the default page size (50) of either resource though, these results are incomplete. That's because the results are just **one page**. You can increase the `page_size` up to 1,000 if you have less than 1,000 resources, but to properly scale this out, we'll need to use the pagination information in our responses to fetch all the pages of results we need.

Here's an example of how you could write a function to fetch all pages of Sim resources:

{% code lineNumbers="true" %}

```python
from clients.kore_supersim_client.build.lib.supersim_client.models.sim_enum_status import SimEnumStatus
from urllib.parse import urlparse, parse_qs

def fetch_all_sims(
		sim_api_client: SupersimV1SimApi,
		status: SimEnumStatus=None,
		fleet: str=None
):
	accumulated_sims = []
	next_page_url = None

	first_page_response = sim_api_client.list_sim(status=status,fleet=fleet)
	accumulated_sims += first_page_response.sims

	if first_page_response.meta.next_page_url is not None:
		next_page_url = first_page_response.meta.next_page_url

	while next_page_url is not None:
		# Parse the next page URL string so we can pass in the individual properties
		# when fetching the next page.
		parsed_next_page_url = urlparse(next_page_url)
		query_params = parse_qs(parsed_next_page_url.query)
		query_params = {key: value[0] for key, value in query_params.items()}

		next_page_response = sim_api_client.list_sim(
			status=status,
			fleet=fleet,
			page=int(query_params['Page']),
			page_size=int(query_params['PageSize']),
			page_token=query_params['PageToken']
		)
		next_page_sims = next_page_response.sims
		accumulated_sims += next_page_sims

		# Reassign the variable to continue or break the loop.
		next_page_url = next_page_response.meta.next_page_url

	return accumulated_sims
```

{% endcode %}

{% hint style="info" %}
Note that in the example above, the `status` variable is using a type also imported from our generated code. Finding and importing these types can be much easier if you use an IDE such as PyCharm in our case here. The generated client resource will be expecting specific types for its arguments.&#x20;
{% endhint %}

We can now use this function in our `main()`call to get all of our Sims if we needed to iterate over each one to pull data usage data for each or build CSV export.

{% code overflow="wrap" lineNumbers="true" %}

```python
def main():
	token_data = get_access_token(CLIENT_ID, CLIENT_SECRET, TOKEN_URL)
	access_token = token_data['access_token']

	config = Configuration(
		access_token=access_token # Set your OAuth2 token here
	)

	# Generate base API client passed to each endpoint client
	api_client = ApiClient(config)

	# Generate clients for each endpoint
	sim_api_client = SupersimV1SimApi(api_client)
	fleet_api_client = SupersimV1FleetApi(api_client)

	all_sims = fetch_all_sims(sim_api_client)
	print(all_sims)
	print(len(all_sims))
```

{% endcode %}

## Bringing It All Together

Now that we can fetch all of our Sims, we can build upon our script here to build a practical application that you can use easily pull data about all of your SIMs and data usage for the last 30 days.

First, we'll create a similar function to like we did for our Sim resources to fetch all of our Fleet resources.

Next, we're going to generate another endpoint client for the UsageRecords endpoint.&#x20;

Lastly, we'll iterate over each SIM and pull the SIM's usage and build a CSV report.

{% code lineNumbers="true" %}

```python
import requests
from urllib.parse import urlparse, parse_qs
import csv

from supersim_client import ApiClient, Configuration, SupersimV1SimApi, SupersimV1FleetApi
from clients.kore_supersim_client.build.lib.supersim_client.models.sim_enum_status import SimEnumStatus
from clients.kore_supersim_client.build.lib.supersim_client.models.supersim_v1_fleet import SupersimV1Fleet
from clients.kore_supersim_client.build.lib.supersim_client.models.supersim_v1_sim import SupersimV1Sim
from clients.kore_supersim_client.supersim_client.api.supersim_v1_usage_record_api import SupersimV1UsageRecordApi
from clients.kore_supersim_client.supersim_client.models.usage_record_enum_granularity import UsageRecordEnumGranularity

TOKEN_URL = "https://api.korewireless.com/api-services/v1/auth/token"
CLIENT_ID='<YOUR_CLIENT_ID>'
CLIENT_SECRET='<YOUR_CLIENT_SECRET>'

def get_access_token(client_id, client_secret, token_url):
	response = requests.post(token_url, data={
		'grant_type': 'client_credentials',
		'client_id': client_id,
		'client_secret': client_secret
	})
	token_data = response.json()
	return token_data

def fetch_all_sims(
		sim_api_client: SupersimV1SimApi,
		status: SimEnumStatus=None,
		fleet: str=None
):
	accumulated_sims = []
	next_page_url = None

	first_page_response = sim_api_client.list_sim(status=status,fleet=fleet)
	accumulated_sims += first_page_response.sims

	if first_page_response.meta.next_page_url is not None:
		next_page_url = first_page_response.meta.next_page_url

	while next_page_url is not None:
		# Parse the next page URL string so we can pass in the individual properties
		# when fetching the next page.
		parsed_next_page_url = urlparse(next_page_url)
		query_params = parse_qs(parsed_next_page_url.query)
		query_params = {key: value[0] for key, value in query_params.items()}

		next_page_response = sim_api_client.list_sim(
			status=status,
			fleet=fleet,
			page=int(query_params['Page']),
			page_size=int(query_params['PageSize']),
			page_token=query_params['PageToken']
		)
		next_page_sims = next_page_response.sims
		accumulated_sims += next_page_sims

		# Reassign the variable to continue or break the loop.
		next_page_url = next_page_response.meta.next_page_url

	return accumulated_sims

def fetch_all_fleets(
		fleet_api_client: SupersimV1FleetApi
):
	accumulated_fleets = []
	next_page_url = None

	first_page_response = fleet_api_client.list_fleet()
	accumulated_fleets += first_page_response.fleets

	if first_page_response.meta.next_page_url is not None:
		next_page_url = first_page_response.meta.next_page_url

	while next_page_url is not None:
		# Parse the next page URL string so we can pass in the individual properties
		# when fetching the next page.
		parsed_next_page_url = urlparse(next_page_url)
		query_params = parse_qs(parsed_next_page_url.query)
		query_params = {key: value[0] for key, value in query_params.items()}

		next_page_response = fleet_api_client.list_fleet(
			page=int(query_params['Page']),
			page_size=int(query_params['PageSize']),
			page_token=query_params['PageToken']
		)
		next_page_fleets = next_page_response.fleets
		accumulated_fleets += next_page_fleets

		# Reassign the variable to continue or break the loop.
		next_page_url = next_page_response.meta.next_page_url

	return accumulated_fleets

def main():
	token_data = get_access_token(CLIENT_ID, CLIENT_SECRET, TOKEN_URL)
	access_token = token_data['access_token']

	config = Configuration(
		access_token=access_token # Set your OAuth2 token here
	)

	# Generate base API client passed to each endpoint client
	api_client = ApiClient(config)

	# Generate clients for each endpoint
	sim_api_client = SupersimV1SimApi(api_client)
	fleet_api_client = SupersimV1FleetApi(api_client)
	usage_records_client = SupersimV1UsageRecordApi(api_client)

	all_sims: list[SupersimV1Sim] = fetch_all_sims(sim_api_client)
	all_fleets: list[SupersimV1Fleet] = fetch_all_fleets(fleet_api_client)

	# Build dictionary of Fleets for looking it up later.
	fleets_dict = {fleet.sid: fleet for fleet in all_fleets}

	output_file = "sim_usage_report.csv"
	with open(output_file, mode="w", newline="") as csvfile:
		csvwriter = csv.writer(csvfile)
		csvwriter.writerow(["SIM SID","ICCID", "SIM Unique Name", "SIM Status", "Fleet SID", "Fleet Unique Name", "Fleet Data Limit (MBs)", "Data Used (MBs)"])

		for sim in all_sims:
			fleet_sid = sim.fleet_sid
			fleet = fleets_dict.get(fleet_sid)
			fleet_unique_name = fleet.unique_name if fleet else "Unknown"
			fleet_data_limit = fleet.data_limit if fleet else "Unknown"

			sim_usage_records = usage_records_client.list_usage_record(
				sim=sim.sid,
				granularity=UsageRecordEnumGranularity("all")
			)

			data_used = sim_usage_records.usage_records[0].data_total
			data_used_mb = data_used / (1000 * 1000)

			csvwriter.writerow([
				sim.sid,
				sim.iccid,
				sim.unique_name,
				sim.status,
				fleet_sid,
				fleet_unique_name,
				fleet_data_limit,
				data_used_mb
			])

if __name__ == "__main__":
	main()
```

{% endcode %}

If you run your code, you should see the generated CSV in your project directory with information about each SIM and its usage.


# Into Production


# Prepare for Production Deployments with Super SIM

Key issues you need to address on your journey to volume production with Twilio Super SIM

You've built and tested your prototype, you've fine-tuned it into a product that can be manufactured in volume and shipped out to delight end-users. Now you're getting ready to deploy it to the first of your chosen target markets.

Or perhaps you're still in the planning stage but are beginning to consider the hardware and connectivity choices you will have to make when you reach the later phases of your IoT project.

Whatever stage you've reached in the journey from prototype to product, you will certainly need to consider how to work with Super SIM at scale. So far you've likely worked with one or two individual SIMs, each one manually managed in the [Super SIM Console](https://supersim.korewireless.com/supersim/sims) for use in evaluation and prototype hardware. Though you will use the same processes to manage a fleet of Super SIMs — either using the Super [SIM API](/api/products/supersim) or [Console Bulk Actions](/supersim/how-to/how-to-use-console-bulk-actions-to-update-multiple-super-sims) — you will find that real-world locations pose some connectivity challenges that you may not have faced in the lab and for which you should now prepare.

To help you do so, this guide will introduce you to the obstacles that taking your IoT project to the next level will place before you, and provide you with strategies to overcome them and set you up for success. It's much better to face these issues now rather than when you have already released your product and devices are being used in the field.

You might even like to view this guide as a checklist of key points you need to address on your journey to volume production.

## 1. Have you selected the right cellular module?

You may already have selected a modem that you know works well with Super SIM through your own evaluation and testing. If not, we're here to help. Use our [Cellular Module Knowledgebase](/supersim/cellular-module-knowledgebase) not only to choose your project's connectivity hardware, but as a guide to configuring your chosen module for successful data connectivity.

Each of the modules in the Knowledgebase has been tested with Super SIM and are known from the experience of customers to support [Super SIM's IMSI-switching technology](/supersim/supersim-multi-imsi-applet): they provide the `REFRESH` proactive command, and either the `STATUS` proactive command, Location Status Event (LSE) or Location Information (LOCI) file updates that are required to allow Super SIM to access the widest range of networks in a given location.

{% hint style="warning" %}
Modules which support only some or none of the proactive commands listed above will not be able to access as many networks as modules that support all of them. Some networks will not be accessible to them at all because they require IMSI switching to be available to the device.
{% endhint %}

## 2. Will you deploy to a 'permanent roaming' country?

SIMs that spend a significant amount of time attached to visited cellular networks rather than their home networks are said to be permanently roaming. This applies to any SIM, from any provider. To be deemed roaming permanently, the SIM must spend 1-3 months attached to the visited network. The exact duration depends on the visited carrier and local regulation.

Most countries don't prevent permanent roaming, but a small number of nations, listed below, restrict or even forbid it. They do so typically to prevent businesses and individuals in those countries from sourcing connectivity from non-local providers. However, such restrictions also impact products like Super SIM.

{% hint style="warning" %}
Super SIMs are always roaming. If you intend to use a Super SIM-connected device in a country for more than 30 days, especially those listed below, you should consider the risks of being blocked from a network due to permanent roaming restrictions.
{% endhint %}

Countries with permanently roaming regulations include, but are not limited to:

* China
* Brazil
* India
* Russia
* Saudi Arabia
* Singapore
* Turkey
* United Arab Emirates

In these countries, SIMs can roam initially, but if they continue to do so for between one and three months, depending on the territory, they may be blocked. These restrictions are not specific to Super SIM, **all non-local connectivity providers are subject to the same rules**.

The local networks typically determine if a SIM is permanently roaming by checking the IMSI. Super SIMs hold [multiple IMSIs](/supersim/supersim-multi-imsi-applet) and if the IMSI normally used in a country is blocked from accessing a network due to permanent roaming restrictions, you may be able to get reconnected, at least temporarily, on one of the backup IMSIs. If you find yourself blocked by a network, you may still be able to connect to other networks enabled in your [Network Access Profile](/supersim/how-to/understanding-network-access-profiles) (NAP) if coverage is available.

If you are looking to use Super SIM in one of the above countries with permanent roaming restrictions, we encourage you to discuss your plans with [one of our IoT Sales Specialists](https://www.korewireless.com/iot/help).

## 3. Have you set the correct APN?

The default Super SIM APN is `super`.

Support for distributed Internet breakouts are now available to all customers. Using a distributed breakout is key to achieving low latency. We offer a breakout in Frankfurt for Super SIM customers in Europe and Africa, and a breakout in Australia for Super SIM customers in Asia Pacific. More locations will follow.

The APN you use determines your breakout point. The default APN, `super`, causes traffic to break out to the Internet from the KORE Mobile Core in Ashburn, Virginia in the US. To make use of the Frankfurt breakout, set your device's APN to `de1.super`. To make use of the Australia breakout, set your device's APN to `au1.super`. Note that `au1.super` and its Internet Breakout Location are supported by a limited number of IMSI sponsors.

You should use `super` in all other circumstances.

{% hint style="danger" %}
You may be tempted to code your application to sample the SIM's current IMSI and use its Public Land Mobile Network (PLMN) ID prefix to create and set an alternative APN. We **do not** recommend this approach, which is not only unnecessary but also risks loss of connectivity. Super SIM leverages multiple IMSIs to upgrade SIMs or for failover and they may be changed over-the-air. The current IMSI being used may change in the future. The generated APN may fail to resolve. In this case, the device won't be able to communicate with the Twilio Mobile Core's Packet-data Network Gateway (PGW) and so won't gain access to the public Internet.

Instead, set your modem to use `super` so that the full APN remains correct no matter what country in which it is trying to connect, or what IMSI the SIM applies. This includes not only the IMSIs that are currently available to the SIM, but others that may be added in future via over-the-air (OTA) updates.
{% endhint %}

## 4. Does your device's OS set the APN for you?

Not all Super SIM-enabled products are custom-built devices. Some make use of new off-the-shelf hardware or repurpose older consumer devices — a great way to extend the life of unwanted electronics and to reduce e-waste.

However, mobile operating systems may alter the APN you have applied. They do so to make life easier for consumers, but this also means that you will need to adopt a strategy to deal with APN changes and, in extreme cases, being prevented from setting the APN at all.

Most Android devices let you enter `super` in the **Cellular networks > Access point names** section of the Settings app, or similar depending on the version of Android in use or the degree of vendor modification.

However, some versions of Android require you to provide a Mobile Country Code (MCC) and Mobile Network Code (MNC) for an APN. This is to help match the APN to the IMSI being used by the device. You should make sure you [enter this information](/supersim/how-to/apn-configuration#adding-an-apn-with-mcc-and-mnc-values). Super SIM can switch IMSI, of course, so you may need to add MCC, MCN, SPN, and APN combinations to your device, one for each of the four IMSIs that Super SIM currently makes available.

{% hint style="info" %}
You can find details of the combinations in How to Set a Device's APN for Super SIM.&#x20;
{% endhint %}


# Super SIM Datasheet

## Specifications

### SIM Hardware

|                                    | Super SIM                                                                | Industrial                                                                               | eSIM removable                                                             | eSIM MFF2                                                                  |
| ---------------------------------- | ------------------------------------------------------------------------ | ---------------------------------------------------------------------------------------- | -------------------------------------------------------------------------- | -------------------------------------------------------------------------- |
| SIM type                           | UICC - Consumer                                                          | UICC - Industrial grade                                                                  | Consumer eSIM (SGP.22) - Consumer grade                                    | Consumer eSIM (SGP.22) - Industrial grade                                  |
| Available form factors             | Triple                                                                   | 2FF / 3FF / MFF2 / MFF-XS                                                                | Triple                                                                     | MFF2 / MFF-X                                                               |
| Data retension                     | 10 years                                                                 | 15 years                                                                                 | 10 year                                                                    | 15 years                                                                   |
| Endurance cycles (ETSI TS 102 221) | >20 million with OS Wear Leveling                                        | >20 million with OS Wear Leveling                                                        | >20 million with OS Wear Leveling                                          | >20 million with OS Wear Leveling                                          |
| Voltage range                      | <p>3V (class B) and 1.8V (class C) </p><p>External clock: 1 to 5 MHz</p> | <p>5V (class A), 3V (class B), and 1.8V (class C) </p><p>External clock: 1 to 10 MHz</p> | <p>3V (class B), and 1.8V (class C) </p><p>External clock: 1 to 10 MHz</p> | <p>3V (class B), and 1.8V (class C) </p><p>External clock: 1 to 10 MHz</p> |
| Temperature range (TX)             | -25°C to +85°C                                                           | -40°C to +105°C                                                                          | -40°C to +85°                                                              | -40°C to +105°C                                                            |
| Humidity (HX)                      | -                                                                        | 85°C / 85%Hr 1000h with bias                                                             | -                                                                          | 85°C / 85%Hr 1000h with bias                                               |
| Corrosion (CX)                     | -                                                                        | Salt atmosphere at 35°C, 96h                                                             | -                                                                          | Salt atmosphere at 35°C, 96h                                               |
| Low power support                  | No                                                                       | Yes (UICC suspend)                                                                       | Yes (UICC suspend)                                                         | Yes (UICC suspend)                                                         |

### **ISO standards**

* **ISO 10373-1**: Provides test methods for cards.
* **ISO 7810**: Establishes the physical characteristics of identification cards.
* **ISO 7816**: Specifies the characteristics of cards with contacts and their operational conditions.

### ETSI standards

* **ETSI TS 101 220:** Specifications for application management in a multi-application environment.
* **ETSI TS 102 221:** Technical specifications for the UICC-Terminal interface; Physical and logical characteristics.
* **ETSI TS 102 241:** Security architecture for Smart Cards.
* **ETSI TS 102 267:** Connection Oriented Service API for the Java Card platform (BIP and CAT-TP feature). Supported on Industrial SIM product, not supported on Super SIM.
* **ETSI TS 102 671:** Remote APDU structure for UICC-based applications.&#x20;

### eSIM (SGP.22) consumer standards

| eSIM OS features                                                     | Super SIM removable / embedded |
| -------------------------------------------------------------------- | ------------------------------ |
| GSMA Remote SIM Provisioning (RSP) for eUICC technical specification | SGP.22 v2                      |
| GSMA Remote SIM Remote Provisioning (RSP) architecture for eUICC     | SGP.21 v2.2                    |
| GSMA Embedded UICC for consumer device protection profile            | SGP.25 v1.0                    |
| GSMA RSP compliance process                                          | SGP.24                         |
| Java Card                                                            | 3.0.5                          |
| GlobalPlatform card                                                  | v2.3                           |

####

#### Security certification

* **Common Criteria EAL 5+:** A security certification indicating a high level of assurance in the product's security features.

## Product compliance information <a href="#product-compliance-information" id="product-compliance-information"></a>

* **Export Control Classification Number (ECCN):** 5A992.c
* **Harmonized Tariff Schedule of the United States (HTS):** 8523.52.0010
* **RoHS compliance:** All KORE SIM suppliers adhere to RoHS standards. (Documentation available upon request)
* **REACH compliance:** All KORE SIM suppliers meet REACH standards. (Documentation available upon request)
* **Toxic Substances Control Act (TSCA):** Compliant to Section 6(h). (Documentation available upon request)
* **SIM production:**
  * **Country of origin:** Mexico or China
  * Our supplier companies adhere to the SIM manufacturing process standards as outlined by the Global System for Mobile Communications Association (GSMA), specifically the Security Accreditation Scheme for UICC Production (SAS-UP) and the Security Accreditation Scheme for Subscription Management (SAS-SM)

## Delivery lead times

Delivery times vary by product and shipping location.

| Product                         | KORE warehouse    | Drop ship |
| ------------------------------- | ----------------- | --------- |
| Super SIM                       | 1 week            | 4-6 weeks |
| Super SIM Industrial / eSIM     | -                 | 4-6 weeks |
| Super SIM downloadable profiles | Immediate via API |           |

KORE warehouse - where the product is held in inventory by KORE; some SKU/form factors may not be held in inventory by KORE and may require a specific order from our supplier.

## Order quantities <a href="#order-quantities" id="order-quantities"></a>

| Product             | KORE Console    | Drop ship |
| ------------------- | --------------- | --------- |
| Super SIM Removable | 1 - 10k         | MoQ 10k   |
| Super SIM MFF2      | 10 / 100 / 1000 | MoQ 10k   |

* KORE Console - This could be an order placed through the console or your sales channel.
* Embedded (MFF2) products are delivered in bags or on reels and sealed in MSL 3 anti-static moisture barrier bags, then boxed for protection.
  * Bags
    * 10
    * 100
  * Reel sizes
    * 1000
    * 3000
    * 5000

## Form factors

KORE supports a wide range of form factors.

<figure><img src="/files/UGg4AlzAjUsqXrE1IDSy" alt=""><figcaption><p>Form factor options</p></figcaption></figure>

## Removable SIM card <a href="#removable-esim" id="removable-esim"></a>

### KORE Super SIM standard

<div align="left"><figure><img src="/files/iZNi17gTHj7Ijw2Tqzil" alt="Super SIM removable card" width="347"><figcaption><p>Super SIM card</p></figcaption></figure></div>

* The KORE Super SIM standard product is branded, industrial, and eSIM products will be provided in plain white format.
* ICCID is printed in full (20 digits) under the barcode, which also contains the ICCID in full, so it can be scanned with a barcode scanner.
* The pop-out/chip part has the ICCID printed on the back.
* On the back of the SIM, there is a 10 alpha-numeric code that can be used to register the SIM in the console ([korewireless.com/register-supersim](https://korewireless.com/register-supersim))

#### Physical characteristics

* The KORE Super SIM is crafted from ABS plastic, enhancing its durability for M2M/IoT applications, particularly in environments that reach temperatures up to 105°C. Furthermore, ABS plastic is more environmentally friendly than traditional PVC-based SIM cards, as recycling is easier.

## Embedded MFF2  <a href="#emedded-mff2-esim" id="emedded-mff2-esim"></a>

<div align="left"><figure><img src="/files/AuY182uo8P2Ep5fAztdX" alt="Embedded MFF2 SIM" width="264"><figcaption><p>Embedded MFF2 SIM</p></figcaption></figure></div>

* ICCID (marked in orange)
* Chip product code (marked in yellow) is related to supplier production and is not defined by KORE.

### Embedded MFF2 technical diagram <a href="#embedded-mff2-technical-diagram" id="embedded-mff2-technical-diagram"></a>

<div align="left"><figure><img src="/files/We4BizBEKqwhDpTLbF6i" alt="Embedded MFF2 diagram" width="375"><figcaption><p>Embedded MFF2 diagram</p></figcaption></figure></div>

### Embedded MFF2 eSIM pin information <a href="#embedded-mff2-esim-pin-information" id="embedded-mff2-esim-pin-information"></a>

The key pin information for an embedded MFF2 eSIM module includes:

* **C1 - VDD/VCC**: Power supply
* **C2 - RST**: Reset signal
* **C3 - CLK**: Clock signal
* **C5 - VSS/GND**: Ground connection
* **C7 - IO**: Input/Output communication line

Section 5 of[ ETSI TS 102 221](https://www.etsi.org/deliver/etsi_ts/102200_102299/102221/17.01.00_60/ts_102221v170100p.pdf) outlines the characteristics of the eUICC PINs.

<div align="left"><figure><img src="/files/fGgjM8roJ1UG6Na3eifU" alt="eUICC pin diagram"><figcaption><p>eUICC pin diagram</p></figcaption></figure></div>


# Super SIM Network Timeouts

Learn about the timeouts applied by Super SIM's mobile core to internet traffic

Super Core, KORE's cloud-native mobile core that connects your Super SIM connected devices to the internet, makes use of inactivity timers when devices establish internet connections through it. These timers depend on the communications protocol in use — TCP or UDP — and are initiated when the device stops transmitting data via the specified protocol. If the device transmits more data before a timer fires, Super Core's NAT (Network Address Translation) unit will continue to route relevant packets to the device's network IP address. If the timer expires, the NAT can release the address translation resource.

These NAT timeouts are separate from any inactivity timeout a visited network may apply to the device's PDP context, the data connection the device establishes via the local carrier network. Such timeouts are set by the carrier, not Super Core, and may depend on whether the network knows the device's location. On some networks, known-location devices are allowed longer inactivity periods because there is less or no likelihood that the inactivity is the result of the device moving to another cell or network.

The current inactivity timeout values are as follows:

| NAT Timer    | Default Value            |
| ------------ | ------------------------ |
| TCP          | 6 hours (21,600 seconds) |
| UDP          | 30 seconds               |
| UDP (stream) | 12 seconds               |


# Works with Super SIM

**Works with Super SIM** is a collaborative program between cellular module manufacturers and Twilio to ensure device designers have an optimal experience when using Super SIM and our vendor partners' modules. Featured modems have been certified to support the functionality required for [Super SIM's multi-IMSI applet](/supersim/supersim-multi-imsi-applet) and the [over-the-air updates](#over-the-air-updates) used to ensure Super SIMs always offer the latest features and improvements. To learn more about the testing performed to ensure certification, [please refer to the section below](#super-sim-functionality-testing).

For each featured module, we provide a guide for using it with Super SIM which includes useful commands such as setting the APN, enabling roaming, and establishing a data connection. The guides also include a step-by-step walkthrough for getting started with the module's primary developer kit.

***

### Featured cellular modules <a href="#featured-cellular-modules" id="featured-cellular-modules"></a>

* [Quectel BG95](/supersim/works-with-super-sim/works-with-super-sim-quectel-bg95)
* [Quectel EG21-G](/supersim/works-with-super-sim/works-with-super-sim-quectel-eg21-g)
* [Quectel EG25-G](/supersim/works-with-super-sim/works-with-super-sim-quectel-eg25-g)
* [Thales Cinterion EXS62-W](/supersim/works-with-super-sim/works-with-super-sim-thales-cinterion-exs62-w)
* [u-blox SARA-R5](/supersim/works-with-super-sim/works-with-super-sim-u-blox-sara-r5)

***

### Super SIM functionality testing <a href="#super-sim-functionality-testing" id="super-sim-functionality-testing"></a>

#### The multi-IMSI applet <a href="#the-multi-imsi-applet" id="the-multi-imsi-applet"></a>

Each Super SIM holds multiple IMSIs (International Mobile Subscriber Identities) allowing it to access different networks worldwide. These IMSIs are managed by an applet that will, under certain conditions, switch to the IMSI that should be used to connect. For an optimal experience when using Super SIM, it's critical that the module supplies the information the applet requires to determine which IMSI to use, and that the module responds to commands issued by the applet.

{% hint style="info" %}
For more detailed information on IMSIs and the Super SIM IMSI switching tool, refer to [**Super SIM's Multi-IMSI Applet**](https://docs.korewireless.com/en-us/supersim/supersim-multi-imsi-applet).
{% endhint %}

Our *Works with Super SIM* tests verify that program modules perform the following tasks.

**Switches to the preferred IMSI**

Each IMSI may offer access to different networks and the best IMSI to use in one country may be different from that required in another country. If the multi-IMSI applet detects that another IMSI should be used to connect, it will update the local files that contain the subscriber information needed to connect to the networks. It will then issue a command to the module to reread those files. If the module does not respond to these commands, you may not be able to access all the networks available to you and the time to initially connect may be longer than intended.

Modules certified as *Works with Super SIM* have been tested to confirm that the location information required by the multi-IMSI applet to determine if a different IMSI should be used is quickly passed by the module to the Super SIM and that the module quickly uses the new IMSI issued by the Super SIM to connect. To test this, we connect a Super SIM with the module in a country where the preferred IMSI is different than the IMSI that the Super SIM first presents. We verify that Super SIM quickly changes to the expected IMSI and that the module is able to successfully connect to the cellular network within an appropriate amount of time.

**Switches IMSIs when unable to connect**

Super SIM's multi-IMSI approach also allows other IMSIs to be used if your device can't connect. This allows your device to try to connect to different networks or to connect to the same networks but through different downstream network partners, giving your devices redundant paths to get connected.

If the module is unable to connect to a cellular network, Super SIM will enter Limited Service mode. After being in this mode for a period of time, the multi-IMSI applet will switch IMSIs and issue a command to the module to reread the local files, which it just updated. The module should then try to connect with the new IMSI. This process repeats until your device is able to connect to a cellular network. If the module does not send the events needed to determine when to switch, or does not respond to the commands from the Super SIM, then your device may not be able to connect or may have longer-than-necessary recovery times in the event of a network outage.

Modules certified as *Works with Super SIM* have been tested to ensure that they change IMSIs within an appropriate amount of time if they are unable to connect. To test this, the network permissions for a Super SIM are modified so that it will be rejected by all networks and therefore will be unable to connect. Using logs emitted by the Twilio Mobile Core, we monitor which IMSI is used each time the module tries to connect and verify that it iterates through each IMSI as expected and within an appropriate amount of time. We then verify that the module is able to successfully connect to the cellular network after the Super SIM's network permissions have again been modified, to allow it to connect.

#### Over-the-air updates <a href="#over-the-air-updates" id="over-the-air-updates"></a>

Super SIMs will be periodically updated over the air to add additional IMSIs, alter which IMSI is preferred for certain countries, modify other settings on the SIM, or receive updates to the applets running onboard. This allows your Super SIMs to continue to improve over time as we add more networks or make improvements to the platform that require changes to the SIM.

Modules certified as *Works with Super SIM* have been tested to ensure that they allow the Super SIM applets to contact the necessary downstream services and can receive over-the-air updates. To perform this test, we stage an update to the multi-IMSI applet's settings, verify that the update has been successfully retrieved, and that the behavior between the Super SIM and the module reflects the expected behavior imposed by the new settings.

{% hint style="info" %}
For more detailed information on how Super SIM updates work, refer to [**Super SIM Over-the-Air Updates**](https://docs.korewireless.com/en-us/supersim/over-the-air-updates).
{% endhint %}


# Works with Super SIM: Quectel BG95

The Quectel BG95 series of multi-mode LPWA modules support the IoT-oriented LTE Cat M1 and NB-IoT 3GPP cellular standards, along with GSM/EDGE/GPRS for backwards compatibility. They also feature integrated GNSS for location-aware applications. The BG95 is often used as a drop-in replacement for the popular BG96 module.

{% hint style="warning" %}
Super SIM does not support NB-IoT, but it does deliver full LTE Cat M1 connectivity for the BG95.
{% endhint %}

{% hint style="info" %}
Learn more about the BG95 on the [Quectel website](https://www.quectel.com/product/lpwa-bg95-cat-m1-cat-nb2-egprs-series).
{% endhint %}

## Get started with BG95 and Super SIM

The best way to begin working with the BG95 is to take advantage of [Quectel's UMTS & LTE EVB developer kit](https://www.quectel.com/product/umts-lte-evb-kit). It features powerful and easy‐to‐use tools in an environment specifically designed for the development and testing of cellular and GNSS applications based on any of a variety of Quectel modems, including the BG95. Just clip on a test board featuring the modem you're using. The one you need for this guide is the BG95-TE-A test board. It's available separately. The kit can be connected to and used with a Windows 10, Linux or macOS computer.

<figure><img src="/files/VRyKfFPqTHwGeVZt1BXN" alt=""><figcaption></figcaption></figure>

The EVB and the separate test board can be purchased from the following suppliers:

### EVB

* [Mouser](https://www.mouser.com/new/quectel/quectel-umts-lte-evb-kit/)
* [Digikey](https://www.digikey.com/en/products/detail/quectel/UMTSLTEEVB-KIT-B/13278231)

### BG95-M3-TE-A

* [Mouser](https://www.mouser.com/ProductDetail/Quectel/BG95M3LATEA-64-SGNS?qs=GedFDFLaBXF7D0DTOn3E%252Bg%3D%3D)
* [Digikey](https://www.digikey.com/en/products/detail/quectel/bg95m3la-64-sgns/13278150)

{% hint style="info" %}
Working with the EVB and BG95 requires a configured Super SIM. If you haven't set up your Super SIM in the [Console](https://supersim.korewireless.com/supersim/sims), please do so now. The [Super SIM First Steps guide](/supersim/supersim-first-steps) has help if you need it.
{% endhint %}

**1. Connect the EVB to your computer**

1. Slot a Super SIM into the board's SIM holder. It takes a standard mini-sized SIM, or a micro- or nano-SIM first fitted into an adapter:

<figure><img src="/files/MOYsjhjtvNC1ff1hkohN" alt=""><figcaption></figcaption></figure>

2. Fit the BG95 test board to the top of the EVB, clipping it to the two connectors in the middle of the EVB. You can place it correctly by aligning the metal panel on the underside of the test board with the four arrows printed on the EVB:

<figure><img src="/files/xaaEArcyOkBMRcQBgLd8" alt=""><figcaption></figcaption></figure>

3. Connect one of the larger bundled antennas to the test board's uFL connector, marked **MAIN J301**. You will need one of the supplied whip adapters to join board and antenna:

<figure><img src="/files/gQt8dXbOphTZOCd9baJz" alt=""><figcaption></figcaption></figure>

4. Connect the EVB to your computer with the supplied RS232-USB cable. Connect the cable to the EVB's **COM (MAIN)** connector:

<figure><img src="/files/fQLXQbeKRGq7veC2pL99" alt=""><figcaption></figcaption></figure>

5. Connect the EVB to a suitable power source, such as a USB AC adapter, and then turn on the EVB by sliding the **POWER** switch to the position marked **ON** on the board:

<figure><img src="/files/MFyal6YMskhWr1qdlt2s" alt=""><figcaption></figcaption></figure>

6. Press the **PWRKEY** button once to enable the modem test board:

<figure><img src="/files/Jj4zT8dBwD8doDHy1o6l" alt=""><figcaption></figcaption></figure>

At this point the board's **POWER** and **STATUS** LEDs should be lit, and the **NET\_STA** LED should be flashing:

<figure><img src="/files/7d1vhGOPdExFkNOPHNXv" alt=""><figcaption></figcaption></figure>

**2. Access the EVB from your computer**

{% tabs %}
{% tab title="Linux" %}

1. Open your distribution's terminal app.
2. Confirm connection with `ls /dev/ttyUSB*` — you should see a single device listed: `/dev/ttyUSB0` . This is the USB-to-serial device you'll use to communicate with the EVB.
3. Using a serial tool like `minicom` — you will have to install this separately from source or a package manager like `apt` — access the board with `minicom -o -D /dev/ttyUSB0` .
   {% endtab %}

{% tab title="macOS" %}

1. Open the Terminal app.
2. Confirm connection with `ls /dev/cu*` — you should see one device listed `/dev/cu.usbserial-14140` . This is the USB-to-serial device you'll use to communicate with the EVB.
3. Using a serial tool like `minicom` — you will have to install this separately from source or a package manager like [Homebrew](https://brew.sh/) — access the board with `minicom -o -D /dev/cu.usbserial-14140` .
   {% endtab %}

{% tab title="Windows 10" %}

1. Windows 10's Device Manager will show the EVK-R5 as two USB Serial Ports in the **Ports (COM & LPT)** section. Try each one in turn, the lowest number first. Note its port's COM number:

<figure><img src="/files/0XuMDOSYcM0Xt45IVNWJ" alt=""><figcaption></figcaption></figure>

2. Right-click on the Pico's entry in the Device Manager list and select **Properties...** . Select the **Port Settings** tab and note the **Bits per second:** value:

<figure><img src="/files/cr9CvmJTv3rzgWu2mpT3" alt=""><figcaption></figcaption></figure>

3. [Download and install PuTTY](https://www.chiark.greenend.org.uk/~sgtatham/putty/latest.html) a terminal emulator for Windows.
4. Run PuTTY, select **Serial** under the **Connection type** , and enter the COM number (as, for example, `COM5`) in the **Serial line** field. Make sure the **Speed** field is set to match the **Bits per second:** value you got from Device Manager:

<figure><img src="/files/KPLZTI1fGs2Jc6yG3sjg" alt=""><figcaption></figcaption></figure>

5. Click **Open** .
6. When you see references to Minicom in the remainder of the tutorial, perform the tasks using your open PuTTY window.
   {% endtab %}
   {% endtabs %}

**3. Check your current carrier**

Within `minicom` or PuTTY, enter the AT command `AT+COPS?` to see which carrier your BG95 is connected through:

<figure><img src="/files/ikc5xBafQtbVVr0A0L0W" alt=""><figcaption></figcaption></figure>

## Useful AT commands

### Initialization

The BG95 supports LTE Cat-M1 in bands 1-5, 8, 12-13, 18-20, 25-27, 28, 31, 66, 72-73, 85, 87-88, and GSM at 850, 900, 1800, and 1900MHz. It also supports NB-IoT. Super SIM does not support NB-IoT, so it's important to ensure that your BG95 is set to operate using Cat-M1 only. Prefer single-mode Cat-M1 to dual-mode Cat-M1/NB-IoT to ensure that the modem never attempts to connect to NB-IoT.

To set the BG95's chosen Radio Access Technology (RAT) to Cat-M1, use the Quectel-specific command:

{% code lineNumbers="true" %}

```bash
AT+QCFG="iotopmode",0,1
```

{% endcode %}

The numeric parameter of the command, `0`, indicates Cat-M1 only.

This command prevents the module from searching for NB-IoT networks:

{% code lineNumbers="true" %}

```bash
AT+QCFG="nwscanseq",0201,1
```

{% endcode %}

The search sequence is set to Cat-M1 (`02`) and then GSM (`01`), after which the sequence repeats.

If you wish to limit communications to LTE only, i.e., to disable 2G (GSM), issue this command:

{% code lineNumbers="true" %}

```bash
AT+QCFG="nwscanmode",3,1
```

{% endcode %}

Finally, to instruct the modem to initiate data-centric attachments only — i.e., not to make voice-oriented circuit-switched attachments too, which is the default — issue:

{% code lineNumbers="true" %}

```bash
AT+QCFG="servicedomain",1,1
```

{% endcode %}

All these settings will be applied immediately.

### Set the APN

Issue this AT command first to apply the Super SIM Access Point Name (APN):

{% code lineNumbers="true" %}

```bash
AT+CGDCONT=1,"IP","super"
```

{% endcode %}

By default, the BG95 will roam automatically, but you can confirm this by issuing:

{% code lineNumbers="true" %}

```bash
AT+QCFG="roamservice",2,1
```

{% endcode %}

These settings will be applied immediately.

### Establish a data connection

Having set the modem's APN, establish a Packet Data Protocol (PDP) context with the following command:

{% code lineNumbers="true" %}

```bash
AT+QIACT=1
```

{% endcode %}

The single parameter is the PDP context's ID, in the range 1-16. It should match the first parameter in the above `CGDCONT` command.

You can also issue `AT+QIACT?`, the command's read form, to get the device's data-connection state — and IP address, if the context is active:

{% code lineNumbers="true" %}

```bash
AT+QIACT?
+QIACT: 1,1,1,"100.74.24.186"
```

{% endcode %}

The first numeric parameter is the context ID. The second is its state — `1` indicates it is active — and the third is its type: `1` for IPV4 or `2` for IPV6.

### Perform a ping

Issue the Quectel-specific command

{% code lineNumbers="true" %}

```bash
AT+QPING=1,"<TARGET_IP_ADDRESS_OR_NAME>" 
```

{% endcode %}

to ping a server. Using one of Google's DNS servers as an example, this will yield:

{% code lineNumbers="true" %}

```bash
+QPING: 0,"8.8.8.8",32,1410,255
+QPING: 0,"8.8.8.8",32,236,255
+QPING: 0,"8.8.8.8",32,210,255
+QPING: 0,"8.8.8.8",32,233,255
+QPING: 0,4,4,0,210,1410,522
```

{% endcode %}

### Perform an HTTP GET

To issue an HTTP `GET` request using the BG95's built-in HTTP client, run the following commands:

1. Set the PDP context ID: `AT+QHTTPCFG="contextid",1`
2. Enable output of HTTP response headers: `AT+QHTTPCFG="responseheader",1`
3. Activate the PDP context if it is not already active: `AT+QIACT=1`
4. Set the target URL: `AT+QHTTPURL=21`This sets the modem to receive, prompted by the output `CONNECT`. The first parameter is the number of bytes the modem should expect to receive: it will end input after receiving this number of characters. The value of `21` comes from the URL below. The URL you provide must include the protocol, i.e., `http://`.
5. Upon receiving `CONNECT`, enter the URL. For example: `http://ifconfig.co/ip`
6. Make a `GET` request: `AT+QHTTPGET`
7. View the request: `AT+QHTTPREAD`

The request will look like this:

{% code lineNumbers="true" %}

```bash
HTTP/1.1 200 OK
Date: Sat, 28 Nov 2020 18:38:52 GMT
Content-Type: text/plain; charset=utf-8
Content-Length: 15
Connection: keep-alive
Set-Cookie: __cfduid=d33c30006be23245591d83133631425031606588732; expires=Mon, 28-Dec-20 18:38:52 GMT; path=/; domain=.ifconfig.co; HttpOnly; SameSite=Lax
Strict-Transport-Security: max-age=15768000; includeSubdomains; preload
CF-Cache-Status: DYNAMIC
cf-request-id: 06b1bfaa91000025ed8fa46000000001
Report-To: {"endpoints":[{"url":"https:\/\/a.nel.cloudflare.com\/report?s=8eYWG5vobibOeI8xWFxNSGJpELSCSthW9aAclBXw3esKOGBsYPT4izdckGI2kpOW%2BA7KOhi3OFk%2FLUab3RpQvKu5EYYWLD%2B2fSxV4Q%3D%3D"}],"group":"cf-nel","max_age":604800}
NEL: {"report_to":"cf-nel","max_age":604800}
Server: cloudflare
CF-RAY: 5f96355748c225ed-IAD

99.84.181.20

OK
+QHTTPREAD: 0
```

{% endcode %}

{% hint style="info" %}
This example uses a service that returns the IP address of the requester.
{% endhint %}

### Custom HTTP request headers

If you need to provide extra HTTP request headers, such `Authorization: Basic <API_KEY>`, or a custom header required by your server, issue

{% code lineNumbers="true" %}

```bash
AT+QHTTPCFG="requestheader",1
```

{% endcode %}

to tell the modem to use the custom header that you will provide when you make each request. You will need to add a full HTTP request header to your request body, separating the two parts with the characters `<CR><LF>`. Whether you make a `POST` or a `GET` request, include a byte-count parameter that totals the header plus the body (`POST` request) or header alone (`GET` request). For example, `AT+QHTTPGET=60,512` for a 512-byte header (including the end-of-header `<CR><LF>`). The first parameter, `60`, is a timeout. This usually defaults to 60 seconds but must be included if a second parameter is also present. The modem uses the supplied byte count to read that number of characters via the UART over which your application is communicating with it.

### Perform an HTTPS GET

To issue a secure HTTP `GET` request using the BG95's built-in HTTP client, you follow the same procedure outlined above but with some extra steps included to configure SSL.

1. Set the PDP context ID: `AT+QHTTPCFG="contextid",1`
2. Enable output of HTTP response headers: `AT+QHTTPCFG="responseheader",1`
3. Activate the PDP context if it is not already active: `AT+QIACT=1`
4. Select the SSL context ID for this PDP context ID: `AT+QHTTPCFG="sslctxid",1`
5. Set the SSL version. Choose TLS 1.2: `AT+QSSLCFG="sslversion",1,3`
6. Set the SSL cipher suite. Choose all types: `AT+QSSLCFG="ciphersuite",1,0xFFFF`
7. For testing, set the SSL verification level to 0, so no CA certificate is required: `AT+QSSLCFG="seclevel",0`
8. Set the target URL: `AT+QHTTPURL=70`This sets the modem to receive, prompted by the output CONNECT. The parameter is the number of bytes the modem should expect to receive: it will end input after receiving this number of characters. The value of `70` comes from the URL below. The URL you provide must include the protocol, i.e., `https://`.
9. Upon receiving `CONNECT`, enter the URL. For example: `https://twilio-cms-prod.s3.amazonaws.com/documents/super-sim-test.json`
10. Make a `GET` request: `AT+QHTTPGET`
11. View the response: `AT+QHTTPREAD`

The response will look something like this:

{% code lineNumbers="true" %}

```bash
HTTP/1.1 200 OK
Date: Thu, 19 May 2022 10:23:25 GMT
Last-Modified: Thu, 19 May 2022 10:05:25 GMT
Accept-Ranges: bytes
Content-Type: application/json
Server: AmazonS3
Content-Length: 128

{
   "userId": 1,
   "id": 5,
   "title": "laboriosam mollitia et enim quasi adipisci quia provident illum",
   "completed": false                                                                                                                         }
OK

+QHTTPREAD: 0
```

{% endcode %}

### Perform an HTTP(S) POST

Sending data from the modem to an Internet-hosted API follows the paths outlined above for the HTTP and HTTPS protocols. The key difference is that you call `AT+QHTTPOST` instead of `AT+QHTTPGET`.

Optionally, the `QHTTPOST` command takes a parameter indicating the amount of data you are sending. The modem uses this to read that number of bytes via the UART over which your application is communicating with it — just as it does with the `QHTTPURL` command we used earlier. If you are providing a custom HTTP request header, remember to include its length too.

### Use low-power modes

While the BG95 supports low-power modes for eDRX and PSM, support for these features will vary by visited network and location. The commands to enable each of these settings on the BG95 are, respectively:

{% code lineNumbers="true" %}

```bash
AT+CEDRXS=1
AT+CPSMS=1
```

{% endcode %}

Both settings, but especially PSM, can prevent the modem from being accessible through the terminal during its sleep time. It's best to experiment with these features with the modem local. To disable all power saving if needed, send:

{% code lineNumbers="true" %}

```bash
AT+CEDRXS=0
AT+CPSMS=0
```

{% endcode %}

## Reach out for more information

Keen to find out more about how the Quectel BG95 family of cellular modules can power your IoT product design? [Contact Quectel sales](https://www.quectel.com/contact) to line up a conversation.

And don't forget, [we're always ready to discuss how Super SIM can help you](https://www.korewireless.com/iot/help) too.

## Additional resources

### KORE resources

* [Get Started with Super SIM](/supersim/supersim-first-steps)
* [Super SIM global network partners](/supersim/available-networks)
* [The Cellular Module Knowledgebase](/supersim/cellular-module-knowledgebase)

### Quectel resources

* [BG95 Series Hardware Design](https://images.quectel.com/python/2023/04/Quectel_BG95_Series_Hardware_Design_V1.5.pdf)
* [BG95 AT Commands Manual](https://www.quectel.com/download_file/1643) *Quectel login required*
* [BG95 TCP/IP Application Note](https://www.quectel.com/wp-content/uploads/2021/03/Quectel_BG95BG77BG600L_Series_TCPIP_Application_Note_V1.1-1.pdf) *Quectel login required*
* [BG95 SSL Application Note](https://www.quectel.com/download_file/34627) *Quectel login required*
* [BG95 HTTP Application Note](https://www.quectel.com/wp-content/uploads/2021/03/Quectel_BG95BG77BG600L_Series_HTTPS_Application_Note_V1.1-1.pdf) *Quectel login required*


# Works with Super SIM: Quectel EG21-G

The Quectel EG21-G module supports LTE Cat 1 (4G), UMTS/HSPA+ (3G), and GSM/EDGE/GPRS (2G) cellular connectivity, and features integrated GNSS. Optimized for IoT applications requiring higher bandwidths than the IoT-oriented 3GPP standard Cat-M1 can accommodate, the EG21-G provides data rates of up to 10Mbps down and 5Mbps up.

{% hint style="info" %}
Learn more about the EG21-G on the [Quectel website](https://www.quectel.com/product/lte-eg21-g).
{% endhint %}

## Get started with EG21-G and Super SIM

The best way to begin working with the EG21-G is to take advantage of [Quectel's UMTS & LTE EVB developer kit](https://www.quectel.com/product/umts-lte-evb-kit). It features powerful and easy‐to‐use tools in an environment specifically designed for the development and testing of cellular and GNSS applications based on any of a variety of Quectel modems, including the EG21-G. Just clip on a test board featuring the modem you're using. The one you need for this guide is the EG21-G-TE-A test board. It's available separately. The kit can be connected to and used with a Windows 10, Linux or macOS computer.

<figure><img src="/files/IS416gzWVpgBEHlRdtnH" alt=""><figcaption></figcaption></figure>

The EVB and the separate test board can be purchased from the following suppliers:

### EVB

* [Mouser](https://www.mouser.com/new/quectel/quectel-umts-lte-evb-kit/)
* [Digikey](https://www.digikey.com/en/products/detail/quectel/UMTSLTEEVB-KIT-B/13278231)

### EG21-G-TE-A

* [Mouser](https://www.mouser.com/ProductDetail/Quectel/EG21GGBTEA-128-SGNS?qs=GedFDFLaBXEanlU3WwkVYg%3D%3D)
* [Digikey](https://www.digikey.com/en/products/detail/quectel/eg21ggb-128-sgns/13278123)

{% hint style="info" %}
Working with the EVB and EG21-G requires a configured Super SIM. If you haven't set up your Super SIM in the [Console](https://supersim.korewireless.com/supersim/sims), please do so now. The Super SIM First Steps guide has help if you need it.
{% endhint %}

**1. Connect the EVB to your computer**

1. Slot a Super SIM into the board's SIM holder. It takes a standard mini-sized SIM, or a micro- or nano-SIM first fitted into an adapter:

<figure><img src="/files/zIDqMUn23Q2247bbDAXP" alt=""><figcaption></figcaption></figure>

2. Fit the EG21-G test board to the top of the EVB, clipping it to the two connectors in the middle of the EVB. You can place it correctly by aligning the metal panel on the underside of the test board with the four arrows printed on the EVB:

<figure><img src="/files/BScNwTUK9qJqG0sid7Dp" alt=""><figcaption></figcaption></figure>

3. Connect one of the larger bundled antennas to the test board's uFL connector, marked **MAIN**. You will need one of the supplied whip adapters to join board and antenna:

<figure><img src="/files/gWg4DnpixJphO5vLcrve" alt=""><figcaption></figcaption></figure>

4. Connect the EVB to your computer with the supplied RS232-USB cable. Connect the cable to the EVB's **COM (MAIN)** connector:

<figure><img src="/files/iWk2RIMzoG9RQUjd1vgj" alt=""><figcaption></figcaption></figure>

5. Connect the EVB to a suitable power source, such as a USB AC adapter, and then turn on the EVB by sliding the **POWER** switch to the position marked **ON** on the board:

<figure><img src="/files/6HyxVBanVtL6f0rHyDaQ" alt=""><figcaption></figcaption></figure>

6. Press the **PWRKEY** button once to enable the modem test board:

<figure><img src="/files/WlX0ZTnzzFLR2wX7OIQD" alt=""><figcaption></figcaption></figure>

At this point the board's **POWER**, **STATUS**, and **NET\_MODE** LEDs should be lit, and the **NET\_STA** LED should be flashing:

<figure><img src="/files/0UVkLF6tMWEayTTpDjOy" alt=""><figcaption></figcaption></figure>

**2. Access the EVB from your computer**

{% tabs %}
{% tab title="Linux" %}

1. Open your distribution's terminal app.
2. Confirm connection with `ls /dev/ttyUSB*` — you should see a single device listed: `/dev/ttyUSB0` . This is the USB-to-serial device you'll use to communicate with the EVB.
3. Using a serial tool like `minicom` — you will have to install this separately from source or a package manager like `apt` — access the board with `minicom -o -D /dev/ttyUSB0` .
   {% endtab %}

{% tab title="macOS" %}

1. Open the Terminal app.
2. Confirm connection with `ls /dev/cu*` — you should see one device listed `/dev/cu.usbserial-14140` . This is the USB-to-serial device you'll use to communicate with the EVB.
3. Using a serial tool like `minicom` — you will have to install this separately from source or a package manager like [Homebrew](https://brew.sh/) — access the board with `minicom -o -D /dev/cu.usbserial-14140` .
   {% endtab %}

{% tab title="Windows 10" %}

1. Windows 10's Device Manager will show the EVK-R5 as two USB Serial Ports in the **Ports (COM & LPT)** section. Try each one in turn, the lowest number first. Note its port's COM number:

   <figure><img src="https://www.twilio.com/_next/image?url=https%3A%2F%2Fdocs-assets.prod.twilio.com%2F8dfab9dcceea9eae6c6979ed589a4a5cc600537cbd0389d0c35c8c5be366df2a.png&#x26;w=1200&#x26;q=75" alt=""><figcaption></figcaption></figure>
2. Right-click on the Pico's entry in the Device Manager list and select **Properties...** . Select the **Port Settings** tab and note the **Bits per second:** value:

   <figure><img src="https://www.twilio.com/_next/image?url=https%3A%2F%2Fdocs-assets.prod.twilio.com%2F880a17db1b7ebfc5bc9d937747b9102319b8cb274f6ce0e35a7289d50781c76e.png&#x26;w=1920&#x26;q=75" alt=""><figcaption></figcaption></figure>
3. [Download and install PuTTY](https://www.chiark.greenend.org.uk/~sgtatham/putty/latest.html) a terminal emulator for Windows.
4. Run PuTTY, select **Serial** under the **Connection type** , and enter the COM number (as, for example, `COM5`) in the **Serial line** field. Make sure the **Speed** field is set to match the **Bits per second:** value you got from Device Manager:

   <figure><img src="https://www.twilio.com/_next/image?url=https%3A%2F%2Fdocs-assets.prod.twilio.com%2F72317765260b795d9f7bfb3c97083314cf13a8081457b8a1214d272f8109fbcd.png&#x26;w=1920&#x26;q=75" alt=""><figcaption></figcaption></figure>
5. Click **Open** .
6. When you see references to Minicom in the remainder of the tutorial, perform the tasks using your open PuTTY window.
   {% endtab %}
   {% endtabs %}

**3. Check your current carrier**

Within `minicom` or PuTTY, enter the AT command `AT+COPS?` to see which carrier your EG21-G is connected through:

<figure><img src="/files/L8yALfTm4WP0sRBBIUUV" alt=""><figcaption></figcaption></figure>

## Useful AT commands

#### Initialization

The EG21-G supports LTE Cat-1 FDD in bands 1-5, 7-8, 12-13, 18-20, 25-26, 28, TDD in bands 38-41, and GSM at 850, 900, 1800, and 1900MHz.

If you wish to limit communications to LTE only, i.e., to disable 2G (GSM), issue this command:

{% code lineNumbers="true" %}

```bash
AT+QCFG="nwscanmode",3
```

{% endcode %}

To instruct the modem to initiate data-centric attachments only — ie., not to make voice-oriented circuit-switched attachments too, which is the default — issue:

{% code lineNumbers="true" %}

```bash
AT+QCFG="servicedomain",1
```

{% endcode %}

All these settings will be applied immediately.

#### Set the APN

Issue this AT command first to apply the Super SIM Access Point Name (APN):

{% code lineNumbers="true" %}

```bash
AT+CGDCONT=1,"IP","super"
```

{% endcode %}

By default, the EG21-G will roam automatically, but you can force this by issuing:

{% code lineNumbers="true" %}

```bash
AT+QCFG="roamservice",2
```

{% endcode %}

These settings will be applied immediately.

### Establish a data connection

Having set the modem's APN, establish a Packet Data Protocol (PDP) context with the following command:

{% code lineNumbers="true" %}

```bash
AT+QIACT=1
```

{% endcode %}

The single parameter is the PDP context's ID, in the range 1-16. It should match the first parameter in the above `CGDCONT` command.

You can also `QIACT`, in its read form, to get the device's data-connection state — and IP address, if the context is active:

{% code lineNumbers="true" %}

```bash
AT+QIACT?
+QIACT: 1,1,1,"100.74.24.186"
```

{% endcode %}

The first numeric parameter is the context ID. The second is its state — `1` indicates it is active — and the third is its type: `1` for IPV4 or `2` for IPV6.

### Perform a ping

Issue the Quectel-specific command

{% code lineNumbers="true" %}

```bash
AT+QPING=1,"<TARGET_IP_ADDRESS_OR_NAME>" 
```

{% endcode %}

to ping a server. Using one of Google's DNS servers as an example, this will yield:

{% code lineNumbers="true" %}

```bash
+QPING: 0,"8.8.8.8",32,172,255
+QPING: 0,"8.8.8.8",32,212,255
+QPING: 0,"8.8.8.8",32,376,255
+QPING: 0,"8.8.8.8",32,174,255
+QPING: 0,4,4,0,172,376,233
```

{% endcode %}

### Perform an HTTP GET

To issue an HTTP `GET` request using the EG21-G's built-in HTTP client, run the following commands:

1. Set the PDP context ID: `AT+QHTTPCFG="contextid",1`
2. Enable output of HTTP response headers: `AT+QHTTPCFG="responseheader",1`
3. Activate the PDP context if it is not already active: `AT+QIACT=1`
4. Set the target URL: `AT+QHTTPURL=21`This sets the modem to receive, prompted by the output `CONNECT`. The first parameter is the number of bytes the modem should expect to receive: it will end input after receiving this number of characters. The value of `21` comes from the URL below. The URL you provide must include the protocol, i.e., `http://`.
5. Upon receiving `CONNECT`, enter the URL. For example: `http://ifconfig.co/ip`
6. Make a `GET` request: `AT+QHTTPGET`
7. View the request: `AT+QHTTPREAD`

The request will look like this:

{% code lineNumbers="true" %}

```bash
HTTP/1.1 200 OK
Date: Thu, 19 May 2022 09:42:03 GMT
Content-Type: text/plain; charset=utf-8
Content-Length: 13
Connection: keep-alive
CF-Cache-Status: DYNAMIC
Report-To: {"endpoints":[{"url":"https:\/\/a.nel.cloudflare.com\/report\/v3?s=9kzHe%2BCGgSnaBOgrEZS6NVZA%2BRV1RQGBlD5gTX5WQGNFtSd4RPnimFfKpQ5e%2FV4DmTsZcyFOZyG}
NEL: {"success_fraction":0,"report_to":"cf-nel","max_age":604800}
Server: cloudflare
CF-RAY: 70dbe160d822595c-IAD
alt-svc: h3=":443"; ma=86400, h3-29=":443"; ma=86400

44.204.32.39

OK

+QHTTPREAD: 0
```

{% endcode %}

{% hint style="info" %}
This example uses a service that returns the IP address of the requester.
{% endhint %}

### Custom HTTP request headers

If you need to provide extra HTTP request headers, such `Authorization: Basic <API_KEY>`, or a custom header required by your server, issue

{% code lineNumbers="true" %}

```bash
AT+QHTTPCFG="requestheader",1
```

{% endcode %}

to tell the modem to use the custom header that you will provide when you make each request. You will need to create a full HTTP request header separated from your request body by the characters `<CR><LF>`. Whether you make a `POST` or a `GET` request, include a byte-count parameter that totals the header plus the body (`POST` request) or header alone (`GET` request). For example, `AT+QHTTPGET=60,512` for a 512-byte header (including the end-of-header `<CR><LF>`). The first parameter, `60`, is a timeout. This usually defaults to 60 seconds but must be included if a second parameter is also present.

#### Perform an HTTPS GET

To issue a secure HTTP `GET` request using the EG21-G's built-in HTTP client, you follow the same procedure outlined above but with some extra steps included to configure SSL.

1. Set the PDP context ID: `AT+QHTTPCFG="contextid",1`
2. Enable output of HTTP response headers: `AT+QHTTPCFG="responseheader",1`
3. Activate the PDP context if it is not already active: `AT+QIACT=1`
4. Select the SSL context ID for this PDP context ID: `AT+QHTTPCFG="sslctxid",1`
5. Set the SSL version. Choose TLS 1.2: `AT+QSSLCFG="sslversion",1,3`
6. Set the SSL cipher suite. Choose all types: `AT+QSSLCFG="ciphersuite",1,0xFFFF`
7. For testing, set the SSL verification level to 0, so no CA certificate is required: `AT+QSSLCFG="seclevel",0`
8. Set the target URL: `AT+QHTTPURL=70`This sets the modem to receive, prompted by the output CONNECT. The parameter is the number of bytes the modem should expect to receive: it will end input after receiving this number of characters. The value of `70` comes from the URL below. The URL you provide must include the protocol, i.e., `https://`.
9. Upon receiving `CONNECT`, enter the URL. For example: `https://twilio-cms-prod.s3.amazonaws.com/documents/super-sim-test.json`
10. Make a `GET` request: `AT+QHTTPGET`
11. View the response: `AT+QHTTPREAD`

The request will look something like this:

{% code lineNumbers="true" %}

```bash
HTTP/1.1 200 OK
Date: Thu, 19 May 2022 10:23:25 GMT
Last-Modified: Thu, 19 May 2022 10:05:25 GMT
Accept-Ranges: bytes
Content-Type: application/json
Server: AmazonS3
Content-Length: 128

{
   "userId": 1,
   "id": 5,
   "title": "laboriosam mollitia et enim quasi adipisci quia provident illum",
   "completed": false                                                                                                                         }
OK

+QHTTPREAD: 0
```

{% endcode %}

### Perform an HTTP(S) POST

Sending data from the modem to an Internet-hosted API follows the paths outlined above for the HTTP and HTTPS protocols. The key difference is that you call `AT+QHTTPOST` instead of `AT+QHTTPGET`.

Optionally, the `QHTTPOST` command takes a parameter indicating the amount of data you are sending. The modem uses this to read that number of bytes via the UART over which your application is communicating with it — just as it does with the `QHTTPURL` command we used earlier. If you are providing a custom HTTP request header, remember to include its length too.

### Use low-power modes

While the EG21-G supports low-power modes for eDRX and PSM, support for these features will vary by visited network and location. The commands to enable each of these settings on the EG21-G are, respectively:

{% code lineNumbers="true" %}

```bash
AT+CEDRXS=1
AT+CPSMS=1
```

{% endcode %}

Both settings, but especially PSM, can prevent the modem from being accessible through the terminal during its sleep time. It's best to experiment with these features with the modem local. To disable all power saving if needed, send:

{% code lineNumbers="true" %}

```bash
AT+CEDRXS=0
AT+CPSMS=0
```

{% endcode %}

## Reach out for more information

Keen to find out more about how the Quectel EG21-G cellular module can power your IoT product design? [Contact Quectel sales](https://www.quectel.com/contact) to line up a conversation.

And don't forget, [we're always ready to discuss how Super SIM can help you](https://www.korewireless.com/iot/help) too.

## Additional resources

### KORE resources

* [Get Started with Super SIM](/supersim/supersim-first-steps)
* [Super SIM global network partners](/supersim/available-networks)
* [The Cellular Module Knowledgebase](/supersim/cellular-module-knowledgebase)

### Quectel resources

* [EG21-G Data Sheet](https://www.quectel.com/product/lte-eg21-g/#specifications) *Quectel login required*
* [EG21-G AT Commands Manual](https://www.quectel.com/download_file/2027) *Quectel login required*


# Works with Super SIM: Quectel EG25-G

The Quectel EG25-G module supports LTE Cat 4 (4G), UMTS/HSPA+ (3G), and GSM/EDGE/GPRS (2G) cellular connectivity, and features integrated GNSS. Optimized for broadband IoT applications requiring very high bandwidths. The EG25-G provides data rates of up to 150Mbps down and 50Mbps up.

{% hint style="info" %}
Learn more about the EG25-G on the [Quectel website](https://www.quectel.com/product/lte-eg25-g).&#x20;
{% endhint %}

## Get started with EG25-G and Super SIM

The best way to begin working with the EG25-G is to take advantage of [Quectel's UMTS & LTE EVB developer kit](https://www.quectel.com/product/umts-lte-evb-kit). It features powerful and easy‐to‐use tools in an environment specifically designed for the development and testing of cellular and GNSS applications based on any of a variety of Quectel modems, including the EG25-G. Just clip on a test board featuring the modem you're using. The one you need for this guide is the EG25-G-TE-A test board. It's available separately. The kit can be connected to and used with a Windows 10, Linux or macOS computer.

<figure><img src="/files/1TO4mYdFmm5rMoQmtwZA" alt=""><figcaption></figcaption></figure>

The EVB and the separate test board can be purchased from the following suppliers:

### EVB

* [Mouser](https://www.mouser.com/new/quectel/quectel-umts-lte-evb-kit/)
* [Digikey](https://www.digikey.com/en/products/detail/quectel/UMTSLTEEVB-KIT-B/13278231)

### EG25-G-TE-A

* [Mouser](https://www.mouser.com/ProductDetail/Quectel/EG25GGBTEA-256-SGNS?qs=GedFDFLaBXHH1X9gkwHxpg%3D%3D)

{% hint style="info" %}
Working with the EVB and EG25-G requires a configured Super SIM. If you haven't set up your Super SIM in the [Console](https://supersim.korewireless.com/supersim/sims), please do so now. The Super SIM First Steps guide has help if you need it.&#x20;
{% endhint %}

**1. Connect the EVB to your computer**

1. Slot a Super SIM into the board's SIM holder. It takes a standard mini-sized SIM, or a micro- or nano-SIM first fitted into an adapter:

<figure><img src="/files/RS4woHfjOBhIwIJQ3ruV" alt=""><figcaption></figcaption></figure>

2. Fit the EG25-G test board to the top of the EVB, clipping it to the two connectors in the middle of the EVB. You can place it correctly by aligning the metal panel on the underside of the test board with the four arrows printed on the EVB:

<figure><img src="/files/5znkKf9YYOp3MhNwEFF5" alt=""><figcaption></figcaption></figure>

3. Connect one of the larger bundled antennas to the test board's uFL connector, marked **MAIN**. You will need one of the supplied whip adapters to join board and antenna:

<figure><img src="/files/OQgP6uuI4mJqw64TMsRq" alt=""><figcaption></figcaption></figure>

4. Connect the EVB to your computer with the supplied RS232-USB cable. Connect the cable to the EVB's **COM (MAIN)** connector:

<figure><img src="/files/XIryjB2tiGAbUK5afRDY" alt=""><figcaption></figcaption></figure>

5. Connect the EVB to a suitable power source, such as a USB AC adapter, and then turn on the EVB by sliding the **POWER** switch to the position marked **ON** on the board:

<figure><img src="/files/gUpN8Y7VSeAlXH0Ul9Ea" alt=""><figcaption></figcaption></figure>

6. Press the **PWRKEY** button once to enable the modem test board:

<figure><img src="/files/gIk1NRRPduvP2FfEW1n6" alt=""><figcaption></figcaption></figure>

At this point the board's **POWER**, **STATUS**, and **NET\_MODE** LEDs should be lit, and the **NET\_STA** LED should be flashing:

<figure><img src="/files/Nc9yqq5M68Pmpk2vBQRC" alt=""><figcaption></figcaption></figure>

**2. Access the EVB from your computer**

{% tabs %}
{% tab title="Linux" %}

1. Open your distribution's terminal app.
2. Confirm connection with `ls /dev/ttyUSB*` — you should see a single device listed: `/dev/ttyUSB0` . This is the USB-to-serial device you'll use to communicate with the EVB.
3. Using a serial tool like `minicom` — you will have to install this separately from source or a package manager like `apt` — access the board with `minicom -o -D /dev/ttyUSB0` .
   {% endtab %}

{% tab title="macOS" %}

1. Open the Terminal app.
2. Confirm connection with `ls /dev/cu*` — you should see one device listed `/dev/cu.usbserial-14140` . This is the USB-to-serial device you'll use to communicate with the EVB.
3. Using a serial tool like `minicom` — you will have to install this separately from source or a package manager like [Homebrew](https://brew.sh/) — access the board with `minicom -o -D /dev/cu.usbserial-14140` .
   {% endtab %}

{% tab title="Windows 10" %}

1. Windows 10's Device Manager will show the EVK-R5 as two USB Serial Ports in the **Ports (COM & LPT)** section. Try each one in turn, the lowest number first. Note its port's COM number:

   <figure><img src="https://www.twilio.com/_next/image?url=https%3A%2F%2Fdocs-assets.prod.twilio.com%2F8dfab9dcceea9eae6c6979ed589a4a5cc600537cbd0389d0c35c8c5be366df2a.png&#x26;w=1200&#x26;q=75" alt=""><figcaption></figcaption></figure>
2. Right-click on the Pico's entry in the Device Manager list and select **Properties...** . Select the **Port Settings** tab and note the **Bits per second:** value:

   <figure><img src="https://www.twilio.com/_next/image?url=https%3A%2F%2Fdocs-assets.prod.twilio.com%2F880a17db1b7ebfc5bc9d937747b9102319b8cb274f6ce0e35a7289d50781c76e.png&#x26;w=1920&#x26;q=75" alt=""><figcaption></figcaption></figure>
3. [Download and install PuTTY](https://www.chiark.greenend.org.uk/~sgtatham/putty/latest.html) a terminal emulator for Windows.
4. Run PuTTY, select **Serial** under the **Connection type** , and enter the COM number (as, for example, `COM5`) in the **Serial line** field. Make sure the **Speed** field is set to match the **Bits per second:** value you got from Device Manager:

   <figure><img src="https://www.twilio.com/_next/image?url=https%3A%2F%2Fdocs-assets.prod.twilio.com%2F72317765260b795d9f7bfb3c97083314cf13a8081457b8a1214d272f8109fbcd.png&#x26;w=1920&#x26;q=75" alt=""><figcaption></figcaption></figure>
5. Click **Open** .
6. When you see references to Minicom in the remainder of the tutorial, perform the tasks using your open PuTTY window.
   {% endtab %}
   {% endtabs %}

**3. Check your current carrier**

Within `minicom` or PuTTY, enter the AT command `AT+COPS?` to see which carrier your EG25-G is connected through:

<figure><img src="/files/lSWwZ6MI12D272LkwE9k" alt=""><figcaption></figcaption></figure>

## Useful AT commands

### Initialization

The EG25-G supports LTE Cat-4 FDD in bands 1-5, 7-8, 12-13, 18-20, 25-26, 28, TDD in bands 38-41, and GSM at 850, 900, 1800, and 1900MHz.

If you wish to limit communications to LTE only, i.e., to disable 2G (GSM), issue this command:

{% code lineNumbers="true" %}

```bash
AT+QCFG="nwscanmode",3
```

{% endcode %}

To instruct the modem to initiate data-centric attachments only — ie., not to make voice-oriented circuit-switched attachments too, which is the default — issue:

{% code lineNumbers="true" %}

```bash
AT+QCFG="servicedomain",1
```

{% endcode %}

All these settings will be applied immediately.

### Set the APN

Issue this AT command first to apply the Super SIM Access Point Name (APN):

{% code lineNumbers="true" %}

```bash
AT+CGDCONT=1,"IP","super"
```

{% endcode %}

By default, the EG21-G will roam automatically, but you can force this by issuing:

{% code lineNumbers="true" %}

```bash
AT+QCFG="roamservice",2
```

{% endcode %}

These settings will be applied immediately.

### Establish a data connection

Having set the modem's APN, establish a Packet Data Protocol (PDP) context with the following command:

{% code lineNumbers="true" %}

```bash
AT+QIACT=1
```

{% endcode %}

The single parameter is the PDP context's ID, in the range 1-16. It should match the first parameter in the above `CGDCONT` command.

You can also `QIACT`, in its read form, to get the device's data-connection state — and IP address, if the context is active:

{% code lineNumbers="true" %}

```bash
AT+QIACT?
+QIACT: 1,1,1,"100.74.24.186"
```

{% endcode %}

The first numeric parameter is the context ID. The second is its state — `1` indicates it is active — and the third is its type: `1` for IPV4 or `2` for IPV6.

### Perform a ping

Issue the Quectel-specific command

{% code lineNumbers="true" %}

```bash
AT+QPING=1,"<TARGET_IP_ADDRESS_OR_NAME>" 
```

{% endcode %}

to ping a server. Using one of Google's DNS servers as an example, this will yield:

{% code lineNumbers="true" %}

```bash
+QPING: 0,"8.8.8.8",32,167,255
+QPING: 0,"8.8.8.8",32,162,255
+QPING: 0,"8.8.8.8",32,164,255
+QPING: 0,"8.8.8.8",32,162,255
+QPING: 0,4,4,0,162,167,163
```

{% endcode %}

### Perform an HTTP GET

To issue an HTTP `GET` request using the EG25-G's built-in HTTP client, run the following commands:

1. Set the PDP context ID: `AT+QHTTPCFG="contextid",1`
2. Enable output of HTTP response headers: `AT+QHTTPCFG="responseheader",1`
3. Activate the PDP context if it is not already active: `AT+QIACT=1`
4. Set the target URL: `AT+QHTTPURL=21`This sets the modem to receive, prompted by the output `CONNECT`. The first parameter is the number of bytes the modem should expect to receive: it will end input after receiving this number of characters. The value of `21` comes from the URL below. The URL you provide must include the protocol, i.e., `http://`.
5. Upon receiving `CONNECT`, enter the URL. For example: `http://ifconfig.co/ip`
6. Make a `GET` request: `AT+QHTTPGET`
7. View the request: `AT+QHTTPREAD`

The request will look like this:

{% code lineNumbers="true" %}

```bash
HTTP/1.1 200 OK
Date: Fri, 20 May 2022 08:52:56 GMT
Content-Type: text/plain; charset=utf-8
Content-Length: 13
Connection: keep-alive
CF-Cache-Status: DYNAMIC
Report-To: {"endpoints":[{"url":"https:\/\/a.nel.cloudflare.com\/report\/v3?s=9fl%2B3t%2FRMhY2tMyWQDFAIM1mfFem0zLc7aONeXJ%2Fg4a%2FJPKFl%2BeGYElL5zwwuxi7%2BIfqx}
NEL: {"success_fraction":0,"report_to":"cf-nel","max_age":604800}
Server: cloudflare
CF-RAY: 70e3d6ceb8cc5b17-IAD
alt-svc: h3=":443"; ma=86400, h3-29=":443"; ma=86400

44.204.32.40

OK

+QHTTPREAD: 0
```

{% endcode %}

{% hint style="warning" %}
This example uses a service that returns the IP address of the requester.&#x20;
{% endhint %}

### Custom HTTP request headers

If you need to provide extra HTTP request headers, such `Authorization: Basic <API_KEY>`, or a custom header required by your server, issue

{% code lineNumbers="true" %}

```bash
AT+QHTTPCFG="requestheader",1
```

{% endcode %}

to tell the modem to use the custom header that you will provide when you make each request. You will need to create a full HTTP request header separated from your request body by the characters `<CR><LF>`. Whether you make a `POST` or a `GET` request, include a byte-count parameter that totals the header plus the body (`POST` request) or header alone (`GET` request). For example, `AT+QHTTPGET=60,512` for a 512-byte header (including the end-of-header `<CR><LF>`). The first parameter, `60`, is a timeout. This usually defaults to 60 seconds but must be included if a second parameter is also present.

### Perform an HTTPS GET

To issue a secure HTTP `GET` request using the EG21-G's built-in HTTP client, you follow the same procedure outlined above but with some extra steps included to configure SSL.

1. Set the PDP context ID: `AT+QHTTPCFG="contextid",1`
2. Enable output of HTTP response headers: `AT+QHTTPCFG="responseheader",1`
3. Activate the PDP context if it is not already active: `AT+QIACT=1`
4. Select the SSL context ID for this PDP context ID: `AT+QHTTPCFG="sslctxid",1`
5. Set the SSL version. Choose TLS 1.2: `AT+QSSLCFG="sslversion",1,3`
6. Set the SSL cipher suite. Choose all types: `AT+QSSLCFG="ciphersuite",1,0xFFFF`
7. For testing, set the SSL verification level to 0, so no CA certificate is required: `AT+QSSLCFG="seclevel",0`
8. Set the target URL: `AT+QHTTPURL=70`This sets the modem to receive, prompted by the output CONNECT. The parameter is the number of bytes the modem should expect to receive: it will end input after receiving this number of characters. The value of `70` comes from the URL below. The URL you provide must include the protocol, i.e., `https://`.
9. Upon receiving `CONNECT`, enter the URL. For example: `https://twilio-cms-prod.s3.amazonaws.com/documents/super-sim-test.json`
10. Make a `GET` request: `AT+QHTTPGET`
11. View the response: `AT+QHTTPREAD`

The request will look something like this:

{% code lineNumbers="true" %}

```bash
HTTP/1.1 200 OK
Date: Thu, 19 May 2022 10:23:25 GMT
Last-Modified: Thu, 19 May 2022 10:05:25 GMT
Accept-Ranges: bytes
Content-Type: application/json
Server: AmazonS3
Content-Length: 128

{
   "userId": 1,
   "id": 5,
   "title": "laboriosam mollitia et enim quasi adipisci quia provident illum",
   "completed": false                                                                                                                         }
OK

+QHTTPREAD: 0
```

{% endcode %}

### Perform an HTTP(S) POST

Sending data from the modem to an Internet-hosted API follows the paths outlined above for the HTTP and HTTPS protocols. The key difference is that you call `AT+QHTTPOST` instead of `AT+QHTTPGET`.

Optionally, the `QHTTPOST` command takes a parameter indicating the amount of data you are sending. The modem uses this to read that number of bytes via the UART over which your application is communicating with it — just as it does with the `QHTTPURL` command we used earlier. If you are providing a custom HTTP request header, remember to include its length too.

### Use low-power modes

While the EG21-G supports low-power modes for eDRX and PSM, support for these features will vary by visited network and location. The commands to enable each of these settings on the EG21-G are, respectively:

{% code lineNumbers="true" %}

```bash
AT+CEDRXS=1
AT+CPSMS=1
```

{% endcode %}

Both settings, but especially PSM, can prevent the modem from being accessible through the terminal during its sleep time. It's best to experiment with these features with the modem local. To disable all power saving if needed, send:

{% code lineNumbers="true" %}

```bash
AT+CEDRXS=0
AT+CPSMS=0
```

{% endcode %}

## Reach out for more information

Keen to find out more about how the Quectel EG25-G cellular module can power your IoT product design? [Contact Quectel sales](https://www.quectel.com/contact) to line up a conversation.

And don't forget, [we're always ready to discuss how Super SIM can help you](https://www.korewireless.com/iot/help) too.

## Additional resources

### KORE resources

* [Get Started with Super SIM](/supersim/supersim-first-steps)
* [Super SIM global network partners](/supersim/available-networks)
* [The Cellular Module Knowledgebase](/supersim/cellular-module-knowledgebase)

### Quectel resources

* [EG25-G Data Sheet](https://www.quectel.com/login/?redirect=https%3A%2F%2Fwww.quectel.com%2Fproduct%2Flte-eg25-g%2F) *Quectel login required*
* [EG25-G AT Commands Manual](https://www.quectel.com/login/?redirect=https%3A%2F%2Fwww.quectel.com%2Fproduct%2Flte-eg25-g%2F) *Quectel login required*
* [EG25-G GNSS Application Note](https://forums.quectel.com/uploads/short-url/jujxS4iCyMIMmoYNv61ixKO9Ij9.pdf)


# Works with Super SIM: Thales Cinterion EXS62-W

The Thales Cinterion EXS62-W is a Low Power Wide Area (LPWA)-focused module that specifically supports LTE Cat-M1 and NB-IoT 1 and 2. It includes a services engine built to support a range of Internet protocols, including TLS, FTP, HTTP, MQTT, and CoAP, and optimized operations for accessing these services.

{% hint style="warning" %}
Super SIM does not support NB-IoT, but it does deliver full LTE Cat M1 connectivity for the EXS62-W.
{% endhint %}

{% hint style="info" %}
Learn more about the EXS62-W on the [Thales website](https://www.thalesgroup.com/en/markets/digital-identity-and-security/iot/iot-connectivity/products/iot-products/exs62-w-global-mtc).
{% endhint %}

## Get started with EXS62-W and Super SIM

The best way to begin working with the EXS62-W is to take advantage of Thales' [Cinterion LGA DevKit](https://www.thalesgroup.com/en/markets/digital-identity-and-security/iot/cinterion-lga-devkit). It's ready to work with a variety of Thales modems, including the EXS62-W. You will need to purchase the 'SM' variant of the board, which comes with the correct adapter for EXS62-W's LGA (Land Grid Array) pinout. The modem is available separately. The kit can be connected to and used with a Windows 10, Linux or macOS computer.

<figure><img src="/files/AunLYdR3cyOhOFx9coqr" alt=""><figcaption></figcaption></figure>

The LGA DevKit and EXS62-W modules can be purchased from the following suppliers:

### EVB

* [Digikey](https://www.digikey.com/en/products/detail/thales-dis-formerly-gemalto/LGA-DevKit-SM/10494118)

### EXS62-W

* [Digikey](https://www.digikey.com/en/products/detail/thales-dis-formerly-gemalto/EXS62-W-REL-1-3/15992095)

{% hint style="info" %}
Working with the LHA DevKit and EXS62-W requires a configured Super SIM. If you haven't set up your Super SIM in the [Console](https://supersim.korewireless.com/supersim/sims), please do so now. The Super SIM First Steps guide has help if you need it.&#x20;
{% endhint %}

**1. Connect the LGA DevKit to your computer**

1. Slot a Super SIM into the DevKit's SIM holder on the underside of the board. It takes a standard-sized SIM, or a micro- or nano-SIM first fitted into an adapter:

<figure><img src="/files/4jdB2i20PWPUIH9FsoAB" alt=""><figcaption></figcaption></figure>

2. Turn the DevKit over and fit the module holder onto the board. Make sure the white arrow is oriented toward the top edge of the board. Drop in the adapter marked **SMALL** so that its label is adjacent to the holder's white arrow:

<figure><img src="/files/BPe7yOkgGtZYweqmnl2y" alt=""><figcaption></figcaption></figure>

3. Fit the EXS62-W module into the adapter, making sure the notch on its corner is aligned with the adapter's white arrow, as shown. This will orient the module upside down relative to the board:

<figure><img src="/files/j5310mucP3kKlzMhAym3" alt=""><figcaption></figcaption></figure>

4. Clip the large retainer onto the holder's four metal pins. Push it down onto the board and rotate it clockwise until its horizontal axis aligns with that of the board. Keep it held down while you turn it:

<figure><img src="/files/Ex48KDtbMJzcBYscQw6s" alt=""><figcaption></figcaption></figure>

5. Connect the SMA adapter cable to the supplied black antenna plate, and then to the DevKit's **MAIN** connector:

<figure><img src="/files/8q15DN7QDxizsxZf6sFW" alt=""><figcaption></figcaption></figure>

6. Connect the supplied USB cable to your computer and fit the cable's micro jack to the DevKit's **ASC0 USB** port:

<figure><img src="/files/OqHf4lZOQZcg0bJzLvHk" alt=""><figcaption></figcaption></figure>

7. The **PWR** LED will go green. If not, make sure the **PWR** and **ASC0** switches on the front edge of the board are set to the **USB** position:

<figure><img src="/files/f2gesxzs0s7aJ6twMbJ5" alt=""><figcaption></figcaption></figure>

8. Briefly press the ON button once:

<figure><img src="/files/9cw7KXByU96Wwk2hN0FZ" alt=""><figcaption></figcaption></figure>

At this point the board's **ON** LED will be white, and the **RXD0**, **TXD0**, and **ASC0 USB** LEDs will blink. The **STATUS** LED will be off.

{% hint style="info" %}
If the **ON** LED does not light, check the **ERROR** LED. If it blinks briefly or continuously red, the EXS62-W module has not been fitted correctly. Check the card that ships with the DevKit for the exact diagnosis, but the codes indicate the module is missing or placed incorrectly.

![](/files/CfVuXfaicYe0LyycvpCV)&#x20;
{% endhint %}

**2. Access the DevKit from your computer**

{% tabs %}
{% tab title="Linux" %}

1. Open your distribution's terminal app.
2. Confirm connection with `ls /dev/ttyUSB*` — you should see a single device listed: `/dev/ttyUSB0` . This is the USB-to-serial device you'll use to communicate with the DevKit.
3. Using a serial tool like `minicom` — you will have to install this separately from source or a package manager like `apt` — access the board with `minicom -o -D /dev/ttyUSB0` .
   {% endtab %}

{% tab title="macOS" %}

1. Open the Terminal app.
2. Confirm connection with `ls /dev/cu*` — you should see one device listed, with a name like `/dev/cu.usbserial-ANZ26CWY` . This is the USB-to-serial device you'll use to communicate with the DevKit.
3. Using a serial tool like `minicom` — you will have to install this separately from source or a package manager like [Homebrew](https://brew.sh/) — access the board with `minicom -o -D /dev/cu.usbserial-ANZ26CWY` .
   {% endtab %}

{% tab title="Windows 10" %}

1. Windows 10's Device Manager will show the EVK-R5 as two USB Serial Ports in the **Ports (COM & LPT)** section. Try each one in turn, the lowest number first. Note its port's COM number:

   <figure><img src="https://www.twilio.com/_next/image?url=https%3A%2F%2Fdocs-assets.prod.twilio.com%2F8dfab9dcceea9eae6c6979ed589a4a5cc600537cbd0389d0c35c8c5be366df2a.png&#x26;w=1200&#x26;q=75" alt=""><figcaption></figcaption></figure>
2. Right-click on the Pico's entry in the Device Manager list and select **Properties...** . Select the **Port Settings** tab and note the **Bits per second:** value:

   <figure><img src="https://www.twilio.com/_next/image?url=https%3A%2F%2Fdocs-assets.prod.twilio.com%2F880a17db1b7ebfc5bc9d937747b9102319b8cb274f6ce0e35a7289d50781c76e.png&#x26;w=1920&#x26;q=75" alt=""><figcaption></figcaption></figure>
3. [Download and install PuTTY](https://www.chiark.greenend.org.uk/~sgtatham/putty/latest.html) a terminal emulator for Windows.
4. Run PuTTY, select **Serial** under the **Connection type** , and enter the COM number (as, for example, `COM5`) in the **Serial line** field. Make sure the **Speed** field is set to match the **Bits per second:** value you got from Device Manager:

   <figure><img src="https://www.twilio.com/_next/image?url=https%3A%2F%2Fdocs-assets.prod.twilio.com%2F72317765260b795d9f7bfb3c97083314cf13a8081457b8a1214d272f8109fbcd.png&#x26;w=1920&#x26;q=75" alt=""><figcaption></figcaption></figure>
5. Click **Open** .
6. When you see references to Minicom in the remainder of the tutorial, perform the tasks using your open PuTTY window.
   {% endtab %}
   {% endtabs %}

**3. Check your current carrier**

Within `minicom` or PuTTY, enter the AT command `AT+COPS?` to see which carrier your EXS62-W is connected through:

<figure><img src="/files/EAQLXj8eCoqsszQl9C0W" alt=""><figcaption></figcaption></figure>

## Useful AT commands

### Initialization

The EXS62-W supports LTE Cat-M1 in NB-IoT in bands 1-5, 8, 12-13, 18-20, 25-28, 66, 71, and 85. A variant, the EXS82-W adds legacy 2G connectivity. The EXS62-W does not support circuit-switched data transmission.

Super SIM does not support NB-IoT so we recommend disabling NB-IoT entirely, to prevent the module from attempting to connect to NB-IoT services in areas where it might appear to the module to be preferable to do so. Switch to and prefer Cat-M1 by issuing:

{% code lineNumbers="true" %}

```bash
AT^SXRAT=7,7
```

{% endcode %}

This sets the current Radio Access Technology (RAT) to Cat-M1 (`7`) and sets the reconnection RAT preference to the same value. The RAT has to be set while the modem is not in airplane mode, and will be reset to favoring both Cat-M1 and NB-IoT if you subsequently issue `AT+COPS=0`.

This setting will be applied immediately if the device is registered with a network, otherwise it will be applied on the next registration.

### Set the APN

Issue this AT command first to apply the Super SIM Access Point Name (APN):

{% code lineNumbers="true" %}

```bash
AT+CGDCONT=1,"IP","super"
```

{% endcode %}

The first parameter is the ID of the PDP (Packet Data Protocol) context to be used for this data connection, in the range 1-16. You will use this ID in all of the following examples.

By default, the EXS62-W will roam automatically.

### Establish a data connection

Having set the modem's APN, establish an Internet connection with the following command:

{% code lineNumbers="true" %}

```bash
AT^SICA=1,1
```

{% endcode %}

The first parameter is the required action: `1` for enable, `0` for disable. The second parameter is the ID of the PDP context to be used to host the connection. It should match the first parameter in the `CGDCONT` call discussed above.

Use the same command in its read form, `AT^SICA?`, to get the device's current Internet connection state. For the device's IP address, issue:

{% code lineNumbers="true" %}

```bash
AT+CGPADDR=1
```

{% endcode %}

The modem will respond with:

{% code lineNumbers="true" %}

```bash
+CGPADDR: 1,"<DEVICE_IP_ADDRESS>"
```

{% endcode %}

The first numeric parameter is the PDP context ID.

### Perform a ping

Issue the Cinterion-specific command:

{% code lineNumbers="true" %}

```bash
AT^SISX=Ping,<PDP_CONTEXT_ID>,"<IP_ADDRESS>",<PINGS>,<TIMEOUT_IN_MS>
```

{% endcode %}

to ping a server. Using one of Google's DNS servers as an example, this will yield:

{% code lineNumbers="true" %}

```bash
^SISX: "Ping",1,1,"8.8.8.8",546
^SISX: "Ping",1,1,"8.8.8.8",515
^SISX: "Ping",1,1,"8.8.8.8",457
^SISX: "Ping",1,1,"8.8.8.8",443
^SISX: "Ping",1,1,"8.8.8.8",375
^SISX: "Ping",2,1,5,5,0,0
^SISX: "Ping",3,1,375,546,467
```

{% endcode %}

### Perform an HTTP GET

To issue an HTTP `GET` request using the EXS62-W's built-in Internet services engine, run the following commands. It's assumed there is no active connection at present, which you can ensure by first issuing `AT^SICA=0,1`.

1. Set at least one DNS server: `AT^SICS=1,"dns1","8.8.8.8"`
2. Activate the Internet connection: `AT^SICA=1,1`
3. Configure the HTTP operation's Internet service profile. This is referenced by its ID, in the range 0-9:
   * Set the profile 0's service type to HTTP: `AT^SISS=0,srvtype,"http"`
   * Set the connection ID to match that of the current PDP context: `AT^SISS=0,conid,"1"`
   * Set the target URL, including the path: `AT^SISS=0,address,"http://ifconfig.co/ip"`**Note** You can specify HTTP by including the protocol as a URL prefix, or by adding `:80` to indicate the required port.
   * Specify the request's HTTP method: `AT^SISS=0,cmd,"get"`
4. Open the Internet service: `AT^SISO=0`
5. The modem will attempt to make the request. You may see these URCs as the response is processed:

   <pre class="language-bash" data-line-numbers><code class="lang-bash">^SIS: 0,0,2200,"Http connect 172.67.133.228:80"
   ^SIS: 0,0,2201,"HTTP/1.1 200 OK"
   ^SIS: 0,0,2201,"Content-Length: 13"
   ^SISR: 0,1
   </code></pre>
6. The last line above indicates there is data available for you to read. In this case, the header data shows how much, so read 13 bytes: `AT^SISR=0,13`
7. You will see:

   <pre class="language-bash" data-line-numbers><code class="lang-bash">^SISR: 0,13
   44.204.32.14
   OK
   </code></pre>
8. Watch for the URC `^SISR: 0,2`, which indicates that all the available data has been read. If you don't see this — perhaps the response's content length was much larger and you only read a portion of it — continue to issue `AT^SISR=0,<NUMBER_OF_BYTES_TO_READ>` commands until all the data has been read — i.e., you do receive `^SISR: 0,2`
9. Close the Internet service: `AT^SISC=0`

{% hint style="warning" %}
This example uses a service that returns the IP address of the requester.
{% endhint %}

### Custom HTTP request headers

If you need to provide extra HTTP request headers, such as `Authorization: Basic <API_KEY>` or a custom header required by your server, issue

{% code lineNumbers="true" %}

```bash
AT^SISS=0,hcprop,"<HEADERS>"
```

{% endcode %}

when you are configuring your Internet service profile. Pass each header in the form `<key>: <value>`. Multiple headers can be included by separating them with the sequence `\0d\0a`. Don't add a separator after the last header and ensure your `<HEADERS>` string is 255 bytes or less.

If you wish to include a `User-Agent` header, don't add it to your headers string but instead supply it to the module with the `hcuseragent` option:

{% code lineNumbers="true" %}

```bash
AT^SISS=0,hcuseragent,"<USER_AGENT>"
```

{% endcode %}

### Perform an HTTPS GET

To issue a secure HTTP `GET` request using the EXS62-W's built-in Internet services engine, you follow the same procedure outlined above but with some extra steps to configure TLS. Again, it's assumed there is no active connection at present, which you can ensure by first issuing `AT^SICA=0,1`.

1. Initialize the module's certificates: `AT^SSECUA="CertStore/TLS/PreconfigureCerts"`
2. Set at least one DNS server: `AT^SICS=1,"dns1","8.8.8.8"`
3. Activate the Internet connection: `AT^SICA=1,1`
4. Configure the HTTP operation's Internet service profile:
   * Set the profile 1's service type to HTTP: `AT^SISS=1,srvtype,"http"`
   * Set the connection ID to match that of the current PDP context: `AT^SISS=1,conid,"1"`
   * Set the target URL, including the path: `AT^SISS=1,address,"https://jsonplaceholder.typicode.com/todos/1"`**Note** You can specify HTTPS by including the protocol as a URL prefix, or by adding `:443` to indicate the required port.
   * Specify the request's HTTP method: `AT^SISS=1,cmd,"get"`
5. Open the Internet service: `AT^SISO=1`
6. The modem will attempt to make the request. You may see these URCs as the response is processed:

   <pre class="language-bash" data-line-numbers><code class="lang-bash">^SIS: 1,0,2200,"Http connect 172.67.131.170:443"
   ^SIS: 1,0,2201,"HTTP/1.1 200 OK"
   ^SIS: 1,0,2201,"Content-Length: 83"
   ^SIS: 1,0,2201,"Etag: W/"53-hfEnumeNh6YirfjyjaujcOPPT+s""
   ^SISR: 1,1
   </code></pre>
7. The last line above indicates there is data available for you to read. In this case, the header data shows how much, so read 83 bytes: `AT^SISR=1,83`
8. You will see:

   <pre class="language-bash" data-line-numbers><code class="lang-bash">^SISR: 1,83
   {
      "userId": 1,
      "id": 1,
      "title": "delectus aut autem",
      "completed": false
   }
   OK
   </code></pre>
9. Watch for the URC `^SISR: 1,2`, which indicates that all the available data has been read. If you don't see this — perhaps the response's content length was much larger and you only read a portion of it — continue to issue `AT^SISR=1,<NUMBER_OF_BYTES_TO_READ>` commands until all the data has been read — i.e., you do receive `^SISR: 1,2`
10. Close the Internet service: `AT^SISC=1`

### Perform an HTTP(S) POST

Sending data from the modem via an Internet-hosted API follows the paths outlined above for the HTTP and HTTPS protocols. Primarily, you call `AT^SISS=0,cmd,"post"` instead of `AT^SISS=0,cmd,"get"`.

The EXS62-W provides a way to load up a small amount (1-255 bytes) of body data: issue

{% code lineNumbers="true" %}

```bash
AT^SISS=0,hccontent,"<DATA_AS_STRING>"
AT^SISS=0,hccontlen,0
```

{% endcode %}

If the size of the data you wish to send is greater than 255 bytes, set the size with `AT^SISS=0,hccontlen,<SIZE_IN_BYTES>` and then upload data to the module after opening the the Internet service with `AT^SISO=0`. Issue `AT^SISW=0,<CHUNK_SIZE>` to trigger the modem to input the data over the UART. Up to 1500 bytes can be sent to the modem at a time, and each chunk will be sent out as they are received from your application.

### Use low-power modes

While the EXS62-W supports low-power modes for eDRX and PSM, support for these features will vary by visited network and location. The commands to enable each of these settings on the EXS62-W are, respectively:

{% code lineNumbers="true" %}

```bash
AT+CEDRXS=1
AT+CPSMS=1
```

{% endcode %}

Both settings, but especially PSM, can prevent the modem from being accessible through the terminal during its sleep time. It's best to experiment with these features with the modem local. To disable all power saving if needed, send:

{% code lineNumbers="true" %}

```bash
AT+CEDRXS=0
AT+CPSMS=0
```

{% endcode %}

## Reach out for more information

Keen to find out more about how the Thales EXS62-W cellular module can power your IoT product design? [Contact Thales sales](https://www.thalesgroup.com/en/markets/digital-identity-and-security/iot/iot-connectivity/products/iot-products/exs62-w-global-mtc#contactUsTitle) to line up a conversation.

And don't forget, [we're always ready to discuss how Super SIM can help you](https://www.korewireless.com/iot/help) too.

## Additional resources

### KORE resources

* [Get Started with Super SIM](/supersim/supersim-first-steps)
* [Super SIM global network partners](/supersim/available-networks)
* [The Cellular Module Knowledgebase](/supersim/cellular-module-knowledgebase)

### Thales resources

* [EXS62-W Data Sheet](https://www.gs-m2m.de/fileadmin/Bilder/GSM_Module/Module/EXS62_82/exs62-w_exs82-w_hid_v01100a.pdf)
* [EXS62-W AT Commands Manual](https://www.gs-m2m.de/fileadmin/Bilder/GSM_Module/Module/EXS62_82/exs62-w_atc_v01100a.pdf)


# Works with Super SIM: u-blox SARA-R5

The [u-blox SARA-R5](https://www.u-blox.com/en/product/sara-r5-series) is a family of cellular modules based on u‑blox's UBX-R5 cellular chipset and M8 GNSS receiver chip. SARA-R5 series modules support Cat-M1 and NB-IoT, and — together with Super SIM — deliver great connectivity optimized for IoT applications.

## The SARA-R5 family members

* SARA-R500S — Multi-regional Cat-M1/NB-IoT module.
* SARA-R510S — Multi-regional Cat-M1/NB-IoT module for ultra-low power applications.
* SARA-R510M8S — Multi-regional Cat-M1/NB-IoT module with integrated u-blox M8 GNSS receiver.

{% hint style="info" %}
Learn more about the SARA-R5 series of modules [on the u-blox website](https://www.u-blox.com/en/product/sara-r5-series).&#x20;
{% endhint %}

{% hint style="danger" %}
Update your R5's firmware to version **3.15** or above for use with Super SIM. You can check the installed version with `AT+GMR`. Please see the [SARA-R5 AT commands manual](#additional-resources) to learn how to update the module.
{% endhint %}

## Get started with SARA-R5 and Super SIM

The best way to begin working with the SARA-R5 is to take advantage of [u-blox's EVK-R5 developer kit](https://www.u-blox.com/en/product/evk-r5). It features powerful and easy‑to‑use tools in an environment specifically designed for the development and testing of cellular and GNSS applications based on the SARA-R5. It includes a USB interface and a built‑in u‑blox GNSS receiver module for SARA-R5 variants that do not feature an integrated unit. The kit can be connected to and used with a Windows 10, Linux or macOS computer.

<figure><img src="/files/whltuWyevmlhmXeulkml" alt=""><figcaption></figcaption></figure>

The EVK-R5 can be obtained from the following recommended suppliers:

* [u-blox](https://www.u-blox.com/en/project-information-form?products=EVK-R500S)
* [Digikey](https://www.digikey.com/en/products/detail/u-blox/EVK-R500S-0/12806568)
* [Mouser](https://www2.mouser.com/ProductDetail/u-blox/EVK-R500S-0?qs=DPoM0jnrROUahJvSqov74A%3D%3D)

{% hint style="warning" %}
If you obtain your developer kit from a third-party, including Digikey and Mouser, please confirm they have the **01B** version before purchasing. This version includes the module's latest production firmware.
{% endhint %}

{% hint style="info" %}
Working with the EVK-R5 and SARA-R5 requires a configured Super SIM. If you haven't set up your Super SIM in the Console, please do so now. The Super SIM First Steps guide has help if you need it.
{% endhint %}

### 1. Connect the EVK-R5 to your computer

1. Slot a Super SIM into the board's SIM holder. It takes a standard-sized SIM, or a micro- or nano-SIM first fitted into an adapter:

<figure><img src="/files/YGA0t8riZZyDl2xAm1w7" alt=""><figcaption></figcaption></figure>

2. Connect the supplied LTE antenna to the **ANT** connector on the SARA-R5 daughtercard:

<figure><img src="/files/kfh9ziofj4mkpmghGO14" alt=""><figcaption></figcaption></figure>

3. Connect the EVK-R5 to your computer by the supplied mini USB cable. Use the mini USB connector alongside the GNSS daughtercard:

<figure><img src="/files/qFYLyxRt6XCsPasgQRY7" alt=""><figcaption></figcaption></figure>

4. Connect the EVK-R5 to power using the supplied AC adapter.
5. Turn the board on by flipping the power toggle:

<figure><img src="/files/qHn3BFut92EvRsIfJxZ0" alt=""><figcaption></figcaption></figure>

### 2. Access the EVK-R5 from your computer

{% tabs %}
{% tab title="Linux" %}

1. Open your distribution's terminal app.
2. Confirm connection with `ls /dev/ttyUSB*` — you should see four devices listed `/dev/ttyUSBx` where x is 0 through 3:

   \
   The USB-to-serial device you'll use to communicate with the EVK-R5 is `/dev/ttyUBS2`.

   <figure><img src="https://www.twilio.com/_next/image?url=https%3A%2F%2Fdocs-assets.prod.twilio.com%2Ff83a97882954871d41a43432f83502922e33cdc156fc9cb91569469b889f7464.png&#x26;w=1920&#x26;q=75" alt=""><figcaption></figcaption></figure>
3. Using a serial tool like `minicom` — you will have to install this separately from source or a package manager like `apt` — access the board with `minicom -o -D /dev/ttyUSB2` .
   {% endtab %}

{% tab title="macOS" %}

1. Open the Terminal app.
2. Confirm connection with `ls /dev/cu*` — you should see four devices listed `/dev/cu.usbserial-FTCSUXUXx` where x is 0 through 3:

   \
   The USB-to-serial device you'll use to communicate with the EVK-R5 is `/dev/cu.usbserial-FTCSUXUX2`.

   <figure><img src="https://www.twilio.com/_next/image?url=https%3A%2F%2Fdocs-assets.prod.twilio.com%2Fb9cf598f99572c6c809f3e0e34640f9a61d8ca240ed85909bca179bae66967c1.png&#x26;w=1920&#x26;q=75" alt=""><figcaption></figcaption></figure>
3. Using a serial tool like `minicom` — you will have to install this separately from source or a package manager like [Homebrew](https://brew.sh/) — access the board with `minicom -o -D /dev/cu.usbserial-FTCSUXUX2`
   {% endtab %}

{% tab title="Windows 10" %}

1. Windows 10's Device Manager will show the EVK-R5 as two USB Serial Ports in the **Ports (COM & LPT)** section. Try each one in turn, the lowest number first. Note its port's COM number:

   <figure><img src="https://www.twilio.com/_next/image?url=https%3A%2F%2Fdocs-assets.prod.twilio.com%2F8dfab9dcceea9eae6c6979ed589a4a5cc600537cbd0389d0c35c8c5be366df2a.png&#x26;w=1200&#x26;q=75" alt=""><figcaption></figcaption></figure>
2. Right-click on the Pico's entry in the Device Manager list and select **Properties...** . Select the **Port Settings** tab and note the **Bits per second:** value:

   <figure><img src="https://www.twilio.com/_next/image?url=https%3A%2F%2Fdocs-assets.prod.twilio.com%2F880a17db1b7ebfc5bc9d937747b9102319b8cb274f6ce0e35a7289d50781c76e.png&#x26;w=1920&#x26;q=75" alt=""><figcaption></figcaption></figure>
3. [Download and install PuTTY](https://www.chiark.greenend.org.uk/~sgtatham/putty/latest.html) a terminal emulator for Windows.
4. Run PuTTY, select **Serial** under the **Connection type** , and enter the COM number (as, for example, `COM5`) in the **Serial line** field. Make sure the **Speed** field is set to match the **Bits per second:** value you got from Device Manager:

   <figure><img src="https://www.twilio.com/_next/image?url=https%3A%2F%2Fdocs-assets.prod.twilio.com%2F72317765260b795d9f7bfb3c97083314cf13a8081457b8a1214d272f8109fbcd.png&#x26;w=1920&#x26;q=75" alt=""><figcaption></figcaption></figure>
5. Click **Open** .
6. When you see references to Minicom in the remainder of the tutorial, perform the tasks using your open PuTTY window.
   {% endtab %}
   {% endtabs %}

### 3. Check your current carrier

Within `minicom` or PuTTY, enter the AT command `AT+COPS?` to see which carrier your SARA-R5 is connected through:

## Useful AT commands

### Firmware

Update your R5's firmware to version 3.15 or above for use with Super SIM. You can check the installed version with `AT+GMR`. Please see the [SARA-R5's AT commands manual](#additional-resources) to learn how to update the module.

### Initialization

The SARA-R5 supports LTE Cat-M1 and NB-IoT in bands 1, 2, 3, 4, 5, 8, 12, 13, 18, 19, 20, 25, 26, 28, 66, 71 and 85. Super SIM is compatible with Cat-M1 but not NB-IoT. It's therefore important to ensure that your SARA-R5 is set to operate using Cat-M1 only.

SARA-R5 supports the use of only a single cellular Radio Access Technology (RAT) at a time, so if Cat-M1 is selected and no suitable network is available, the module will not attempt to connect using NB-IoT. Consequently, if you have set the module to use NB-IoT, it will never connect until Cat-M1 is set as the favored RAT.

By default, all current SARA-R5 variants prioritize Cat-M1, but you can set this manually by issuing the command `AT+URAT` and specifying the value 7. You should apply the value using the following command sequence:

{% code lineNumbers="true" %}

```bash
AT+CFUN=0
AT+URAT=7
AT+CFUN=16
```

{% endcode %}

The `AT+CFUN` commands first disable cellular operation and, lastly, re-enable cellular operation after first rebooting the module. The reboot is required to persist the specified RAT value.

### Set the APN

Issue this AT command first to apply the Super SIM Access Point Name (APN):

{% code lineNumbers="true" %}

```bash
AT+CGDCONT=1,"IP","super"
```

{% endcode %}

The SARA-R5 enables roaming automatically.

### Establish a data connection

The following commands can be used to establish a PDP context once the APN has been set:

{% code lineNumbers="true" %}

```bash
AT+CGACT=1,1
AT+UPSD=0,0,0
AT+UPSD=0,100,1
AT+UPSDA=0,3
```

{% endcode %}

Line two must match the PDP type set in the above `AT+CGDCONT` command. For example, the latter includes `"IP"` to select IPv4, so the final parameter of `AT+UPSD=0,0,0` must also indicate IPv4, i.e., `0`.

Line three maps the module's internal packet-switched data (PSD) profile, `0`, to the PDP context ID, `1`, set with the `AT+CGDCONT` command shown above. For more information on SARA-R5 PSD profiles, please see the [SARA-R5 Internet Applications Development Guide](#additional-resources).

Line four activates PSD profile 0, and will return `+UUPSDA: 0,"aaa.bbb.ccc.ddd"` where `aaa.bbb.ccc.ddd` is your device's IP address.

### Perform a ping

Issue the u-blox specific command `AT+UPING=<TARGET_IP_ADDRESS_OR_NAME>` to ping a server. Using one of Google's DNS servers as an example, this will yield:

{% code lineNumbers="true" %}

```bash
AT+UPING="8.8.8.8"
OK

+UUPING: 1,32,"dns.google","8.8.8.8",109,1105
+UUPING: 2,32,"dns.google","8.8.8.8",109,271
+UUPING: 3,32,"dns.google","8.8.8.8",109,238
+UUPING: 4,32,"dns.google","8.8.8.8",109,216
```

{% endcode %}

By default, `+UPING` issues only four pings.

### Perform an HTTP GET

To perform an HTTP `GET` using the SARA-R5's built-in HTTP client:

1. Set up a data connection [as described above](#establish-a-data-connection).
2. Reset the parameters of HTTP profile 0 to the defaults: `AT+UHTTP=0`.
3. Configure the HTTP server name: `AT+UHTTP=0,1,"api.ipify.org"`.
4. Perform a `GET` request using profile 0 and store the result in the file `test.ffs`: `AT+UHTTPC=0,1,"/","test.ffs"`.
   * The modem will respond with `+UUHTTPCR: 0,1,1`. This may take a moment or two as the server's DNS name is resolved and then the HTTP request is issued.

The file `test.ffs` will contain the response from the server. Request the file by issuing `AT+URDFILE="test.ffs"`. This will yield:

{% code lineNumbers="true" %}

```bash
+URDFILE: "test.ffs",178,"HTTP/1.1 200 OK
Server: Cowboy
Connection: close
Content-Type: text/plain
Vary: Origin
Date: Mon, 14 Mar 2022 11:54:03 GMT
Content-Length: 11
Via: 1.1 vegur

3.239.194.9"
OK
```

{% endcode %}

{% hint style="info" %}
This example uses a service that returns the IP address of the requester.
{% endhint %}

### Use low-power modes

While the SARA-R5 supports low-power modes for eDRX and PSM, support for these features will vary by visited network and location. The commands to enable each of these settings on the SARA-R5 are, respectively:

{% code lineNumbers="true" %}

```bash
AT+CEDRXS=1
AT+CPSMS=1
```

{% endcode %}

Both settings, but especially PSM, can prevent the modem from being accessible through the terminal during its sleep time. It's best to experiment with these features with the modem local. To disable all power saving if needed, send:

{% code lineNumbers="true" %}

```bash
AT+CEDRXS=0
AT+CPSMS=0
```

{% endcode %}

You can learn more about implementing these modes in our power optimization documentation and by consulting the [SARA-R5 AT commands manual](#additional-resources).

## Reach out for more information

Keen to find out more about how the u-blox SARA-R5 family of cellular modules can power your IoT product design? Contact [u-blox sales](mailto:info_us@u-blox.com) to line up a conversation.

And don't forget we're [always ready to discuss how Super SIM can help you](https://www.korewireless.com/iot/help) too.

## Additional resources

### KORE resources

* [Get Started with Super SIM](/supersim/supersim-first-steps)
* [Super SIM global network partners](/supersim/available-networks)
* [The Cellular Module Knowledgebase](/supersim/cellular-module-knowledgebase)

### u-blox resources

* [SARA R5 Data Sheet](https://www.u-blox.com/sites/default/files/SARA-R5_DataSheet_UBX-19016638.pdf)
* [SARA-R5 AT Commands Manual](https://www.u-blox.com/en/docs/UBX-19047455)
* [SARA-R5 Application Development Guide](https://www.u-blox.com/en/docs/UBX-20009652)
* [SARA-R5 Internet Applications Development Guide](https://www.u-blox.com/en/docs/UBX-20032566)
* [EVK-R5 Developer Kit User Guide](https://www.u-blox.com/sites/default/files/EVK-R5_UserGuide_UBX-19042592.pdf)


# Cellular Module Knowledgebase


# Overview

## Cellular Module Knowledgebase

***

KORE's Cellular Connectivity for IoT service is compatible with a wide range of devices from a variety of manufacturers. To help developers who are running into difficulties, we've collected a number of common configuration requirements, errata, and solutions to common challenges for many of the modules we've worked with in our lab. The list of devices will grow as our we and our developers work with more modems.

The presence (or absence) of a module in the Knowledgebase does not necessarily indicate a device's suitability (or unsuitability) for use on our networks, and is provided solely as an aid to help developers with their implementations.

***

## Cellular modules we've tested <a href="#cellular-modules-weve-tested" id="cellular-modules-weve-tested"></a>

{% hint style="warning" %}
Radio technologies below indicate those supported by the modules which may not all be supported by KORE's connectivity solutions. For example, Super SIM does not support NB-IoT. So while many Cat-M1 (aka LTE-M) modules also support NB-IoT, you will only be able to use Cat-M1 and GSM, if also supported, when used with a Super SIM.
{% endhint %}

* **Nordic** [Super SIM](https://docs.korewireless.com/en-us/supersim/cellular-module-knowledgebase/nordic-modules-with-super-sim)
  * nRF9160 (Cat-M1, NB-IoT)
* **Quectel** [Super SIM](https://docs.korewireless.com/en-us/supersim/cellular-module-knowledgebase/quectel-modules-with-super-sim)
  * BG95-M3 (Cat-M1, NB-IoT, GSM)
  * BG96 (Cat-M1, NB-IoT, GSM)
  * EG21-G (Cat-1, GSM)
  * EG25-A, EG25-G (Cat-4)
  * EG91-NA (Cat-1)
* **Simcom** [Super SIM](https://docs.korewireless.com/en-us/supersim/cellular-module-knowledgebase/simcom-modules-with-super-sim)
  * SIM7000G (Cat-M1, NB-IoT, GSM)
  * SIM7080G (Cat-M1, NB-IoT, GSM)
  * SIM7600A (Cat-4)
* **Telit** [Super SIM](https://docs.korewireless.com/en-us/supersim/cellular-module-knowledgebase/telit-modules-with-super-sim)
  * ME910C1 (Cat-M1, NB-IoT)
* **Thales Cinterion** [Super SIM](https://docs.korewireless.com/en-us/supersim/cellular-module-knowledgebase/thales-cinterion-modules-with-super-sim)
  * EXS62-W (Cat-M1, NB-IoT)
* **u-Blox** [Super SIM](https://docs.korewireless.com/en-us/supersim/cellular-module-knowledgebase/u-blox-modules-with-super-sim)
  * LARA-R203 (North America) (Cat-1/2/3)
  * LARA-R211 (Europe) (Cat-1/2/3)
  * SARA-R410M (Cat-M1, NB-IoT)
  * SARA-R510M8S (Cat-M1, NB-IoT)

Click on a link for the vendor's tested modules for the selected SIM type.

***

## General guidance <a href="#general-guidance" id="general-guidance"></a>

While some configuration is [specific to each modem manufacturer and sometimes each model](#module-specific-details), certain concepts behind getting connected with Super SIM are common to all modems. This page covers these general factors, and so should be your first port of call for troubleshooting and application preparation purposes.

{% hint style="info" %}
Although the commands listed below should have similar parameters, outputs, and behavior across modules and manufacturers, always the AT command documentation for your specific device(s) for specific parameter details and usage. You can find links to the listed modules' AT command manuals [on their own pages](#module-specific-details).
{% endhint %}

***

## Access Point Name (APN) <a href="#access-point-name-apn" id="access-point-name-apn"></a>

The Super SIM APN is `super`.

The APN is set on most modules this way:

Copy code block

```
AT+CGDCONT=1,"IP","super"
```

The initial parameter is most commonly 1 but you may find some modules require it to be 0. With the APN set, you should be able to obtain an IP address from the network and to connect via PPP.

{% hint style="info" %}
For more detailed guidance on setting the APN, particularly for devices with integrated modules, and for setting the APN using the Super SIM API's SMS Commands functionality, please see our [APN configuration page](https://docs.korewireless.com/en-us/supersim/how-to/apn-configuration).
{% endhint %}

{% hint style="info" %}
This APN is separate from the APN you may set on vendor-specific commands to utilize a modem's built-in TCP, UDP, or application-specific protocols. This will vary by vendor and is described in subsequent documents for [modules we have tested](#module-specific-details).
{% endhint %}

***

## Working with Cat-M1 Devices <a href="#working-with-cat-m1-devices" id="working-with-cat-m1-devices"></a>

To get the best experience when using Super SIM with Cat-M1 modems, we suggest that you apply the following configuration settings on your device. They will make sure the Cat-M1 modem in your IoT device connects quickly and successfully.

If your IoT device uses a regular LTE modem, the following changes do not apply.

### Disable NB-IoT <a href="#disable-nb-iot" id="disable-nb-iot"></a>

Super SIM does not currently support Narrowband IoT (NB-IoT). If NB-IoT is enabled, a Cat-M1 device will scan all NB-IoT bands, which can take a considerable amount of time, before switching to Cat-M. It may also lead to a failure to attach in some locations. To minimize the time to connect and avoid wasting power scanning NB-IoT bands, you should disable NB-IoT.

### Disable 2G (GSM) <a href="#disable-2g-gsm" id="disable-2g-gsm"></a>

Some modems support both Cat-M1 and 2G. If your modem supports 2G, we recommend that you disable it unless your IoT device can perform optimally on 2G or if Cat-M1 is not available in every location where you will deploy your IoT device. There is a risk that if the initial connection is made over a cellular network that does not support Cat-M1, your device will instead connect using 2G. It may then stay attached to the 2G network and may therefore be unable to receive over-the-air (OTA) updates from our platform. If 2G is disabled, then the device will only connect over a Cat-M1 network.

For Cat-M1 devices that don't support 2G, this is not an issue.

{% hint style="info" %}
We are actively exploring improvements to our mobile core to deliver OTA updates over 2G.
{% endhint %}

***

## Unsolicited Response Codes <a href="#unsolicited-response-codes" id="unsolicited-response-codes"></a>

Many modems use Unsolicited Response Codes (URCs) to communicate events and status changes to your application. These strings may not arrive on a serial line (UART, or Universal Asynchronous Receiver-Transmitter) your application is monitoring so check your modem's documentation to learn how it will send URCs to your device and to find out how to change this if you need to. For those modems for which we have provided additional information, we will call out how to configure this feature.

{% hint style="danger" %}
Many commands which subscribe to URCs are scoped to the current session and will need to be sent again when the modem is next powered up or rebooted.
{% endhint %}

***

## Network registration status <a href="#network-registration-status" id="network-registration-status"></a>

To obtain the current network registration status, and to receive real-time connection state updates, there are three commands available to you. These are part of the 3GPP standard and so are available on all modems:

* `AT+CREG` indicates the status of the circuit-switched (CS) network connection, generally 2G or 3G .
* `AT+CGREG` indicates the status of the packet-switched network connection, generally 2G. This will usually occur after CS registration.
* `AT+CEREG` indicates the status of the Evolved Packet System (EPS) network connection, generally 3G or LTE (4G and 5G).

These commands have several uses:

* You can explicitly query the modem's current status with respect to each connection type: `AT+CREG?`, `AT+CGREG?`, `AT+CEREG?`.
* You can request URC notices for each: `AT+CREG=x`, `AT+CGREG=x`, `AT+CREG=x`.

### Network registration URCs <a href="#network-registration-urcs" id="network-registration-urcs"></a>

The recommended way for your application to remain aware of the connectivity status is to register for notifications for all of the registration modes your hardware is capable of achieving. If your module is an LTE-only device, you do not need to check for CS or PS registrations, only EPS registrations. But if your module supports 2G, 3G and 4G, you need to check for CS, PS, and EPS registration notification.

You may only see one of the modes — CS, PS or EPS — report a successful registration, but only a single type is required to commence normal operations.

To subscribe to updates on registration status changes, issue one of the following. Use AT command chaining to include all three modes with one command:

* `AT+CREG=1;+CGREG=1;+CEREG=1` to provide only registration status.
* `AT+CREG=2;+CGREG=2;+CEREG=2` to provide registration status, location information, and RAT.

Issue `AT+CREG=0;+CGREG=0;+CEREG=0` to turn off receipt of network registration URCs.

{% hint style="danger" %}
A common issue that is being seen more frequently as 2G and 3G networks are turned off is that a modem will experience EPS registration, but not CS or PS. As older modems only ever supported CS, so many device-side modem drivers often only check CS registration status and so stop working when CS registration checks fail — even though the modem can communicate using LTE/EPS.

For this reason, it is **critically important** to check **all** three registrations, and initiate communications when **any** registration is reported.
{% endhint %}

Once you have subscribed network registration URCs, the modem will issue notifications of the form:

```
+CREG=2,<registration_state>[,<additional_information>]
```

and/or

```
+CGREG=2,<registration_state>[,<additional_information>]
```

and/or

```
+CEREG=2,<registration_state>[,<additional_information>]
```

The initial `2` indicates the configured URC state.

The device needs to initiate data communication when `<registration_state>` is either `1` (registered on the home network) or `5` (registered on a roaming network). If none of the `+CREG`/`+CGREG`/`+CEREG` URCs indicate `1` or `5`, then the modem is not connected to a network.

Typically you will see state `2` (searching), and then `5` upon connect. Sometimes you may see state `3` (rejected) briefly, followed by a return to state `2`.

`<additional_information>` can include the cell ID and RAT in use. Consult your modem's manual for more information.

Here's an example:

```
+CREG: 2,5,"0123","456789A",2
```

This indicates:

* The inclusion of location and RAT in the response (`2`).
* The device is registered as roaming (`5`).
* The LAC (Location Area Code) (`"0123"`) and CI (Cell Identity) (`"456789A"`) of the tower the device is connected to.
  * The location information provides a coarse device location and should be treated sensitively.
* The RAT in use is UTRAN/GSM (`2`).

Registration URCs will come in for a variety of reasons:

* When the modem is rejected from the network (no connection).
* When the modem is registered to the network (no connection yet, but one may be possible).
* When the modem moves between cells without an interruption in registration (connection may be active but is not interrupted).

As a result of the last item, when the modem moves between cells, you may see numerous `+CREG`/`+CGREG`/`+CEREG` indications over the course of a connection without your data session being affected.

***

## Data-centric devices <a href="#data-centric-devices" id="data-centric-devices"></a>

Many cellular modules can be set to attach as data-centric devices rather than voice-centric units. However, many modules will default to voice-centric unless they are explicitly configured to attach as data-centric devices.

Which of these attachment modes a modem selects is an especially important consideration in the context of the end of 2G and 3G services. Some cellular carriers deliver circuit-switched (CS) voice via 3G so will lose support for CS voice when their 3G networks are shut down. Devices that appear to the network as voice-centric may not then be able to connect via those carriers, even if they support LTE connectivity.

The solution is to configure the module to attach as a data-centric device.

Please consult your module's manufacturer for details of supported attachment modes and how they can be selected. Your modem may require a firmware update to enable this functionality. You should also check whether such settings are persisted or must be re-applied every time the device is power-cycled.

***

## Operator information <a href="#operator-information" id="operator-information"></a>

To check current operator status, use `AT+COPS?`.

This will return the current operator selection mode as well as your current operator, if any. For example:

```
+COPS: 0,2,"310260",2
```

Looking at the returned values from left to right, this result indicates automatic selection (`0`) of the current operator (`2`), which is T-Mobile (`"310260"`), connected over 3G (`2`).

### List available operators <a href="#list-available-operators" id="list-available-operators"></a>

To list all of the operators visible to the module, issue `AT+COPS=?`.

{% hint style="danger" %}
Avoid running `AT+COPS=?` while the modem is attempting to connect to the network. The command will interrupt the modem's normal scanning process and can delay connection to the network — it may take seconds or even minutes to complete. The modem will cycle through all supported radio access technologies to get all available networks.
{% endhint %}

Developers often use this command in conjunction with scanning for and manually selecting a network — this is [not recommended for KORE Super SIM](#operator-selection).

In the output of `AT+COPS=?`, you will receive a list of operators the modem sees. For example:

```
+COPS: (3,"AT&T","AT&T","310410",2),(2,"T-Mobile","T-Mobile","310260",2),,(0-5),(0-2)
```

The values returned by this command, and by `AT+COPS?`, will vary by your modem and the Radio Access Technologies (RATs) it supports. For the example above, we can see that:

* The modem was forbidden access (`3`) to AT\&T.
* The modem is currently connected (`2`) to T-Mobile on 3G (the last `2` in the section).

### Operator selection <a href="#operator-selection" id="operator-selection"></a>

If you have used single-IMSI or fixed-provider SIMs in the past, you may be accustomed to selecting the operator by numeric or alphanumeric identifier. This is not generally recommended for Super SIM.

Super SIMs contain multiple IMSI from different network partners to give you access to the widest catalog of cellular networks. Each IMSI may have access to different networks in a country. We recommend that you enable as many networks as possible on your Fleet's [Network Access Profiles](https://docs.korewireless.com/en-us/api/products/supersim/networkaccessprofile-resource) and leave your device set to automatic operator selection so that it will try multiple networks if it cannot connect on the first.

You can learn more about Super SIM's multi-IMSI approach in [this doc](https://docs.korewireless.com/en-us/supersim/supersim-multi-imsi-applet).

{% hint style="danger" %}
Manually selecting an operator obtaining a list of visible/available operators with `AT+COPS`, or by manually de-registering from the network with `AT+COPS=2`, can adversely affect connection times and even the ability to connect until the parameter is reverted. We therefore recommend always utilizing automatic operator selection using `AT+COPS=0`.
{% endhint %}

### Override operator selection <a href="#override-operator-selection" id="override-operator-selection"></a>

You use [Network Access Profiles](https://docs.korewireless.com/en-us/api/products/supersim/networkaccessprofile-resource) to include or exclude specific networks you would like your device to favor or avoid. This is the recommended method you should use to steer devices to a particular network. If you must force the modem to connect to a specific network, typically for testing purposes only, you can manually select an operator using `AT+COPS=`. For example:

```
AT+COPS=4,2,"310410"
```

Here we provide a desired network (AT\&T, `310410`) for the next connection attempt only, falling back to automatic network selection if it fails. If you prefer the device to remain disconnected if the connection attempt fails, replace the initial `4` with `1`.

***

## Modem resets <a href="#modem-resets" id="modem-resets"></a>

If you need to reset the modem or disconnect for power reasons, we recommend using `AT+CFUN` instead of `AT+COPS`. `AT+COPS=2`, which is a way to de-register from the network, tells the software running on Super SIM that the connected network was not suitable for the user. Super SIM will then have to exhaust all other possible networks, potentially with all available IMSI partners, until it loops back around to the functioning network again.

To terminate the connection to the network temporarily, use `AT+CFUN=0`.

To take the modem offline then bring it back, use `AT+CFUN=1`. This applies the last known good network, for a quicker reconnection.

### Application-driven modem/connectivity resets <a href="#application-driven-modemconnectivity-resets" id="application-driven-modemconnectivity-resets"></a>

Developers who have moved to KORE from another wireless connectivity provider often reset the modem and apply a short timer (e.g., five minutes or less) to get back online. This can be effective for single-IMSI SIMs, which scan for a very specific network when the modem is back up, but can be detrimental to Super SIM's ability to connect. Each Super SIM contains software which is also trying to pivot and reset the SIM's connectivity while it is trying to reconnect. If your application is resetting the modem more frequently than the built-in timer is pivoting to other connectivity options, the Super SIM may never have time to switch networks. This can also negatively impact the Super SIM's ability to receive important connectivity updates from KORE.

We recommend that any application-based timer have a cycle of no less than 30 minutes to ensure that the Super SIM has time to connect if it is needed. In certain outage scenarios it may take a significant amount of time to iterate through all alternate connectivity options provided by Super SIM.

{% hint style="danger" %}
All modems, in any operational mode, **will attempt to connect at all times** and so either at power up or upon registration loss, the application should wait for registration and **resist the temptation** to "speed things up" by sending additional commands to the modem. These commands will almost always slow things down.
{% endhint %}

***

## Modem and SIM information <a href="#modem-and-sim-information" id="modem-and-sim-information"></a>

A number of standard informational commands exist that may be useful to your application or when troubleshooting connectivity. Some of the most common commands are listed below. More information on these and other manufacturer-specific commands can be found either in our [manufacturer and modem specific documentation](#module-specific-details) or the AT command guides for your specific modem.

* Retrieve the modem's International Mobile Equipment Identity (IMEI): `AT+CGSN`.
* Retrieve the SIM card's Integrated Circuit Card ID (ICCID): `AT+CCID`.
* Retrieve the SIM card's 'current' International Mobile Subscriber Identity (IMSI): `AT+CIMI`.
  * **Note** 'Current' relates to Super SIM, since the Super SIM has multiple IMSIs assigned. Programmable Wireless SIMs have a single static IMSI.
* Retrieve the modem's manufacturer: `AT+CGMI`.
* Retrieve the modem's model: `AT+CGMM`.
* Retrieve the modem's revision: `AT+CGMR`.

While these commands are generally standard on cellular modems, the output and contents may vary between manufacturers.

### Differentiating between KORE SIMs <a href="#differentiating-between-twilio-sims" id="differentiating-between-twilio-sims"></a>

This is discussed separately, [on this page](https://docs.korewireless.com/en-us/supersim/how-to/check-a-device-has-super-sim).


# About AT Commands

***

Any developer who must work with a cellular modem will have to make use of what are called 'AT commands' at some point. AT commands are essentially modem instructions. Originally developed by the modem maker Hayes as means to operate their dial-up landline products, AT commands — the 'AT' stands for 'come to ATtention' — are now used by all modems, of all types.

AT commands are primarily used to configure a modem and establish its network connection. They can be used to interact with the modem's SIM, such as a KORE [Super SIM](https://www.korewireless.com/super-sim-card) . They can also be used to get modem and connection status information, and this can be very helpful in debugging applications and in confirming that a modem is operating correctly: it has connected to the right network, is using the correct cellular technology, has roaming enabled, etc. We'll look at some useful commands for tasks like these shortly.

{% hint style="info" %}
This page covers AT commands at a high level. Which AT commands are supported, how to send them, and how to process responses may vary from modem to modem. Refer to your specific modem's AT command documentation to learn more about functionality, including some useful abstractions, is available.
{% endhint %}

***

## How to send AT commands <a href="#how-to-send-at-commands" id="how-to-send-at-commands"></a>

AT commands are sent to the modem as plain text over a serial (UART) connection comprising two wires, one for receive (RX) and one for transmit (TX), or via USB. In the field, a cellular-enabled IoT device will manage its modem by sending it AT commands, but during application development and debugging, it's not uncommon to tap the modem's USB connection. This allows you to fire up a terminal and interact with the modem directly by issuing AT commands of your own. You do this with serial terminal software — just follow the instructions provided below for the computer operating system you're using.

{% tabs %}
{% tab title="Linux" %}

1. Open your distribution's terminal app.
2. Install the command-line serial console tool Minicom using your operating system's package manager, such as `apt`, `rpm`, `dpkg`, or similar, e.g., `sudo apt install minicom`.
3. Get the modem's device file with `ls /dev/ttytUSB*`. It'll be something like `/dev/ttyUSBx` where `x` is 0 or above. You may see multiple devices listed. Your modem's documentation should indicate which one is the modem, but you may need to use trial and error to find it.\
   You may also need to ensure you have access to the serial port: on most distributions this can be done by adding your user account to the `dialout` user group or using `sudo`.
4. Enter `minicom -o -D /dev/ttyUSBx` to open a connection to the module. If Minicom posts an error indicating that the device is inaccessible, you may need to try one of the other devices listed in step&#x20;
   {% endtab %}

{% tab title="macOS" %}

1. Open the Terminal app.
2. Install the command-line serial console tool called Minicom using [Homebrew](https://brew.sh/) with the command `brew install minicom`. You may need to install Homebrew first.
3. Get the modem's device file. Enter `ls /dev/cu*`. You should see a single entry like `/dev/cu.usbmodem14244201`.
4. Enter `minicom -o -D <DEVICE_FILE>` to open a connection to the module. `<DEVICE_FILE>` is the filename you got in step 3. If Minicom posts an error indicating that the device is inaccessible, please check that you've connected the modem to your computer and that you copied its device file name correctly.
   {% endtab %}

{% tab title="Windows 10" %}

1. Open Windows 10's Device Manager. It will show the modem as a USB Serial Device in the **Ports (COM & LPT)** section. Note its COM number.
2. Right-click on the modem's entry in the Device Manager list and select **Properties...** . Select the **Port Settings** tab and note the **Bits per second:** value.
3. [Download and install PuTTY](https://www.chiark.greenend.org.uk/~sgtatham/putty/latest.html), a terminal emulator for Windows.
4. Run PuTTY, select **Serial** as the **Connection type** , and enter the COM number (for example, `COM3`) in the **Serial line** field. Make sure the **Speed** field is set to match the **Bits per second:** value you got from Device Manager.
5. Click **Open** .
   {% endtab %}
   {% endtabs %}

***

## How to format AT commands <a href="#how-to-format-at-commands" id="how-to-format-at-commands"></a>

The commands you send must obey the following basic syntax:

```
AT<COMMAND><SUFFIX><DATA><CR>
```

This is called a 'command line'. As you can see, it starts with `AT`, followed by a command, a suffix to indicate command mode or 'type', and finally some data, though not all commands need this field to be included.

This structure is called a 'command line' and it is always terminated by a single carriage return, `<CR>`. You can include multiple commands in the line, each separated by a semi-colon:

```
AT<COMMAND><SUFFIX><DATA>;<COMMAND><SUFFIX><DATA>;<COMMAND><SUFFIX><DATA><CR>
```

Every line, no matter how many commands it contains, only has one `AT`, at the start. You'll get an error if you include `AT` more than once in a single line. The commands in multi-command lines are processed sequentially. The line length is usually, but not always, limited to 80 characters. Here's an example:

```
AT+CMEE=2;+CMGF=1;+CMGD=,4;+CNMP=38;+CMNB=1;+CGDCONT=1,"IP","super"
```

This sets error reporting to level 2, sets the modem to text mode, deletes all stored SMS, selects LTE-only mode, selects Cat-M only mode, and sets the APN.

***

## AT command line fields <a href="#at-command-line-fields" id="at-command-line-fields"></a>

The `<COMMAND>` field indicates what you want the modem to do. Older, 'basic' commands have single-character names; later additions to the commands set, called 'extended' commands, are prefixed with a `+` sign, such as `AT+COPS` (scan for networks) and `AT+CGMI` (get modem manufacturer). Some commands are prefixed with & — for example, `AT&F`, which resets the modem's settings. All cellular commands are extended commands. According to the AT command specification, commands must comprise uppercase characters, but many modems allow commands to be sent in lowercase too. We'll stick with the standard.

If you're sending a sequence of AT commands as shown above, make sure you include the `+` or `&` after each semi-colon.

The values of the `<DATA>` and `<SUFFIX>` fields depend on the command type, of which there are four:

| Type    | Suffix | Role                                                                                                                          |
| ------- | ------ | ----------------------------------------------------------------------------------------------------------------------------- |
| Read    | `?`    | Get a modem configuration setting                                                                                             |
| Set     | `=`    | Set a modem configuration setting                                                                                             |
| Execute | None   | Trigger a modem operation                                                                                                     |
| Test    | `=?`   | Check whether a modem supports the named command — but note that `AT+COPS=?` works slightly differently, as we'll see shortly |

We'll see how these types affect the use of AT commands in a moment, but first let's see how the modem responds to commands.

***

## AT command response <a href="#at-command-response" id="at-command-response"></a>

When an AT command is issued, depending on the command sent, the modem may or may not return data, ie. make what's called an 'information response'. Either way, the command operation always ends with the modem returning a 'result code'.

For example, suppose we ask for the name of the modem's manufacturer using the following command:

```
AT+CGMI
```

This will generate the following response when called on a u-blox modem:

```
u-blox

OK
```

Each unit of the response — the information (top line) and the result code (bottom line) — are bracketed by Carriage Return Line Feed characters (Ascii codes `0x0D` and `0x0A`, respectively, or in string form `"\r\n"`), hence the empty line before the `OK`.

`OK` is one return code; the other is `ERROR` — you made a mistake. Perhaps the modem doesn't respond to the AT command you sent, or you mistyped it. Maybe you provided too few or too many data values or command parameters. By default, modems may not provide much in the way of explanation. Fortunately, some of them can be set to return extended error information; again, you'll need to send an AT command to apply this setting: `AT+CMEE=2`.

It's important to understand that you may also receive `ERROR` from a perfectly valid AT command. When this happens, it's an indication that the modem is in state that is incompatible with the command. For example, if you attempt to change a modem's Access Point Name (APN) while it is active, this will typically return `ERROR`. The remedy is to deactivate the modem, make the APN change, and then reactivate it.

***

## AT command types and testing <a href="#at-command-types-and-testing" id="at-command-types-and-testing"></a>

You can mitigate the problem of seemingly correct commands throwing errors by making use of the test command suffix (`=?`), which is used to ask the modem if it supports the given command. If it doesn't, you'll receive an `ERROR` return code; you know not to issue this command. If the modem does support the command, you will receive an information response indicating the command's parameters, if it has any, followed by `OK`.

The example above can be used to demonstrate command testing. We can ask the modem if it supports the `+CGMI` command:

```
AT+CGMI=?
```

and it will return `OK` because it does support this command. However, because the modem's manufacturer is fixed, attempting to change it will always result in `ERROR`. How might we have attempted to change its value? With a set command suffix (`=`):

```
AT+CGMI="Fintlewoodlewix"

ERROR
```

Note how the string data is placed within double quotes — this too is an AT command requirement.

{% hint style="info" %}
There's one key exception to the command test rule: `AT+COPS=?`. This does not report on the availability of the `+COPS` command, but instead triggers a network scan and reports the results. `AT+COPS?` reports the network to which the modem is currently connected.
{% endhint %}

Test mode can also be used to determine what parameters a supported command takes. For example, if you send the command `+CBC` in test mode (it asks the modem what its current battery level is) you will get a result indicating the number of parameters and the range of values for each:

```
AT+CBC=?
+CBC: (0-2),(1-100),(voltage)

OK
```

The parameters are separated by commas; each parameter's value range is presented in brackets in the form `<LOWEST VALUE>-<HIGHEST VALUE>`.

Issue the command to a [Simcom 7080G](https://docs.korewireless.com/en-us/supersim/get-started/get-started-with-super-sim-sms-commands-and-the-raspberry-pi-pico) and you might see:

```
AT+CBC
+CBC: 0,66,3863

OK
```

Again, the parameters are separated by a comma and preceded with a colon and a space. You can use these separator characters to help you extract the data values. Numeric values will have to be converted from the source string, of course, but double quote delimited values are intended to remain strings.

Here's an example of a multi-parameter command: this sets the modem's power-on welcome text:

<pre><code>AT+CSGT=1,"A Super SIM-containing Modem"
<strong>
</strong>OK
</code></pre>

There are no spaces in the command line; only those within strings are permitted.

We can read back the values with a read command suffix (`?`):

```
AT+CSGT?

1,A Super SIM-containing Modem

OK
```

Which commands a given module supports and what values are returned are generally manufacturer specific and the list of commands is often extensive. You will need to download the command guide for your chosen modem from its manufacturer's website.

***

## How to respond to modem requests <a href="#how-to-respond-to-modem-requests" id="how-to-respond-to-modem-requests"></a>

Sometimes the modem will ask your application code for data. It will signal this by including the character `>` in its response to a command you issued. You now send a Carriage Return, `<CR>` or `"\r"` followed by the requested data. Finally, you send the keyboard combination `Ctrl-Z` to tell the modem to use the data you supplied, or `ESC` to cancel the operation.

How do you send `Ctrl-Z`? You include the character as a numeric character value: `0x1A` in hex, or 26 in decimal. Typically you'll do this with a string format command in your chosen language. For example, here's some C++:

```
string response = modem.send_at_and_get_response(data + "\x1A");
```

And here's the equivalent in Python:

```
response = modem.send_at_and_get_response(data + chr(26))
```

`ESC` is sent in the same way; you just use the code `0x1B` or 27.

One example of returning responses to a modem is sending a text message. Usually you do this with the `AT+CMGS` command and supply the target number. Here's how you send a [Super SIM SMS Command](https://docs.korewireless.com/en-us/api/products/supersim/smscommand-resource):

```
AT+CMGS="000"
```

The modem will respond with `>` and your code needs to look for this and then send a string comprising a Carriage Return, the SMS body, and either `Ctrl-Z` (to send) or `ESC` to cancel.

***

## Key AT commands <a href="#key-at-commands" id="key-at-commands"></a>

The following table lists some of the most useful AT commands you may need while working with a cellular modem and Super SIM.

* **Command**`AT+CGMI`
* **Example Response**`u-blox``OK`
* **Description**Return the modem's manufacturer.

***

* **Command**`AT+CGMM`
* **Example Response**`LARA-R211``OK`
* **Description**Return the modem's model number.

***

* **Command**`AT+CGSN`
* **Example Response**`1234567890``OK`
* **Description**Return the modem's serial number.

***

* **Command**`AT+CPIN?`
* **Example Response**`+CPIN: READY``OK`
* **Description**Confirm the modem's SIM is ready.

***

* **Command**`AT+CIMI`
* **Example Response**`<imsi>``OK`
* **Description**Get the SIM's current International Mobile Subscriber Identifier (IMSI).

***

* **Command**`AT+CCID`
* **Example Response**`<iccid>``OK`
* **Description**Get the SIM's ICCID (Integrated Circuit Card ID).

***

* **Command**`AT+CMEE=2`
* **Example Response**`OK`
* **Description**Enabled extended error reporting: instead of the usual `ERROR`, you will receive `+CME ERROR:` followed by an error message.

***

* **Command**`AT+CSQ`
* **Example Response**`+CSQ: 4,7``OK`
* **Description**Get the current signal strength in the format: ,\<ERR\_RATE>. is an indexed dbM value. \<ERR\_RATE> is an indexed percentage bit error rate. A `99` in either field indicates the value is unknown.

***

* **Command**`AT+CREG?`
* **Example Response**`+CREG: 0,7``OK`
* **Description**Get the current network registration status in the format: \<URC\_MODE>,. \<URC\_MODE> indicates whether network registration status notifications are enabled (`1`) or not (`0`). is value indicating the network status, e.g., `0` shows the modem is not registered, `5` shows the modem is registered and is roaming, and `7` shows the modem is registered for SMS only.

***

* **Command**`AT+COPS?`
* **Example Response**`+COPS: 0,0,"vodafone UK KORE",0``OK`
* **Description**The output fields are: operator selection mode, operator name format, operator name, and network type.

***

* **Command**`AT+COPS=?`
* **Example Response**`+COPS: (2,"EE","EE","23440",7),(1,"3 UK","3 UK","23420",7)``OK`
* **Description**Scan and report visible networks.

***

* **Command**`AT+CGDCONT?`
* **Example Response**`+CGDCONT: 1,"IP","super","0.0.0.0",0,0,0,0``OK`
* **Description**Get the APN (the third response parameter).

***

* **Command**`AT+CMGF=<MODE>`
* **Example Response**`OK`
* **Description**Set the SMS message format. Usually a choice between a binary format and text. For some modems is an integer, for others it is a string, possibly indicating the character set to be used.

### Super SIM setup AT commands <a href="#super-sim-setup-at-commands" id="super-sim-setup-at-commands"></a>

To use a Super SIM, its host modem's APN must be set to `super`, and roaming must be enabled. The following AT commands will help you do so.

{% hint style="info" %}
Other modules will require their own vendor-specific roaming setup commands — please check their documentation. We hope to extend the following sections to include other modules over time. You can also check out the [**Cellular Module Knowledgebase**](https://docs.korewireless.com/en-us/supersim/cellular-module-knowledgebase) .
{% endhint %}

#### **Set APN**

* **Command**`AT+CGDCONT=1,"IP","super"`
* **Example Response**`AT+CGDCONT=1,"IP","super"``OK`
* **Description**Set the modem's APN. It's possible to set multiple APNs, for different IP types (the second parameter), but we recommend setting just one.

#### **Enable roaming**

* **Command** *Quectel BG96 only*`AT+QCFG="roamservice",2`
* **Example Response**`AT+QCFG="roamservice",2``OK`
* **Command** *u-blox Lara-R2xx only*`AT+UDCONF=20,1`
* **Example Response**`OK`

***

## Further Reading <a href="#further-reading" id="further-reading"></a>

* [How to Determine Good Cellular Signal Strength](https://docs.korewireless.com/en-us/supersim/cellular-module-knowledgebase/how-to-determine-good-cellular-signal-strength)
* [How Super SIM Devices Connect to Cell Networks](https://docs.korewireless.com/en-us/supersim/cellular-module-knowledgebase/how-super-sim-devices-connect-to-cell-networks)
* [Best Practices for Cellular Module Registration](https://docs.korewireless.com/en-us/supersim/cellular-module-knowledgebase/four-best-practices-for-cellular-module-registration)
* You can [download](https://www.etsi.org/deliver/etsi_ts/127000_127099/127007/15.07.00_60/ts_127007v150700p.pdf) the comprehensive *AT Command Set for User Equipment* from the ETSI standards agency. It lists all AT commands that are not vendor specific.
* See the [**Cellular Module Knowledgebase**](https://docs.korewireless.com/en-us/supersim/cellular-module-knowledgebase) for more module-specific useful AT commands.


# Nordic Modules with Super SIM

## Cellular modules covered on this page <a href="#cellular-modules-covered-on-this-page" id="cellular-modules-covered-on-this-page"></a>

* [BG96](#bg96-nb-iot)

***

## Super SIM <a href="#super-sim" id="super-sim"></a>

If you are looking for information related to using Quectel modules with Super SIM, please see [this document](https://docs.korewireless.com/en-us/supersim/cellular-module-knowledgebase/quectel-modules-with-super-sim).

***

## Firmware updates <a href="#firmware-updates" id="firmware-updates"></a>

Firmware updates for Quectel cellular modules are typically available through Quectel support. Please reach out to your Quectel representative or [Quectel Support](https://www.quectel.com/support/contact.htm) for assistance with firmware updates.

***

## General getting started information <a href="#general-getting-started-information" id="general-getting-started-information"></a>

Please refer to the main Knowlegdebase page for [modem-independent configuration tips](https://docs.korewireless.com/en-us/supersim/cellular-module-knowledgebase/overview).

***

### BG96 `NB-IoT` <a href="#bg96-nb-iot" id="bg96-nb-iot"></a>

## Initialization <a href="#initialization" id="initialization"></a>

{% hint style="danger" %}
Modifying the following parameters can have an adverse affect on connection times immediately following their execution. They restart the network scanning process even if the newly set value is the same as the previously set value. This restart can also discard the cellular modem's affinity to the previously connected network, causing the modem to scan all visible networks again.

We recommend querying the values of these parameters in your initialization code and only setting values when changes are needed. This will help ensure the correct configuration is being used and allow the modem's connection process to proceed normally if the correct values are already set.
{% endhint %}

KORE [Narrowband](https://docs.korewireless.com/en-us/programmable-wireless#the-narrowband-sim) can be made accessible by setting `iotopmode` to `1`: `AT+QCFG="iotopmode",1,1`.

### Operator selection <a href="#operator-selection" id="operator-selection"></a>

Calling `AT+COPS` redundantly can adversely affect connection times. We recommend using automatic operator selection: `AT+COPS=0`.

{% hint style="danger" %}
Calling `AT+COPS=0` when the operator mode is already set to automatic can cause the modem to perform a user re-selection process. This will disconnect from the current/previously connected network and restart the connection process.

Similarly, using `AT+COPS=2` to temporarily deregister from the network will result in the current/last connected network to be disregarded upon returning to a registered state and require a scan of available networks. If your application needs to deregister from the network for power reasons, we recommend you consider using `AT+CFUN=0` and `AT+CFUN=1` to accomplish a similar result without the loss of the previously connected network information.
{% endhint %}

### Low-power modes <a href="#low-power-modes" id="low-power-modes"></a>

While the BG96 supports low-power modes for eDRX and PSM, support for these features will vary by visited network and location. The commands for each of these settings are:

* eDRX: `AT+CEDRXS`
* PSM: `AT+CPSMS`

{% hint style="danger" %}
Using these features, but especially PSM, can make the modem inaccessible to the terminal during its sleep time. It's best to experiment with these features with the modem local. To disable all power saving, send:

`AT+CEDRXS=0 AT+CPSMS=0`

You can learn more about implementing these modes in [our low-power usage documentation](https://docs.korewireless.com/en-us/supersim/cellular-module-knowledgebase/low-power-optimization-for-cellular-modules).
{% endhint %}

### Known issues <a href="#known-issues" id="known-issues"></a>

**1. DNS servers may not be provided by the network with the Twilio Narrowband SIM**

Modem firmware versions prior to `BG96MAR03A06M1G` may not receive valid DNS servers upon connection. Affected versions include, but are not limited to, `BG96MAR02A06M1G` and `BG96MAR02A07M1G`.

This issue does not impact GSM connections maintained by the Narrowband SIM.

This issue can be observed by connecting to the network and executing the following commands, noting the 0.0.0.0 DNS addresses:

```bash
AT+QICSGP=1,1,"iot.nb"
OK
AT+QIACT=1
OK
AT+QIACT?
+QIACT: 1,1,1,"x.x.x.x"
OK
AT+QIDNSCFG=1
+QIDNSCFG: 1,"0.0.0.0","0.0.0.0"
OK
```

Attempts to resolve a host name to an address will fail:

```bash
AT+QIDNSGIP=1,"www.twilio.com"
OK

+QIURC: "dnsgip",565
```

**Recommended solution** Update the BG96's firmware to version `BG96MAR03A06M1G` or above.

**Workaround** Provide DNS servers manually after connection with the following command:

```bash
AT+QIDNSCFG=1,"8.8.8.8","8.8.4.4"
```

This example uses Google's DNS servers, but you can use the DNS service of your choice.


# Quectel Modules with Super SIM

## Cellular modems covered on this page <a href="#cellular-modems-covered-on-this-page" id="cellular-modems-covered-on-this-page"></a>

* [BG95/BG96](#bg95bg96-cat-m1-nb-iot-gsm)
* [EG21-G](#eg21-g-cat-1-gsm)
* [EG25-G](#eg25-g-cat-4-gsm)

***

## Firmware updates <a href="#firmware-updates" id="firmware-updates"></a>

Firmware updates for Quectel cellular modules are typically available through Quectel support. Please reach out to your Quectel representative or [Quectel Support](https://www.quectel.com/support/contact.htm) for assistance with firmware updates.

***

## General getting started information <a href="#general-getting-started-information" id="general-getting-started-information"></a>

Please refer to the main Knowlegdebase page for [modem-independent configuration tips](https://docs.korewireless.com/en-us/supersim/cellular-module-knowledgebase/overview).

***

## BG95/BG96 `Cat-M1, NB-IoT, GSM` <a href="#bg95bg96-cat-m1-nb-iot-gsm" id="bg95bg96-cat-m1-nb-iot-gsm"></a>

{% hint style="danger" %}
Super SIM does not support NB-IoT.
{% endhint %}

### Initialization <a href="#initialization" id="initialization"></a>

If you are connecting via LTE, only configure the modem's Radio Access Technology (RAT) preference to Cat-M1: issue the Quectel-specific command `AT+QCFG="iotopmode"` with its default setting, `0`, the first numeric parameter of the command below.

```
AT+QCFG="iotopmode",0,1
```

{% hint style="danger" %}
If `iotopmode` is set to `1` (NB-IoT), the modem will **not** be able to connect to Cat-M1.
{% endhint %}

If you wish to limit comms to LTE only, i.e., disable 2G (GSM), issue:

```bash
AT+QCFG="nwscanmode",3,1
```

The first numeric parameter, `3`, indicates LTE only; a value of `1` sets the modem to GSM only. The default, `0`, tells the modem to select the RAT automatically. The setting is applied immediately.

### Data-centric attach mode <a href="#data-centric-attach-mode" id="data-centric-attach-mode"></a>

To set the modem to force data-centric attachment — ie., do not make circuit-switched attachments — issue `AT+QCFG="servicedomain",1,1`.

The first numeric parameter is the mode:

* `1` = Packet Switch (PS) attach only.
* `2` = Circuit Switch and Packet Switch (CS/PS) attach.

This setting is non-volatile.

### Configure the URC UART <a href="#configure-the-urc-uart" id="configure-the-urc-uart"></a>

To configure the Unsolicited Result Code (URC) serial (UART) delivery channel to `uart1`, issue `AT+QURCCFG="urcport","uart1"`.

### Perform a ping <a href="#perform-a-ping" id="perform-a-ping"></a>

To perform a ping to a remote host, issue `AT+QPING=1,"<TARGET_IP_ADDRESS_OR_NAME>"`. This will yield, for example:

```bash
+QPING: 0,"8.8.8.8",32,93,255
+QPING: 0,"8.8.8.8",32,78,255
+QPING: 0,"8.8.8.8",32,80,255
+QPING: 0,4,4,0,78,93,82
```

### Perform an HTTP GET <a href="#perform-an-http-get" id="perform-an-http-get"></a>

To issue an HTTP `GET` request using the built-in HTTP client, run the following commands:

1. Set the PDP context ID: `AT+QHTTPCFG="contextid",1`
2. Enable output of HTTP response headers: `AT+QHTTPCFG="responseheader",1`
3. Activate the PDP context: `AT+QIACT=1`
4. Set the target URL: `AT+QHTTPURL=21`This sets the modem to receive, prompted by the output `CONNECT`. The first parameter is the number of bytes the modem should expect to receive: it will end input after receiving this number of characters. The value of `21` comes from the URL below. The URL you provide must include the protocol, ie. `http://`.
5. Upon `CONNECT`, enter the URL. For example: `http://ifconfig.co/ip`
6. Issue a `GET` request: `AT+QHTTPGET`
7. View the request: `AT+QHTTPREAD`

The request will look like this:

```html
HTTP/1.1 200 OK
Date: Sat, 28 Nov 2020 18:38:52 GMT
Content-Type: text/plain; charset=utf-8
Content-Length: 15
Connection: keep-alive
Set-Cookie: __cfduid=d33c30006be23245591d83133631425031606588732; expires=Mon, 28-Dec-20 18:38:52 GMT; path=/; domain=.ifconfig.co; HttpOnly; SameSite=Lax
Strict-Transport-Security: max-age=15768000; includeSubdomains; preload
CF-Cache-Status: DYNAMIC
cf-request-id: 06b1bfaa91000025ed8fa46000000001
0Report-To: {"endpoints":[{"url":"https:\/\/a.nel.cloudflare.com\/report?s=8eYWG5vobibOeI8xWFxNSGJpELSCSthW9aAclBXw3esKOGBsYPT4izdckGI2kpOW%2BA7KOhi3OFk%2FLUab3RpQvKu5EYYWLD%2B2fSxV4Q%3D%3D"}],"group":"cf-nel","max_age":604800}
1NEL: {"report_to":"cf-nel","max_age":604800}
2Server: cloudflare
3CF-RAY: 5f96355748c225ed-IAD
4
599.84.181.20
6
7OK
8+QHTTPREAD: 0
```

{% hint style="danger" %}
This example uses a service that returns the IP address of the requester.
{% endhint %}

{% hint style="info" %}
If you need to provide extra HTTP request headers, such `Authorization: Basic <API_KEY>`, or a custom header required by your server, issue `AT+QHTTPCFG="requestheader",1` to tell the modem to use the custom header that you will provide when you make each request. You must create a full HTTP request header separated from your request body by `<CR><LF>` characters. Whether you make a `POST` or a `GET` request, include a byte-count parameter that totals the header plus the body (`POST` request) or header alone (`GET` request). For example, `AT+QHTTPGET=60,512` for a 512-byte header (including the end-of-header `<CR><LF>`). The `60` is a timeout. This defaults to 60 seconds but must be included if a second parameter is also present.
{% endhint %}

{% hint style="info" %}
You can check the status of a PDP context with `AT+QIACT?`. If activated, this will return the context ID; `0` or `1` whether the context is inactive or active; `1` or `2` whether the context is using IPv4 or IPv6; and the device's IP address.
{% endhint %}

### Perform an HTTPS GET <a href="#perform-an-https-get" id="perform-an-https-get"></a>

To issue an HTTPS `GET` request using the built-in HTTP client, follow the same procedure outlined above but with extra steps to configure SSL.

1. Set the PDP context ID: `AT+QHTTPCFG="contextid",1`
2. Enable output of HTTP response headers: `AT+QHTTPCFG="responseheader",1`
3. Activate the PDP context if it is not already active: `AT+QIACT=1`
4. Select the SSL context ID for this PDP context ID: `AT+QHTTPCFG="sslctxid",1`
5. Set the SSL version. Choose TLS 1.2: `AT+QSSLCFG="sslversion",1,3`
6. Set the SSL cipher suite. Choose all types: `AT+QSSLCFG="ciphersuite",1,0xFFFF`
7. For testing, set the SSL verification level to `0`, i.e., no CA certificate is required: `AT+QSSLCFG="seclevel"=0`
8. Set the target URL: `AT+QHTTPURL=70`This sets the modem to receive, prompted by the output `CONNECT`. The parameter is the number of bytes the modem should expect to receive: it will end input after receiving this number of characters. The value of `70` comes from the URL below. The URL you provide must include the protocol, ie. `https://`.
9. Upon receiving `CONNECT`, enter the URL. For example: `https://twilio-cms-prod.s3.amazonaws.com/documents/super-sim-test.json`
10. Issue a `GET` request: `AT+QHTTPGET`
11. View the response: `AT+QHTTPREAD`

The request will look something like this:

```html
HTTP/1.1 200 OK
Date: Thu, 19 May 2022 10:23:25 GMT
Last-Modified: Thu, 19 May 2022 10:05:25 GMT
Accept-Ranges: bytes
Content-Type: application/json
Server: AmazonS3
Content-Length: 128

{
   "userId": 1,
   "id": 5,
   "title": "laboriosam mollitia et enim quasi adipisci quia provident illum",
   "completed": false,
}                                                                                                                         }
OK

+QHTTPREAD: 0
```

### Perform an HTTP(S) POST <a href="#perform-an-https-post" id="perform-an-https-post"></a>

Sending data from the modem to an Internet-hosted API follows the paths outlined above for the HTTP and HTTPS protocols: call `AT+QHTTPOST` instead of `AT+QHTTPGET`.

Optionally, the `QHTTPOST` command takes a parameter indicating the amount of data you are sending. The modem uses this to read that number of bytes via the UART over which your application is communicating with it. If you are providing a custom HTTP request header, remember to include its length too.

### Low-power modes <a href="#low-power-modes" id="low-power-modes"></a>

While the BG95 and 96 support low-power modes for eDRX and PSM, support for these features will vary by visited network and location. The commands to enable for each of these are:

```bash
AT+CEDRXS=1
AT+CPSMS=1
```

*See also `AT+QPTWEDRXS` and `AT+CEDRXRDP` in the BG95/96 AT Commands Manual for further options.*

Using these features, but especially PSM, can make the modem inaccessible to the terminal during its sleep time. It's best to experiment with these features locally. To disable all power saving, send:

<pre class="language-bash"><code class="lang-bash">AT+CEDRXS=0
<strong>AT+CPSMS=0
</strong></code></pre>

You can learn more about implementing these modes in our [low-power usage documentation](https://docs.korewireless.com/en-us/supersim/cellular-module-knowledgebase/low-power-optimization-for-cellular-modules).

### Known issues <a href="#known-issues" id="known-issues"></a>

The BG95 and BG96 will connect to 2G if they are unable to connect to Cat-M1 and 2G has not been disabled. Unfortunately, if Cat-M1 coverage is restored, or the device moves into an area where Cat-M1 is available, the modem will nonetheless continue to connect to 2G. This is because Quectel modems favor the most recently used RAT when they reconnect, and this value is persisted in non-volatile memory.

To avoid this issue, you can use the following AT command in your application to clear the stored RAT by resetting the modem's RAT searching sequence:

```bash
AT+QCFG="nwscanseq",020103,1
```

The parameter `020103` represents the RAT sequence: `02` is Cat-M1, `01` is GSM, and `03` is NB-IoT. Super SIM is not compatible with NB-IoT, so this is placed last.

The final `1` forces the sequence to be applied immediately, avoiding the need to reboot the modem. Leave this parameter off, or set it to `0`, to impose the new sequence on the next power cycle.

### Additional resources <a href="#additional-resources" id="additional-resources"></a>

• [BG96 AT Commands Manual](https://www.quectel.com/download/quectel_bg96_at_commands_manual_v2-3) *Quectel sign-in required* • [BG95, BG77, and BG600L Series AT Commands Manual](https://www.quectel.com/download/quectel_bg95bg77bg600l_series_at_commands_manual_v2-0) *Quectel sign-in required*

***

## EG21-G `Cat-1, GSM` <a href="#eg21-g-cat-1-gsm" id="eg21-g-cat-1-gsm"></a>

### Initialization <a href="#initialization-2" id="initialization-2"></a>

If you wish to limit communications to LTE only, i.e., to disable 2G (GSM), issue this command:

```bash
AT+QCFG="nwscanmode",3
```

This setting will be applied immediately.

### Data-centric attach mode <a href="#data-centric-attach-mode-2" id="data-centric-attach-mode-2"></a>

To instruct the modem to initiate data-centric attachments only — ie., not to make voice-oriented circuit-switched attachments too, which is the default — issue:

```bash
AT+QCFG="servicedomain",1
```

This setting will be applied immediately.

### Configure the URC UART <a href="#configure-the-urc-uart-2" id="configure-the-urc-uart-2"></a>

To configure the Unsolicited Result Code (URC) serial (UART) delivery channel to `uart1`, issue `AT+QURCCFG="urcport","uart1"`.

### Perform a ping <a href="#perform-a-ping-2" id="perform-a-ping-2"></a>

To perform a ping to a remote host, issue `AT+QPING=1,"<TARGET_IP_ADDRESS_OR_NAME>"`. This will yield, for example:

```bash
+QPING: 0,"8.8.8.8",32,172,255
+QPING: 0,"8.8.8.8",32,212,255
+QPING: 0,"8.8.8.8",32,376,255
+QPING: 0,"8.8.8.8",32,174,255
+QPING: 0,4,4,0,172,376,233
```

### Perform an HTTP GET <a href="#perform-an-http-get-2" id="perform-an-http-get-2"></a>

To issue an HTTP `GET` request using the built-in HTTP client, run the following commands:

1. Set the PDP context ID: `AT+QHTTPCFG="contextid",1`
2. Enable output of HTTP response headers: `AT+QHTTPCFG="responseheader",1`
3. Activate the PDP context: `AT+QIACT=1`
4. Set the target URL: `AT+QHTTPURL=21`This sets the modem to receive, prompted by the output `CONNECT`. The first parameter is the number of bytes the modem should expect to receive: it will end input after receiving this number of characters. The URL you provide must include the protocol, ie. `http://`.
5. Upon `CONNECT`, enter the URL. For example: `http://ifconfig.co/ip`
6. Issue a `GET` request: `AT+QHTTPGET`
7. View the request: `AT+QHTTPREAD`

The request will look like this:

```html
HTTP/1.1 200 OK
Date: Sat, 28 Nov 2020 18:38:52 GMT
Content-Type: text/plain; charset=utf-8
Content-Length: 15
Connection: keep-alive
Set-Cookie: __cfduid=d33c30006be23245591d83133631425031606588732; expires=Mon, 28-Dec-20 18:38:52 GMT; path=/; domain=.ifconfig.co; HttpOnly; SameSite=Lax
Strict-Transport-Security: max-age=15768000; includeSubdomains; preload
CF-Cache-Status: DYNAMIC
cf-request-id: 06b1bfaa91000025ed8fa46000000001
Report-To: {"endpoints":[{"url":"https:\/\/a.nel.cloudflare.com\/report?s=8eYWG5vobibOeI8xWFxNSGJpELSCSthW9aAclBXw3esKOGBsYPT4izdckGI2kpOW%2BA7KOhi3OFk%2FLUab3RpQvKu5EYYWLD%2B2fSxV4Q%3D%3D"}],"group":"cf-nel","max_age":604800}
NEL: {"report_to":"cf-nel","max_age":604800}
Server: cloudflare
CF-RAY: 5f96355748c225ed-IAD

99.84.181.20

OK
+QHTTPREAD: 0
```

{% hint style="danger" %}
This example uses a service that returns the IP address of the requester.
{% endhint %}

{% hint style="info" %}
If you need to provide extra HTTP request headers, such `Authorization: Basic <API_KEY>`, or a custom header required by your server, issue `AT+QHTTPCFG="requestheader",1` to tell the modem to use the custom header that you will provide when you make each request. You must create a full HTTP request header separated from your request body by `<CR><LF>` characters. Whether you make a `POST` or a `GET` request, include a byte-count parameter that totals the header plus the body (`POST` request) or header alone (`GET` request). For example, `AT+QHTTPGET=60,512` for a 512-byte header (including the end-of-header `<CR><LF>`). The `60` is a timeout. This defaults to 60 seconds but must be included if a second parameter is also present.
{% endhint %}

{% hint style="info" %}
You can check the status of a PDP context with `AT+QIACT?`. If activated, this will return the context ID; `0` or `1` whether the context is inactive or active; `1` or `2` whether the context is using IPv4 or IPv6; and the device's IP address.
{% endhint %}

### Perform an HTTPS GET <a href="#perform-an-https-get-2" id="perform-an-https-get-2"></a>

To issue an HTTPS `GET` request using the built-in HTTP client, follow the same procedure outlined above but with extra steps to configure SSL.

1. Set the PDP context ID: `AT+QHTTPCFG="contextid",1`
2. Enable output of HTTP response headers: `AT+QHTTPCFG="responseheader",1`
3. Activate the PDP context if it is not already active: `AT+QIACT=1`
4. Select the SSL context ID for this PDP context ID: `AT+QHTTPCFG="sslctxid",1`
5. Set the SSL version. Choose TLS 1.2: `AT+QSSLCFG="sslversion",1,3`
6. Set the SSL cipher suite. Choose all types: `AT+QSSLCFG="ciphersuite",1,0xFFFF`
7. For testing, set the SSL verification level to `0`, i.e., no CA certificate is required: `AT+QSSLCFG="seclevel"=0`
8. Set the target URL: `AT+QHTTPURL=70`This sets the modem to receive, prompted by the output `CONNECT`. The parameter is the number of bytes the modem should expect to receive: it will end input after receiving this number of characters. The value of `70` comes from the URL below. The URL you provide must include the protocol, ie. `https://`.
9. Upon receiving `CONNECT`, enter the URL. For example: <https://twilio-cms-prod.s3.amazonaws.com/documents/super-sim-test.json>
10. Issue a `GET` request: `AT+QHTTPGET`
11. View the response: `AT+QHTTPREAD`

The request will look something like this:

```html
HTTP/1.1 200 OK
Date: Thu, 19 May 2022 10:23:25 GMT
Last-Modified: Thu, 19 May 2022 10:05:25 GMT
Accept-Ranges: bytes
Content-Type: application/json
Server: AmazonS3
Content-Length: 128

{
   "userId": 1,
   "id": 5,
   "title": "laboriosam mollitia et enim quasi adipisci quia provident illum",
   "completed": false,
}                                                                                                                         }
OK
+QHTTPREAD: 0
```

### Perform an HTTP(S) POST <a href="#perform-an-http-s--post-2" id="perform-an-http-s--post-2"></a>

Sending data from the modem to an Internet-hosted API follows the paths outlined above for the HTTP and HTTPS protocols: call `AT+QHTTPOST` instead of `AT+QHTTPGET`.

Optionally, the `QHTTPOST` command takes a parameter indicating the amount of data you are sending. The modem uses this to read that number of bytes via the UART over which your application is communicating with it. If you are providing a custom HTTP request header, remember to include its length too.

### Low-power modes <a href="#low-power-modes-2" id="low-power-modes-2"></a>

The EG21-G does not support eDRX and PSM.

### Additional resources <a href="#additional-resources-2" id="additional-resources-2"></a>

• [EG21-G AT Commands Manual](https://www.quectel.com/download_file/2027) *Quectel sign-in required*

***

## EG25-G `Cat-4, GSM` <a href="#eg25-g-cat-4-gsm" id="eg25-g-cat-4-gsm"></a>

### Initialization <a href="#initialization-3" id="initialization-3"></a>

If you wish to limit communications to LTE only, i.e., to disable 2G (GSM), issue this command:

```bash
AT+QCFG="nwscanmode",3
```

This setting will be applied immediately.

### Data-centric attach mode <a href="#data-centric-attach-mode-3" id="data-centric-attach-mode-3"></a>

To instruct the modem to initiate data-centric attachments only — ie., not to make voice-oriented circuit-switched attachments too, which is the default — issue:

```bash
AT+QCFG="servicedomain",1
```

This setting will be applied immediately.

### Configure the URC UART <a href="#configure-the-urc-uart-3" id="configure-the-urc-uart-3"></a>

To configure the Unsolicited Result Code (URC) serial (UART) delivery channel to `uart1`, issue `AT+QURCCFG="urcport","uart1"`.

### Perform a ping <a href="#perform-a-ping-3" id="perform-a-ping-3"></a>

To perform a ping to a remote host, issue `AT+QPING=1,"<TARGET_IP_ADDRESS_OR_NAME>"`. This will yield, for example:

```bash
+QPING: 0,"8.8.8.8",32,167,255
+QPING: 0,"8.8.8.8",32,162,255
+QPING: 0,"8.8.8.8",32,164,255
+QPING: 0,"8.8.8.8",32,162,255
+QPING: 0,4,4,0,162,167,163
```

### Perform an HTTP GET <a href="#perform-an-http-get-3" id="perform-an-http-get-3"></a>

To issue an HTTP `GET` request using the built-in HTTP client, run the following commands:

1. Set the PDP context ID: `AT+QHTTPCFG="contextid",1`
2. Enable output of HTTP response headers: `AT+QHTTPCFG="responseheader",1`
3. Activate the PDP context: `AT+QIACT=1`
4. Set the target URL: `AT+QHTTPURL=21`This sets the modem to receive, prompted by the output `CONNECT`. The first parameter is the number of bytes the modem should expect to receive: it will end input after receiving this number of characters. The URL you provide must include the protocol, ie. `http://`.
5. Upon `CONNECT`, enter the URL. For example: `http://ifconfig.co/ip`
6. Issue a `GET` request: `AT+QHTTPGET`
7. View the request: `AT+QHTTPREAD`

The request will look like this:

```html
HTTP/1.1 200 OK
Date: Fri, 20 May 2022 08:52:56 GMT
Content-Type: text/plain; charset=utf-8
Content-Length: 13
Connection: keep-alive
CF-Cache-Status: DYNAMIC
Report-To: {"endpoints":[{"url":"https:\/\/a.nel.cloudflare.com\/report\/v3?s=9fl%2B3t%2FRMhY2tMyWQDFAIM1mfFem0zLc7aONeXJ%2Fg4a%2FJPKFl%2BeGYElL5zwwuxi7%2BIfqx}
NEL: {"success_fraction":0,"report_to":"cf-nel","max_age":604800}
Server: cloudflare
CF-RAY: 70e3d6ceb8cc5b17-IAD
alt-svc: h3=":443"; ma=86400, h3-29=":443"; ma=86400

44.204.32.40

OK

+QHTTPREAD: 0
```

{% hint style="info" %}
This example uses a service that returns the IP address of the requester.
{% endhint %}

{% hint style="info" %}
If you need to provide extra HTTP request headers, such `Authorization: Basic <API_KEY>`, or a custom header required by your server, issue `AT+QHTTPCFG="requestheader",1` to tell the modem to use the custom header that you will provide when you make each request. You must create a full HTTP request header separated from your request body by `<CR><LF>` characters. Whether you make a `POST` or a `GET` request, include a byte-count parameter that totals the header plus the body (`POST` request) or header alone (`GET` request). For example, `AT+QHTTPGET=60,512` for a 512-byte header (including the end-of-header `<CR><LF>`). The `60` is a timeout. This defaults to 60 seconds but must be included if a second parameter is also present.
{% endhint %}

{% hint style="info" %}
You can check the status of a PDP context with `AT+QIACT?`. If activated, this will return the context ID; `0` or `1` whether the context is inactive or active; `1` or `2` whether the context is using IPv4 or IPv6; and the device's IP address.
{% endhint %}

### Perform an HTTPS GET <a href="#perform-an-https-get-3" id="perform-an-https-get-3"></a>

To issue an HTTPS `GET` request using the built-in HTTP client, follow the same procedure outlined above but with extra steps to configure SSL.

1. Set the PDP context ID: `AT+QHTTPCFG="contextid",1`
2. Enable output of HTTP response headers: `AT+QHTTPCFG="responseheader",1`
3. Activate the PDP context if it is not already active: `AT+QIACT=1`
4. Select the SSL context ID for this PDP context ID: `AT+QHTTPCFG="sslctxid",1`
5. Set the SSL version. Choose TLS 1.2: `AT+QSSLCFG="sslversion",1,3`
6. Set the SSL cipher suite. Choose all types: `AT+QSSLCFG="ciphersuite",1,0xFFFF`
7. For testing, set the SSL verification level to `0`, i.e., no CA certificate is required: `AT+QSSLCFG="seclevel"=0`
8. Set the target URL: `AT+QHTTPURL=70`This sets the modem to receive, prompted by the output `CONNECT`. The parameter is the number of bytes the modem should expect to receive: it will end input after receiving this number of characters. The value of `70` comes from the URL below. The URL you provide must include the protocol, ie. `https://`.
9. Upon receiving `CONNECT`, enter the URL. For example: <https://twilio-cms-prod.s3.amazonaws.com/documents/super-sim-test.json>
10. Issue a `GET` request: `AT+QHTTPGET`
11. View the response: `AT+QHTTPREAD`

The request will look something like this:

```html
HTTP/1.1 200 OK
Date: Thu, 19 May 2022 10:23:25 GMT
Last-Modified: Thu, 19 May 2022 10:05:25 GMT
Accept-Ranges: bytes
Content-Type: application/json
Server: AmazonS3
Content-Length: 128

{
   "userId": 1,
   "id": 5,
   "title": "laboriosam mollitia et enim quasi adipisci quia provident illum",
   "completed": false,
}                                                                                                                         }
OK

+QHTTPREAD: 0
```

### Perform an HTTP(S) POST <a href="#perform-an-http-s--post-3" id="perform-an-http-s--post-3"></a>

Sending data from the modem to an Internet-hosted API follows the paths outlined above for the HTTP and HTTPS protocols: call `AT+QHTTPOST` instead of `AT+QHTTPGET`.

Optionally, the `QHTTPOST` command takes a parameter indicating the amount of data you are sending. The modem uses this to read that number of bytes via the UART over which your application is communicating with it. If you are providing a custom HTTP request header, remember to include its length too.

### Low-power modes <a href="#low-power-modes-3" id="low-power-modes-3"></a>

While the EG21-G supports low-power modes for eDRX and PSM, support for these features will vary by visited network and location. The commands to enable for each of these are:

```bash
AT+CEDRXS=1
AT+CPSMS=1
```

Using these features, but especially PSM, can make the modem inaccessible to the terminal during its sleep time. It's best to experiment with these features locally. To disable all power saving, send:

```bash
AT+CEDRXS=0
AT+CPSMS=0
```

You can learn more about implementing these modes in our [low-power usage documentation](https://docs.korewireless.com/en-us/supersim/cellular-module-knowledgebase/low-power-optimization-for-cellular-modules).

### Additional resources <a href="#additional-resources-3" id="additional-resources-3"></a>

• [EG25-G AT Commands Manual](https://www.quectel.com/product/lte-eg25-g/#specifications) - *Scroll down to the AT Commands section, login is required to download*


# Quectel Modules with the KORE Narrowband SIM

***

## Cellular modules covered on this page <a href="#cellular-modules-covered-on-this-page" id="cellular-modules-covered-on-this-page"></a>

* [BG96](#bg96-nb-iot)

***

## Super SIM <a href="#super-sim" id="super-sim"></a>

If you are looking for information related to using Quectel modules with Super SIM, please see [this document](https://docs.korewireless.com/en-us/supersim/cellular-module-knowledgebase/quectel-modules-with-super-sim).

***

## Firmware updates <a href="#firmware-updates" id="firmware-updates"></a>

Firmware updates for Quectel cellular modules are typically available through Quectel support. Please reach out to your Quectel representative or [Quectel Support](https://www.quectel.com/support/contact.htm) for assistance with firmware updates.

***

## General getting started information <a href="#general-getting-started-information" id="general-getting-started-information"></a>

Please refer to the main Knowlegdebase page for [modem-independent configuration tips](https://docs.korewireless.com/en-us/supersim/cellular-module-knowledgebase/overview).

***

## BG96 `NB-IoT` <a href="#bg96-nb-iot" id="bg96-nb-iot"></a>

### Initialization <a href="#initialization" id="initialization"></a>

{% hint style="danger" %}
Modifying the following parameters can have an adverse affect on connection times immediately following their execution. They restart the network scanning process even if the newly set value is the same as the previously set value. This restart can also discard the cellular modem's affinity to the previously connected network, causing the modem to scan all visible networks again.

We recommend querying the values of these parameters in your initialization code and only setting values when changes are needed. This will help ensure the correct configuration is being used and allow the modem's connection process to proceed normally if the correct values are already set.
{% endhint %}

[KORE Narrowband](https://docs.korewireless.com/en-us/programmable-wireless/what-is-narrowband) can be made accessible by setting `iotopmode` to `1`: `AT+QCFG="iotopmode",1,1`.

### Operator selection <a href="#operator-selection" id="operator-selection"></a>

Calling `AT+COPS` redundantly can adversely affect connection times. We recommend using automatic operator selection: `AT+COPS=0`.

{% hint style="danger" %}
Calling `AT+COPS=0` when the operator mode is already set to automatic can cause the modem to perform a user re-selection process. This will disconnect from the current/previously connected network and restart the connection process.

Similarly, using `AT+COPS=2` to temporarily deregister from the network will result in the current/last connected network to be disregarded upon returning to a registered state and require a scan of available networks. If your application needs to deregister from the network for power reasons, we recommend you consider using `AT+CFUN=0` and `AT+CFUN=1` to accomplish a similar result without the loss of the previously connected network information.
{% endhint %}

### Low-power modes <a href="#low-power-modes" id="low-power-modes"></a>

While the BG96 supports low-power modes for eDRX and PSM, support for these features will vary by visited network and location. The commands for each of these settings are:

* eDRX: `AT+CEDRXS`
* PSM: `AT+CPSMS`

{% hint style="danger" %}
Using these features, but especially PSM, can make the modem inaccessible to the terminal during its sleep time. It's best to experiment with these features with the modem local. To disable all power saving, send:

`AT+CEDRXS=0 AT+CPSMS=0`

You can learn more about implementing these modes in [our low-power usage documentation](https://docs.korewireless.com/en-us/supersim/cellular-module-knowledgebase/low-power-optimization-for-cellular-modules).
{% endhint %}

### Known issues <a href="#known-issues" id="known-issues"></a>

**1. DNS servers may not be provided by the network with the KORE Narrowband SIM**

Modem firmware versions prior to `BG96MAR03A06M1G` may not receive valid DNS servers upon connection. Affected versions include, but are not limited to, `BG96MAR02A06M1G` and `BG96MAR02A07M1G`.

This issue does not impact GSM connections maintained by the Narrowband SIM.

This issue can be observed by connecting to the network and executing the following commands, noting the 0.0.0.0 DNS addresses:

```
AT+QICSGP=1,1,"iot.nb"
OK
AT+QIACT=1
OK
AT+QIACT?
+QIACT: 1,1,1,"x.x.x.x"
OK
AT+QIDNSCFG=1
+QIDNSCFG: 1,"0.0.0.0","0.0.0.0"
OK
```

Attempts to resolve a host name to an address will fail:

```
AT+QIDNSGIP=1,"www.korewireless.com"
OK

+QIURC: "dnsgip",565
```

**Recommended solution** Update the BG96's firmware to version `BG96MAR03A06M1G` or above.

**Workaround** Provide DNS servers manually after connection with the following command:

```
AT+QIDNSCFG=1,"8.8.8.8","8.8.4.4"
```

This example uses Google's DNS servers, but you can use the DNS service of your choice.


# Simcom Modules with Super SIM

## Cellular modules covered on this page <a href="#cellular-modules-covered-on-this-page" id="cellular-modules-covered-on-this-page"></a>

* [SIM7000](#sim7000-cat-m1-nb-iot-gsm)
* [SIM7080](#sim7080-cat-m1-nb-iot-gsm)
* [SIM7600](#sim7600-cat-4)

***

## General getting started information <a href="#general-getting-started-information" id="general-getting-started-information"></a>

Please refer to the main Knowlegdebase page for [modem-independent configuration tips](https://docs.korewireless.com/en-us/supersim/cellular-module-knowledgebase/overview).

***

## SIM7000 `Cat-M1, NB-IoT, GSM` <a href="#sim7000-cat-m1-nb-iot-gsm" id="sim7000-cat-m1-nb-iot-gsm"></a>

{% hint style="danger" %}
Super SIM does not support NB-IoT.
{% endhint %}

### Initialization <a href="#initialization" id="initialization"></a>

Only configure the modem's Radio Access Technology (RAT) preference for Cat-M1 when you are connecting to LTE. To do so, issue `AT+CMNB=1`.

If you wish to limit comms to LTE only, i.e., no GSM, send `AT+CNMP=38`.

A parameter of `13` instead of `38` indicates GSM only. The default is `2`, which is auto.

### Bring up a data connection <a href="#bring-up-a-data-connection" id="bring-up-a-data-connection"></a>

1. Set the APN: `AT+CSTT="super","",""`.
2. Bring up the wireless data connection: `AT+CIICR`.
3. Obtain an IP address (required before TCP/IP operations): `AT+CIFSR`.
4. Optionally, query the current connection status: `AT+CIPSTATUS`.

To shut down the connection when you are done, issue `AT+CIPSHUT`.

### Perform a ping <a href="#perform-a-ping" id="perform-a-ping"></a>

To perform a ping to a remote host after bringing up a connection as described above, issue `AT+CIPPING="8.8.8.8"`. This will yield:

```bash
+CIPPING: 1,"8.8.8.8",111,53
+CIPPING: 2,"8.8.8.8",165,53
+CIPPING: 3,"8.8.8.8",159,53
+CIPPING: 4,"8.8.8.8",154,53
OK
```

### Perform an HTTP GET <a href="#perform-an-http-get" id="perform-an-http-get"></a>

To perform an HTTP `GET` using the built-in HTTP client:

1. Configure the bearer: `AT+SAPBR=3,1,"APN","super"`.
2. Check the bearer's status: `AT+SAPBR=2,1`.
   * This will return `+SAPBR: 1,3,"0.0.0.0"`. The `3` indicates the connection is closed.
3. Connect: `AT+SAPBR=1,1`.
4. Initialize the HTTP service: `AT+HTTPINIT`.
5. Set the URL: `AT+HTTPPARA="URL","http://ifconfig.co/ip"`.
6. Initiate this as a `GET` operation: `AT+HTTPACTION=0`.

After the `OK` response to the last of these commands, some time will pass and then the result will be indicated by a `+HTTPACTION` URC:

```bash
+HTTPACTION: 0,200,13
```

This indicates that we received an HTTP response status of 200 and 13 response bytes. Let's read them starting at index 0. Use `AT+HTTPREAD=0,13`. The response will be something like:

```bash
+HTTPREAD: 13
3.23.456.789

OK
```

To terminate the HTTP service, issue `AT+HTTPTERM`.

Finally, disconnect the bearer with `AT+SAPBR=0,1`.

{% hint style="danger" %}
This uses a service that returns the IP address of the requester.
{% endhint %}

### Low-power modes <a href="#low-power-modes" id="low-power-modes"></a>

The SIM7000 supports the eDRX and PSM low-power modes. The commands to enable each of these are:

<pre class="language-bash"><code class="lang-bash">AT+CEDRXS=1
<strong>AT+CPSMS=1
</strong></code></pre>

Using these features, but especially PSM, can make the modem inaccessible to the terminal during its sleep time. It's best to experiment with these features locally. To disable all power saving, send:

```bash
AT+CEDRXS=0
AT+CPSMS=0
```

You can learn more about implementing these modes in our [low-power usage documentation](https://docs.korewireless.com/en-us/supersim/cellular-module-knowledgebase/low-power-optimization-for-cellular-modules).

### Known issues <a href="#known-issues" id="known-issues"></a>

None at this time.

***

### SIM7080 `Cat-M1, NB-IoT, GSM` <a href="#sim7080-cat-m1-nb-iot-gsm" id="sim7080-cat-m1-nb-iot-gsm"></a>

{% hint style="danger" %}
Super SIM does not support NB-IoT.
{% endhint %}

### Initialization <a href="#initialization-2" id="initialization-2"></a>

If you wish to limit comms to LTE only, i.e., no GSM, send `AT+CNMP=38`.

A parameter of `13` instead of `38` indicates GSM only. The default is `2`, which is auto.

Set the modem's Radio Access Technology (RAT) preference to Cat-M1 when you are connecting to LTE. To do so, issue `AT+CMNB=1`.

{% hint style="danger" %}
After power on, the modem takes approximately 26 seconds to bring up the UART for AT communications.
{% endhint %}

### Data-centric attach mode <a href="#data-centric-attach-mode" id="data-centric-attach-mode"></a>

To set the 7080 to force data-centric attachment, issue `AT+CSDP=1`.

The numeric parameter is the mode:

* `0` — Circuit Switched (CS) only.
* `1` — Packet Switched (PS) only
* `2` — CS and PS

This setting is non-volatile.

### Bring up a data connection <a href="#bring-up-a-data-connection-2" id="bring-up-a-data-connection-2"></a>

1. Activate a data connection: `AT+CNACT=0,1`.
   * The `0` parameter is the PDP context; four (0-3) are available.
2. A successful response includes the string `ACTIVE`.
3. Optionally, obtain an IP address and the current connection status with `AT+CNACT?`.
4. To shut down the connection when you are done, issue `AT+CNACT=0,0`.

### Perform a ping <a href="#perform-a-ping-2" id="perform-a-ping-2"></a>

To perform a ping to a remote host after bringing up a connection as described above, issue `AT+SNPDPID=0` to choose the connected PDP context and then `AT+SNPING4="8.8.8.8"`.

### Perform an HTTP GET <a href="#perform-an-http-get-2" id="perform-an-http-get-2"></a>

To perform an HTTP `GET` using the built-in HTTP client:

1. Activate the data connection as above.
2. Configure a session to the server with `AT+SHCONF="URL","example.com"`.
3. Connect to the server with `AT+SHCONN`.
4. Optionally, check the connection state with `AT+SHSTATE?`.
5. To add headers to the request, set the module's internal header record. Issue `AT+SHCONF="HEADERLEN",350` to set the internal header record's maximum size. Call `AT+SHCHEAD` to clear any existing header and the add header entries with `AT+SHAHEAD`:

   Copy code block

   ```bash
   AT+SHAHEAD="Content-Type","application/x-www-form-urlencoded"
   AT+SHAHEAD="Cache-control","no-cache"
   AT+SHAHEAD="Connection","keep-alive"
   ```
6. The same approach is taken for the request URL parameters, if there is one. Issue `AT+SHCONF="BODYLEN",1024` to set the internal body record's maximum size. Call `AT+SHCPARA` to clear the internal parameter record and then `AT+SHPARA="data","<your_request_parameters>"` to set the new parameter data.
7. Issue the request with `AT+SHREQ="<path_to_resource>",1`.
   * The `1` parameter indicates a `GET` request. Others are:
     * 2 (`PUT`)
     * 3 (`POST`)
     * 4 (`PATCH`)
     * 5 (`HEAD`)
8. The URC will contain `SHREQ: "GET",xxx,yyy` where `xxx` is the HTTP status code and `yyy` the number of bytes received. For example:

   Copy code block

   ```bash
   SHREQ: "GET",200,83
   ```
9. Issue `AT+SHREAD=0,yyy` to get `yyy` bytes from index `0` sent over. For example:

   Copy code block

   ```bash
   AT+SHREAD=0,83
   OK

   +SHREAD: 83
   {
      "userId": 1,
      "id": 1,
      "title": "delectus aut autem",
      "completed": false
   }
   ```
10. Call `AT+SHDISC` to disconnect from the server.
11. Optionally, [close the data connection](#bring-up-a-data-connection)

The steps above assume you are sending an HTTP request. To use HTTPS, you will need to apply additional settings. For testing only, we use:

Copy code block

```bash
AT+CSSLCFG="sslversion",1,3
AT+SHSSL=1,"<cert_name>"
```

This selects SSL configuration index 1, and then SSL version 1.2. The next line applies a certificate name to SSL configuration index 1, but you can pass an empty string to bypass certificate verification **for testing only**.

A full discussion of HTTPS configuration on this module is beyond the scope of this document. For more information, please see [Simcom's HTTPS Application Note](https://www.waveshare.net/w/upload/4/48/SIM7070_SIM7080_SIM7090_Series_HTTP%28S%29_Application_Note_V1.02.pdf).

### Low-power modes <a href="#low-power-modes-2" id="low-power-modes-2"></a>

The SIM7080 supports the eDRX and PSM low-power modes. The commands to enable each of these are:

```bash
AT+CEDRXS=1
AT+CPSMS=1
```

Using these features, but especially PSM, can make the modem inaccessible to the terminal during its sleep time. It's best to experiment with these features locally. To disable all power saving, send:

Copy code block

<pre class="language-bash"><code class="lang-bash">AT+CEDRXS=0
<strong>AT+CPSMS=0
</strong></code></pre>

You can learn more about implementing these modes in our [low-power usage documentation](https://docs.korewireless.com/en-us/supersim/cellular-module-knowledgebase/low-power-optimization-for-cellular-modules).

### Known issues <a href="#known-issues-2" id="known-issues-2"></a>

None at this time.

***

## SIM7600 `Cat 4` <a href="#sim7600-cat-4" id="sim7600-cat-4"></a>

### Initialization <a href="#initialization-3" id="initialization-3"></a>

To configure the APN, use `AT+CGDCONT=1,"IP","super"`.

### Perform a ping <a href="#perform-a-ping-3" id="perform-a-ping-3"></a>

To perform a ping to a remote host after bringing up a connection as described above, issue `AT+CPING="8.8.8.8",1`. This will yield:

```bash
OK
+CPING: 1,8.8.8.8,64,70,255
+CPING: 3,1,1,0,70,70,70
```

### Perform an HTTP GET <a href="#perform-an-http-get-3" id="perform-an-http-get-3"></a>

To perform an HTTP `GET` using the built-in HTTP client:

1. Set IP mode: `AT+CIPMODE=1`.
2. Connect a socket: `AT+NETOPEN`.
3. Initialize the HTTP service: `AT+HTTPINIT`.
4. Check an IP address has been assigned: `AT+CGPADDR`.
   * This will return something like: `+CGPADDR: 1,100.66.159.130`.
5. Set the URL : `AT+HTTPPARA="URL","http://ifconfig.co/ip"`.
6. Initiate this as a `GET` operation: `AT+HTTPACTION=0`.

After the `OK` response, some time will pass and then the result will be indicated by a `+HTTPACTION` URC:

```bash
+HTTPACTION: 0,200,13
```

This indicates that we received an HTTP response status of 200 and 13 response bytes. Let's read them starting at index 0. Issue `AT+HTTPREAD=0,12`. This will yield:

```bash
+HTTPREAD: 13
3.84.68.183

OK
```

To terminate the HTTP service, issue `AT+HTTPTERM`.

Now close the socket with `AT+NETCLOSE`.

{% hint style="danger" %}
This uses a service that returns the IP address of the requester.
{% endhint %}

### Known issues <a href="#known-issues-3" id="known-issues-3"></a>

None at this time.

***

### Additional resources <a href="#additional-resources" id="additional-resources"></a>

* [SIM7500, and SIM7600 Series AT Command Manual](https://www.simcom.com/service-1230.html) *Simcom sign-in required*
* [SIM7070, SIM7080, and SIM7090 Series AT Command Manual](https://www.simcom.com/service-1048.html) *Simcom sign-in required*
* [SIM7000 Series AT Command Manual](https://www.simcom.com/service-193.html) *Simcom sign-in required*


# Telit Modules with Super SIM

## Cellular modules covered on this page <a href="#cellular-modules-covered-on-this-page" id="cellular-modules-covered-on-this-page"></a>

* [ME901C1](#me910c1-cat-m1-nb-iot)

***

## General getting started information <a href="#general-getting-started-information" id="general-getting-started-information"></a>

Please refer to the main Knowlegdebase page for [modem-independent configuration tips](https://docs.korewireless.com/en-us/supersim/cellular-module-knowledgebase).

***

## ME910C1 `Cat-M1, NB-IoT` <a href="#me910c1-cat-m1-nb-iot" id="me910c1-cat-m1-nb-iot"></a>

{% hint style="danger" %}
Super SIM does not support NB-IoT.
{% endhint %}

### Initialization <a href="#initialization" id="initialization"></a>

Only configure the modem's Radio Access Technology (RAT) preference for Cat-M1. To do so, issue `AT#WS46=0`.

A parameter of 2 instead of 0 indicates both Cat-M1 and NB-IoT. Do not select 1 (NB-IoT only), and we strongly recommend you avoid `2` in order to prevent the modem from attempting to connect to NB-IoT networks if any are nearby. Such attempts will always be unsuccessful. The default value is 0.

### Data-centric attach mode <a href="#data-centric-attach-mode" id="data-centric-attach-mode"></a>

To set the ME910C1 to force data-centric attachment, issue `AT+CEMODE=2`.

The parameter's value is as follows:

* `0` = PS mode 2: EPS only, data centric
* `1` = CS/PS mode 1: voice centric
* `2` = CS/PS mode 2: data centric
* `3` = PS mode 1: EPS only, voice centric

This setting is non-volatile.

### Bring up a data connection <a href="#bring-up-a-data-connection" id="bring-up-a-data-connection"></a>

1. Set the APN: `AT+CGDCONT=1,"IP","super"`.
2. Activate a PDP context: `AT#SGACT=1,1`.

{% hint style="info" %}
This second command will yield the IP address.
{% endhint %}

### Perform a ping <a href="#perform-a-ping" id="perform-a-ping"></a>

To perform a ping to a remote host after bringing up a connection as described above, issue `AT#PING="8.8.8.8"`. This will yield:

```bash
#PING: 01,"8.8.8.8",2,109
#PING: 02,"8.8.8.8",1,109
#PING: 03,"8.8.8.8",1,109
#PING: 04,"8.8.8.8",1,109
OK
```

### Perform an HTTP GET <a href="#perform-an-http-get" id="perform-an-http-get"></a>

1. Set the target server: `AT#HTTPCFG=0,"jsonplaceholder.typicode.com"`.
   * `0` is the HTTP "profile ID".
2. `GET` a resource: `AT#HTTPQRY=0,0,"/todos/1"`.
   * The first parameter is the profile ID.
   * The second `0` is the request method: `0` = `GET`.
   * The string is the path to the required resource.
3. The modem will issue an outcome URC: `#HTTPRING: 0,200,"application/json",83`.
   * The first parameter is the profile ID.
   * The second parameter is the HTTP status code.
   * The final parameter is the number of received bytes.
4. Read the data: `AT#HTTPRCV=0,0`.
   * The first parameter is the profile ID.
   * The second parameter is the number of bytes to read: `0` = all.
5. The modem will return the data:

   <pre><code><strong>   {
   </strong>      "userId": 1,
         "id": 1,
         "title": "delectus aut autem",
         "completed": false
      }
   </code></pre>

### Low-power modes <a href="#low-power-modes" id="low-power-modes"></a>

The ME910C1 supports the eDRX and PSM low-power modes. The commands to enable each of these are:

```
AT+CEDRXS=1
AT+CPSMS=1
```

*See also `AT#CEDRXS` in the ME910C1 Series AT Command Manual for extended eDRX settings, and `AT#CPSMS` for further Power Saving Mode settings.*

Using these features, but especially PSM, can make the modem inaccessible to the terminal during its sleep time. It's best to experiment with these features locally. To disable all power saving, send:

```
AT+CEDRXS=0
AT+CPSMS=0
```

You can learn more about implementing these modes in our [low-power usage documentation](https://docs.korewireless.com/en-us/supersim/cellular-module-knowledgebase/low-power-optimization-for-cellular-modules).

### Known issues <a href="#known-issues" id="known-issues"></a>

None at this time.

***

### Additional resources <a href="#additional-resources" id="additional-resources"></a>

* [ME910C1 Series AT Command Manual](https://sixfab.com/wp-content/uploads/2021/06/Telit_ME910C1_ML865C1_AT_Commands_Reference_Guide_r15.pdf)
* [ME910C1 Datasheet](https://sixfab.com/wp-content/uploads/2021/01/Telit_ME910C1-mPCIe_Hardware_Design_Guide_r1.pdf)


# Thales Cinterion Modules with Super SIM

## Cellular modules covered on this page <a href="#cellular-modules-covered-on-this-page" id="cellular-modules-covered-on-this-page"></a>

* [EXS62-W](#exs62-w-cat-m1-nb-iot)

***

## General getting started information <a href="#general-getting-started-information" id="general-getting-started-information"></a>

Please refer to the main Knowlegdebase page for [modem-independent configuration tips](https://docs.korewireless.com/en-us/supersim/cellular-module-knowledgebase).

***

## EXS62-W `Cat-M1, NB-IoT` <a href="#exs62-w-cat-m1-nb-iot" id="exs62-w-cat-m1-nb-iot"></a>

{% hint style="danger" %}
Super SIM does not support NB-IoT.
{% endhint %}

### Initialization <a href="#initialization" id="initialization"></a>

Only configure the modem's Radio Access Technology (RAT) preference for Cat-M1. To do so, issue `AT^SXRAT=7,7`.

The first parameter is the RAT to connect to immediately. The second is the preferred RAT on re-connection.

A value of `8` indicates NB-IoT, and `10` indicates Cat-M1/NB-IoT dual mode. Do not use `8`, and we strongly recommend that you do not select `10`. This is the default and so you should always command the module to favor Cat-M1. This prevents the modem from spending time attempting to attach to NB-IoT networks, if any are nearby, only to be rejected.

### Data-centric attach mode <a href="#data-centric-attach-mode" id="data-centric-attach-mode"></a>

To set the EXS62-W to force data-centric attachment, issue:

```bash
AT+CEMODE=2
AT+CFUN=1,1
```

The `CEMODE` parameter's value is as follows:

`0` = PS mode 2: EPS only, data centric `2` = CS/PS mode 2: data centric

This setting is non-volatile and implemented when the modem is reset.

### Bring up a data connection <a href="#bring-up-a-data-connection" id="bring-up-a-data-connection"></a>

1. Set the APN: `AT+CGDCONT=1,"IP","super"`.
2. Activate a PDP context: `AT^SICA=1,1`.

The first parameter of `AT^SICA` is the required action: `1` for enable, `0` for disable. The second parameter is the ID of the PDP context to be used to host the connection — it should match the value used in the `AT+CGDCONT` command.

Check the device's IP address with `AT+CGPADDR=1`.

### Perform a ping <a href="#perform-a-ping" id="perform-a-ping"></a>

To perform a ping to a remote host after bringing up a connection as described above, issue `AT^SISX=Ping,1,"8.8.8.8",5,5000`. This will yield:

```bash
^SISX: "Ping",1,1,"8.8.8.8",546
^SISX: "Ping",1,1,"8.8.8.8",515
^SISX: "Ping",1,1,"8.8.8.8",457
^SISX: "Ping",1,1,"8.8.8.8",443
^SISX: "Ping",1,1,"8.8.8.8",375
^SISX: "Ping",2,1,5,5,0,0
^SISX: "Ping",3,1,375,546,467
OK
```

#### Perform an HTTP GET <a href="#perform-an-http-get" id="perform-an-http-get"></a>

1. Set at least one DNS server. The first argument is the PDP Context ID: `AT^SICS=1,"dns1","8.8.8.8"`
2. Activate the data connection: `AT^SICA=1,1`
3. Configure the HTTP operation's Internet service profile. This is referenced by its ID, in the range 0-9:
   1. Set profile 0's service type to HTTP: `AT^SISS=0,srvtype,"http"`
   2. Set the connection ID to match that of the current PDP context: `AT^SISS=0,conid,"1"`
   3. Set the target URL, including the path: `AT^SISS=0,address,"http://ifconfig.co/ip"`**Note** You can specify HTTP by including the protocol as a URL prefix, or by adding `:80` to indicate the required port.
   4. Specify the request's HTTP method: `AT^SISS=0,cmd,"get"`
4. Start the Internet service: `AT^SISO=0`
5. The modem will attempt to make the request. You may see these URCs as the response is processed:

   ```bash
   ^SIS: 0,0,2200,"Http connect 172.67.133.228:80"
   ^SIS: 0,0,2201,"HTTP/1.1 200 OK"
   ^SIS: 0,0,2201,"Content-Length: 13"
   ^SISR: 0,1
   ```
6. The last line above appears when there is data available for you to read. In this case, the header data shows how much. Read 13 bytes: `AT^SISR=0,13`
7. You will see:

   ```bash
   ^SISR: 0,13
   44.204.32.14
   OK
   ```
8. Watch for the URC (Unsolicited Response Code) `^SISR: 0,2`. This indicates that all the available data has been read. If you don't see this — perhaps the response's content length was much larger and you only read a portion of it — continue to issue `AT^SISR=0,<NUMBER_OF_BYTES_TO_READ>` commands until all the data has been read — i.e., you receive `^SISR: 0,2`
9. Close the Internet service: `AT^SISC=0`

{% hint style="info" %}
If you need to provide extra request headers, such `Authorization: Basic <API_KEY>` or a custom header required by your server, issue `AT^SISS=0,hcprop,"<HEADERS>"` when you are configuring your Internet service profile.

Pass each header in the form `<key>: <value>`. Multiple headers can be included by separating them with the sequence `\0d\0a`. Don't add a separator after the last header and ensure your headers string is 255 bytes or less.

**Tip** If you wish to include a `User-Agent` header, *don't* add it to your headers string but instead supply it to the module with `AT^SISS=0,hcuseragent,"<USER_AGENT>"`. This will make room in the modem's header store for other headers.
{% endhint %}

### Perform an HTTPS GET <a href="#perform-an-https-get" id="perform-an-https-get"></a>

1. Initialize the module's certificates: `AT^SSECUA="CertStore/TLS/PreconfigureCerts"`
2. Set a DNS server: `AT^SICS=1,"dns1","8.8.8.8"`
3. Activate the connection: `AT^SICA=1,1`
4. Configure the operation's Internet service profile:
   1. Set profile 1's service type to HTTP: `AT^SISS=1,srvtype,"http"`
   2. Set the connection ID to match that of the current PDP context ID: `AT^SISS=1,conid,"1"`
   3. Set the target URL, including the path: `AT^SISS=1,address,"https://jsonplaceholder.typicode.com/todos/1"`**Note** You can specify HTTPS by including the protocol as a URL prefix, or by adding `:443` to indicate the required port.
   4. Specify the request's HTTP method: `AT^SISS=1,cmd,"get"`
5. Open the Internet service: `AT^SISO=1`
6. The connection will be attempted. You will see these URCs:

   ```bash
   ^SIS: 1,0,2200,"Http connect 172.67.131.170:443"
   ^SIS: 1,0,2201,"HTTP/1.1 200 OK"
   ^SIS: 1,0,2201,"Content-Length: 83"
   ^SISR: 1,1
   ```
7. The last line above indicates there is data available for you to read. In this case, the header data shows how much. Read 83 bytes: `AT^SISR=1,83`
8. You will see:

   ```bash
   ^SISR: 1,83
   {
      "userId": 1,
      "id": 1,
      "title": "delectus aut autem",
      "completed": false
   }
   OK
   ```
9. Watch for the URC `^SISR: 1,2`, which indicates that all the available data has been read. If you don't see this — perhaps the content length was much larger and you only read a portion of it — continue to issue `AT^SISR=1,<NUMBER_OF_BYTES_TO_READ>` commands until all the data is read — i.e., you receive `^SISR: 1,2`
10. Close the Internet service: `AT^SISC=1`

### Perform an HTTP(S) POST <a href="#perform-an-https-post" id="perform-an-https-post"></a>

Sending data from the modem via an Internet-hosted API follows the paths outlined above for the HTTP and HTTPS protocols. You call `AT^SISS=0,cmd,"post"` instead of `AT^SISS=0,cmd,"get"`.

The EXS62-W provides a way to load up a small amount (1-255 bytes) of body data: issue `AT^SISS=0,hccontent,"<DATA_AS_STRING>"` and `AT^SISS=0,hccontlen,0`.

If the size of the data you wish to send is greater than 255 bytes, set the size with `AT^SISS=0,hccontlen,<SIZE_IN_BYTES>` and then upload data to the module after opening the Internet service with `AT^SISO=0`. Issue `AT^SISW=0,<CHUNK_SIZE>` to trigger the modem to input the data over the UART. Up to 1500 bytes can be sent to the modem at a time, and each chunk will be sent out as they are received from your application.

### Low-power modes <a href="#low-power-modes" id="low-power-modes"></a>

The EXS62-W supports the eDRX and PSM low-power modes. The commands to enable each of these are:

```bash
AT+CEDRXS=1
AT+CPSMS=1
```

*See also `AT^SEDRXS` in the EXS62-W AT Commands Manual for further eDRX settings, and `AT+CEDRXRDP` to read dynamic eDRX parameters.*

Using these features, but especially PSM, can make the modem inaccessible to the terminal during its sleep time. It's best to experiment with these features locally. To disable all power saving, send:

<pre class="language-bash"><code class="lang-bash">AT+CEDRXS=0
<strong>AT+CPSMS=0
</strong></code></pre>

You can learn more about implementing these modes in our [low-power usage documentation](https://docs.korewireless.com/en-us/supersim/cellular-module-knowledgebase/low-power-optimization-for-cellular-modules).

### Known issues <a href="#known-issues" id="known-issues"></a>

The EXS62-W does not support `AT+CCID` to retrieve the SIM's ICCID. Instead, issue `AT^SIND?` and look for the line commencing `^SIND: iccid,0`.

### Additional resources <a href="#additional-resources" id="additional-resources"></a>

• [EXS62-W AT Commands Manual](https://www.thalesgroup.com/en/markets/digital-identity-and-security/iot/iot-connectivity/products/iot-products/exs62-w-global-mtc) *Thales sign-in required*


---

[Next Page](/llms-full.txt/1)